Batches and serial numbers are two ways to identify and track products in Odoo. Despite the similarities between the two tracking methods, there are also notable differences that affect receipts, deliveries, and inventory reports.
A batch usually refers to a specific batch of goods that has been received, is in storage, or has been shipped from the warehouse. However, it can also refer to a batch of products manufactured in-house.
A serial number is a unique identifier that is assigned step-by-step (or sequentially) to an item or product to distinguish it from other items or products..
In order to enable batch and serial number tracking, you need to find the Tracking group in the warehouse settings and check the "Batches and serial numbers" option. And if you have food products, you also need to check the "Expiration date" option for them.
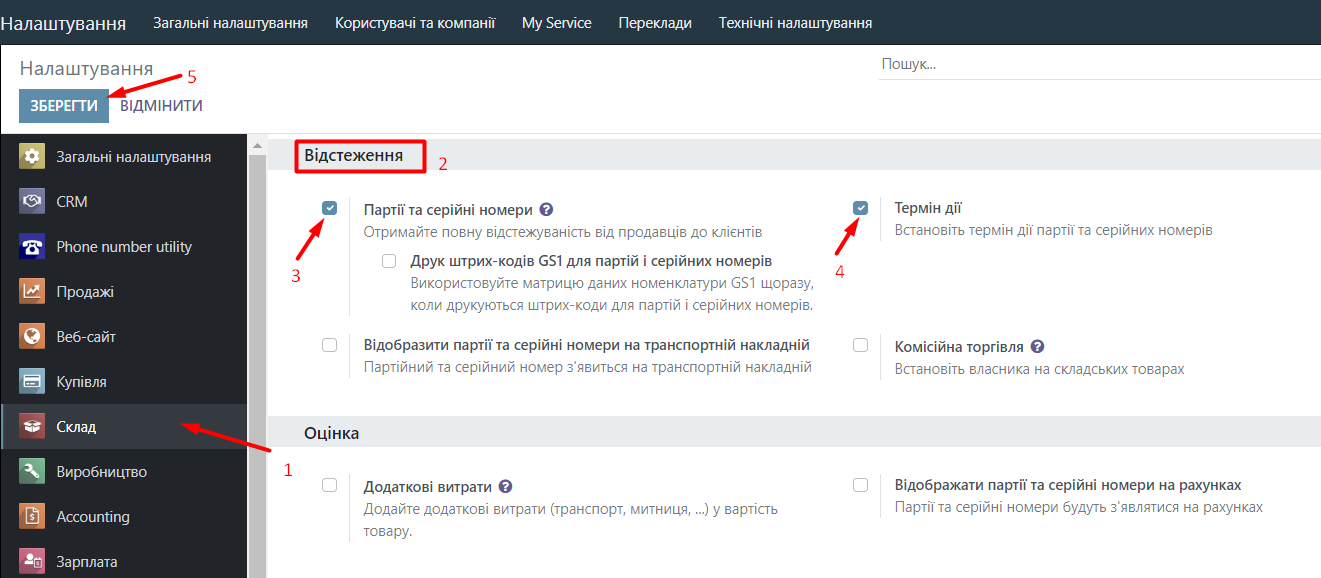
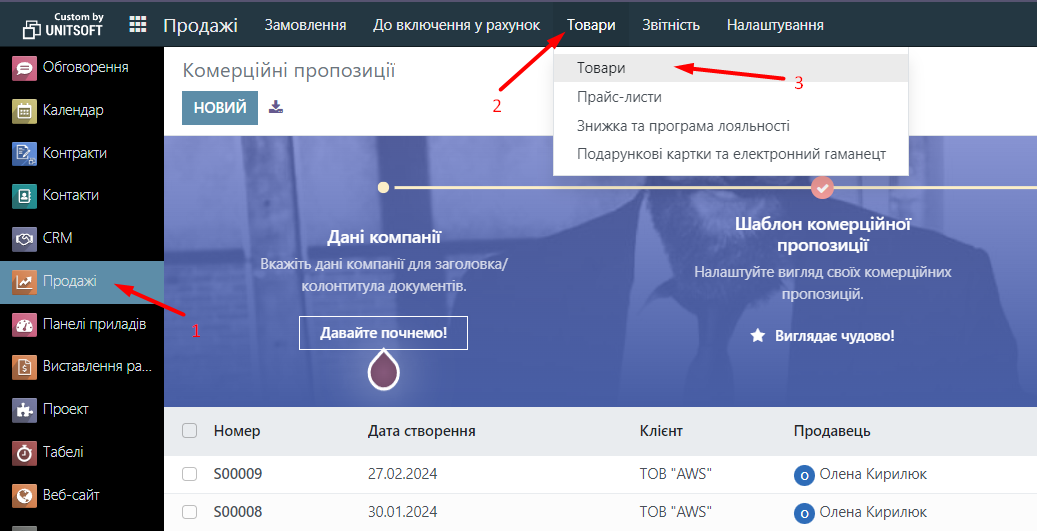
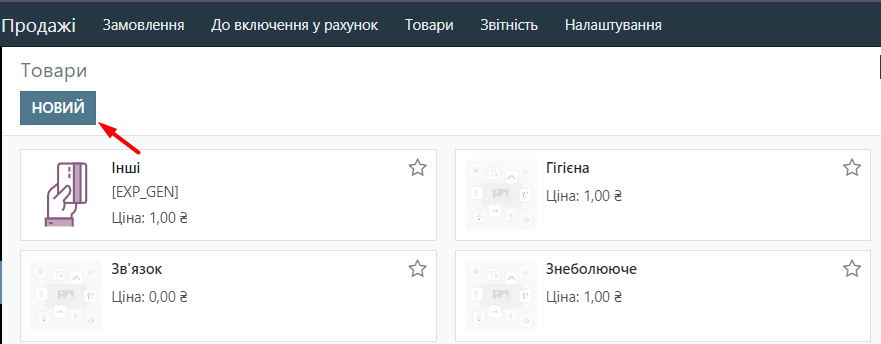
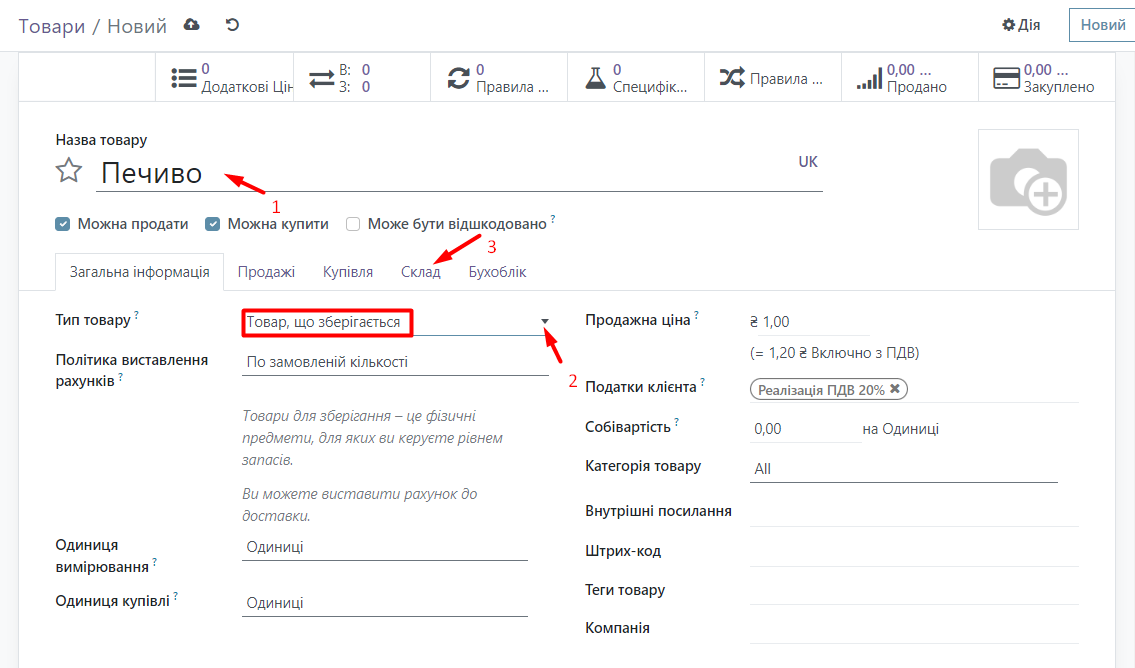
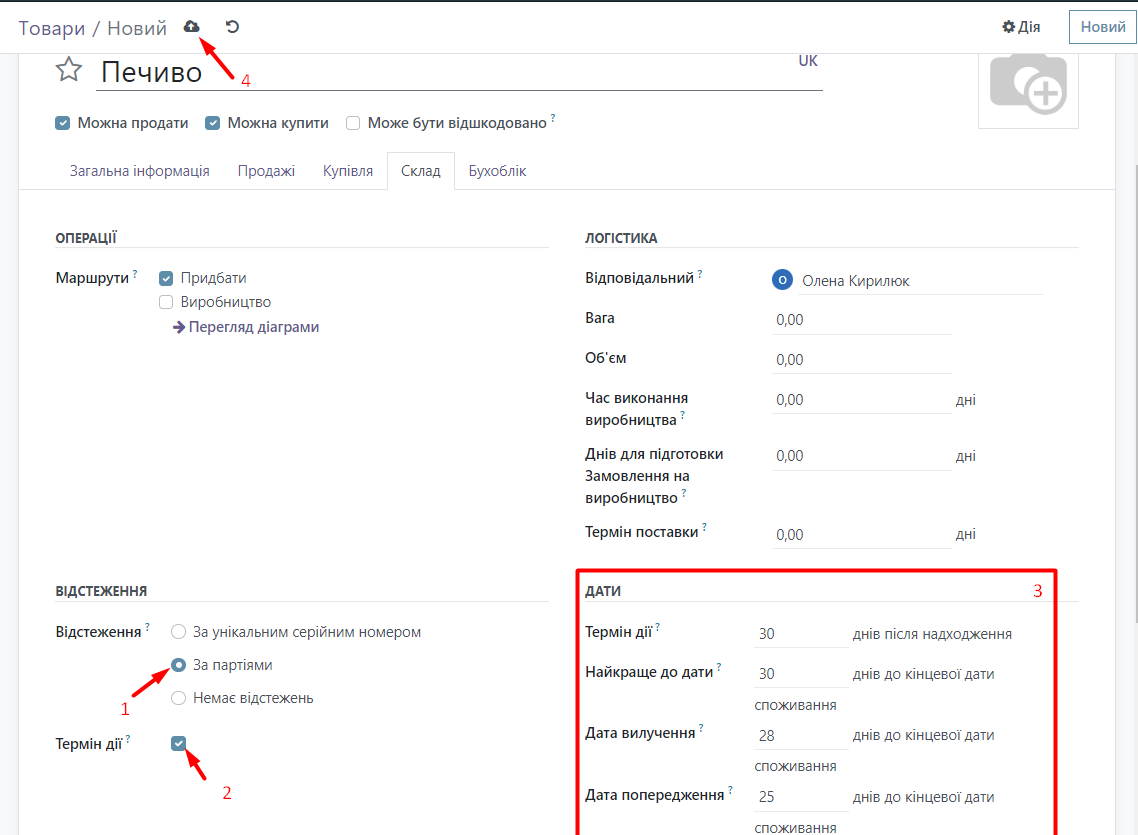
Now you can check that these settings have been enabled by going to the Sales module, clicking on Products in the top menu, and selecting Products. Click the New button and create a product, for example, Cookies. Specify the name and type of product (if the product will be tracked, the type of product should be "Storable Product"). Then go to the Inventory tab, in the Tracking group specify what the product will be tracked by, in this case by batches, if necessary specify the expiration date, you can specify how many days after receipt the product will spoil, how many days it needs to be removed, etc. After everything, click the Save button.
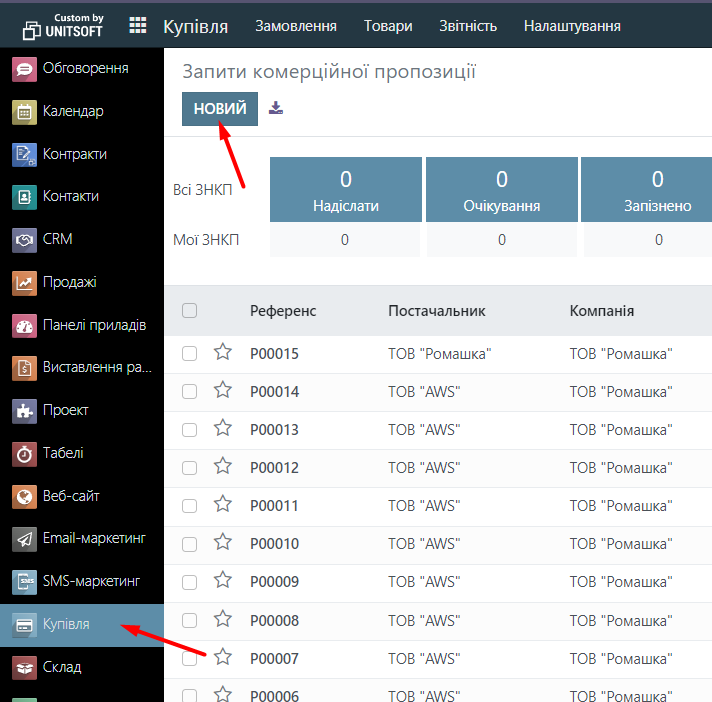
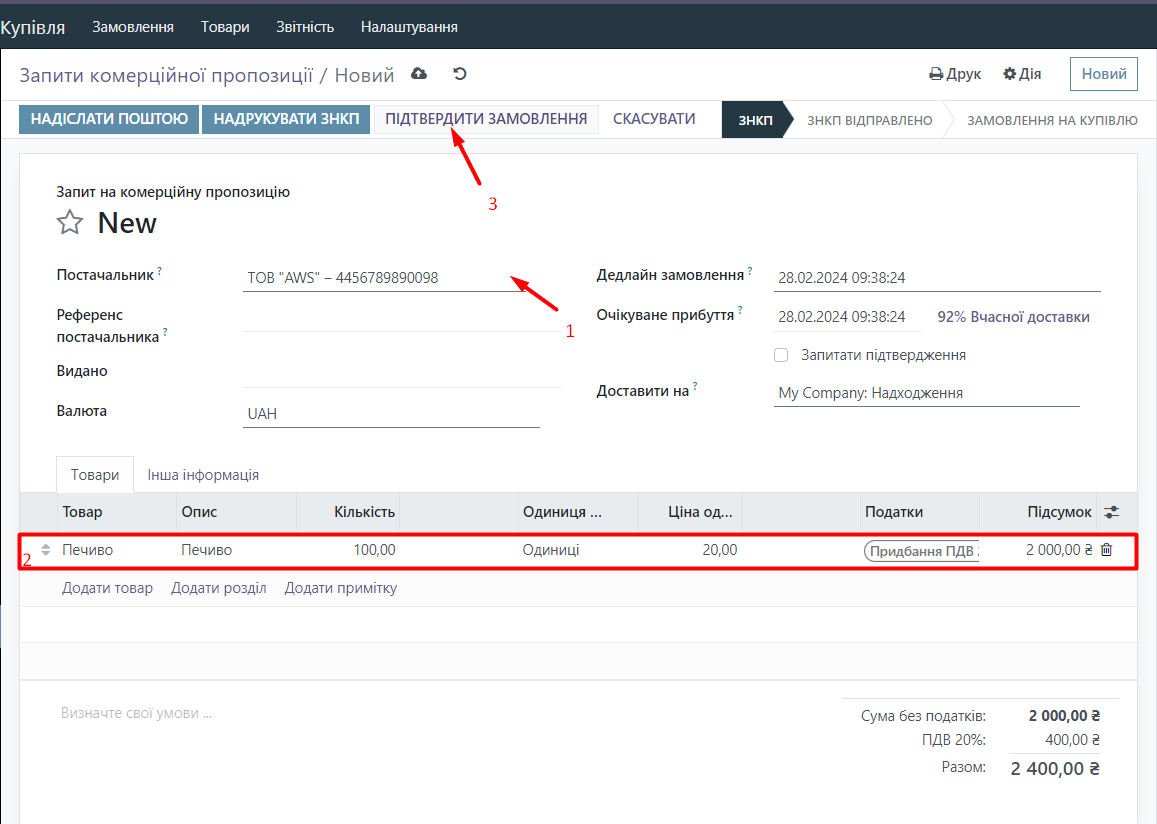
Now let's purchase our product. Go to the Purchase module and click the New button. Next, specify the supplier, select our product, indicate the quantity and price. Then click the Confirm Order button.
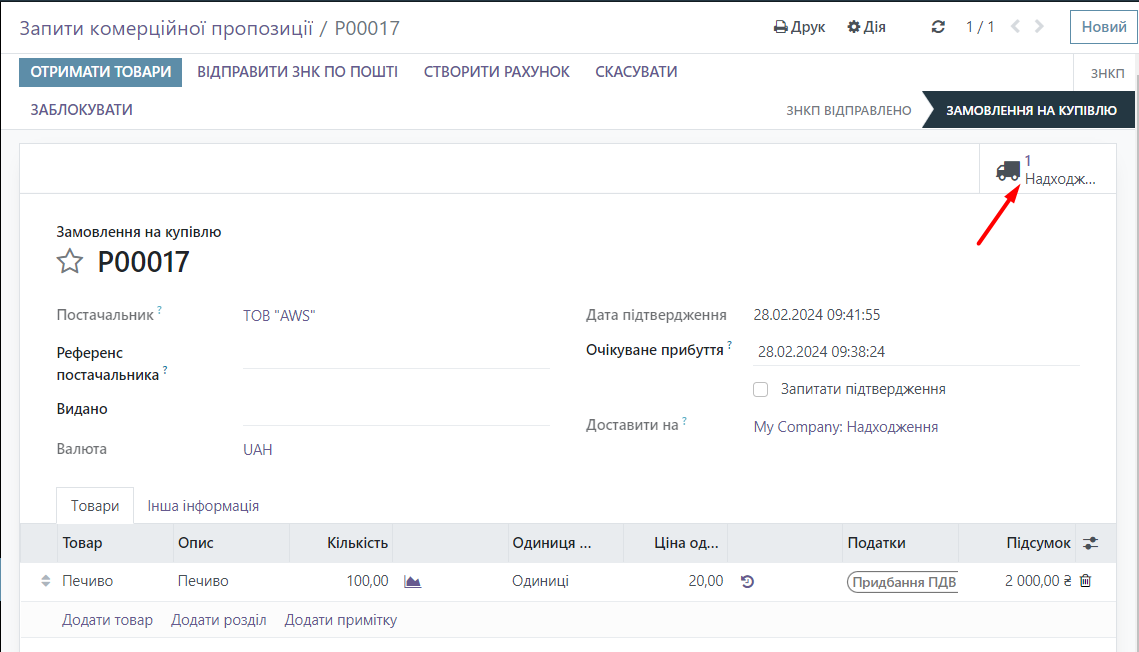
Now you need to receive the goods, click on Receipt.
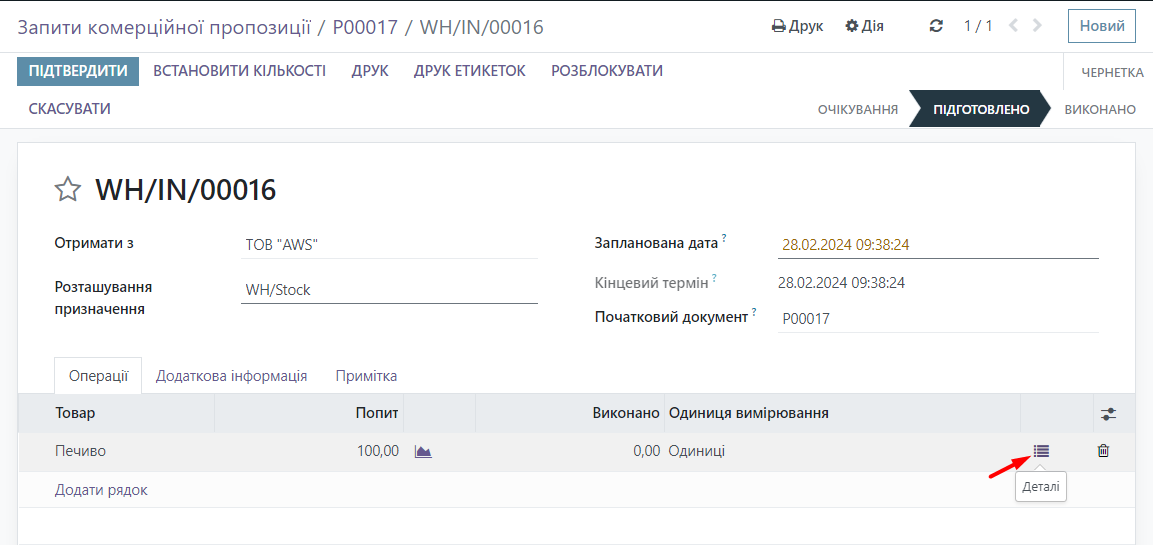
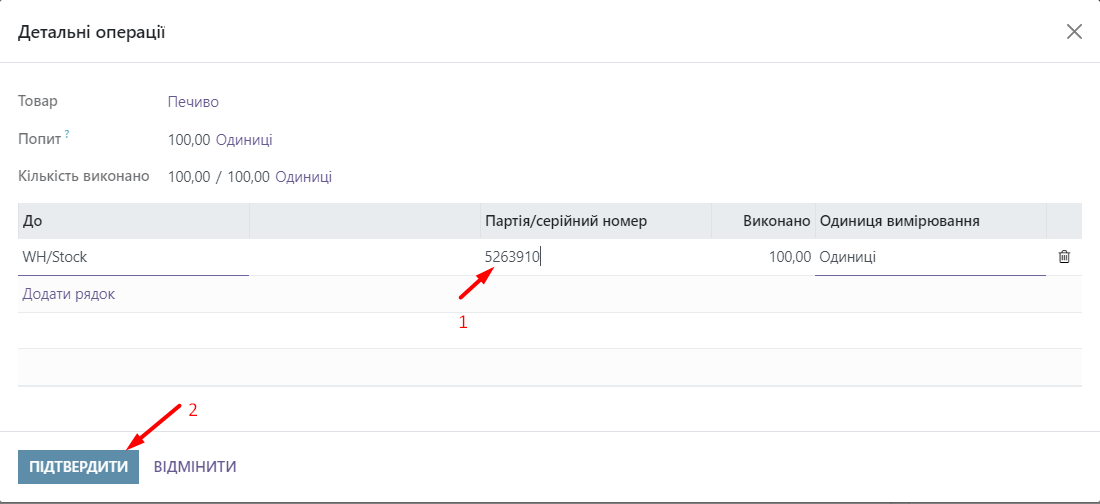
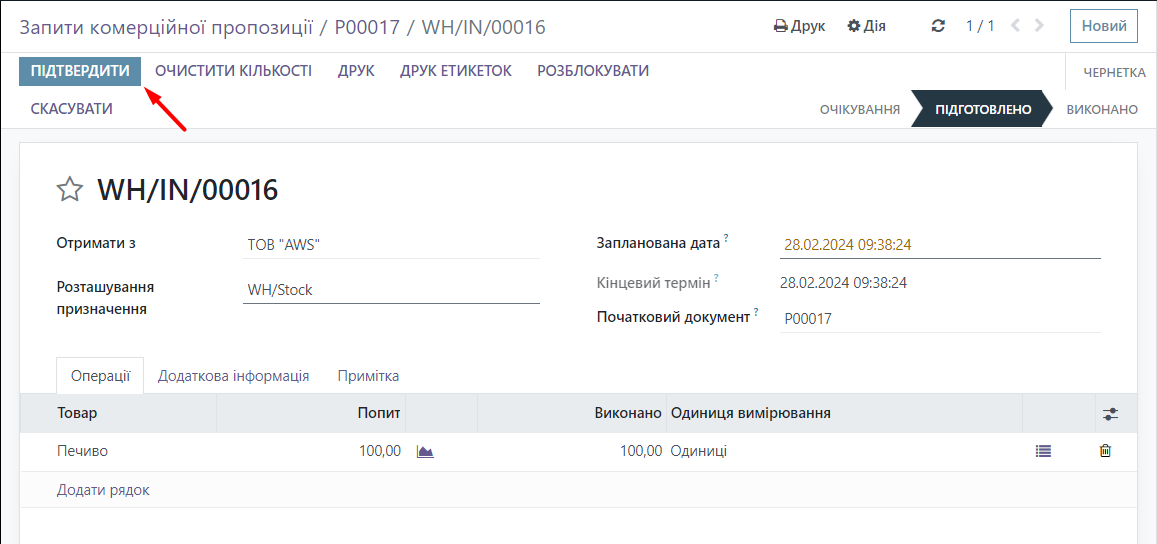
After this, to process this product, it is necessary to specify the batch number. To do this, click the Details button. A window will appear where you need to enter the batch number, and then click the Confirm button. The batch number can be entered manually, as shown, or the system will generate it automatically (by date, for example).
In this same window, you can split the arrival into several batches by specifying a different batch number and dividing the quantity into parts.
Now click the Confirm button in the document itself.
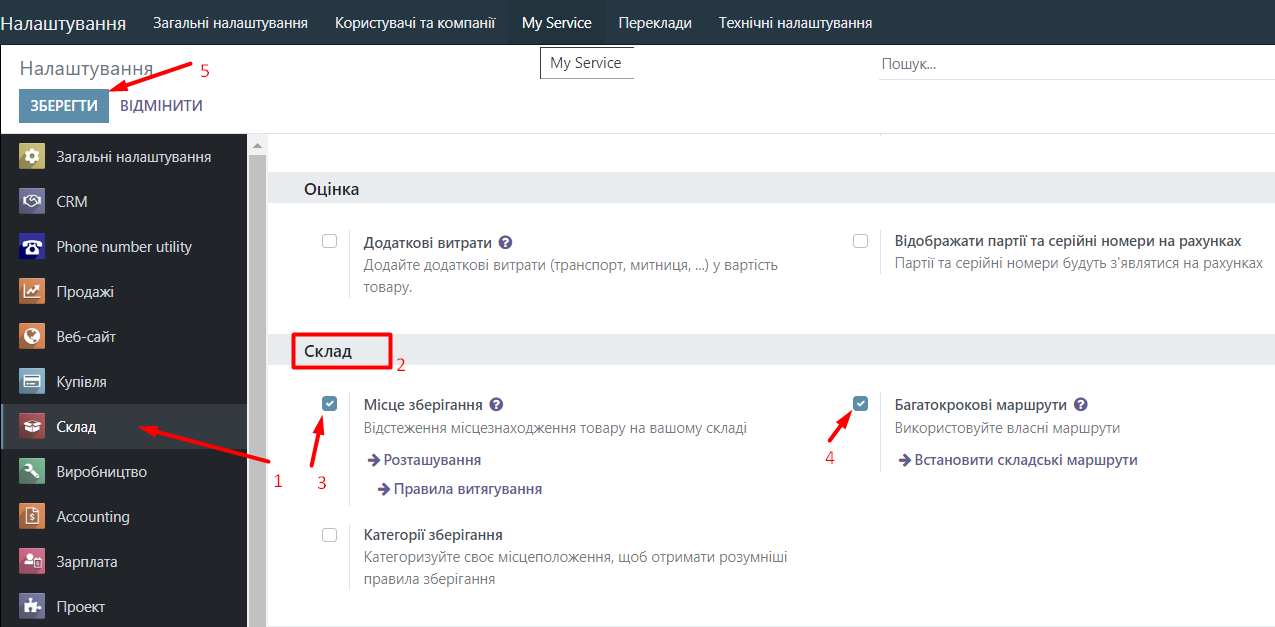
Now, in order to track our product in the Warehouse module, you need to enable the settings. Go to Settings, select Warehouse, and look for the Warehouse group, then enable Storage Location and Multi-step Routes. After that, click the Save button.
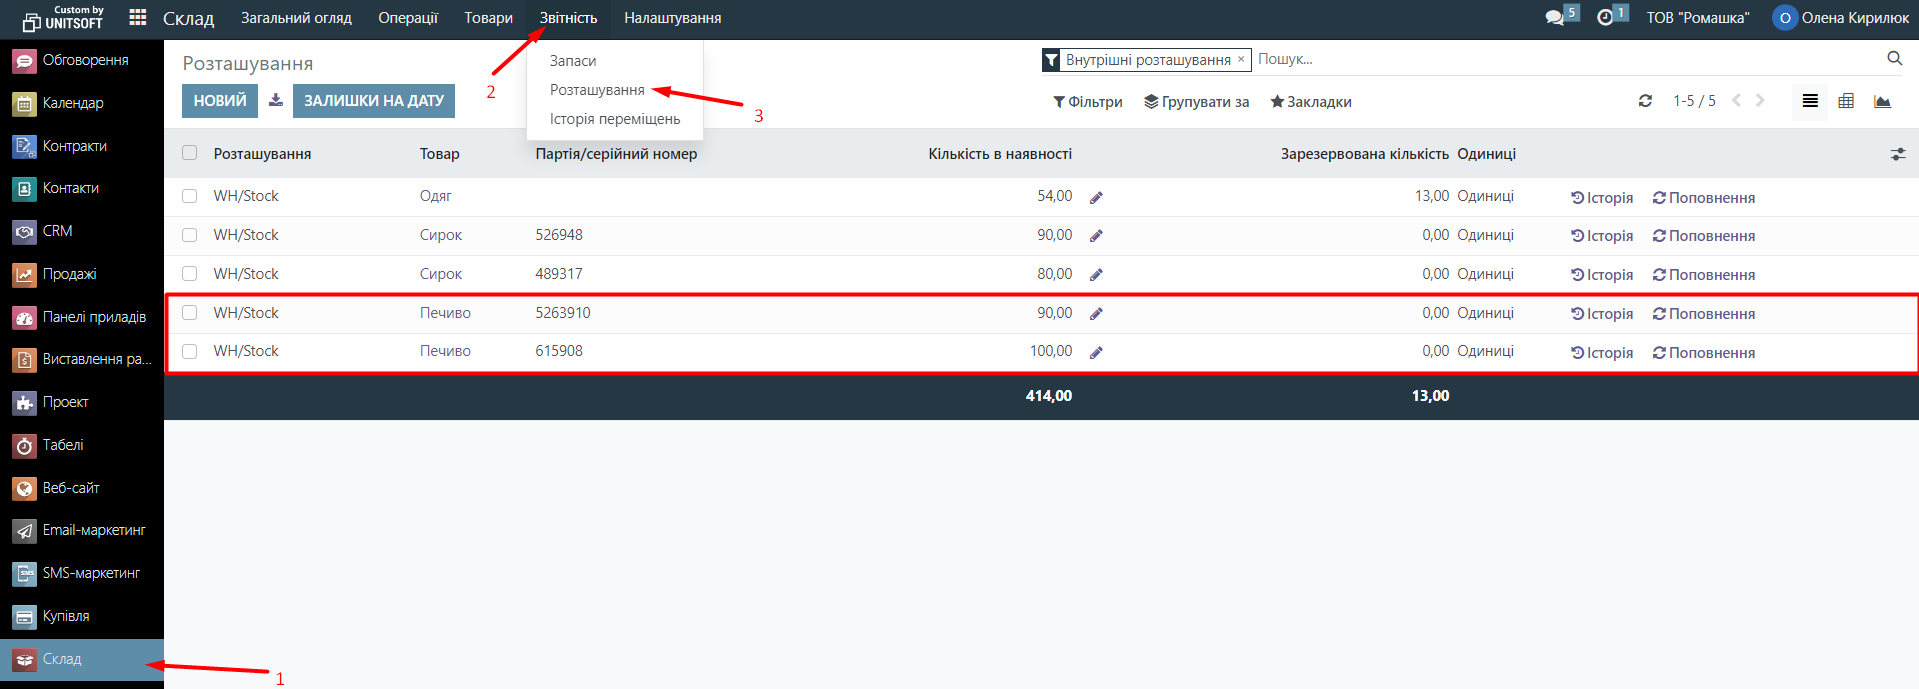
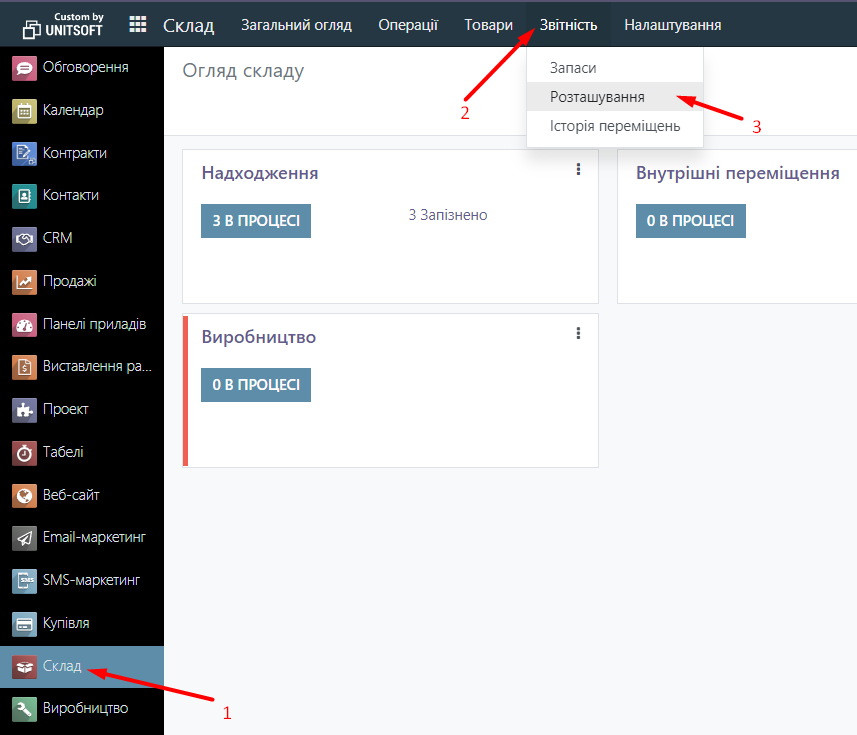
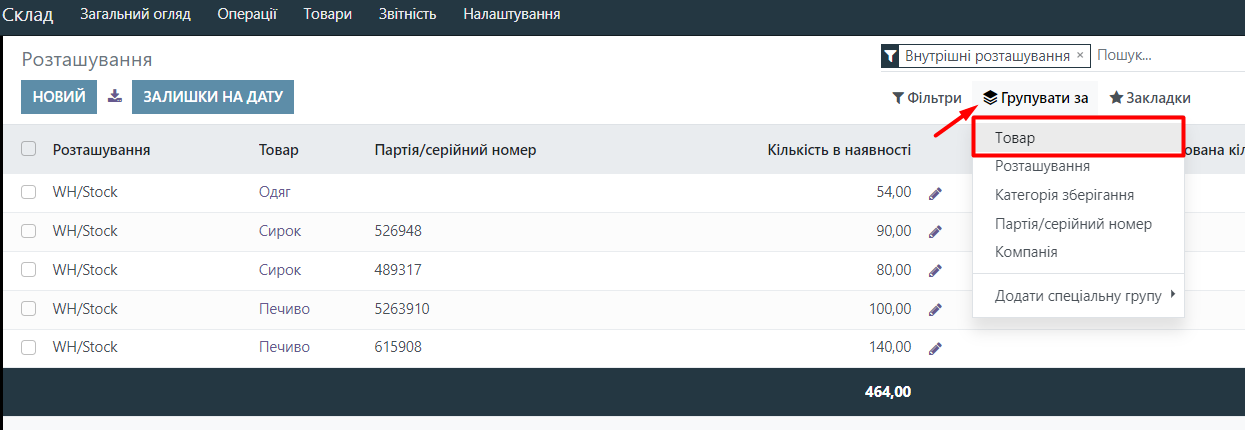
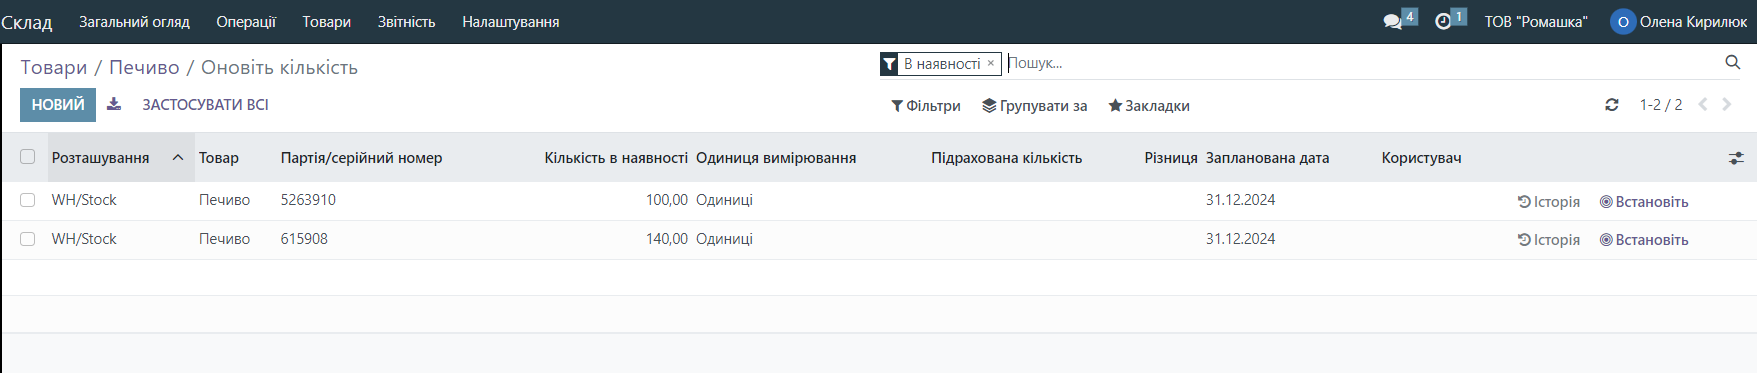
Now go to the Warehouse module, click on Reports in the menu, and select Location.
Now we can see how much stock we have in what quantity and with which batch number. To make it easier to review this report, you can group, for example, by product. To do this, click the Group by Product button.
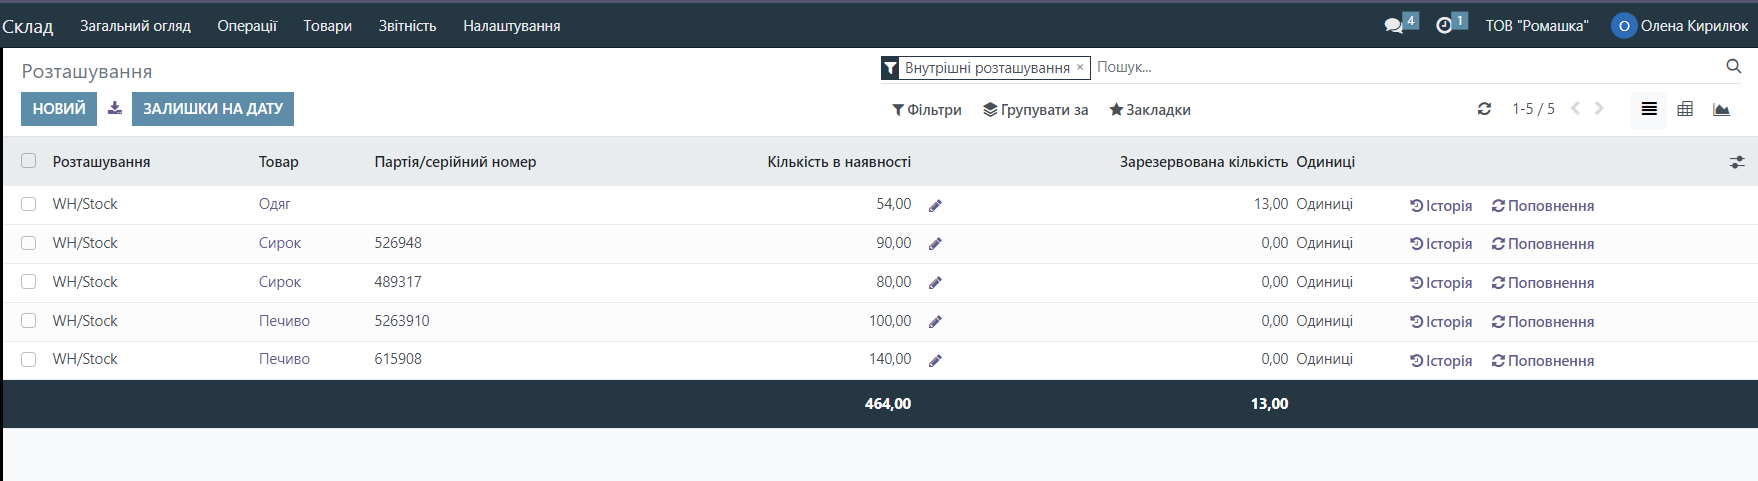
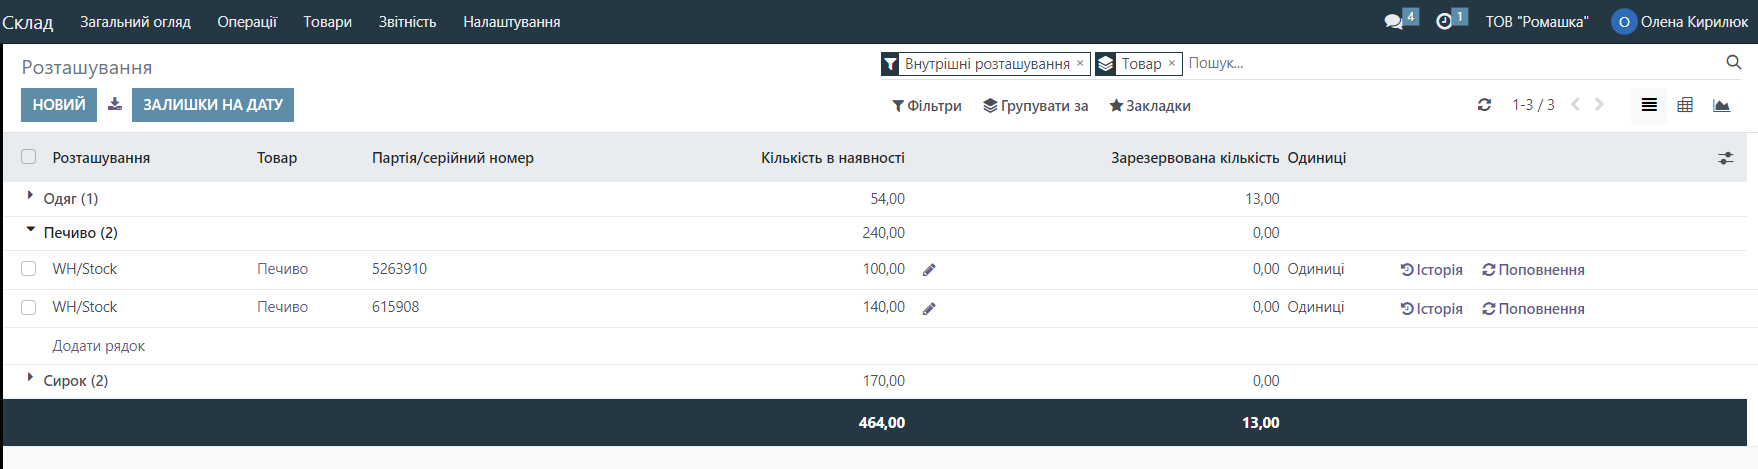
Then our report will look like this. If the expiration date is included, it will also be displayed here and in this report.
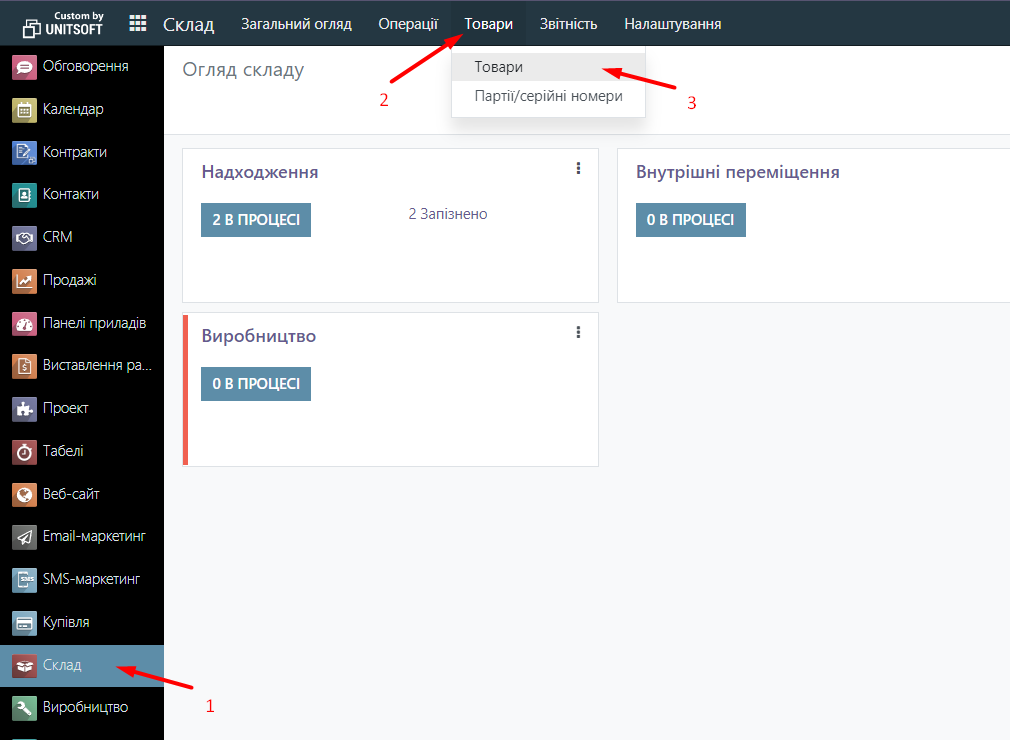
You can also view the quantity of goods in stock in the Products tab itself. To do this, go to the Warehouse module, click on Products in the menu, and select Products. Choose the desired product. And click the In Stock button.

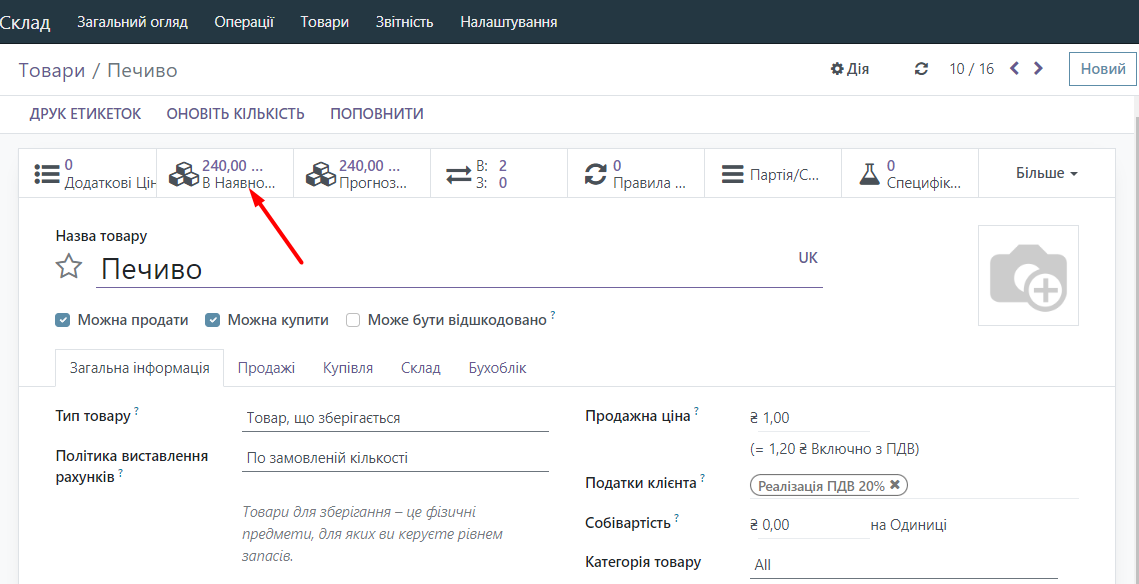
We will get the following report on the product Cookies.
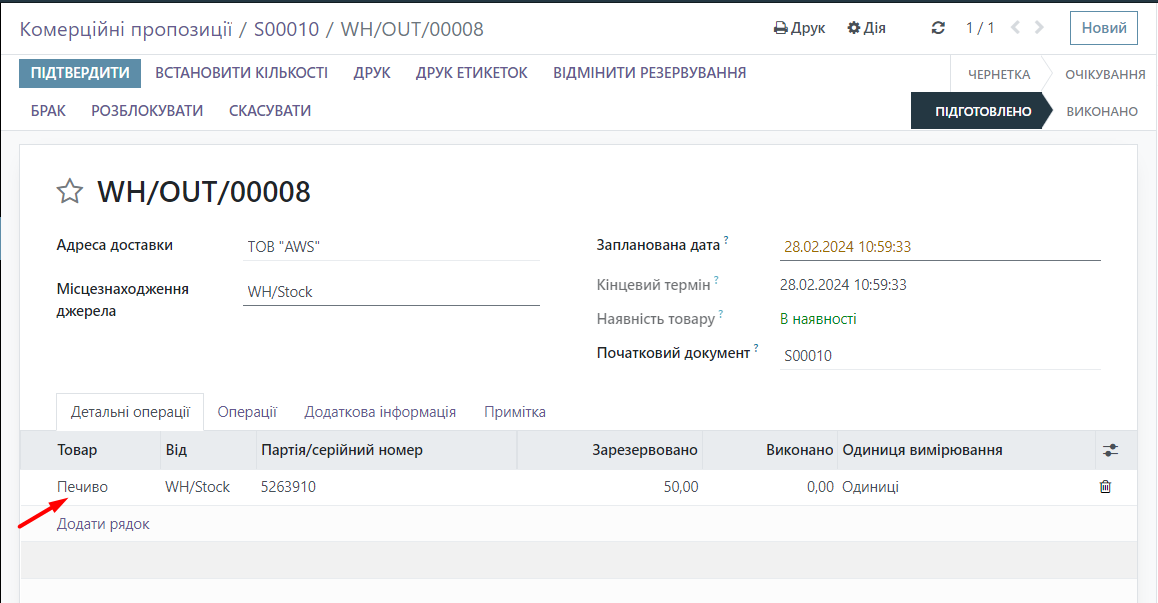
When warehouse transfers or product sales are conducted, it is necessary to specify the batch number in the relevant documents. Let's consider an example of a sale.
We go to the Sales module and click the New button.
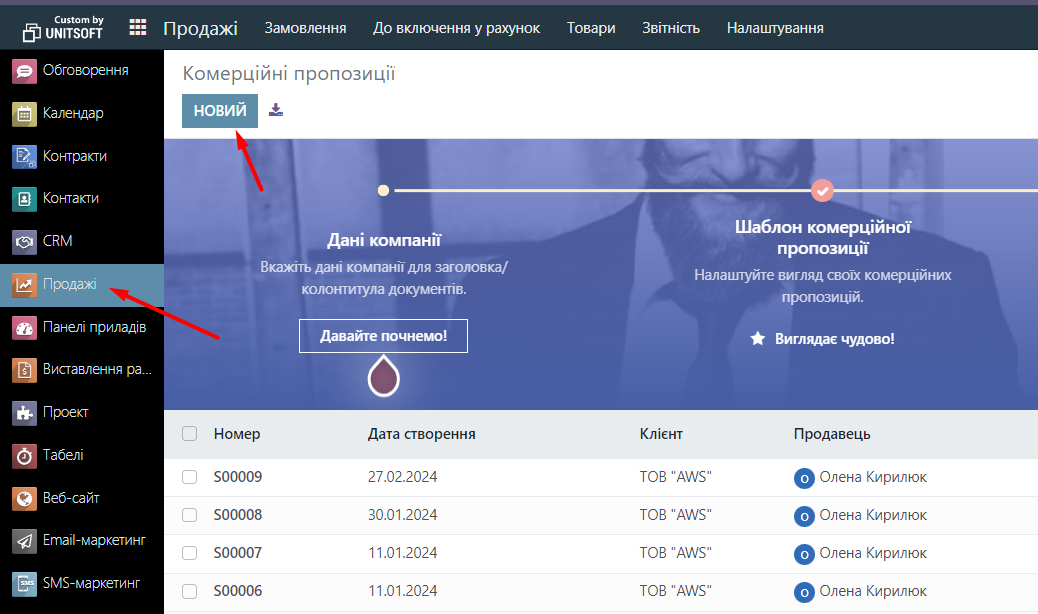
Select the Client, add the product, and specify its quantity. After that, click the Confirm button.

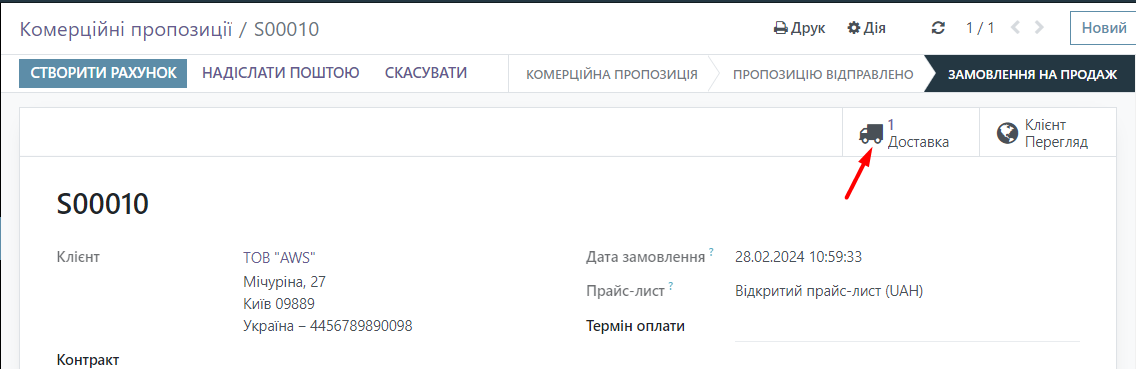
We go to Delivery
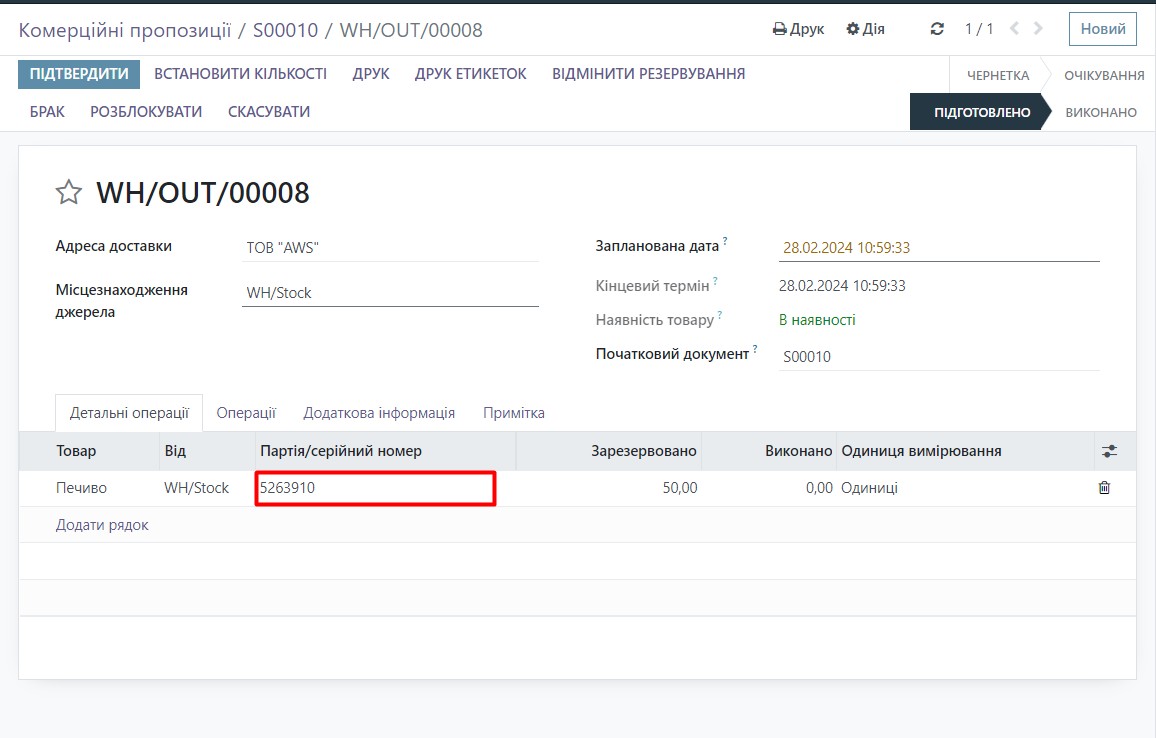
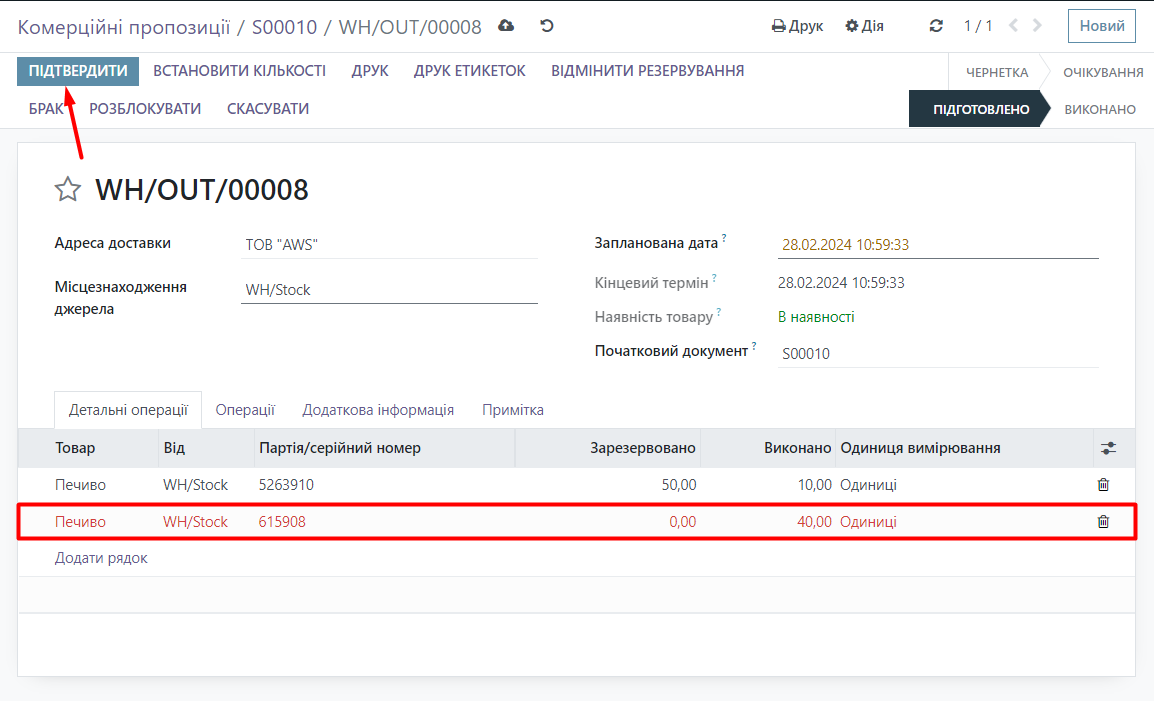
Now we see that the batch number is pulled up here. So, which batch number is being pulled up?
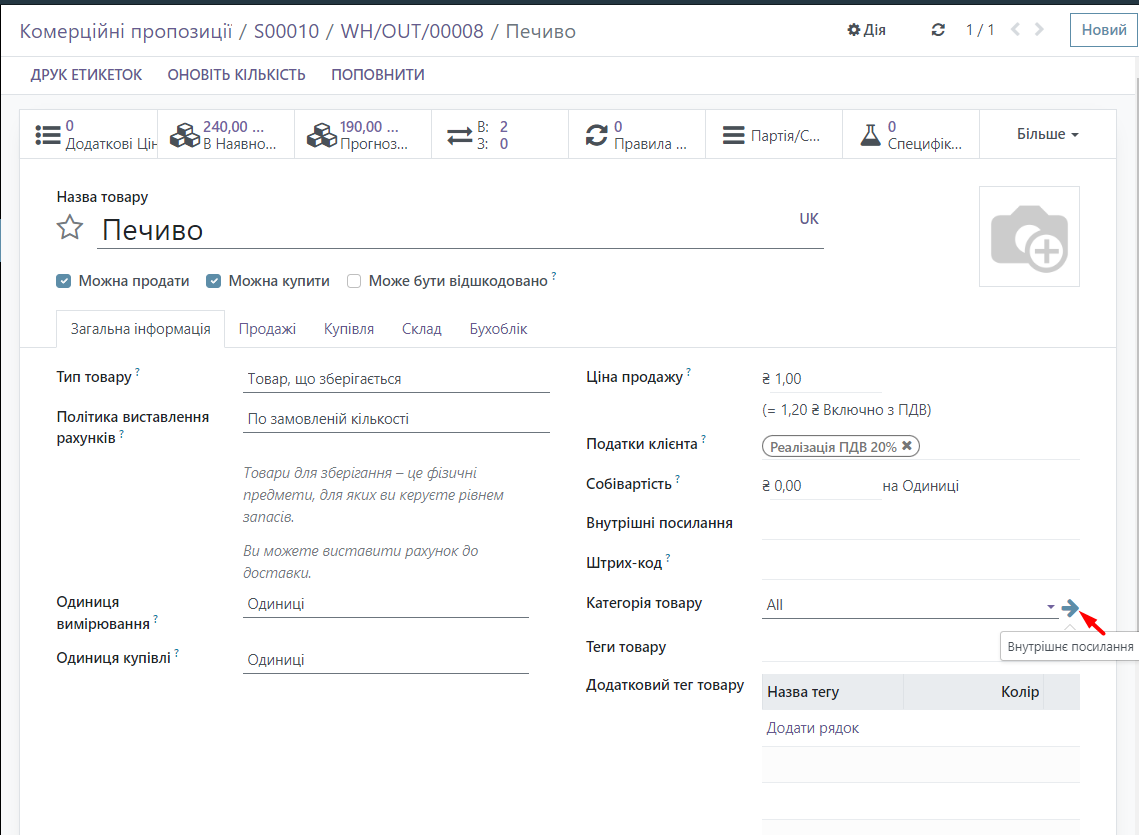
In the Odoo system, in Products, we make settings so that the system knows which batch number for the product should be pulled up. If we go to the product Cookies (double-click on the product name), then go to the internal link of the product category, the product category settings window will open.
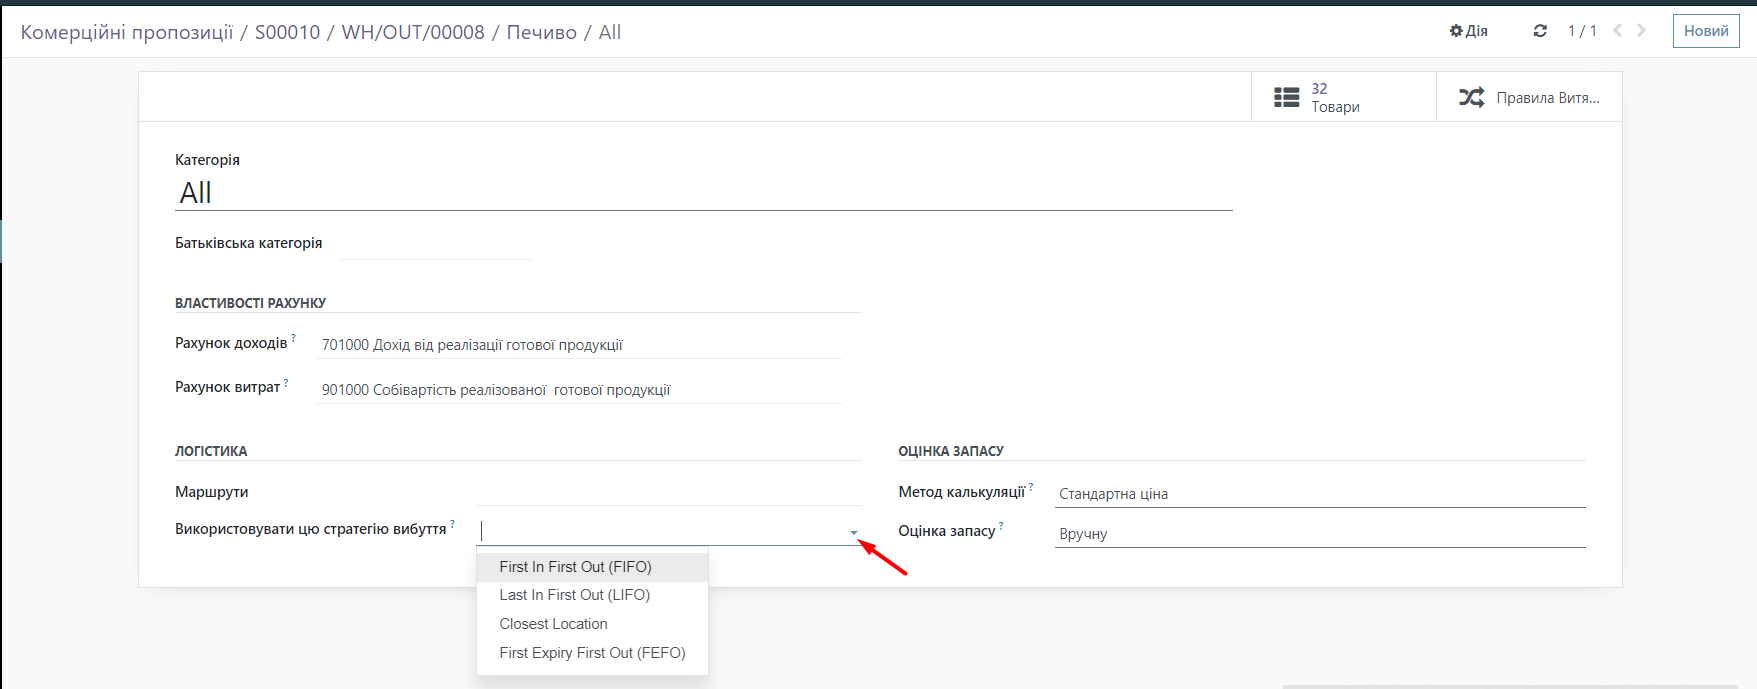
In the product category settings, you can select in the Logistics group which disposal strategy to use.
1 FIFO strategy (First in First Out) – this means that the system will automatically select the batch of goods that arrived the earliest.
2 LIFO strategy (Last in First Out) – this means that the system will automatically select the batch of goods that arrived last (the newest).
3 FEFO strategy (First Expiry First Out) – this means that the system will automatically select the batch of goods that is nearing its expiration date.
Let's return to warehouse transfers, if this batch number is not suitable, you can choose another batch of this product by clicking on the arrow next to the batch number and selecting the desired one from the list of available options. Alternatively, you can split it into 2 batches.
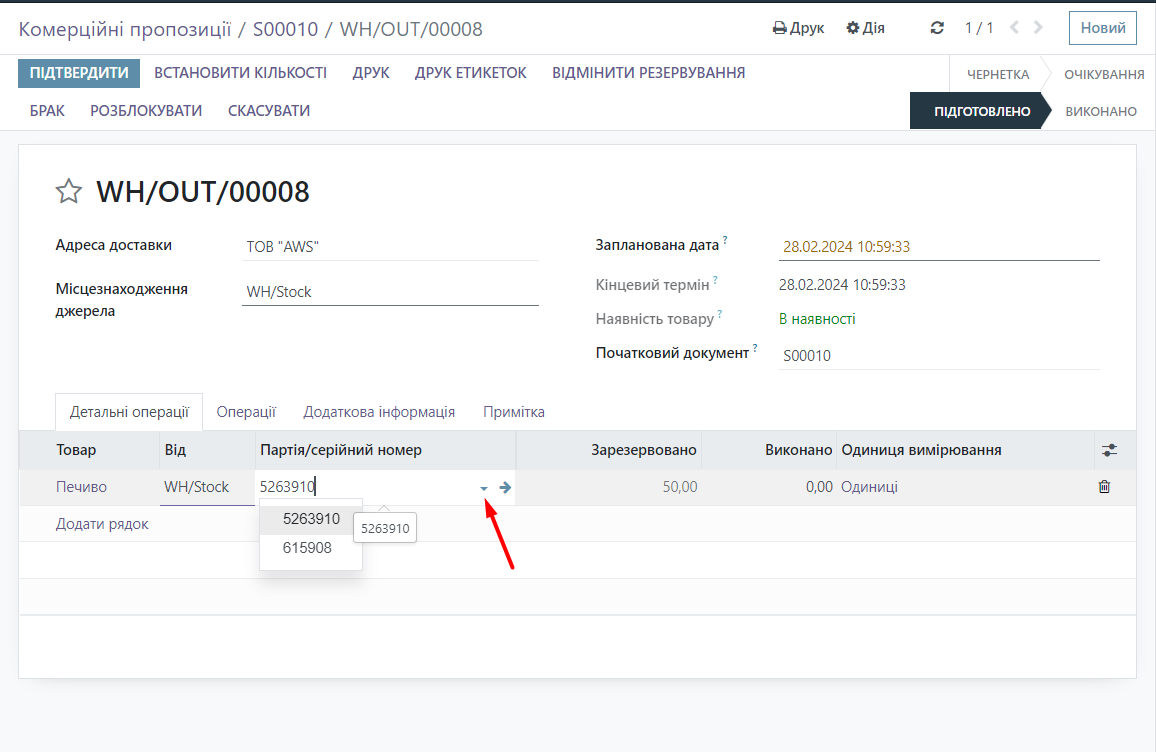
To do this, click Add row, select the product, choose a different batch number and the quantity to be sold (done). Then click the Confirm button.
This is us shipping our product to the client. Now let's go back to the Warehouse module, select Reporting in the menu, and find Location. Now you can check that the quantity of the product Cookies has decreased accordingly due to the sale to the client.