1. Company formation
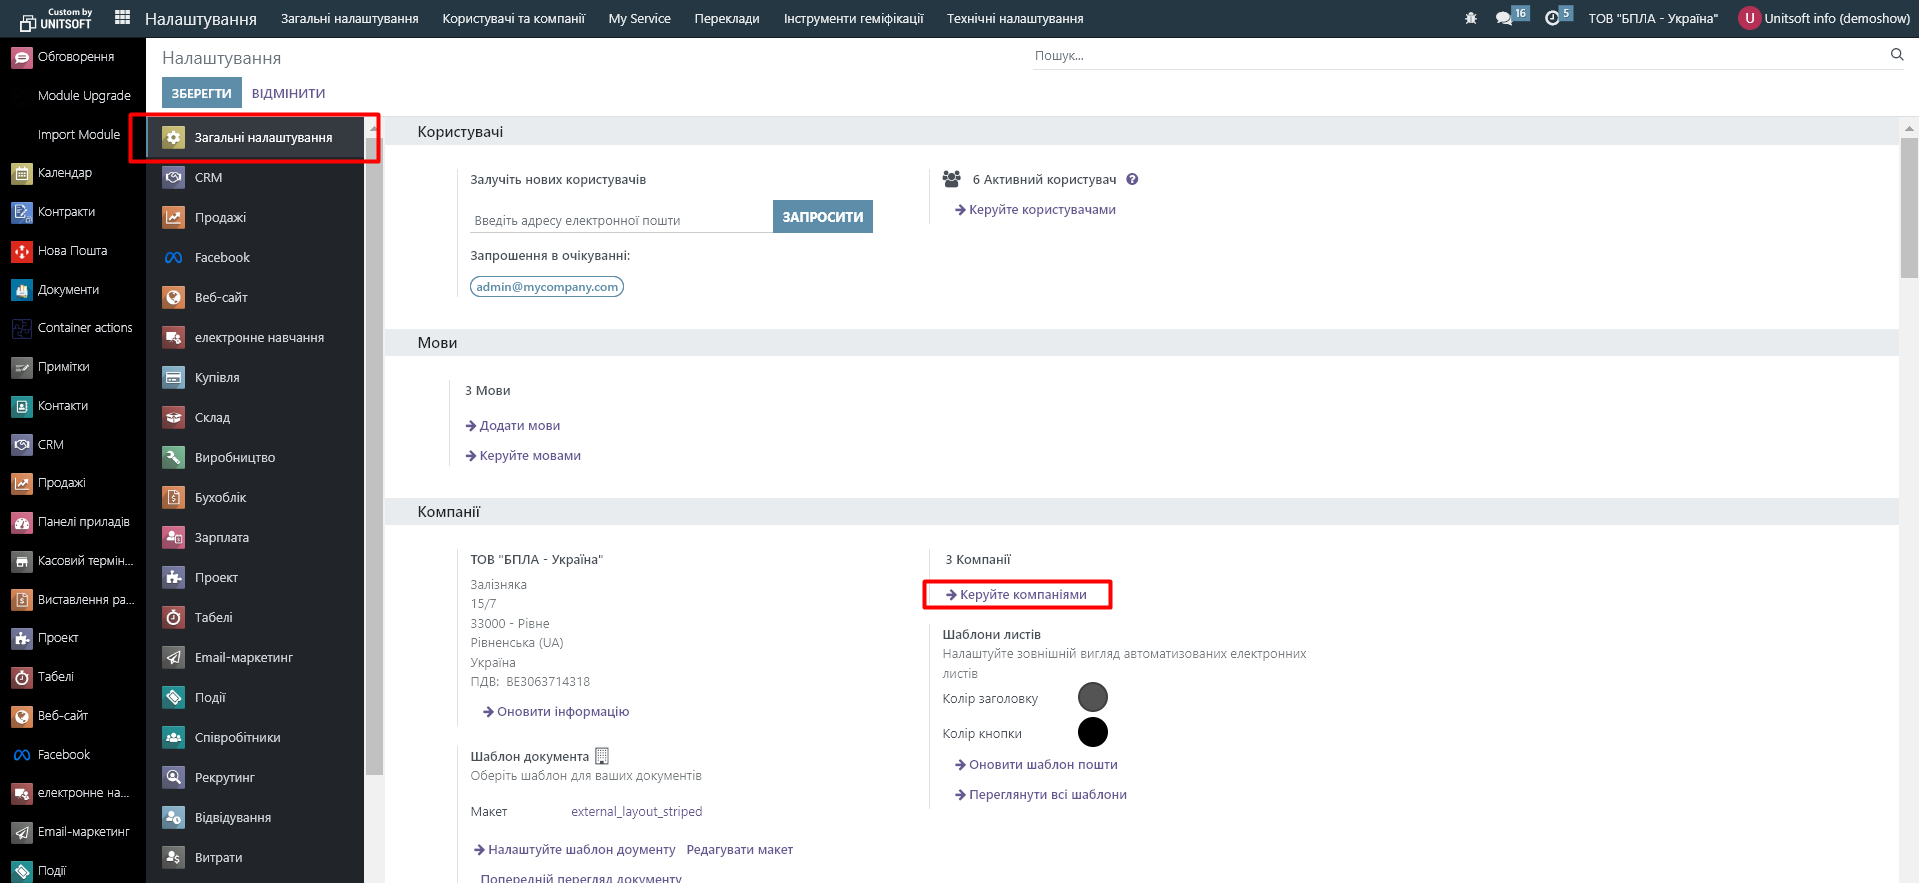
To add a new company, you need to go to the "Settings" module:
In the "General Settings" section, click the "Manage Companies" link:
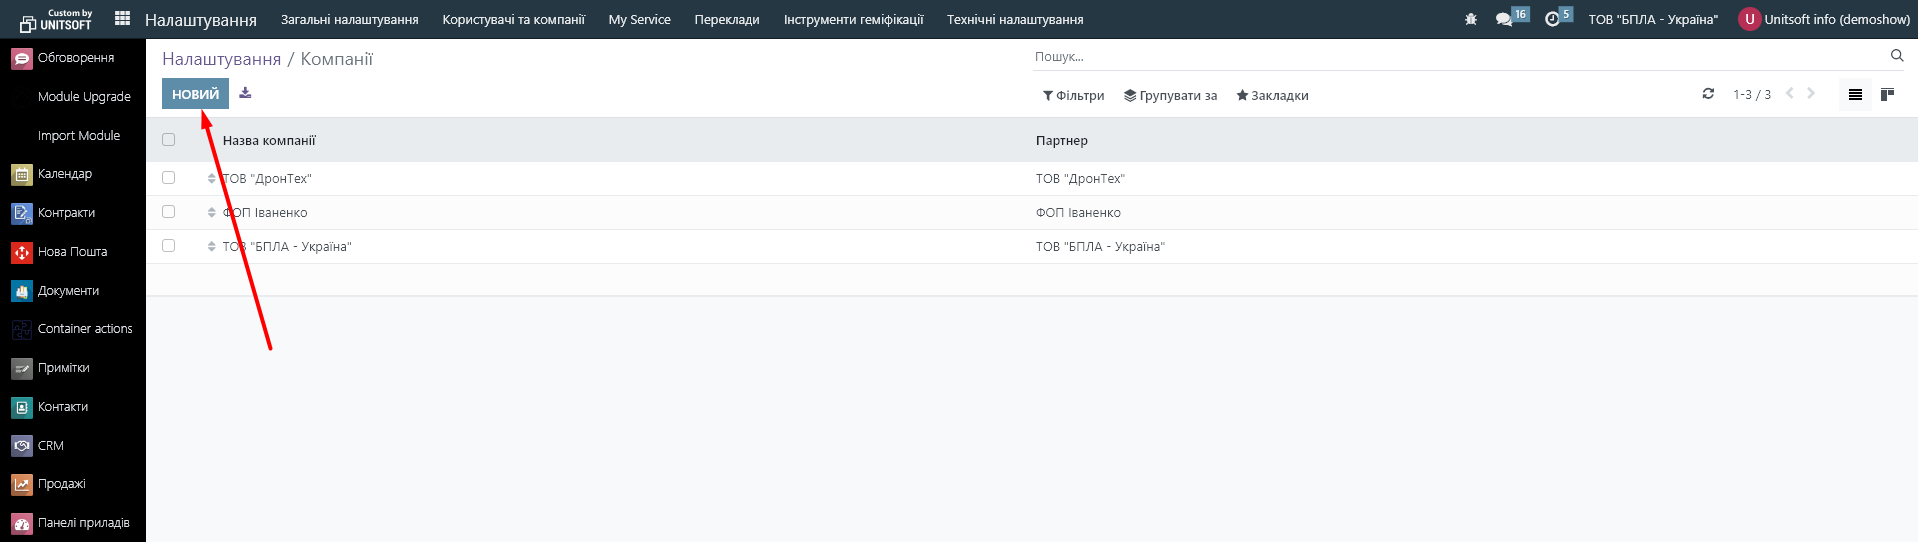
Click the "New" button:
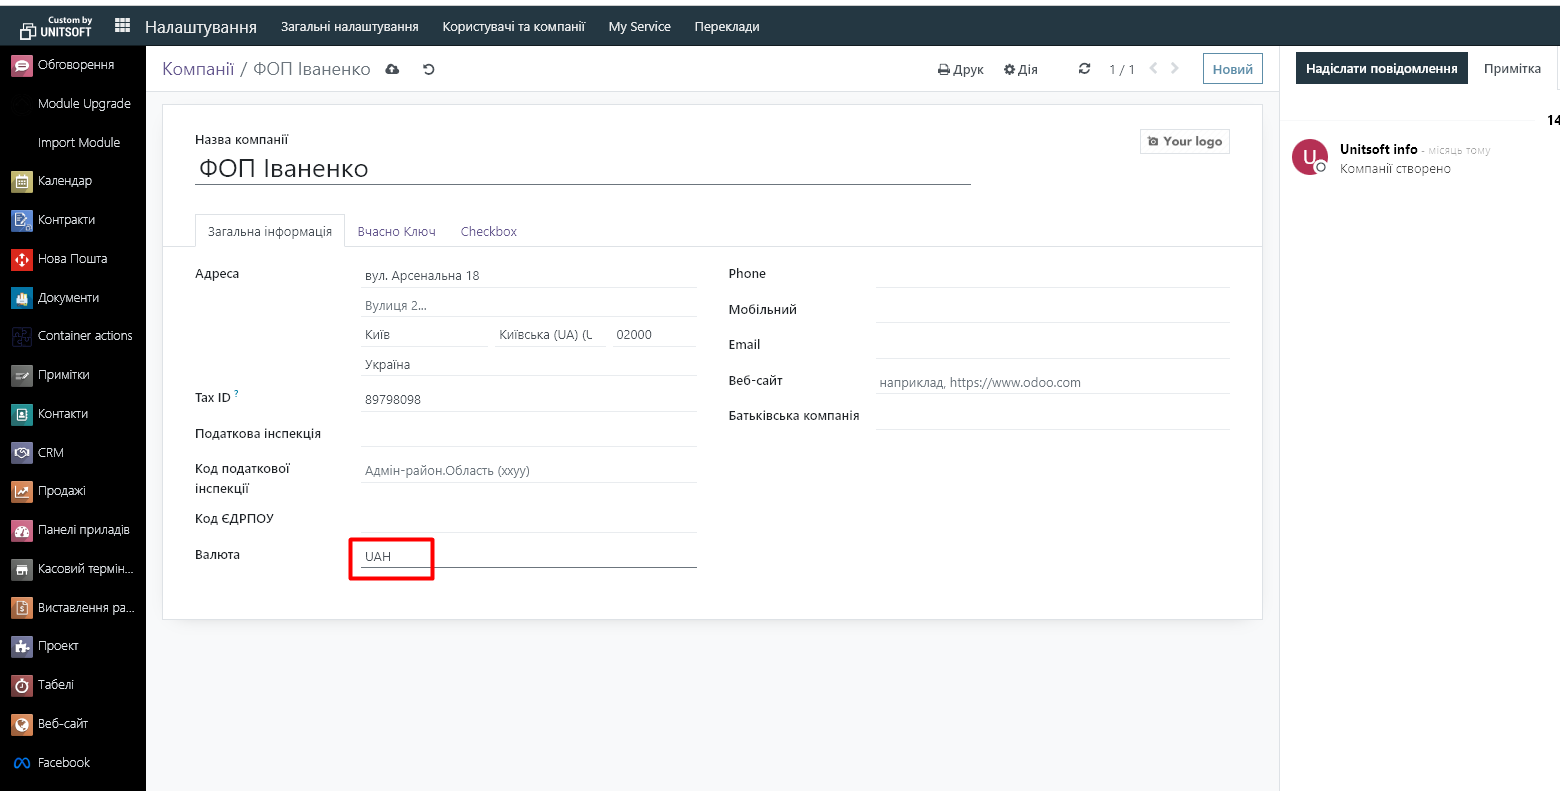
In the new window, specify the name and contact information. It is important to immediately correctly specify the company's accounting currency. After the first financial document is issued, it will no longer be possible to change:
You can save changes by clicking on the corresponding icon, or simply by going to any other menu item (the Odoo system automatically saves all changes, even if the "save" button has not been clicked).
1. Settings for printed forms
After creating a company, a contact card with the same name will be automatically generated in the Odoo system.
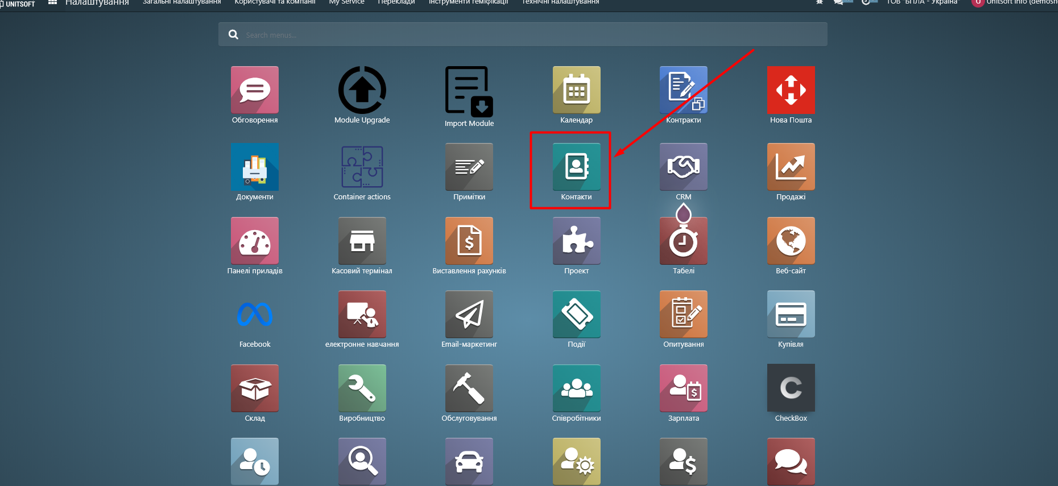
To get to it, you need to go to the "Contacts" module:
In the contact card, you need to fill in the information about the full and short legal name of the company. This information will be used later for printed forms:
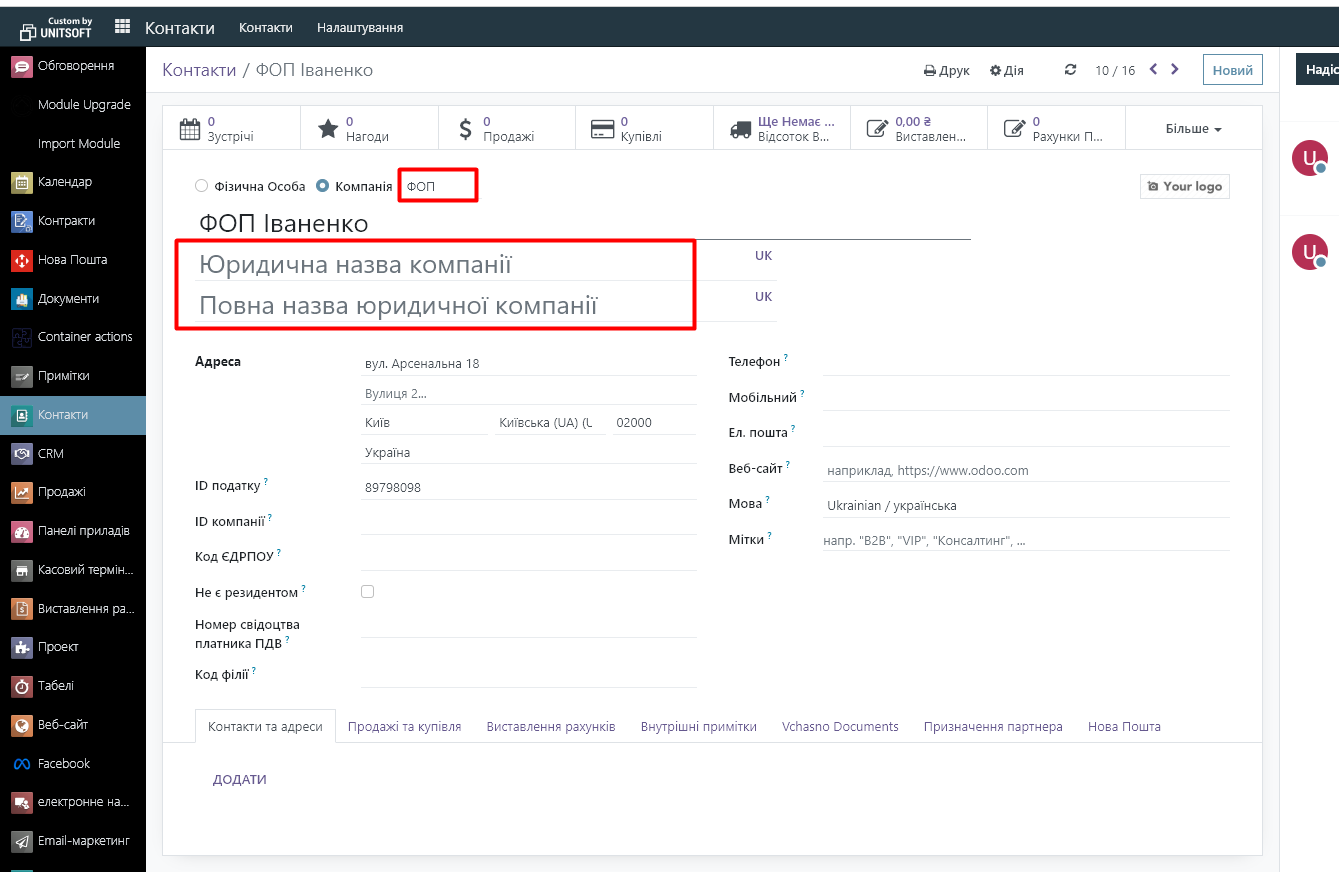
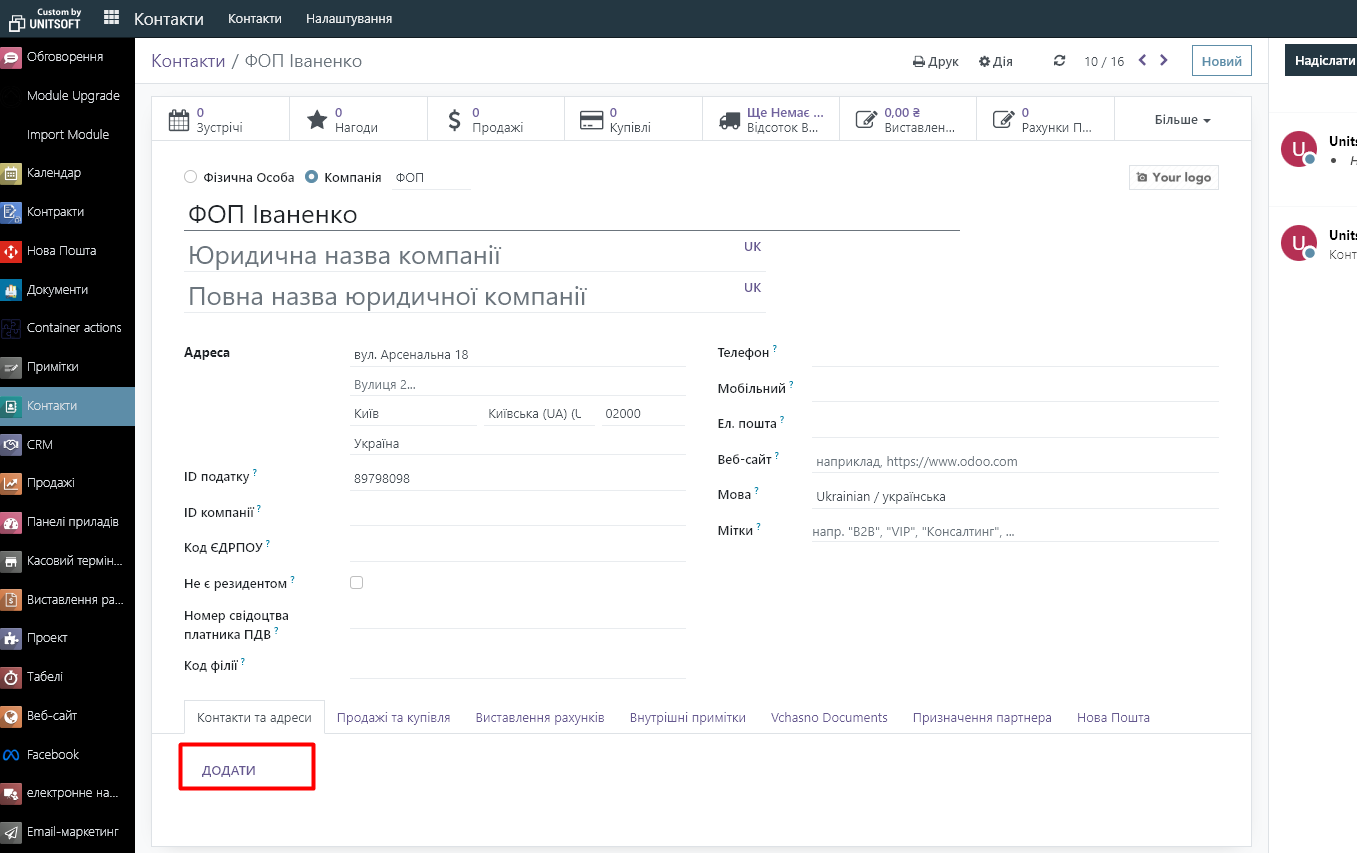
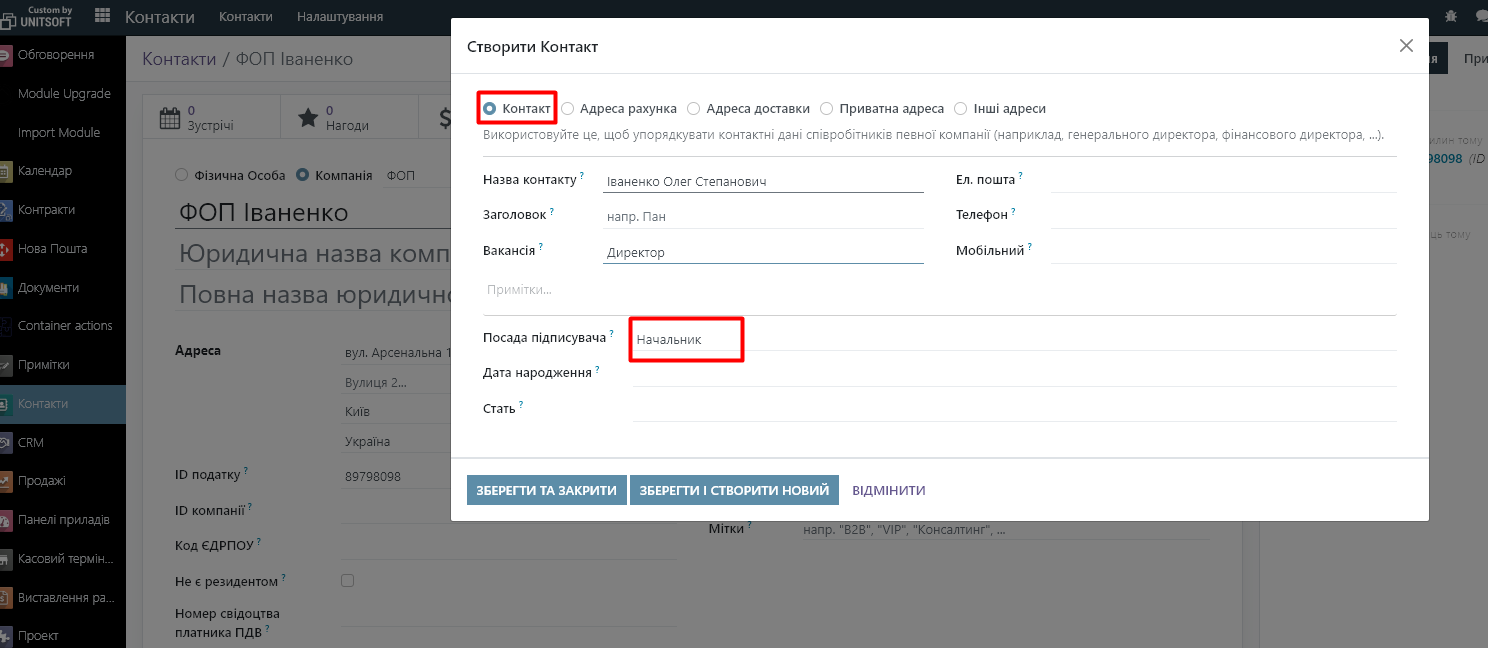
We also recommend that you immediately add the company's signatories in the "Contacts and Addresses" section. Then their full names will automatically be pulled into the appropriate printed forms.
3. Setting up user access to the new company
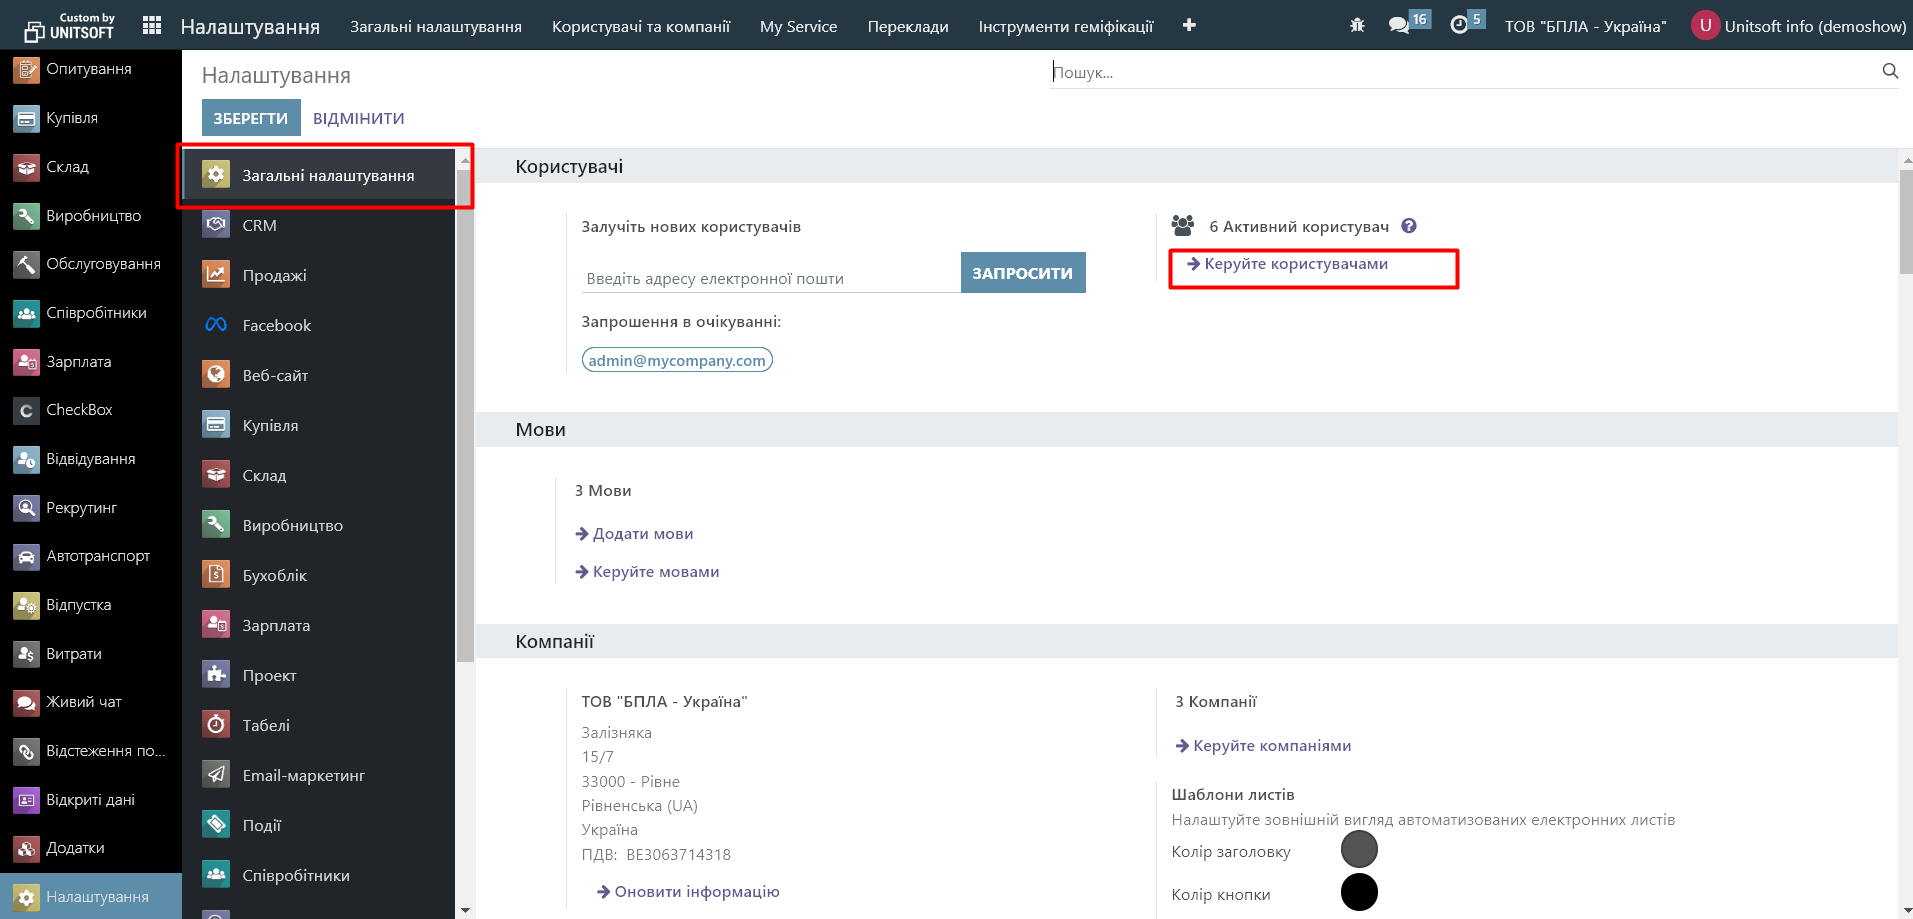
In order for other users to have access to the new company, you need to make the appropriate settings for their rights. To do this, go to the "Settings" - "General Settings" module. There, find the "Manage Users" link:
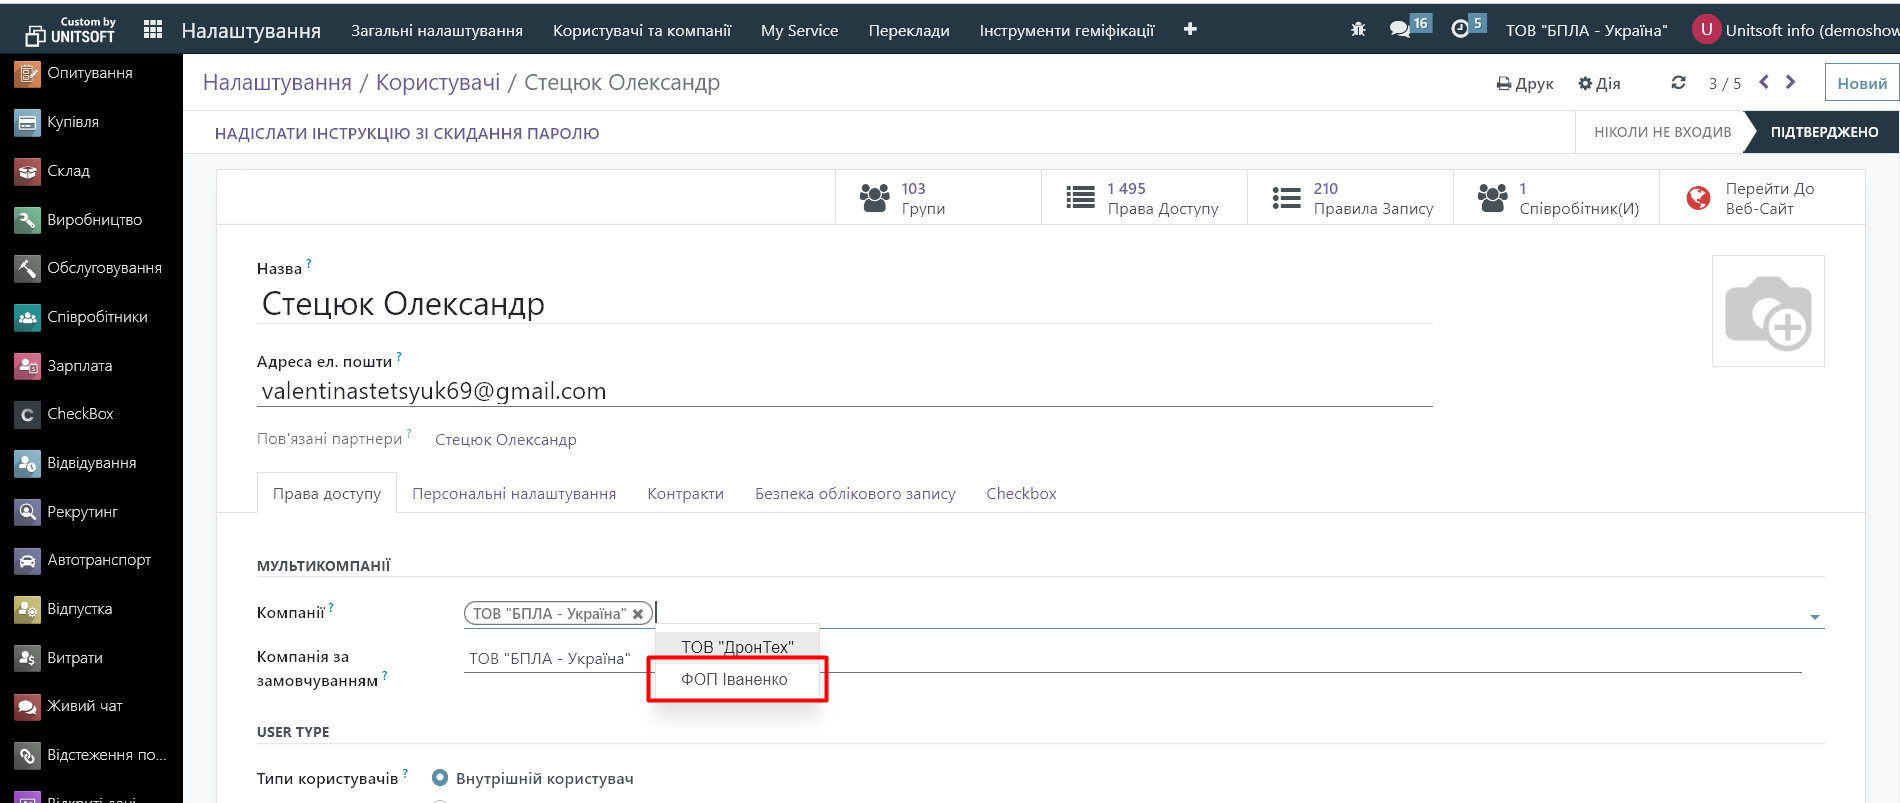
Open the required user. In his card, in the "Company" line, add a new company:
4. Managing companies in the Odoo system
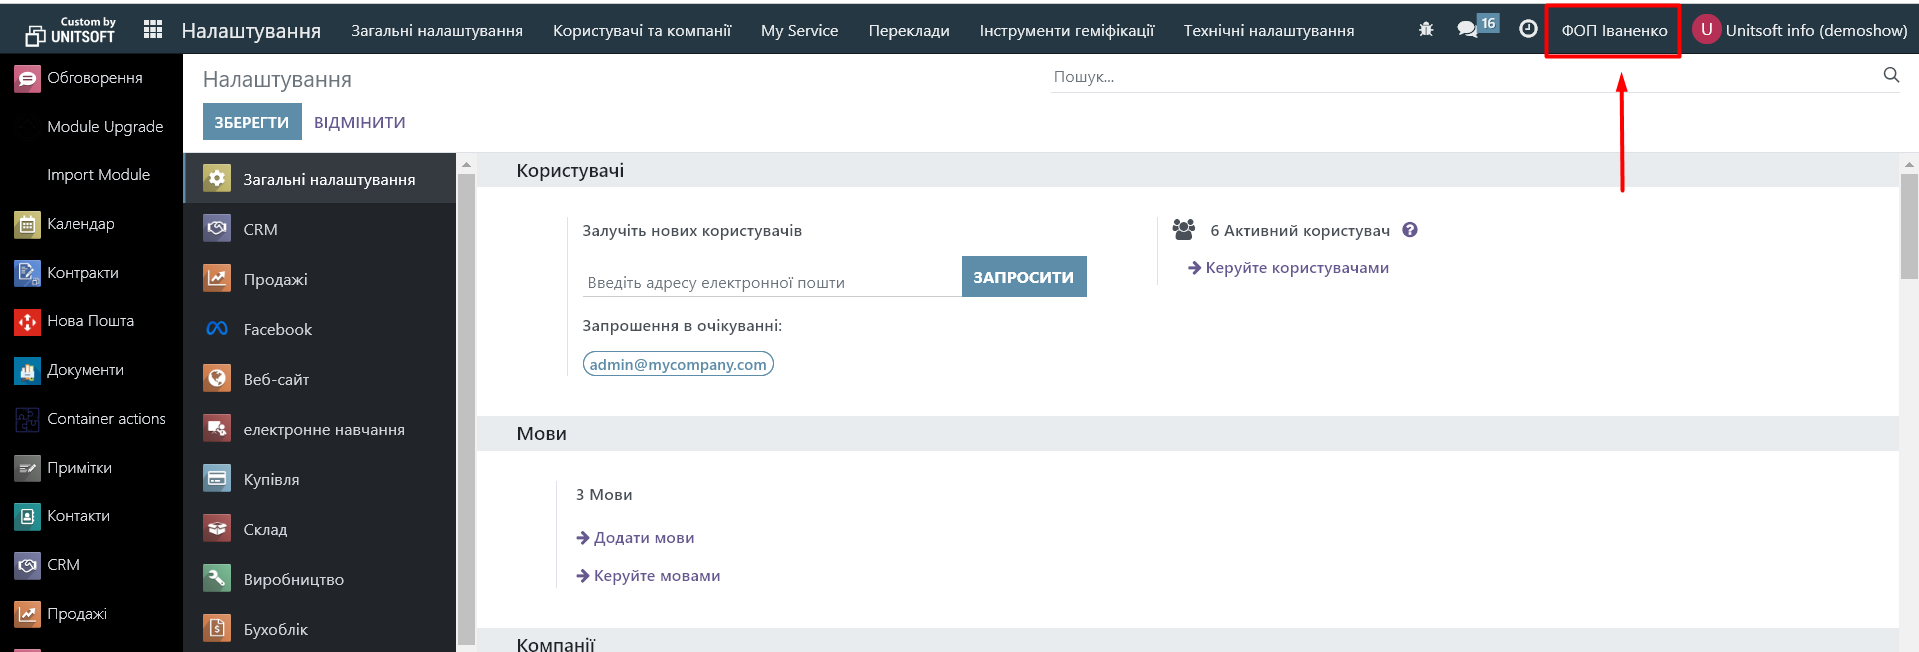
After creating a new company, a new button will appear in the upper right panel - a switch between companies:


The company in the top panel is actually the company you currently work for.
This switch allows you to switch to another company. You can also enable viewing of multiple companies at once:

In this case, you will see documents from several companies in the system at the same time, and the reporting will display information for two companies at once. However, we do not recommend creating documents with several companies enabled at the same time, as this increases the risk of errors.
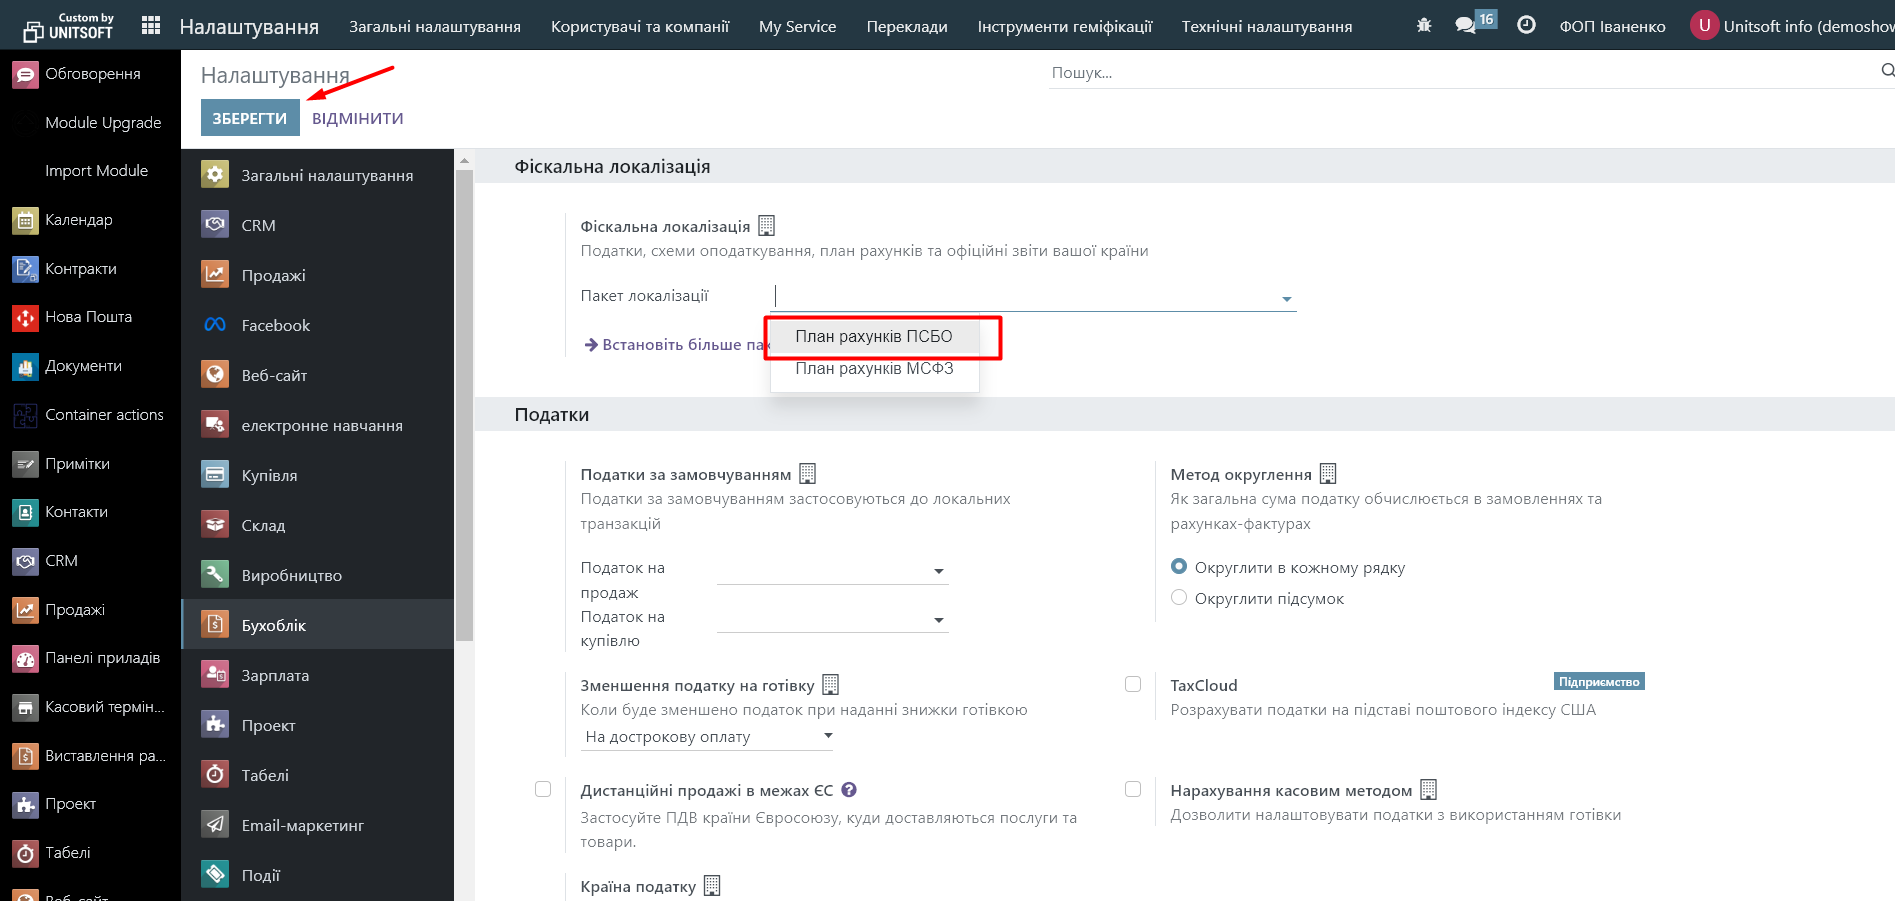
5. Connecting localization
Another setting that we recommend doing immediately after creating a company is to enable the necessary localization. Otherwise, when working in the company (creating invoices, partners, products, etc.), you will receive an error about the absence of accounting accounts.
To do this, you need to switch to a new company:
After that, go to the "Settings" - "Accounting" module. Look for the "Localization package" field:
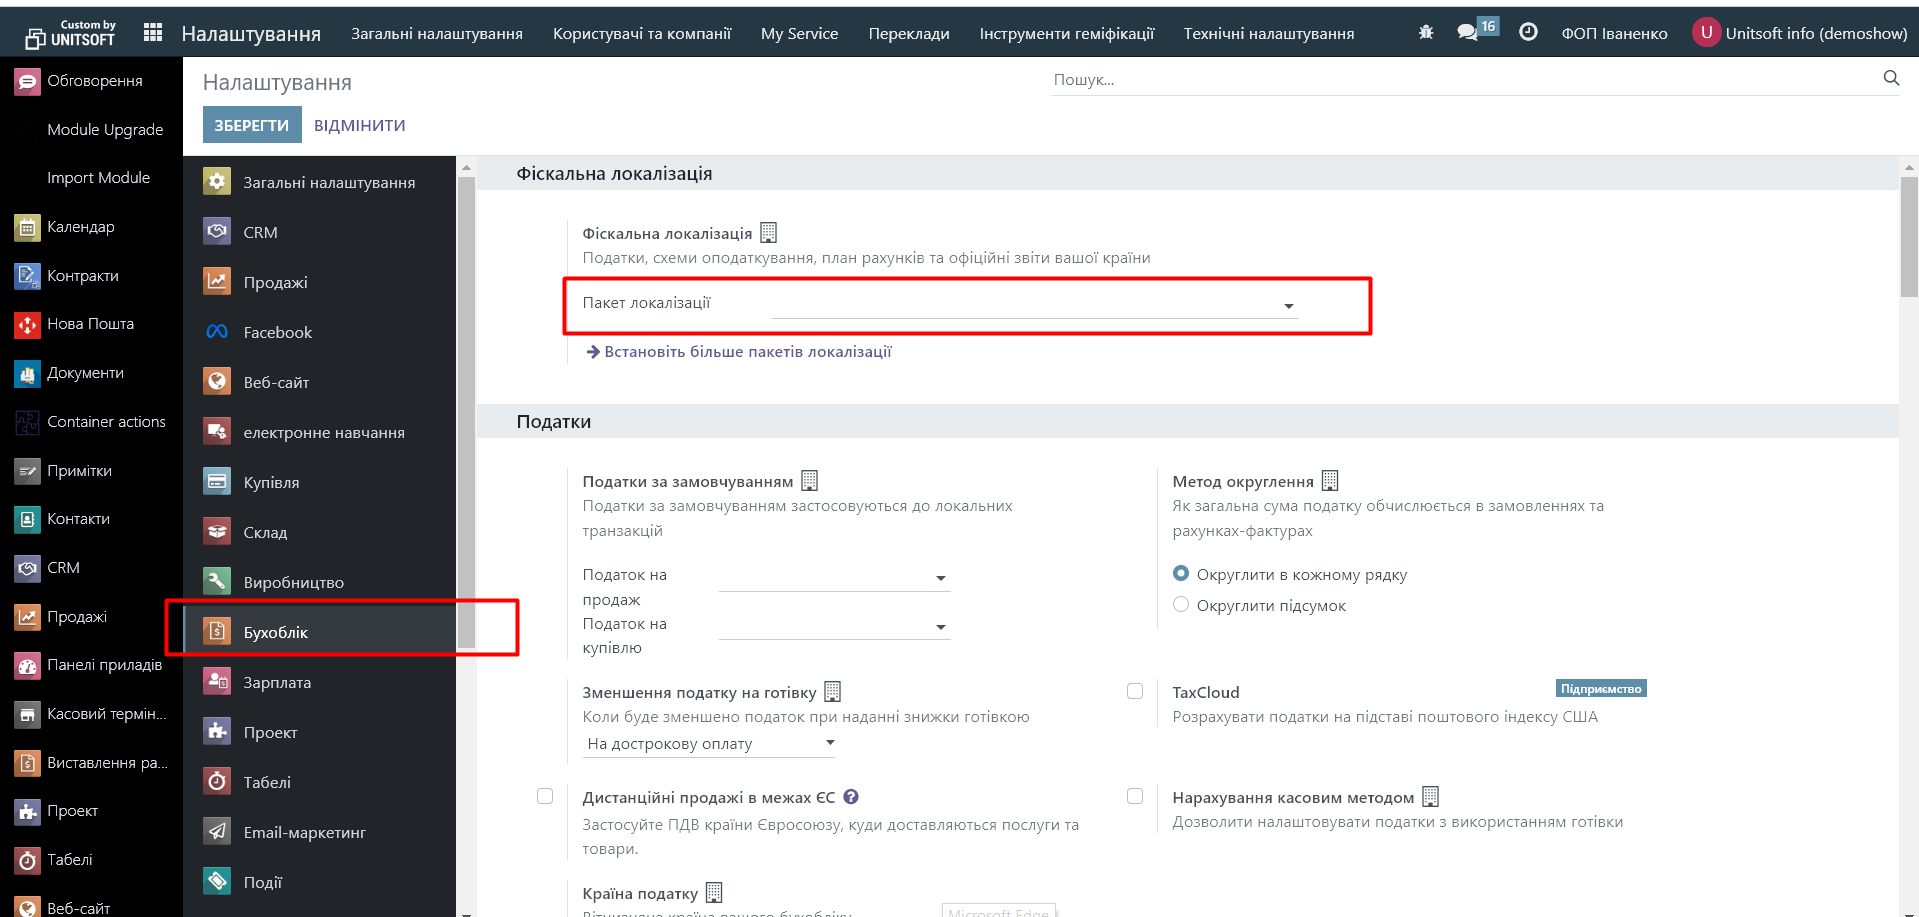
Select the required localization here and save the changes: