Odoo allows employees to submit expense reports and managers to review and approve them. This is useful for keeping track of expenses related to business trips, purchasing goods, transportation, etc.
1. Adding a separate journal for employee expense tracking
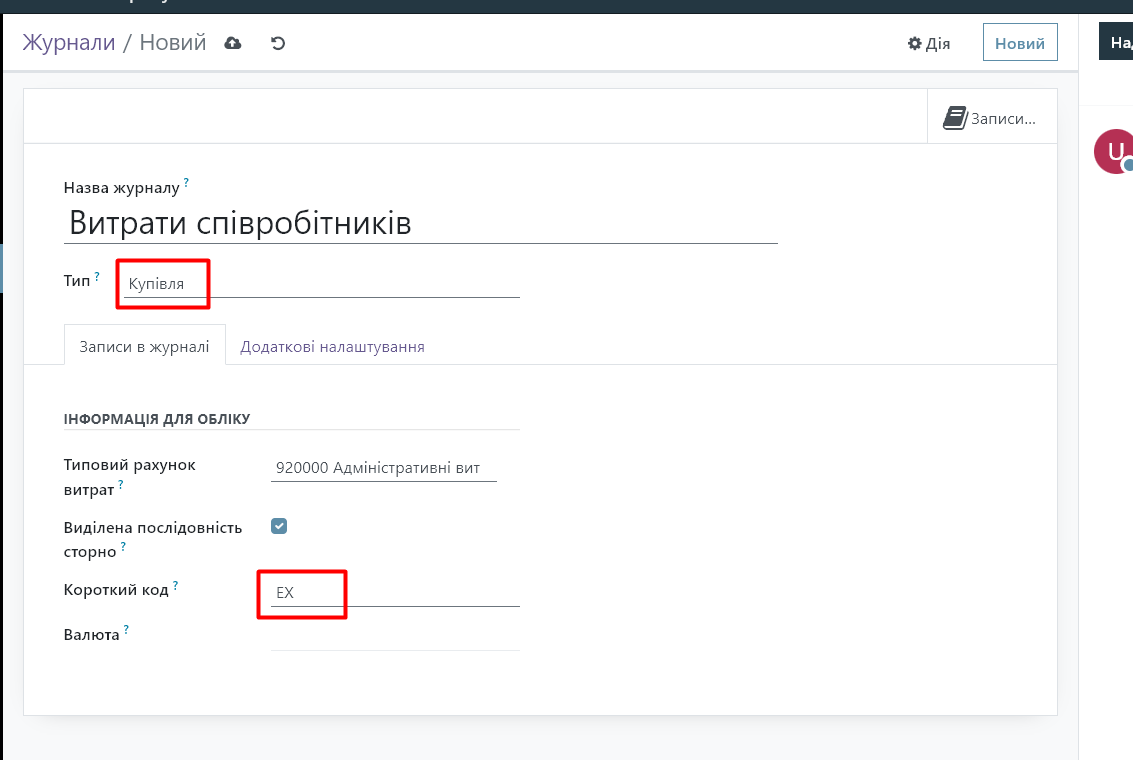
1.1. Go to the "Invoicing" module - "Settings" - "Journals":
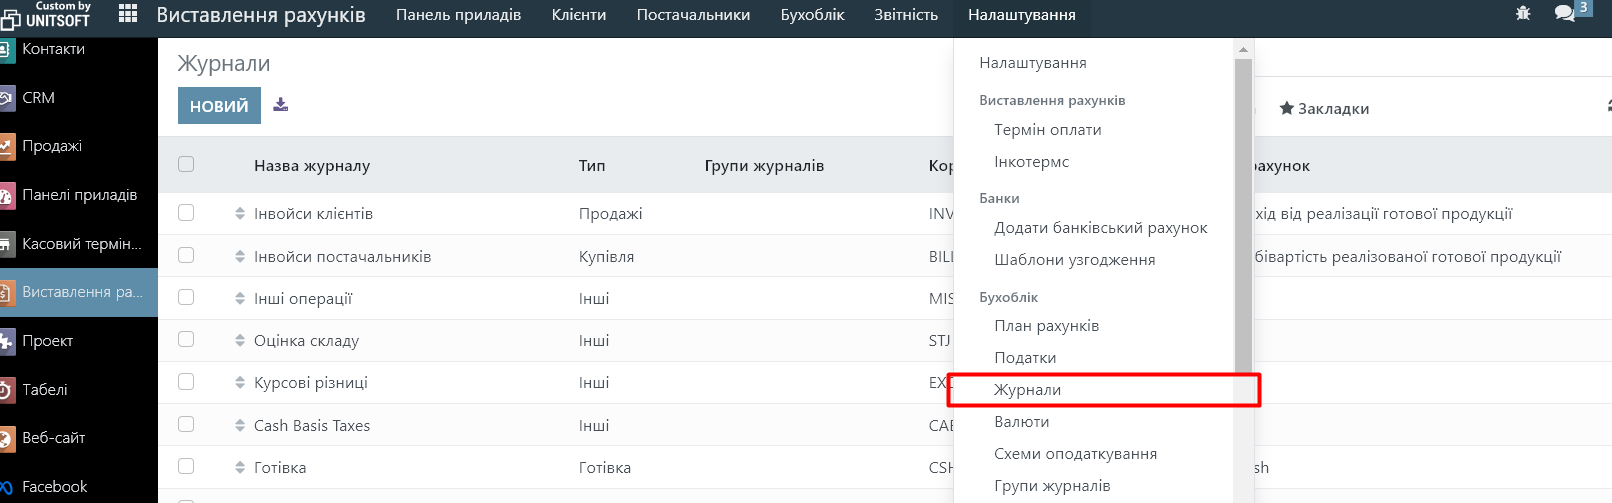
1.2. Create a new journal. Specify the type "Purchase" and any shortcode that will be used to number documents in this journal.
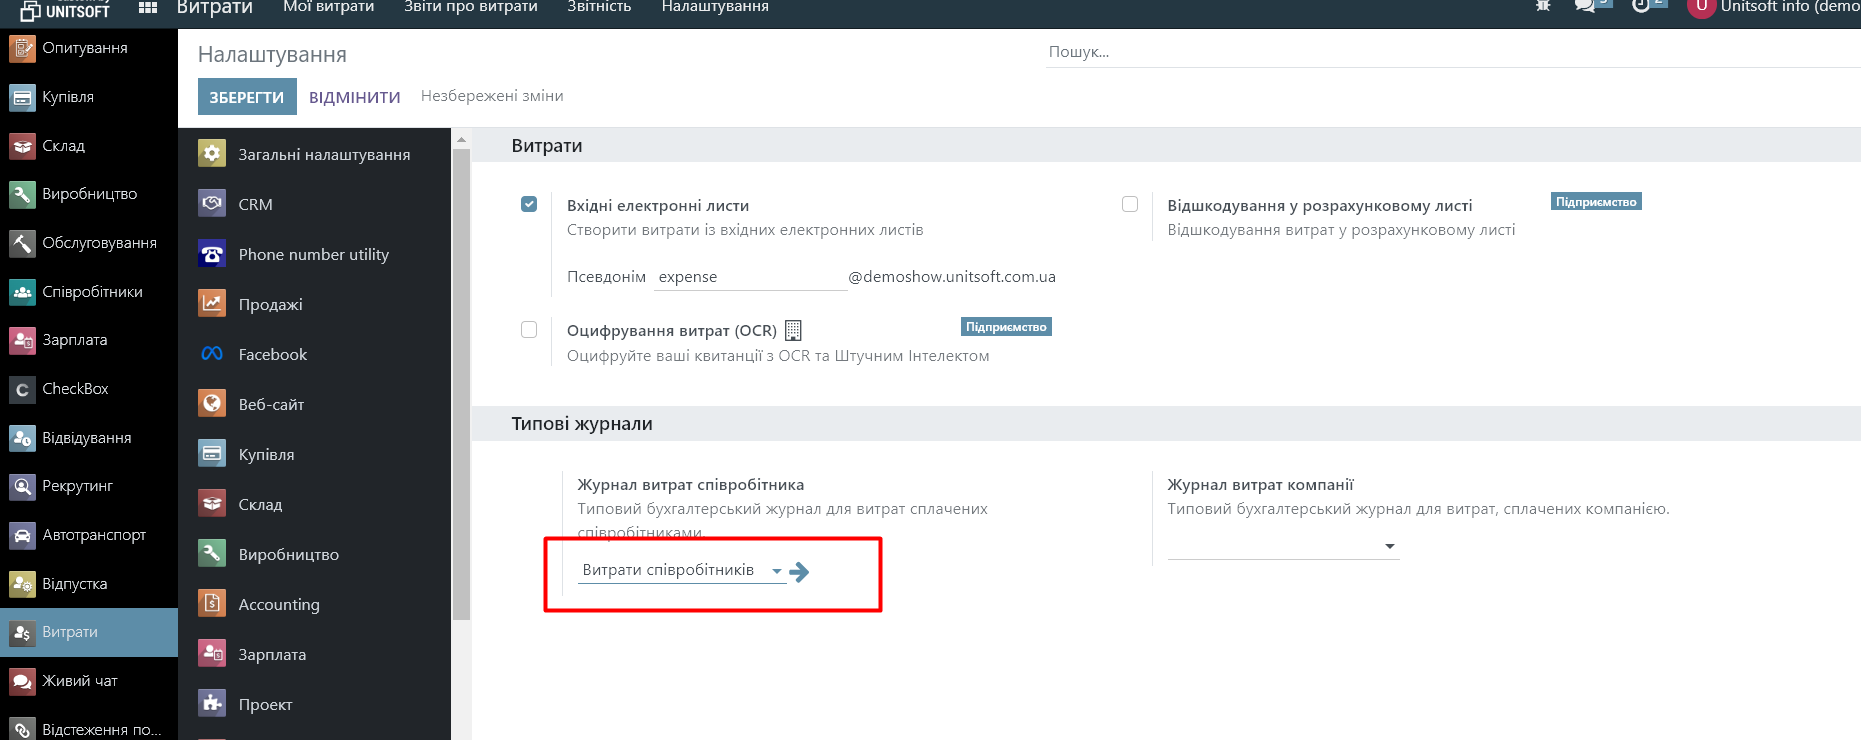
1.3. Next, we recommend going to the settings of the "Expenses" module and specifying the created journal as the default journal for employee expenses:
2. Creating and configuring employees
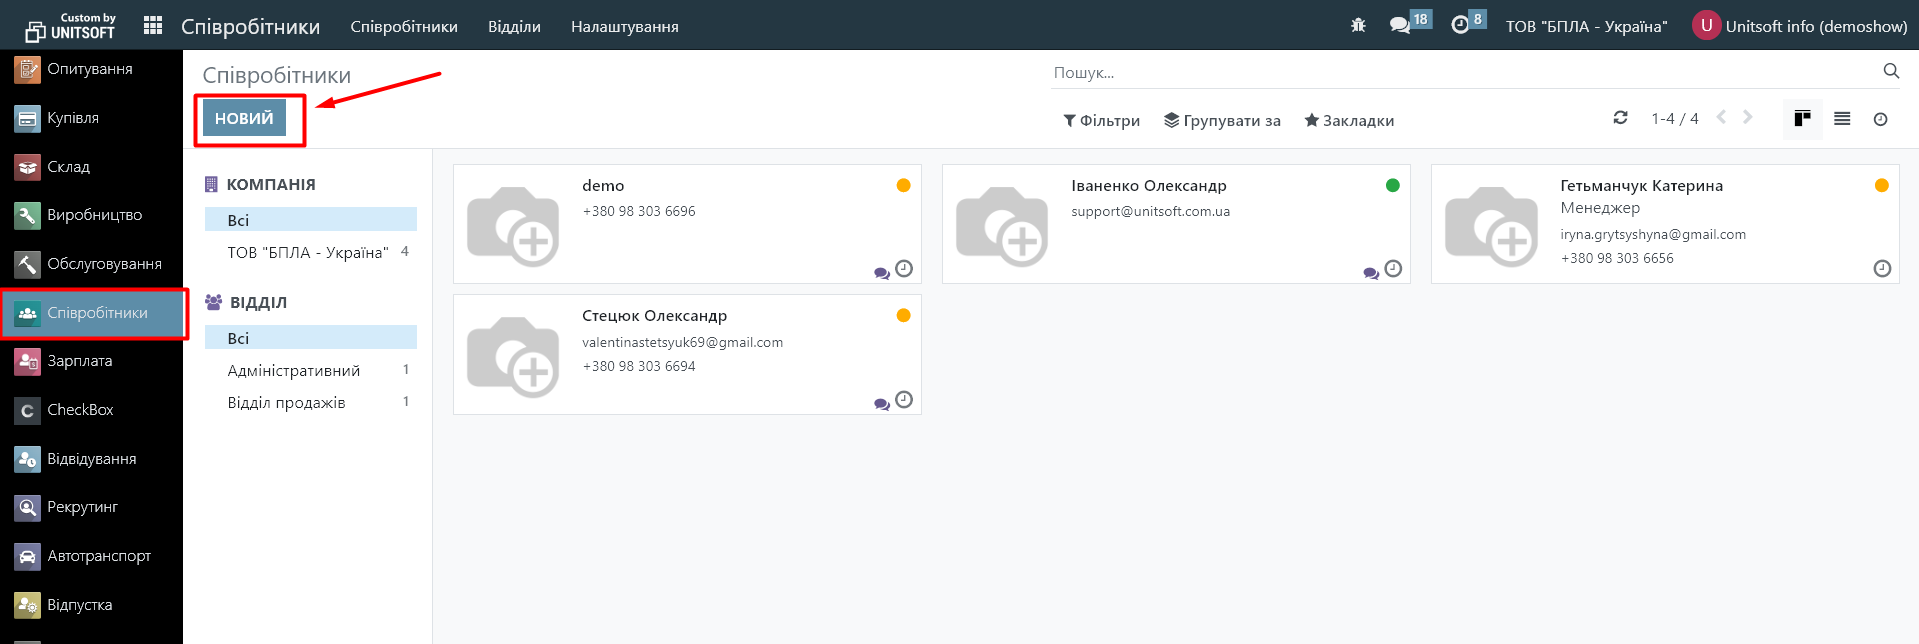
2.1. Go to the "Employees" module, add a new employee to the database using the "New" button
2.2. Save the created employee:
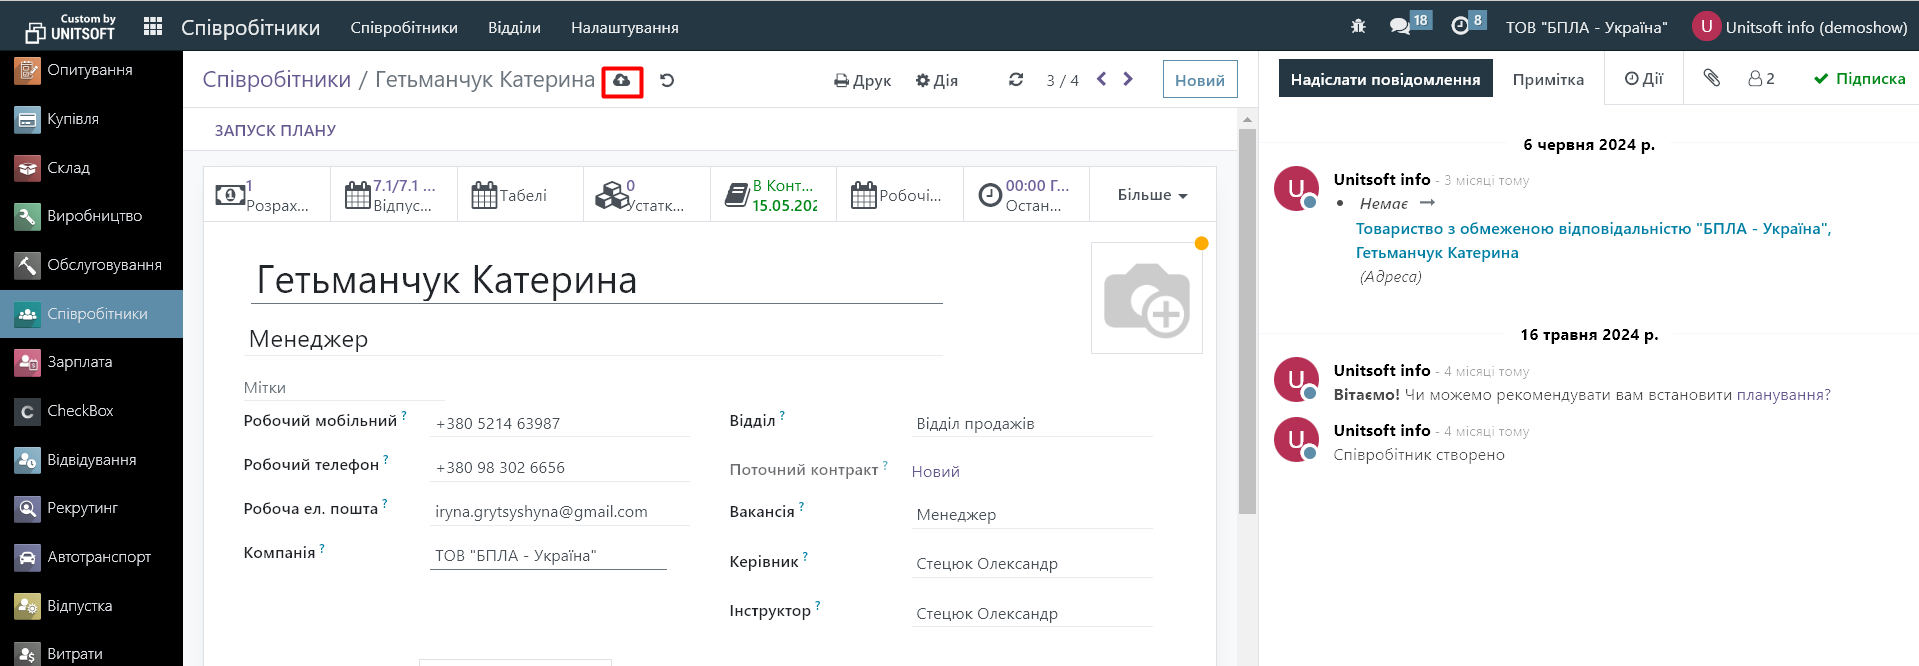
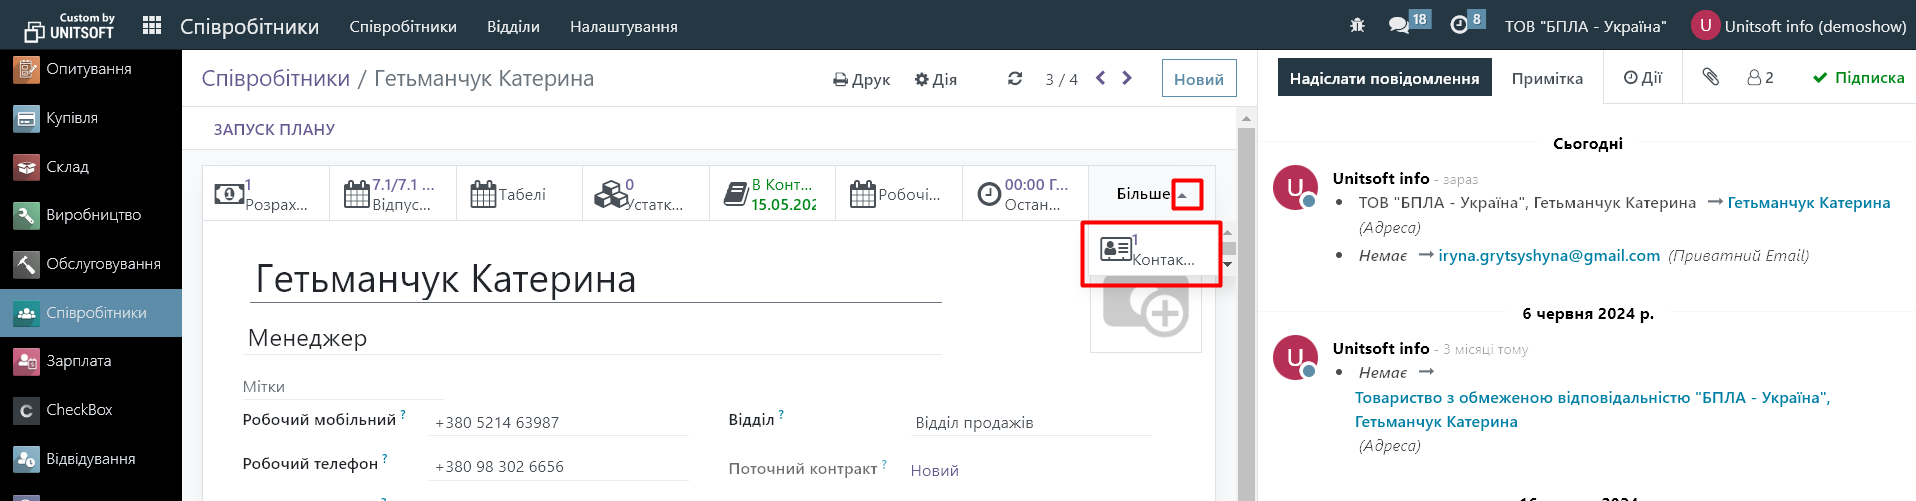
2.3. Important! When you save it, the Odoo system automatically generates a linked contact (partner). This contact must be specified in the "Private Information" section, in the "Addresses" field. Without this setting, the Odoo system will not allow you to confirm the expense document and will throw the error "Employee's private address is required to post the expense report":
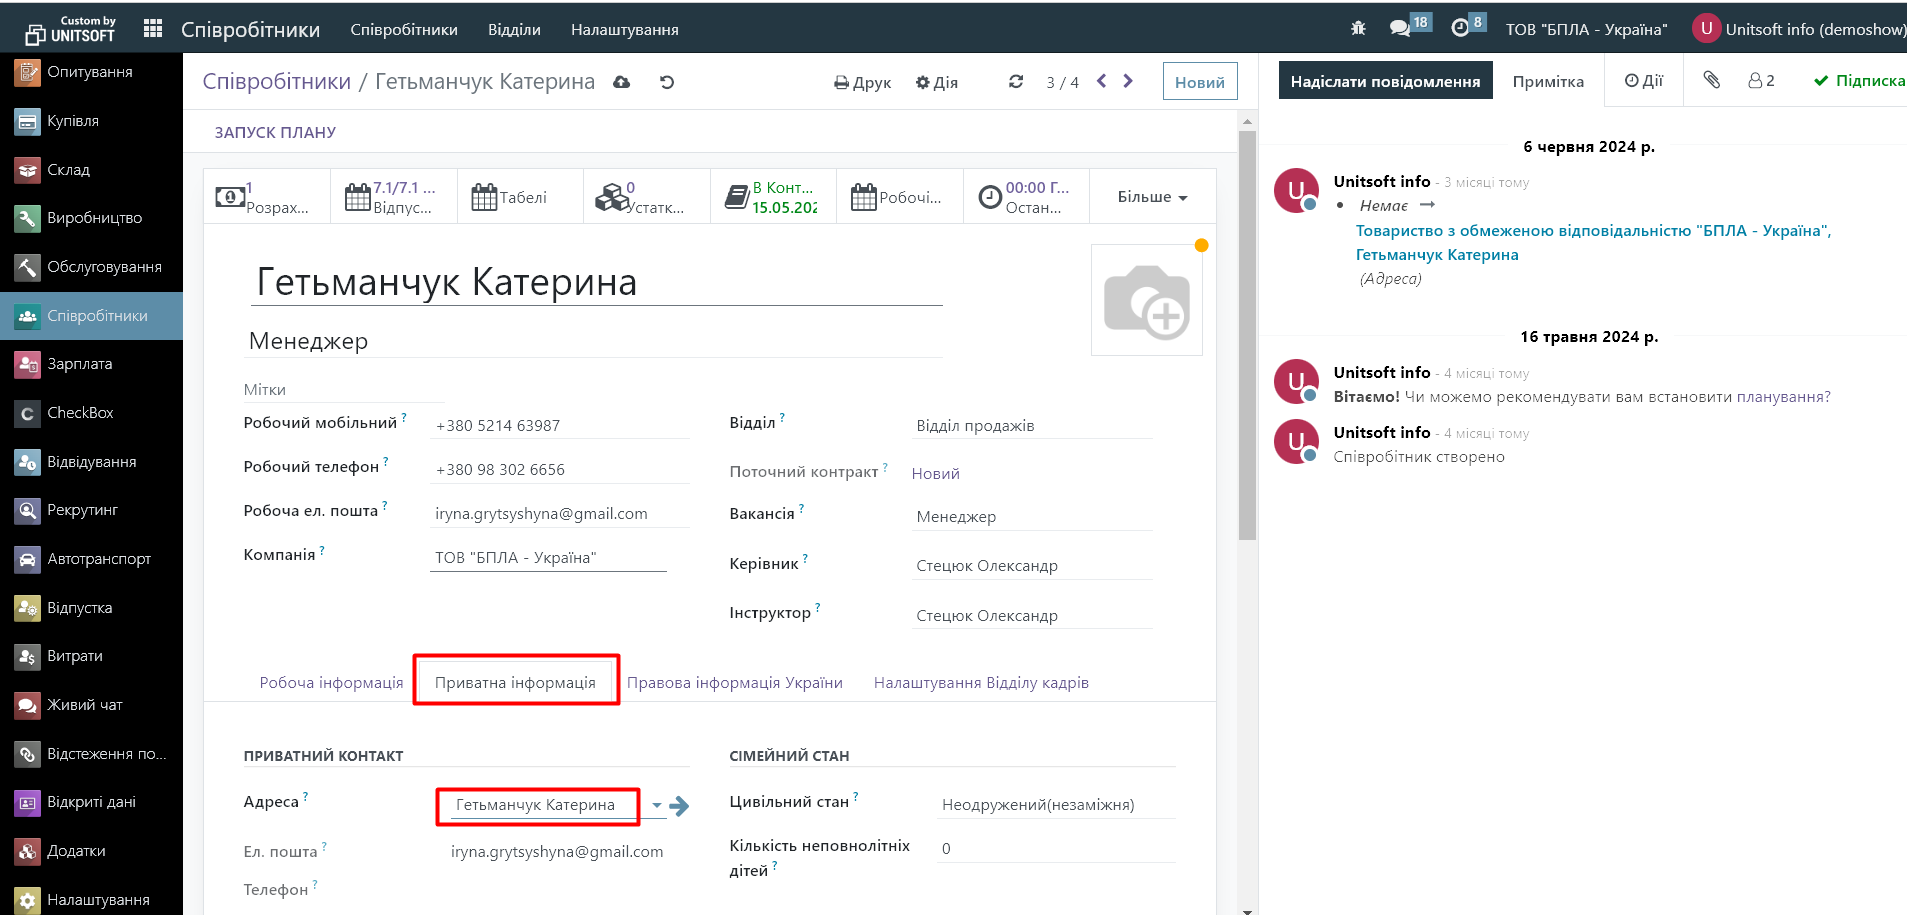
2.4. Important! When you save it, the Odoo system automatically generates a linked contact (partner). This contact must be specified in the "Private Information" section, in the "Addresses" field. Without this setting, the Odoo system will not allow you to confirm the expense document and will throw the error "Employee's private address is required to post the expense report":
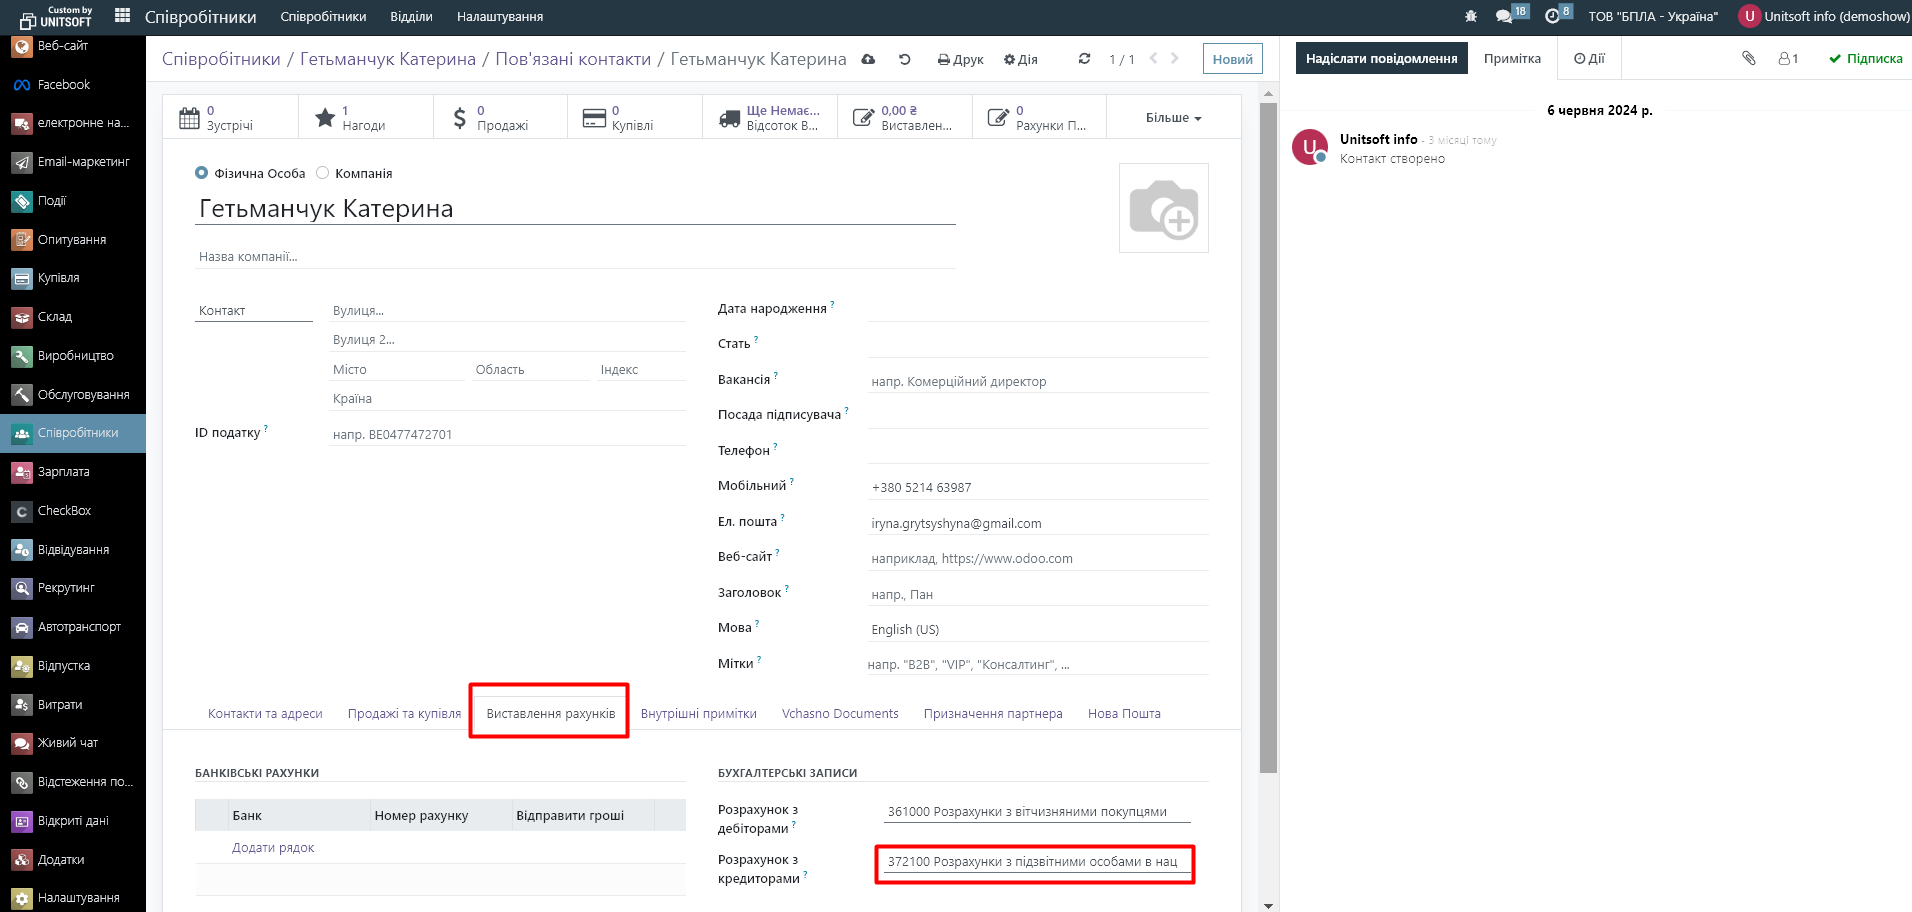
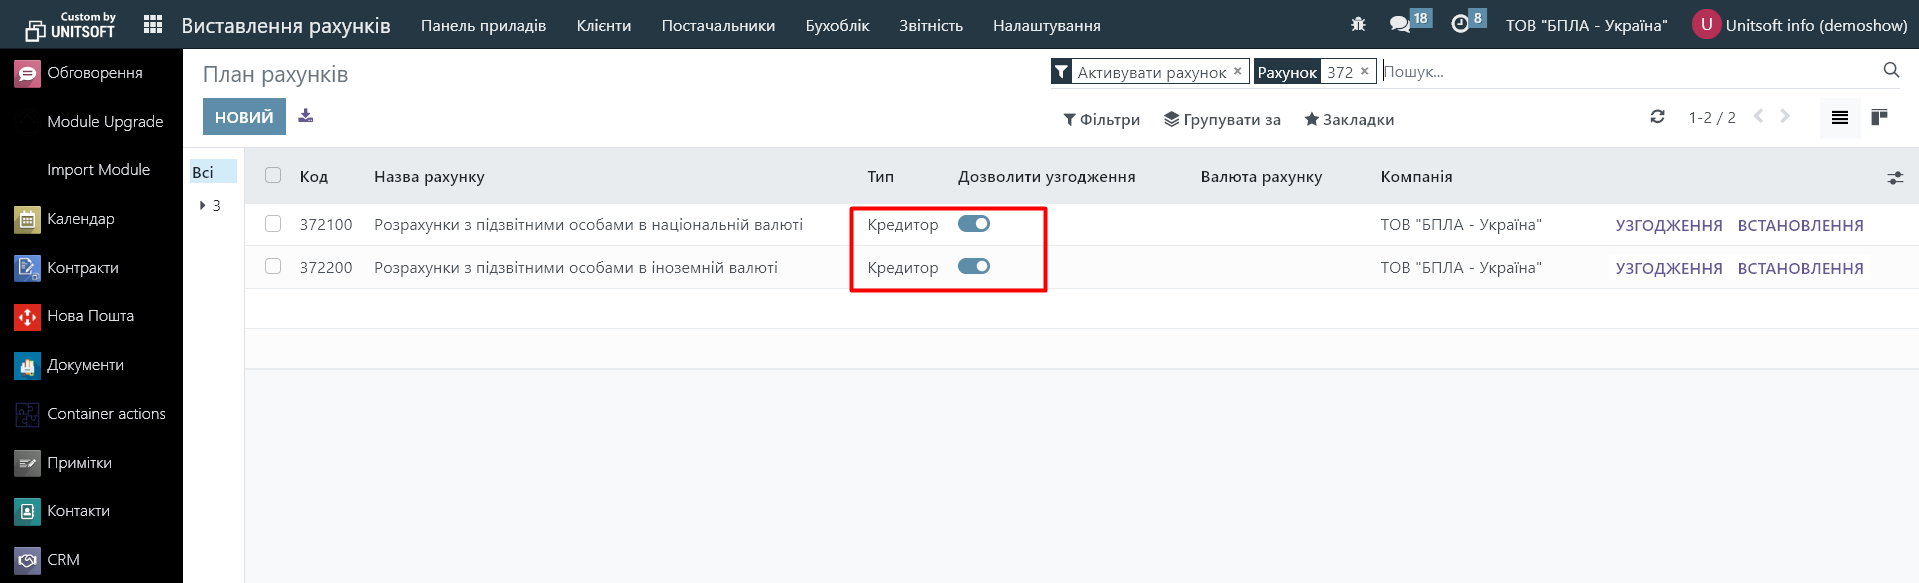
It is important that account 372100 can be selected, its type must be "Creditor":
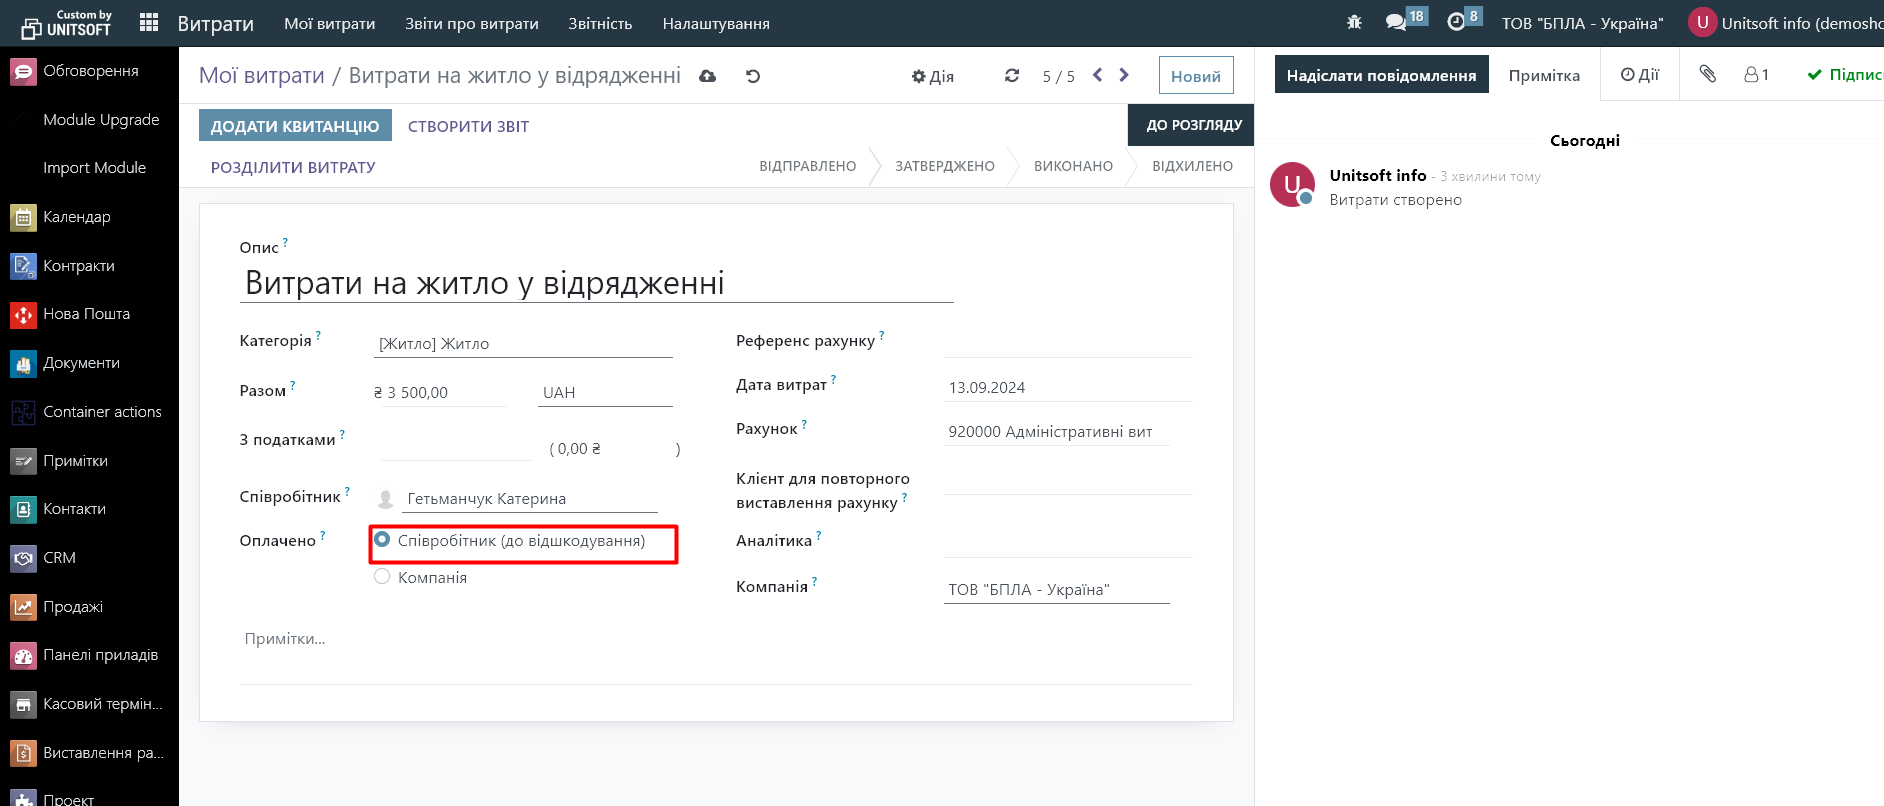
3. Creating an expense report
3.1. Go to the "Expenses" module. Click the "Create" button to add new expenses.

3.2. Fill in the following fields:
- Description: A brief description of the expense (e.g., “Travel expenses”).
- Expense category: select the category the expense belongs to (e.g. transportation, accommodation, food, etc.). Expense categories can be configured in the Expenses - Settings - Expense categories module.
- Total: Enter the amount and currency of the expense.
- Date: Select the date the expense was incurred.
- Reimbursement: choose who paid the expense. In our case, the employee paid, we indicate him in the new line "Employee"
3.3. Add any other details, such as documents or scanned receipts. The report allows you to upload attachments.
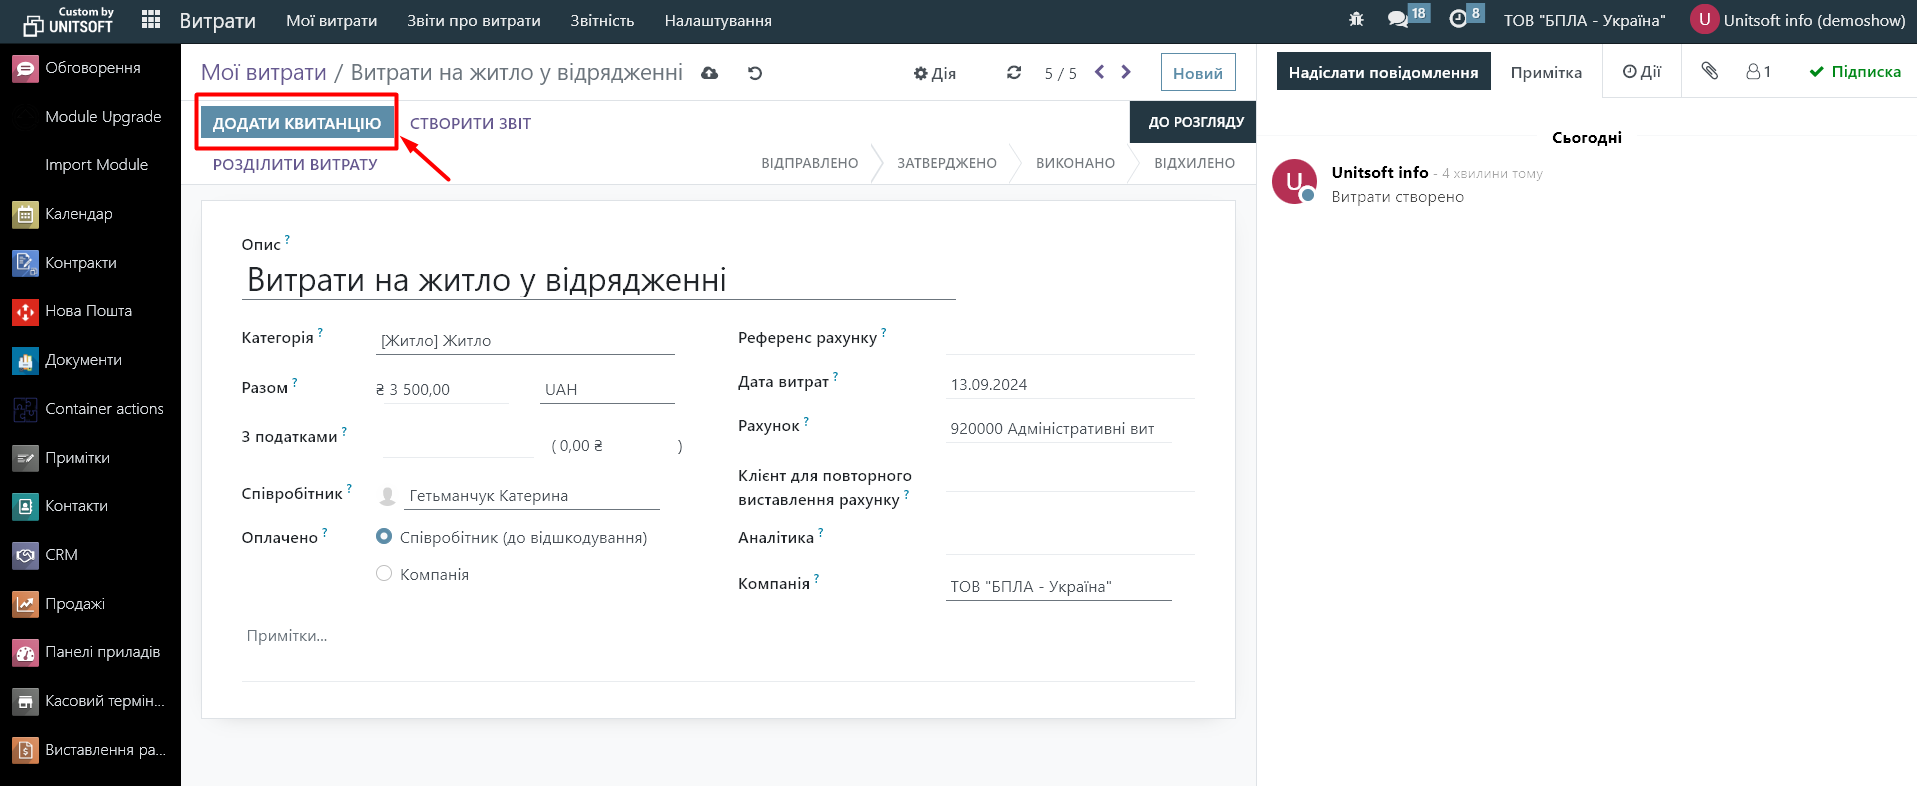
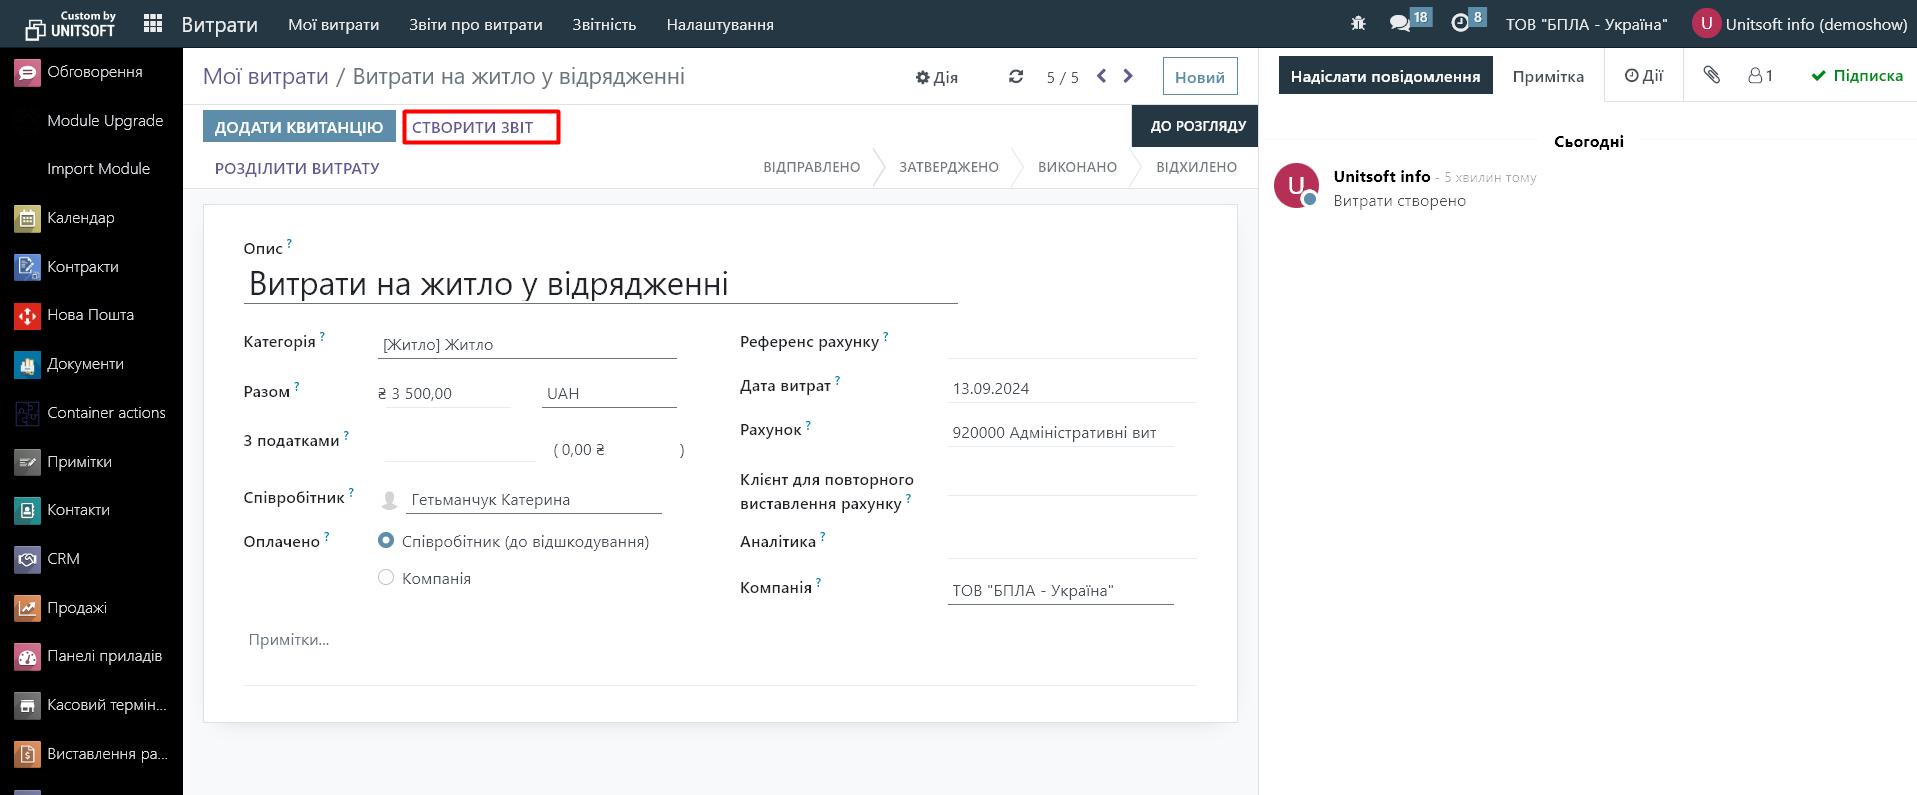
3.4. Click "Create Report":
3.5. You can add more expenses to the report (using the "add line" button) and send the report to your manager for approval:
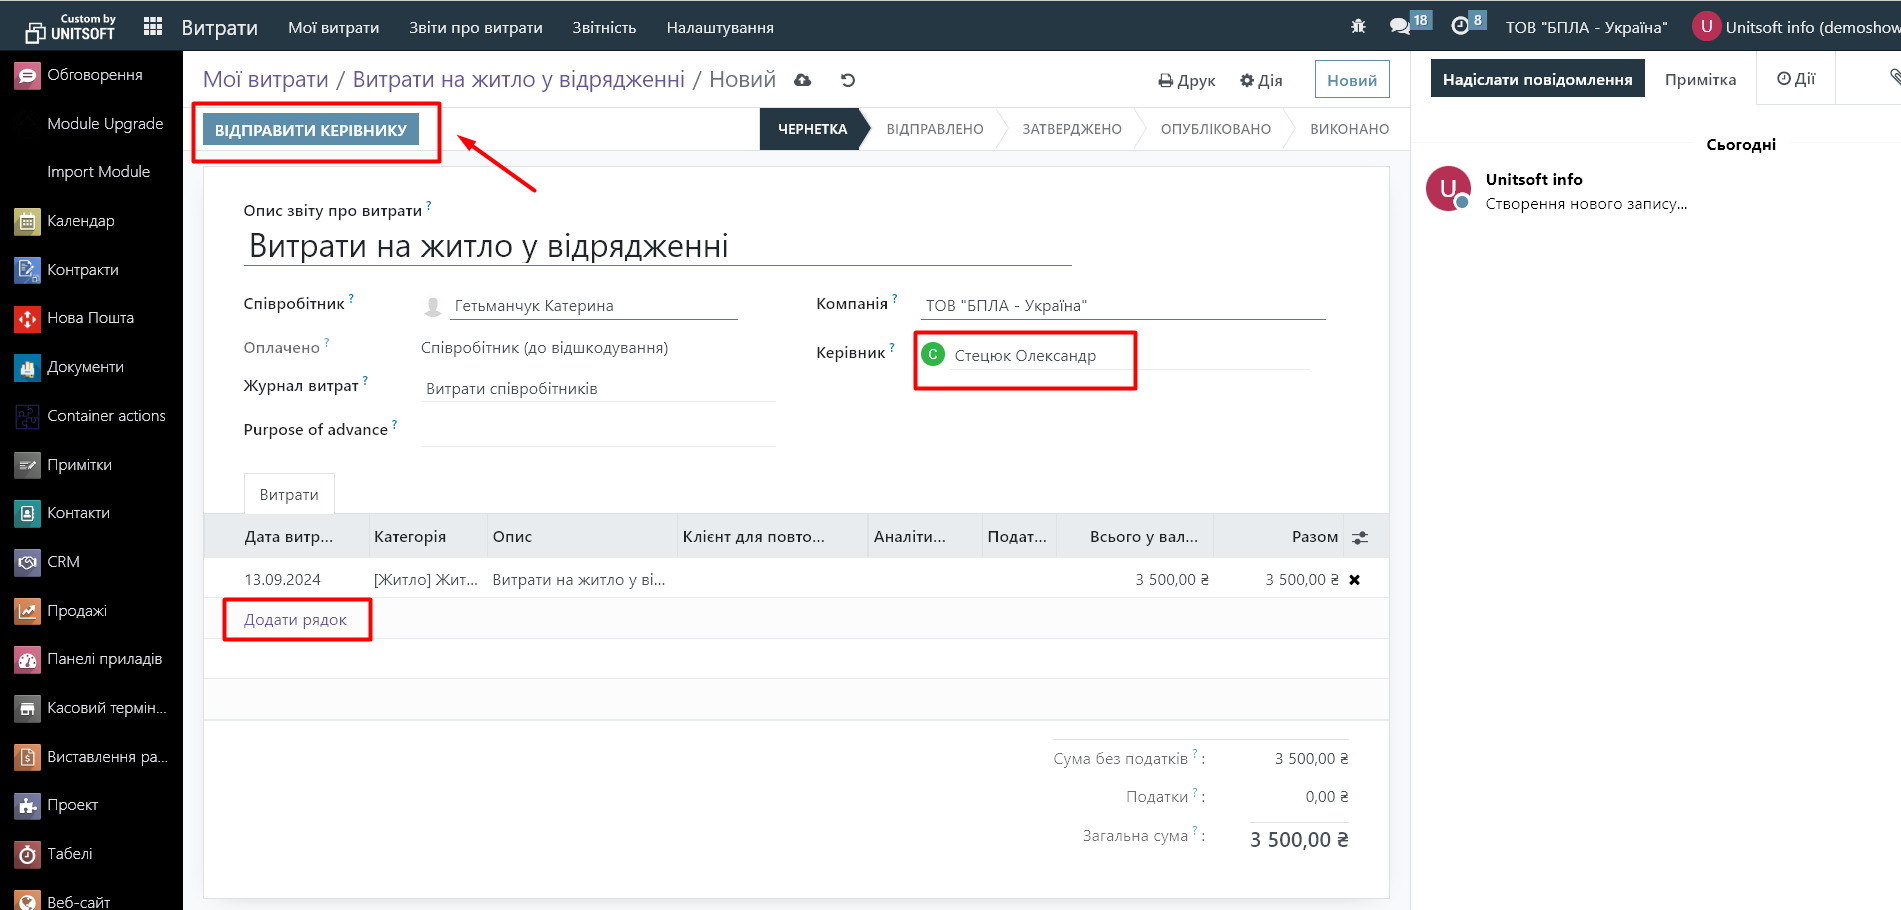
4. Expense approval (for managers)
4.1. After an employee submits an expense report, the manager receives a notification of a new report for approval.
4.2. Go to the "Expenses" - "Expense Reports" module. Here, filter documents with the "Sent" status:
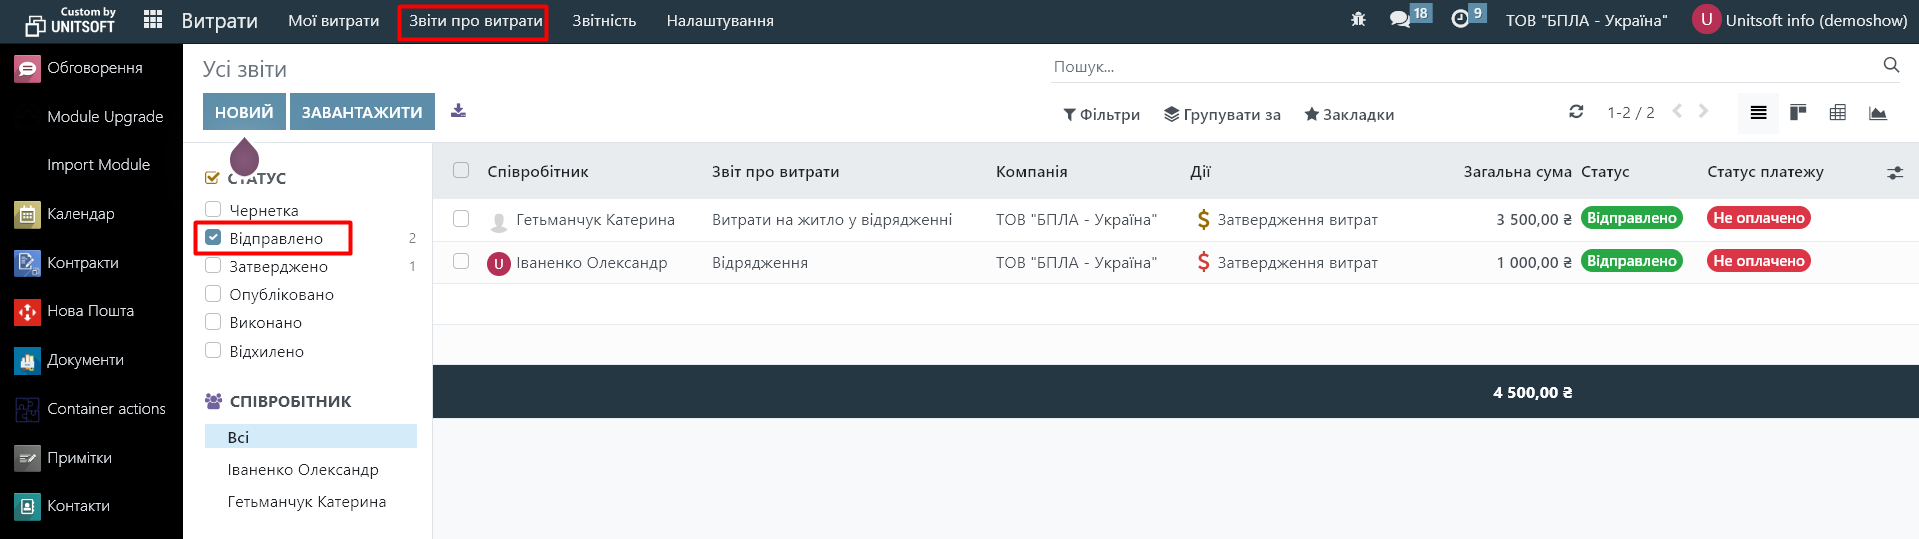
4.3. Select the report you want to view.
4.4. Check the information, amount, and additional documents provided by the employee.
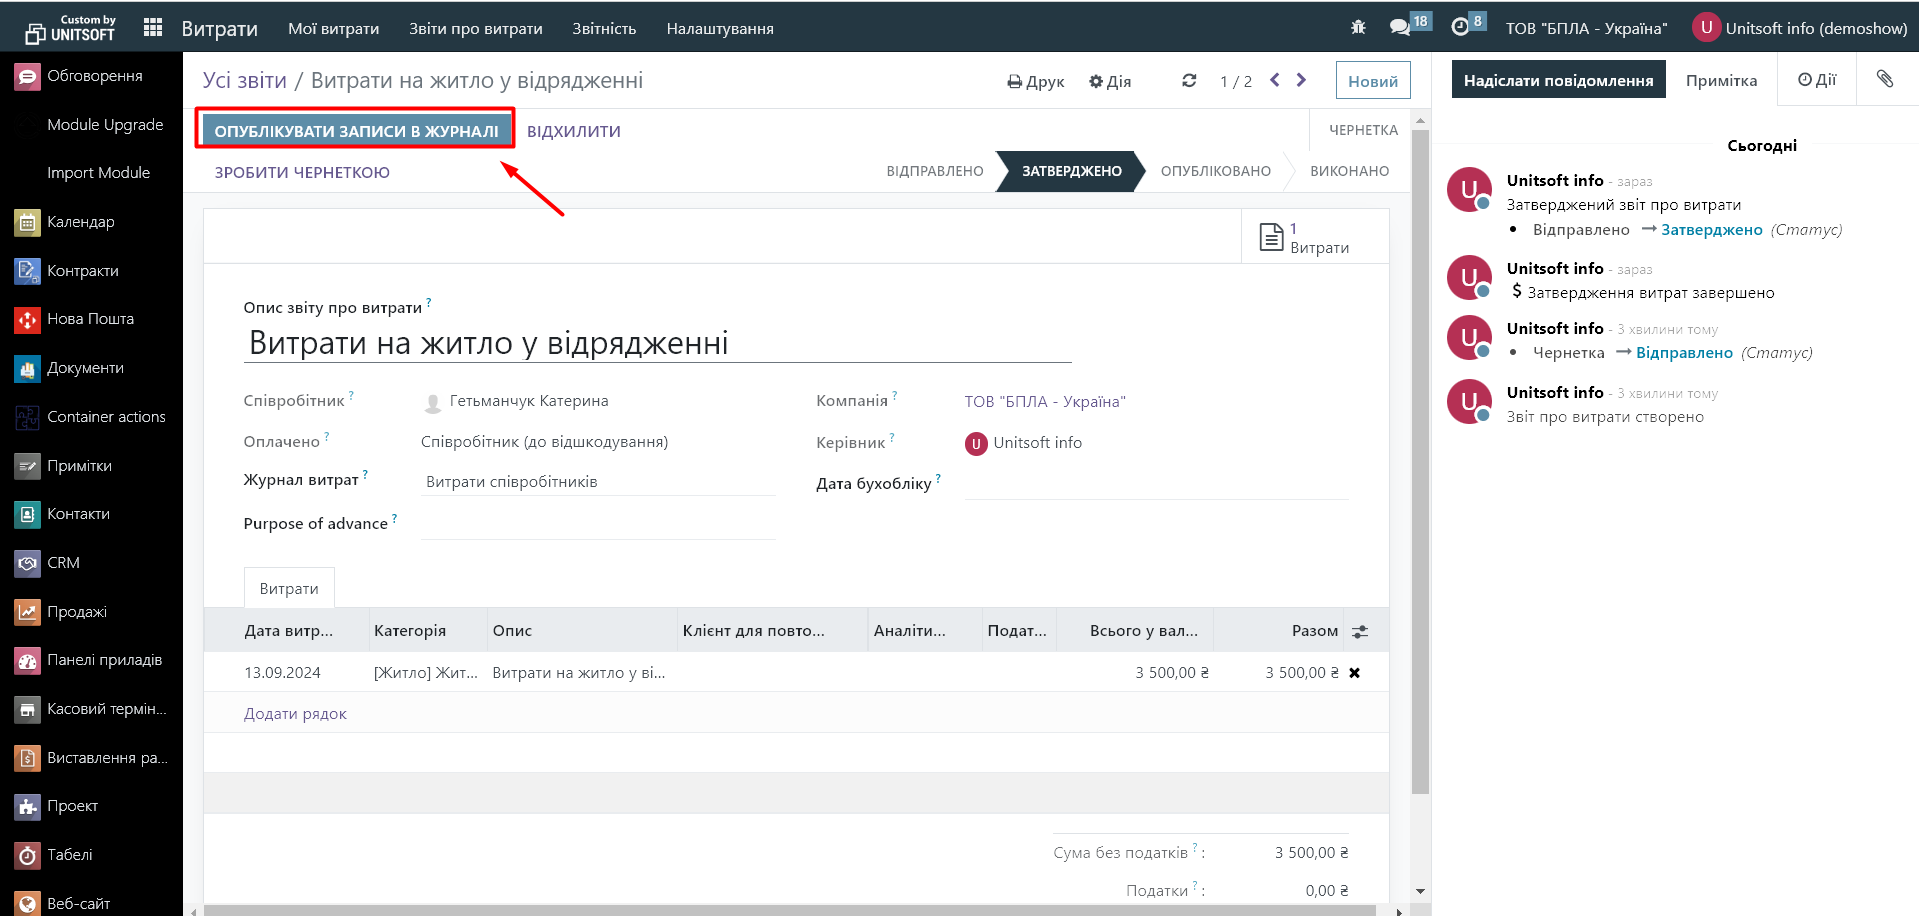
4.5. If everything is correct, click "Approve."
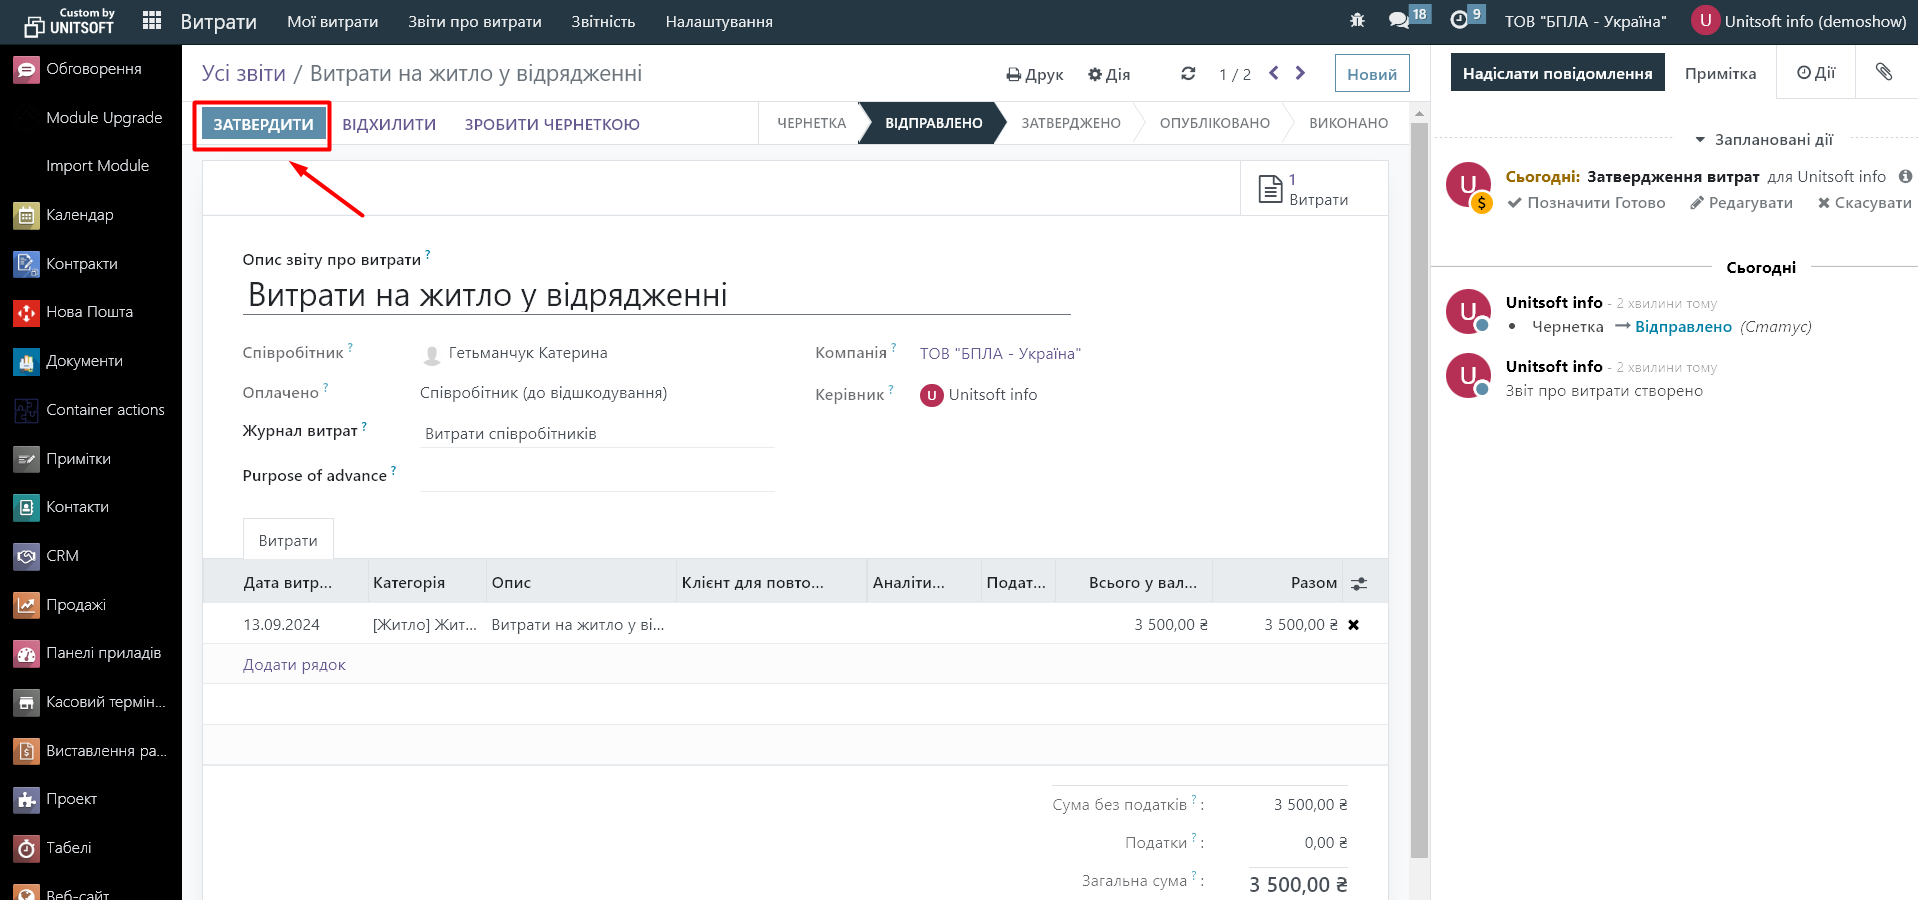
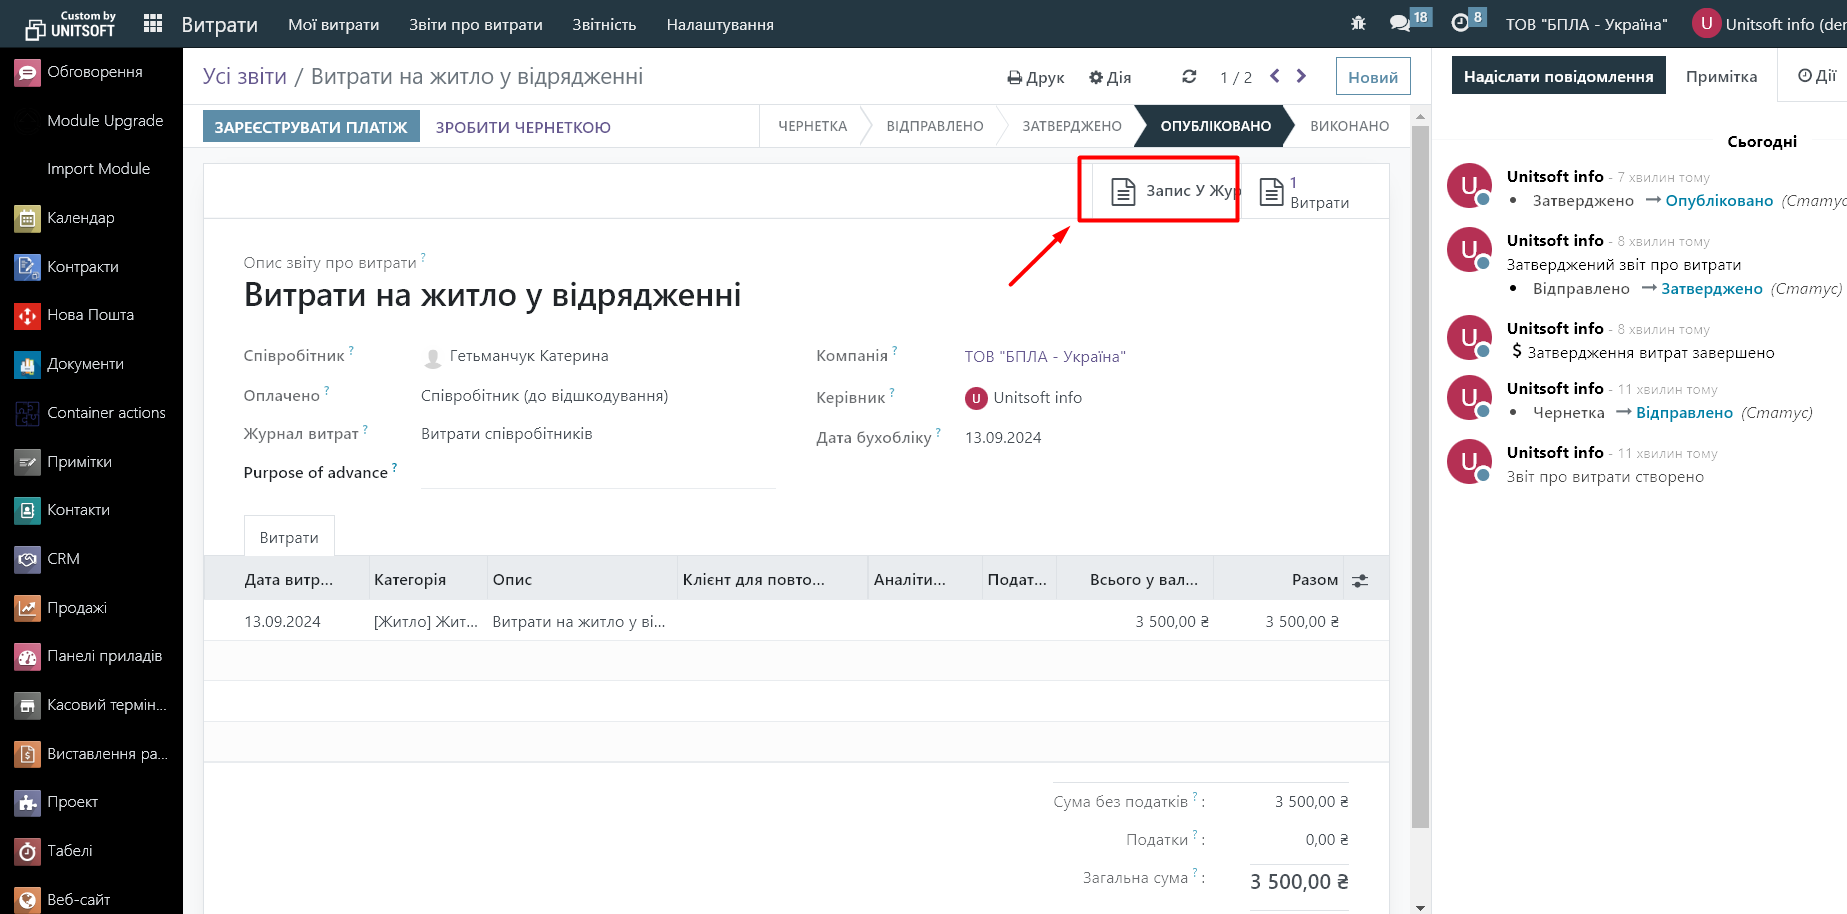
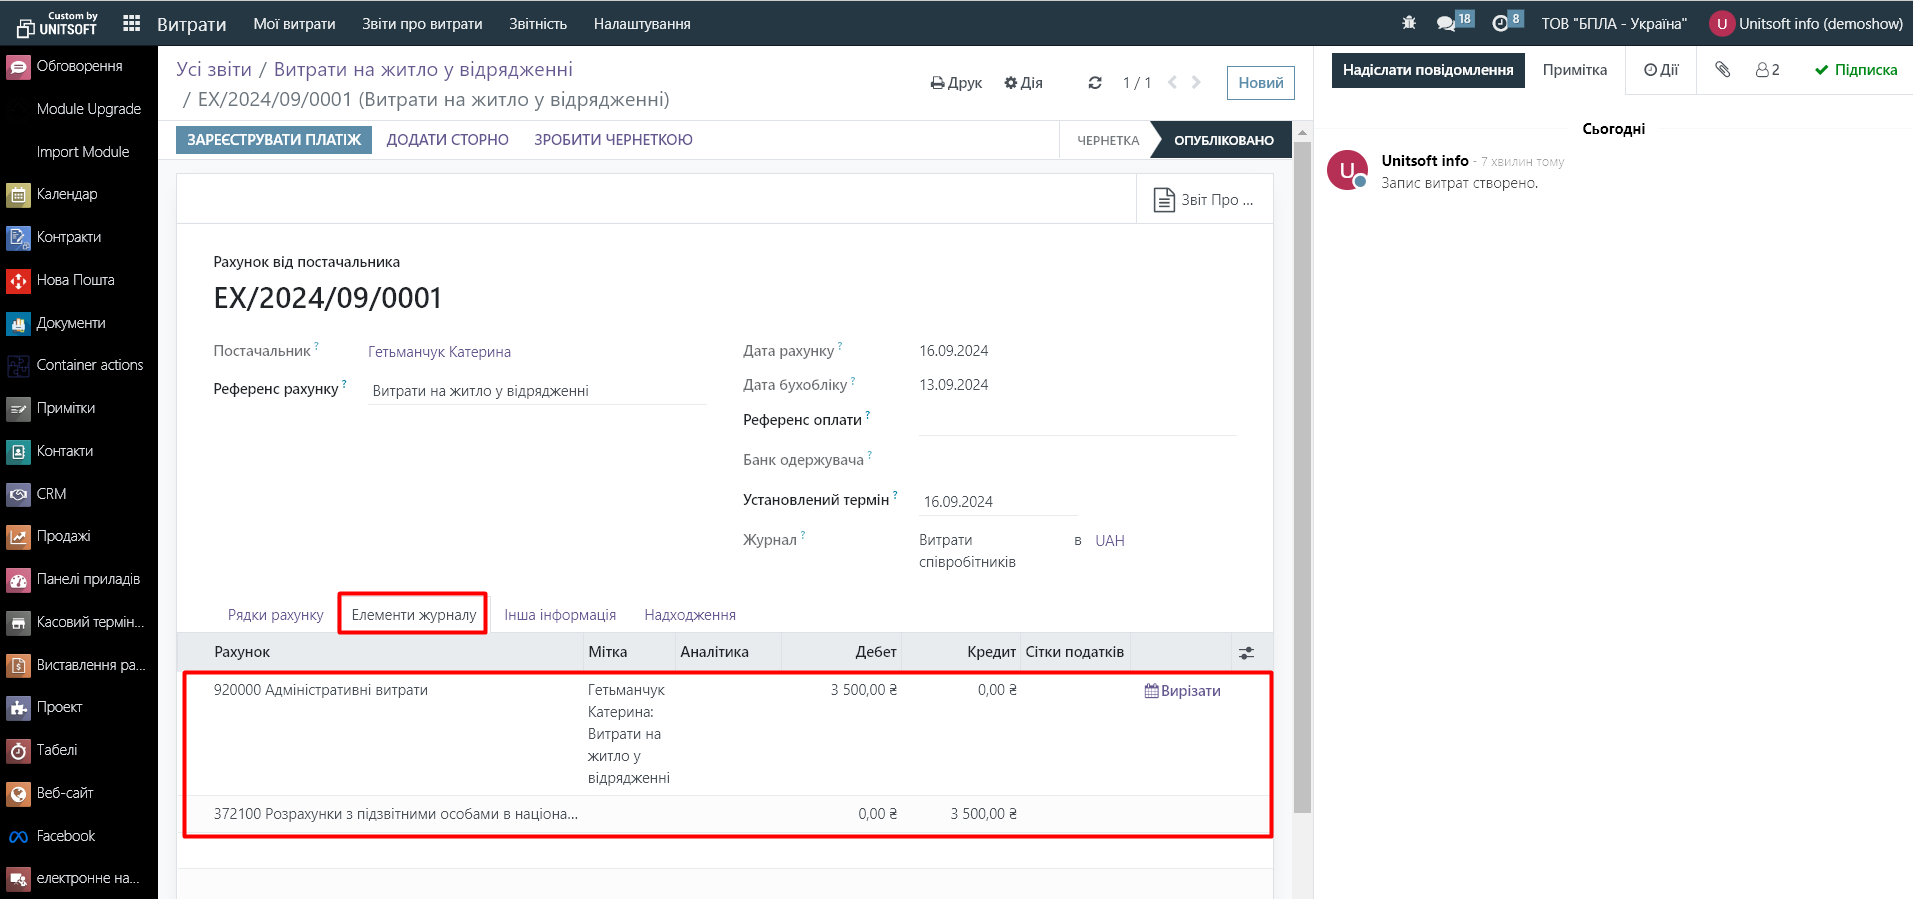
4.6. In the approved report, click the "Post Journal Entries" button. This will create an invoice for the expenses and generate the accounting entries: