First of all, you need to configure the mail server through which the expense documents will be registered. You can use the standard server that comes with our bundle and is already configured in the database by default. Or you can connect your own mail server — but it must first be properly configured so that Odoo can receive incoming emails. Instructions for configuration can be found at this link.
Next, go to the "Settings" module:
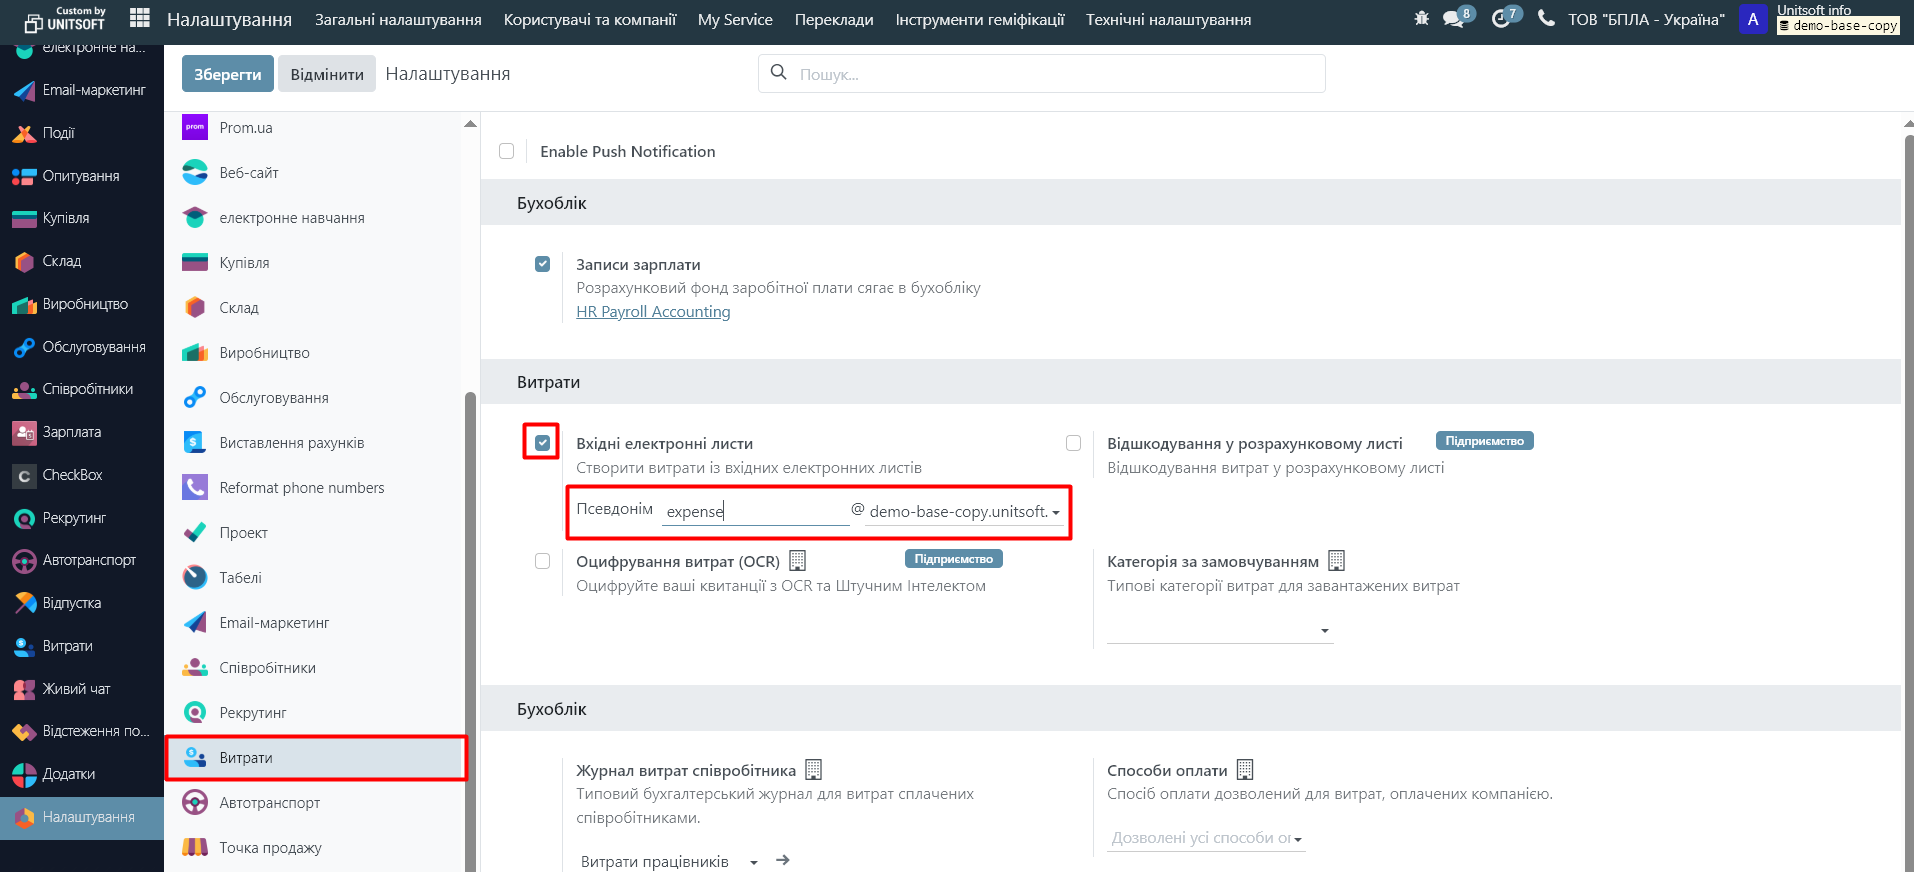
In the "Expenses" menu, check the "Incoming emails" option and specify which email you want to generate expenses from:
After sending the letter to the specified email, it will automatically create an expense document in Odoo.
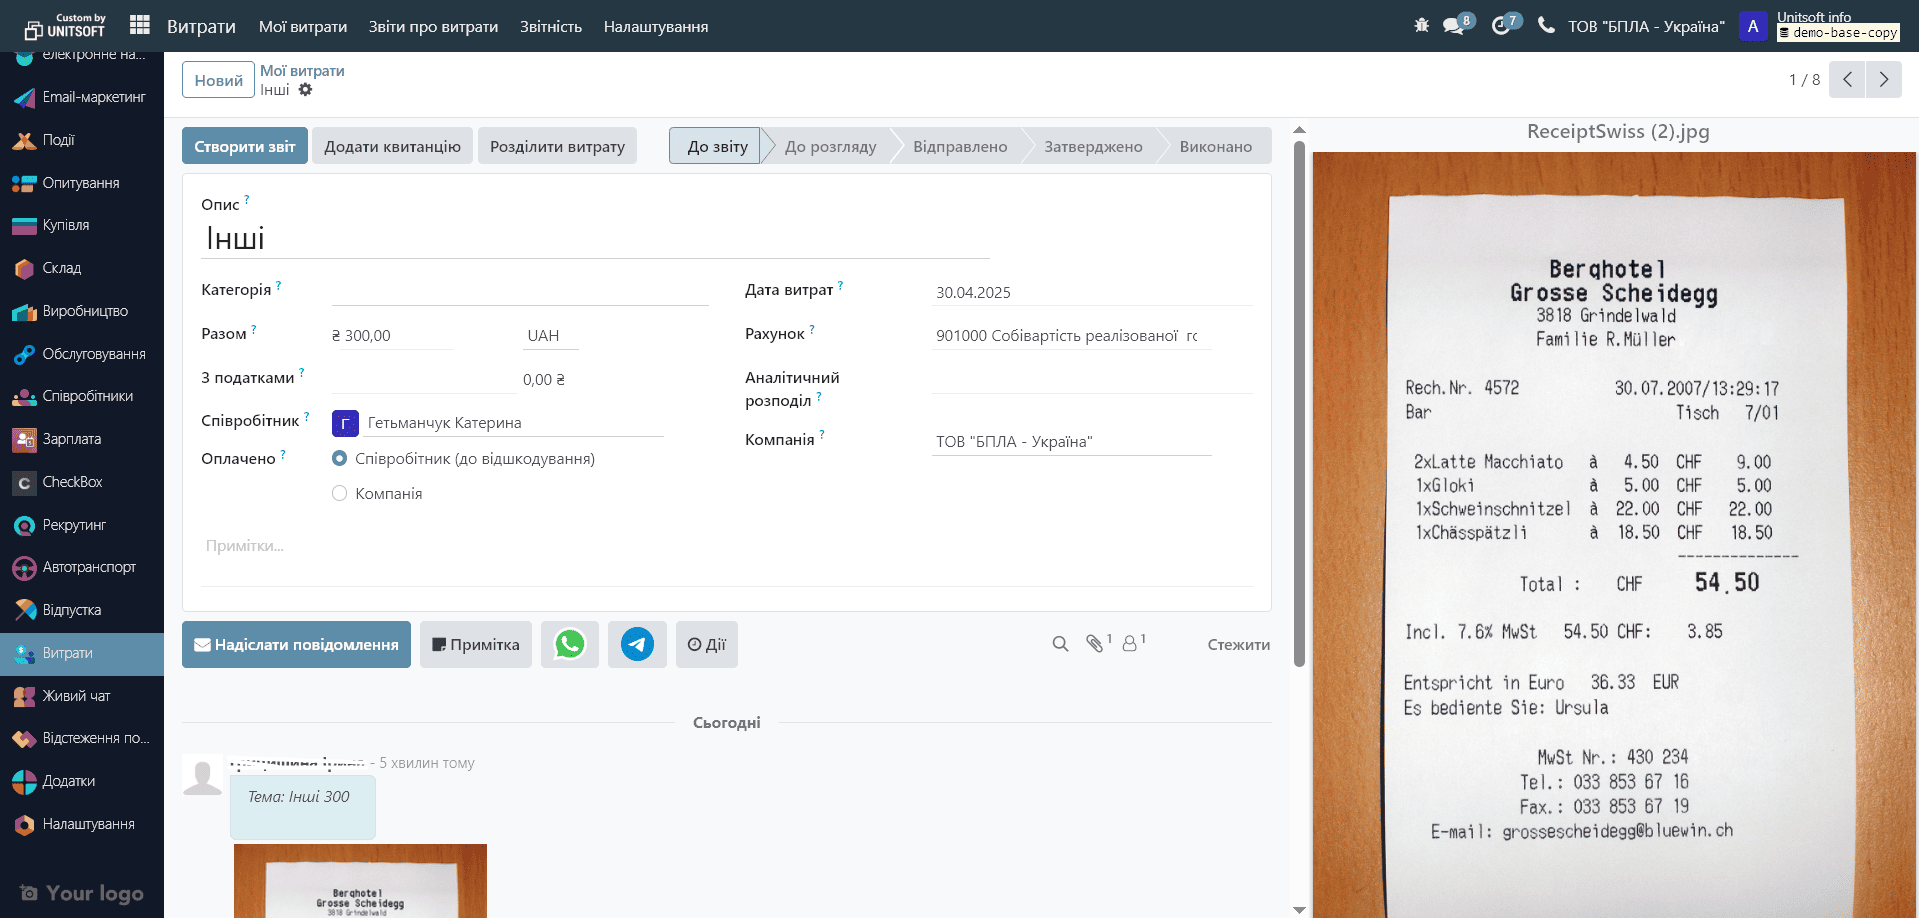
If the first word in the subject of the email matches an internal link or category name, that category will be automatically set in the expense document. In addition, the amount specified in the subject of the email will be automatically inserted into the corresponding field in the document. Any files attached to the email (e.g. receipts) are also automatically added to the expenses in Odoo.
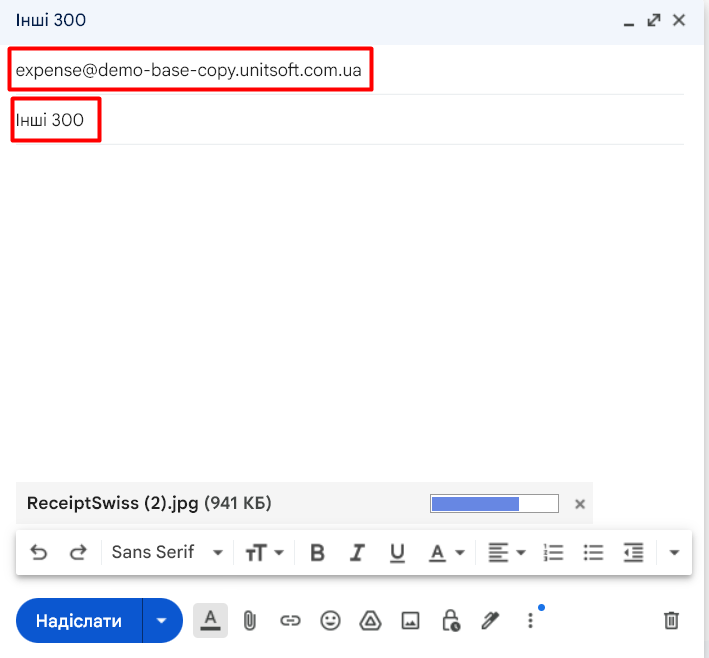
Example of a letter:
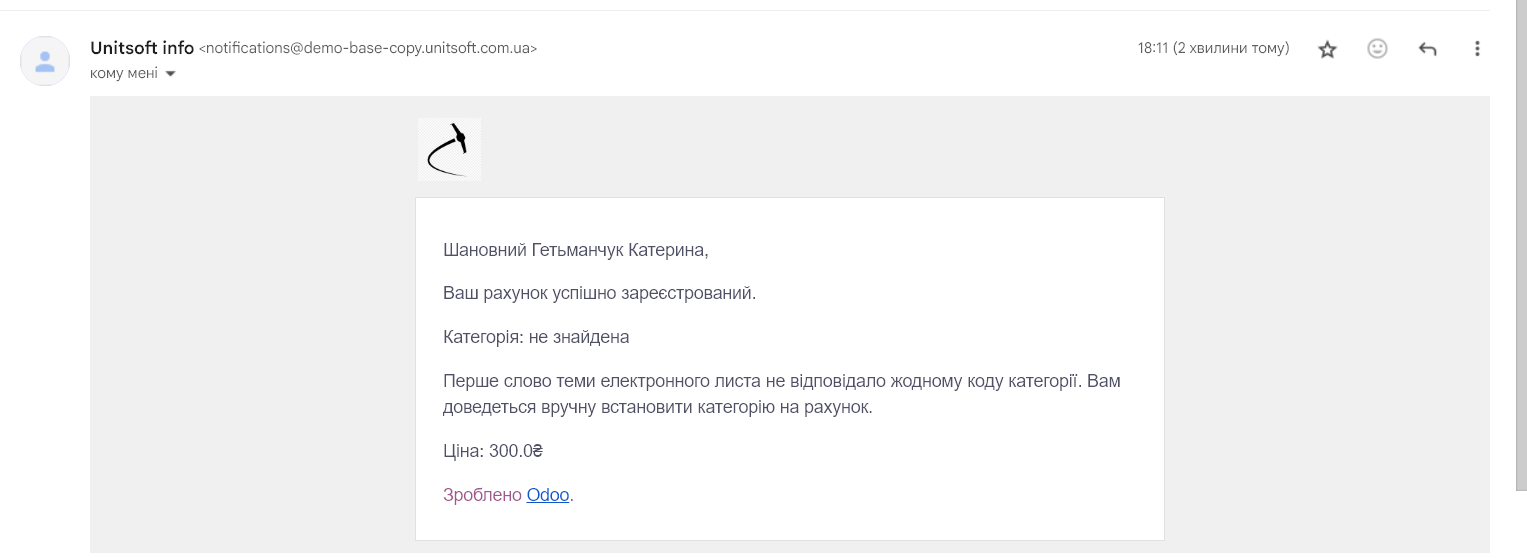
In response to the letter, the employee will receive information about the successful registration of expenses:
Meanwhile, the system will automatically generate the Expense document:
Please note that the expense will be generated only if the letter is sent from the mailing address specified in the employee settings:
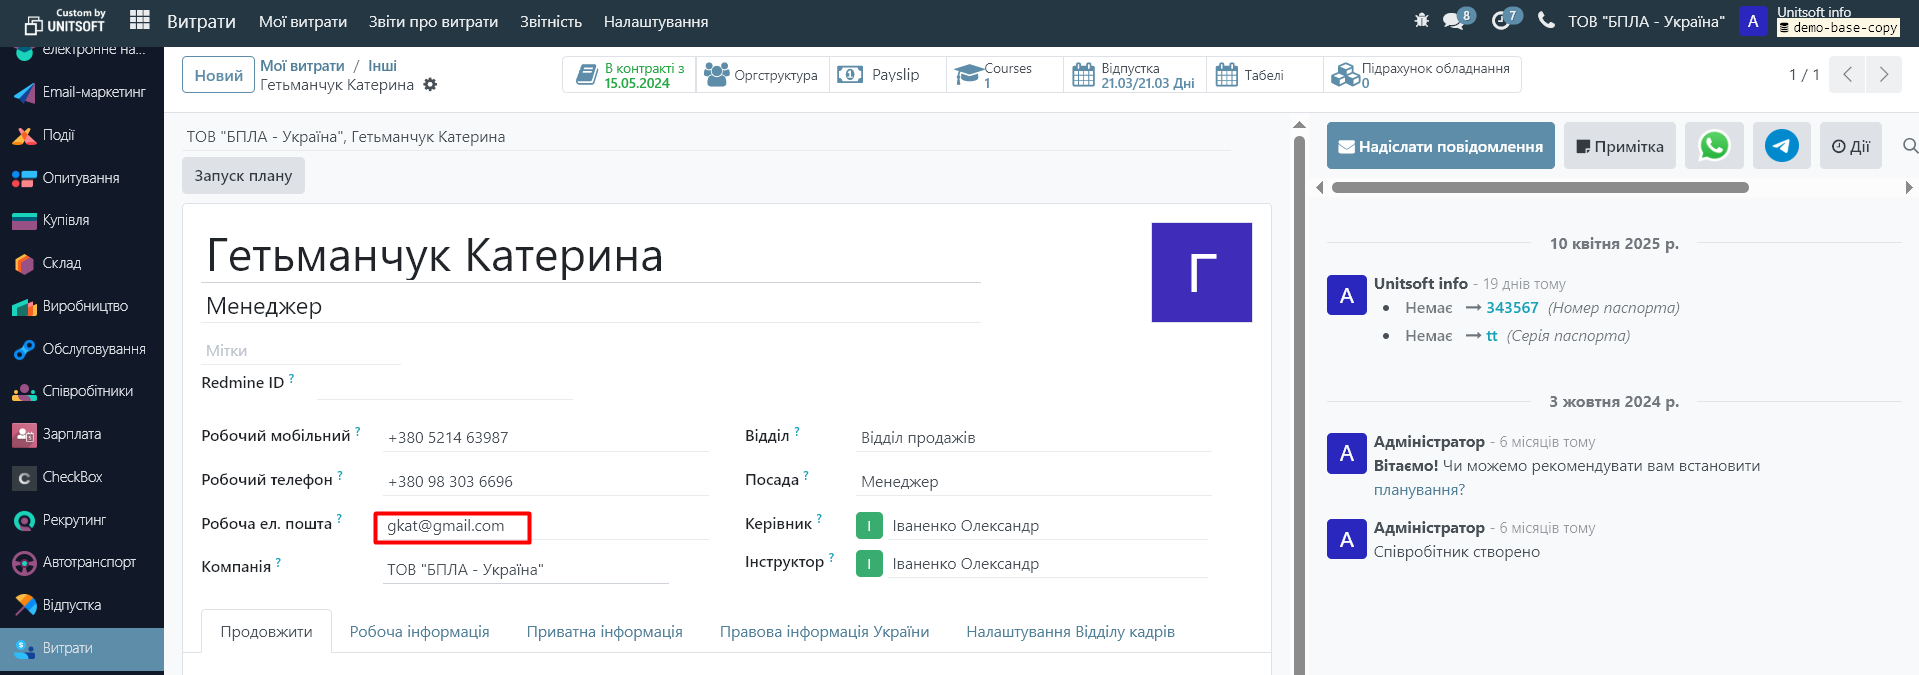
Letters from other mailboxes will not generate charges.
If you need to set up expense generation from all emails that arrive in your mailbox, contact our company's technical support - we will be happy to help.