Email templates in Odoo allow you to automate the sending of emails to clients, suppliers, or employees. You can create templates with fixed text, dynamic variables (e.g., client name, order amount) and link them to specific actions in the system (e.g., invoice creation or order confirmation).
Step 1: Enable Developer Mode
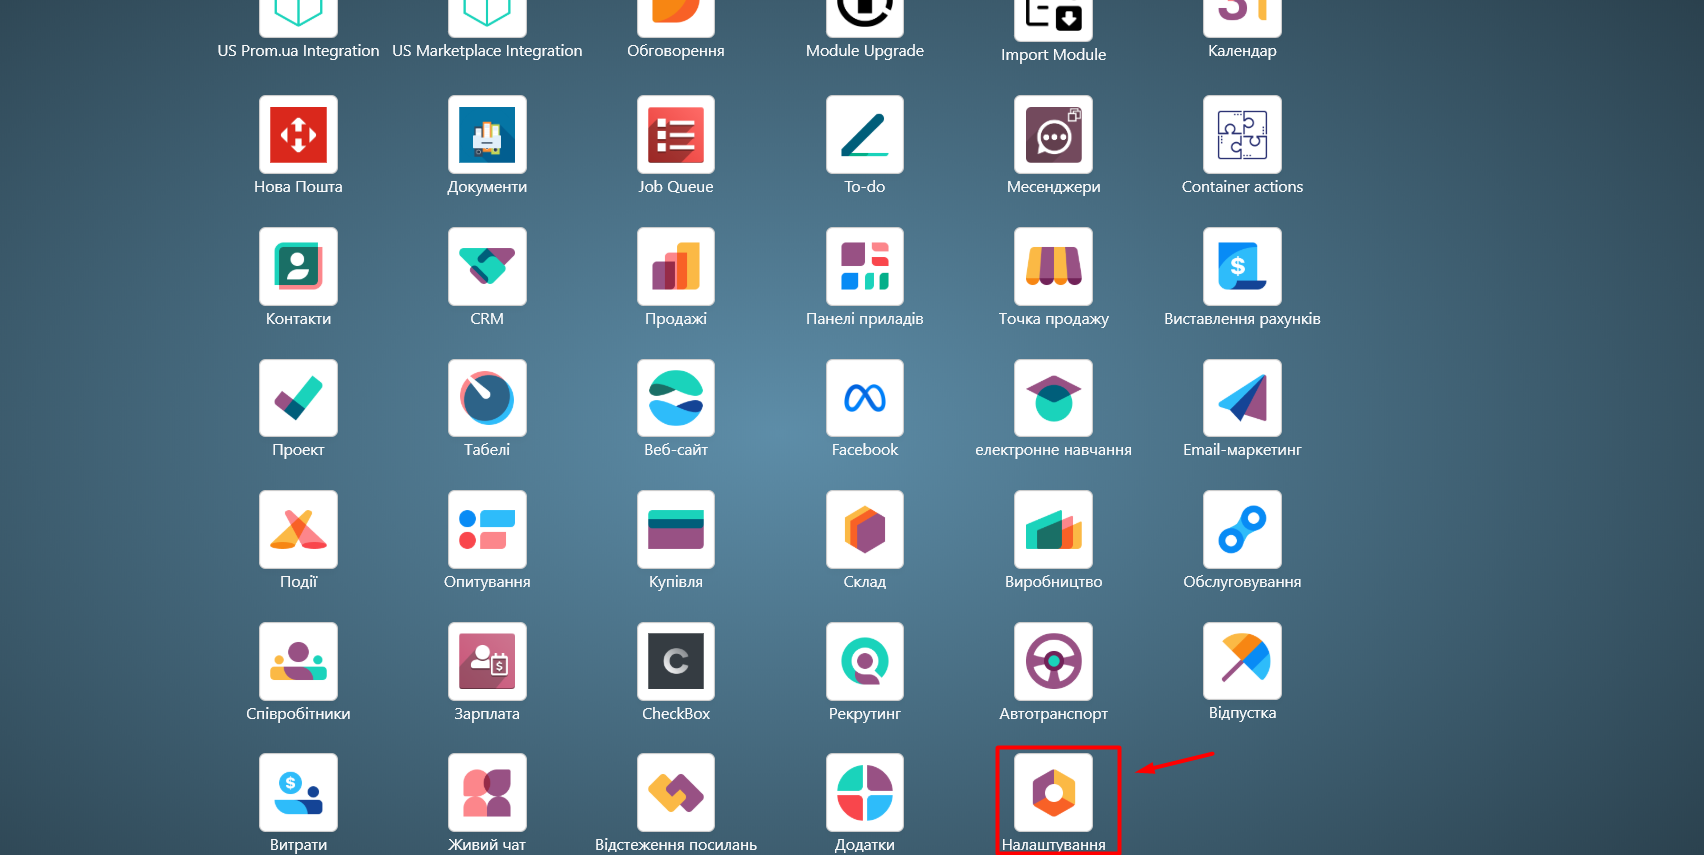
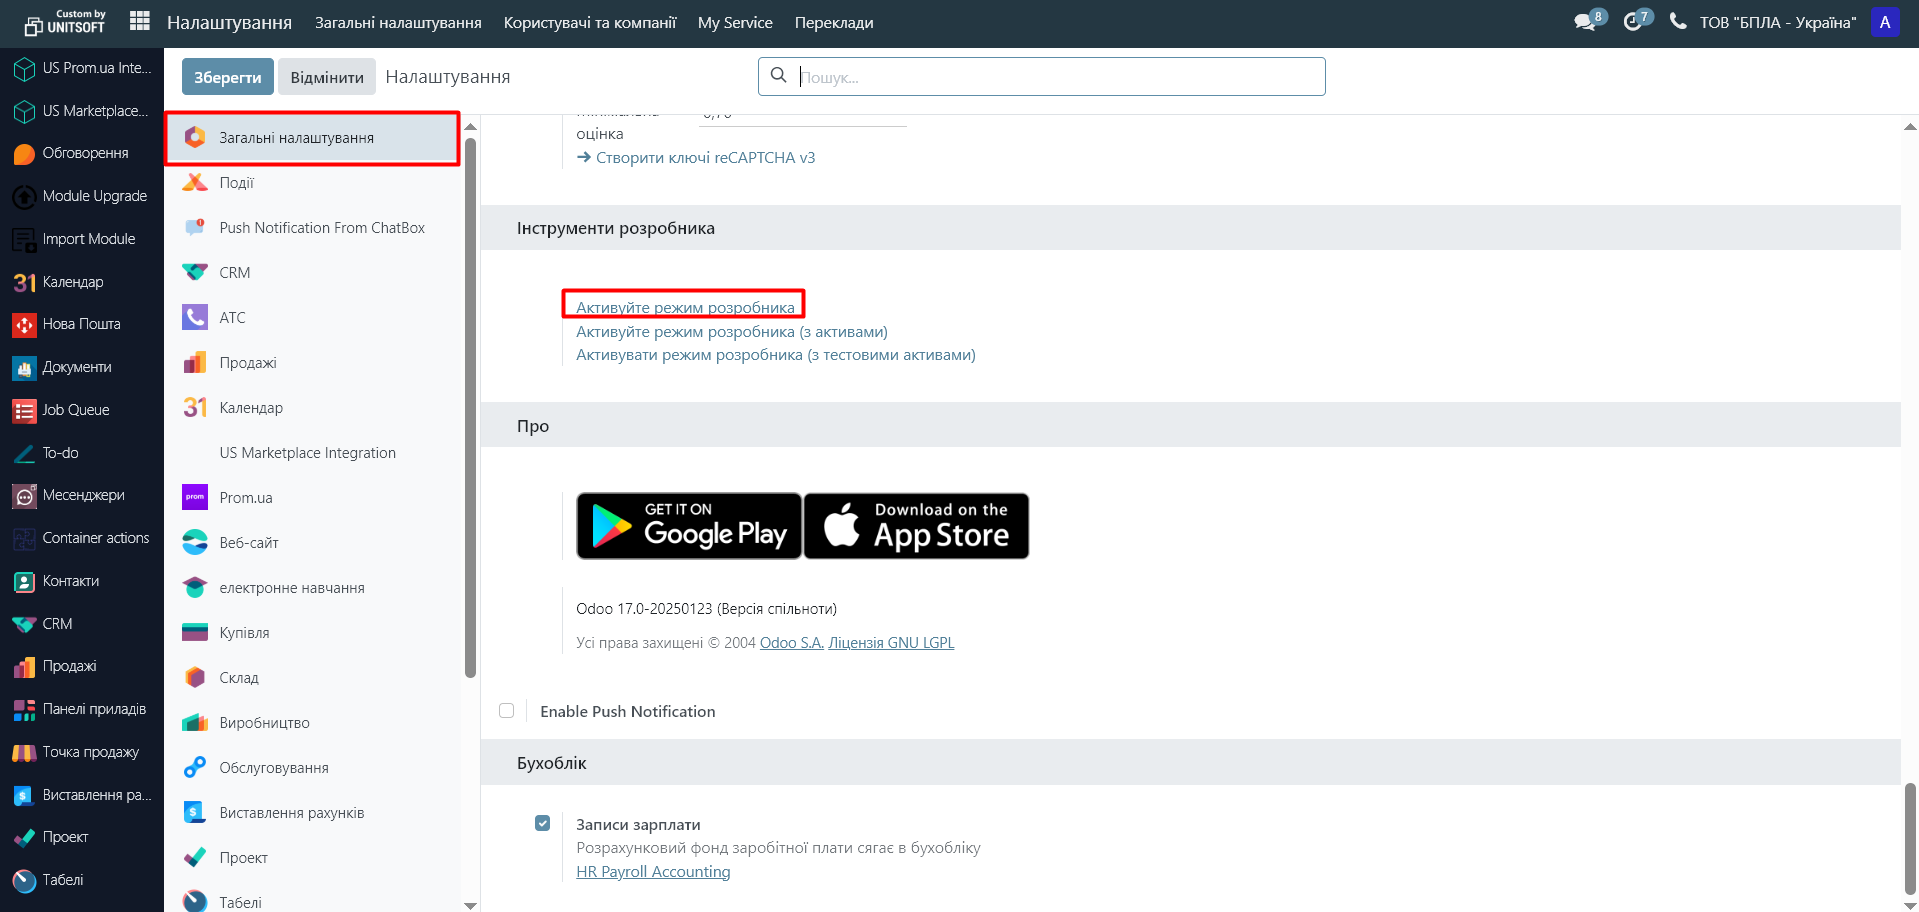
Go to the 'Settings' module
In 'General Settings', scroll down the page and click 'Activate Developer Mode' (Activate the Developer Mode):
Step 2: Set up the email template
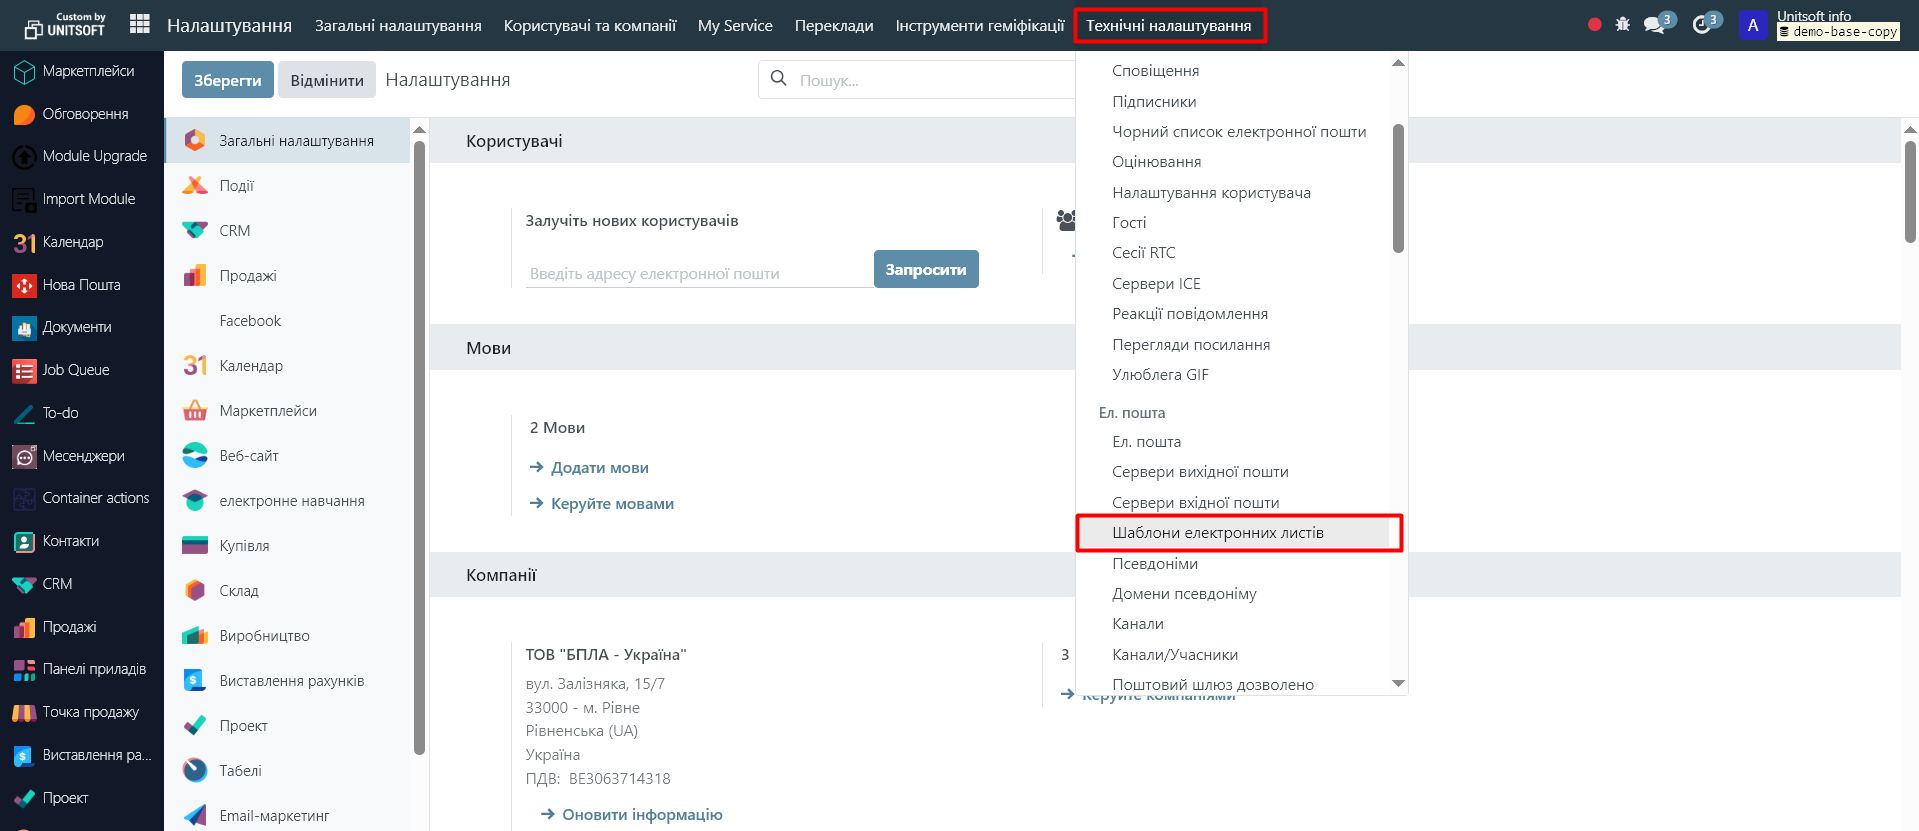
2.1 Go to the 'Settings' module - 'Technical Settings' - 'Email Templates':
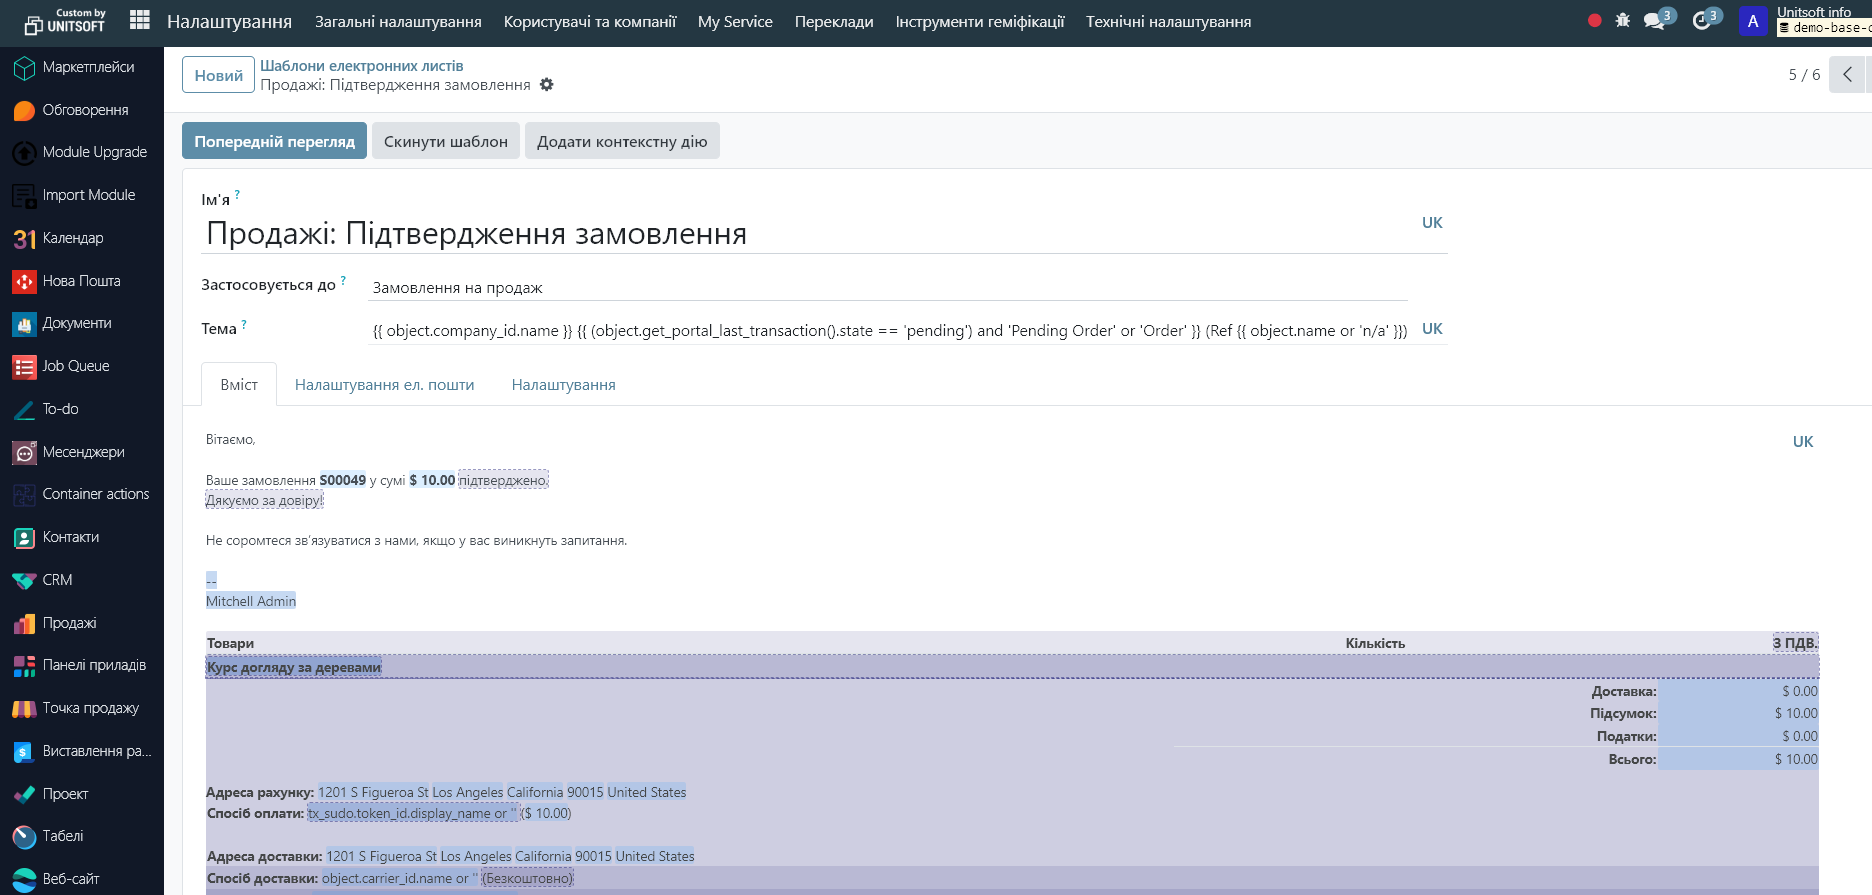
2.2 Go to the desired template for editing, or create a new one using the 'New' button
2.3 In the template, fill in the following fields:
- Template Name - for example: Order Confirmation.
- Model - choose what this template is for (for example: Sales Order (sale.order), if this is an order email).
- Subject - this is the email subject.
- Email Content - main text.
If you want to add automatic data (e.g., client name or order amount) — this is done using special tags (they look like code, but it's simple). Odoo uses this for the QWeb template language,.
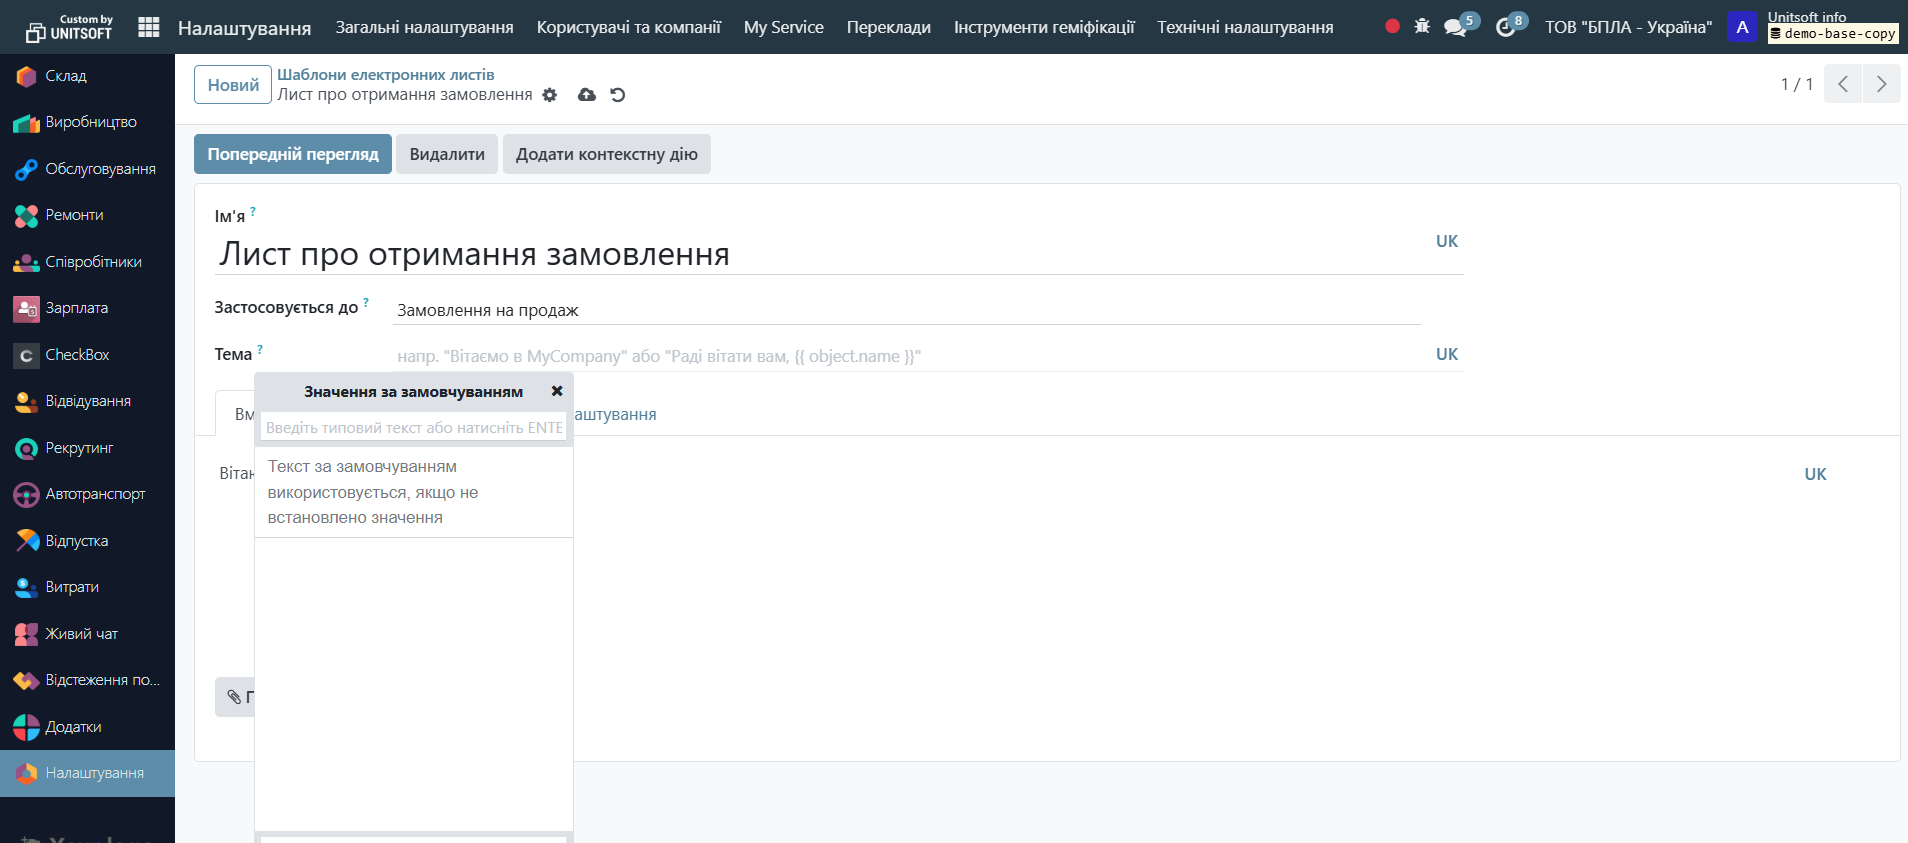
The easiest way to add these dynamic fields is through the 'Dynamic Filler' assistant.
To do this, place the sign in the email / :
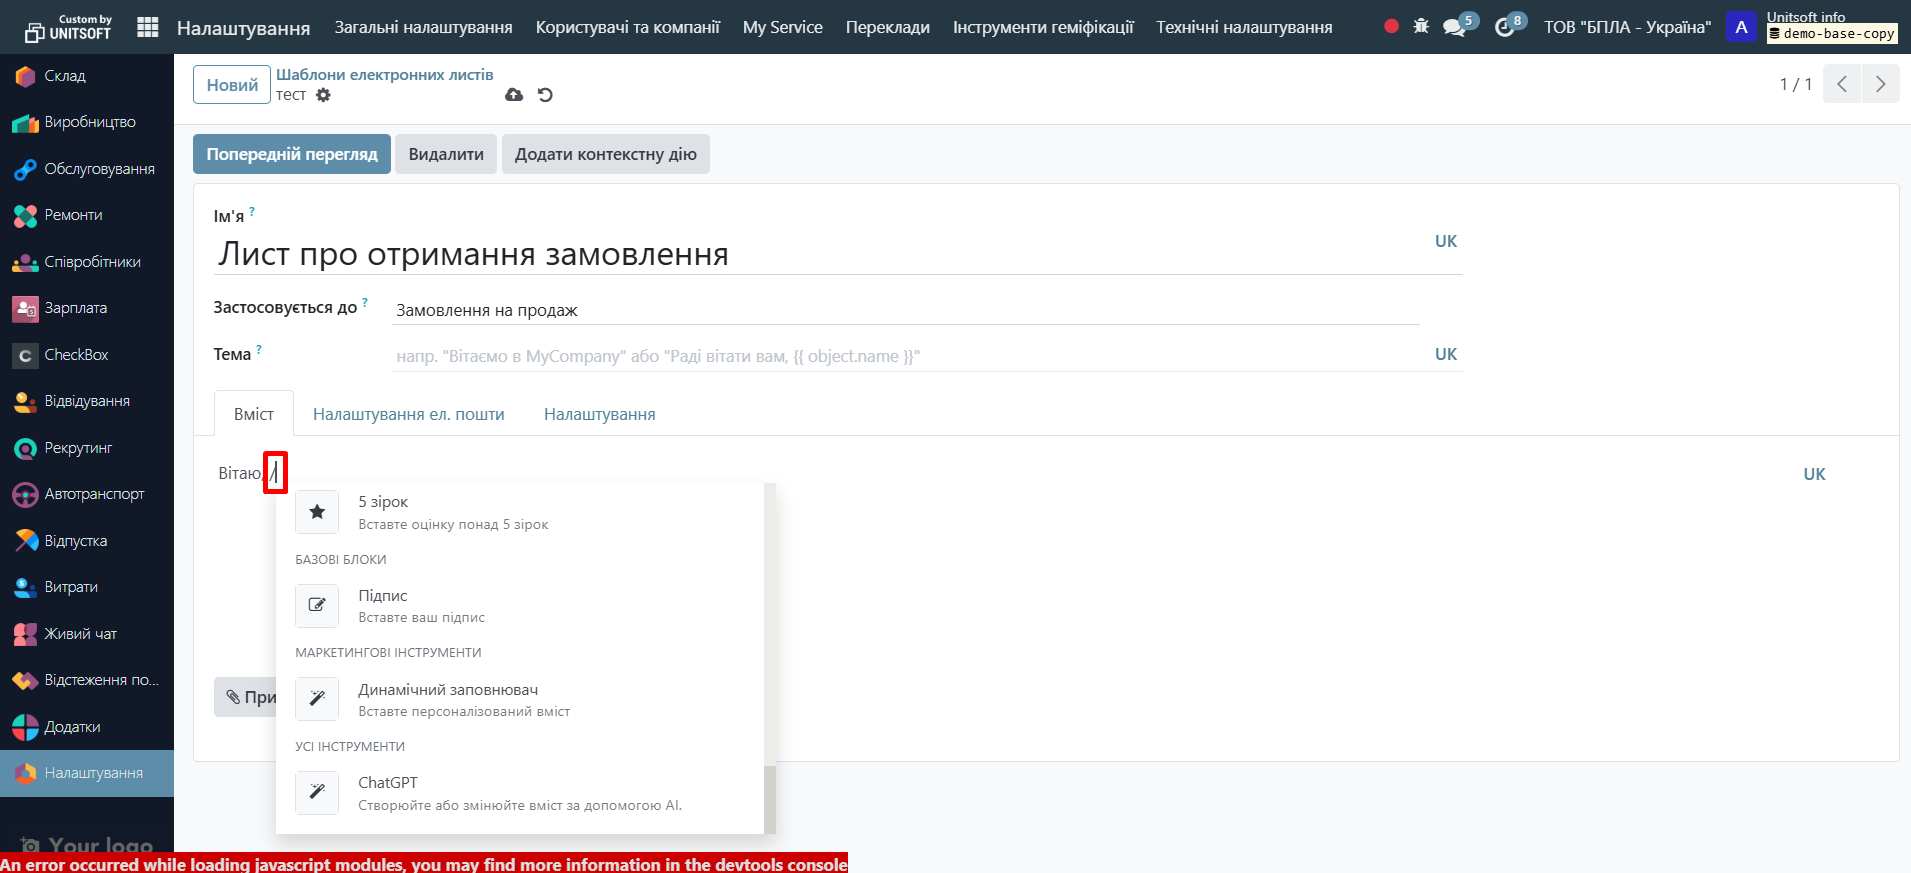
In the open menu, select 'Dynamic Filler':
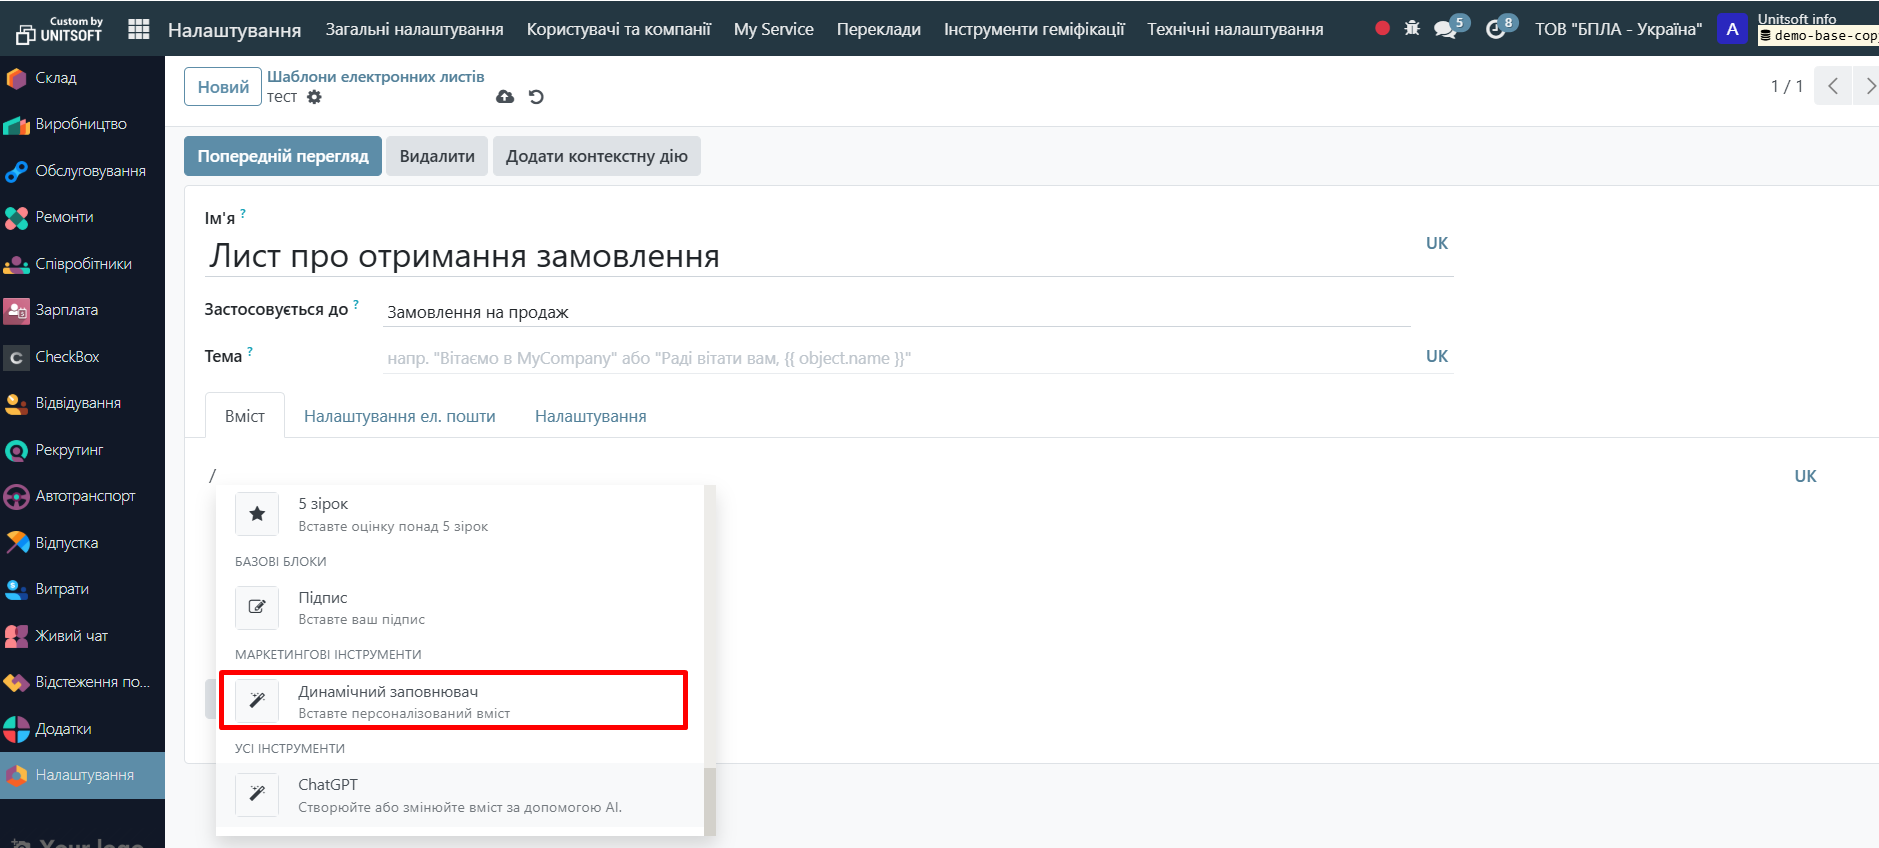
Now choose the field that should be filled dynamically in the email. For example, the client's name:
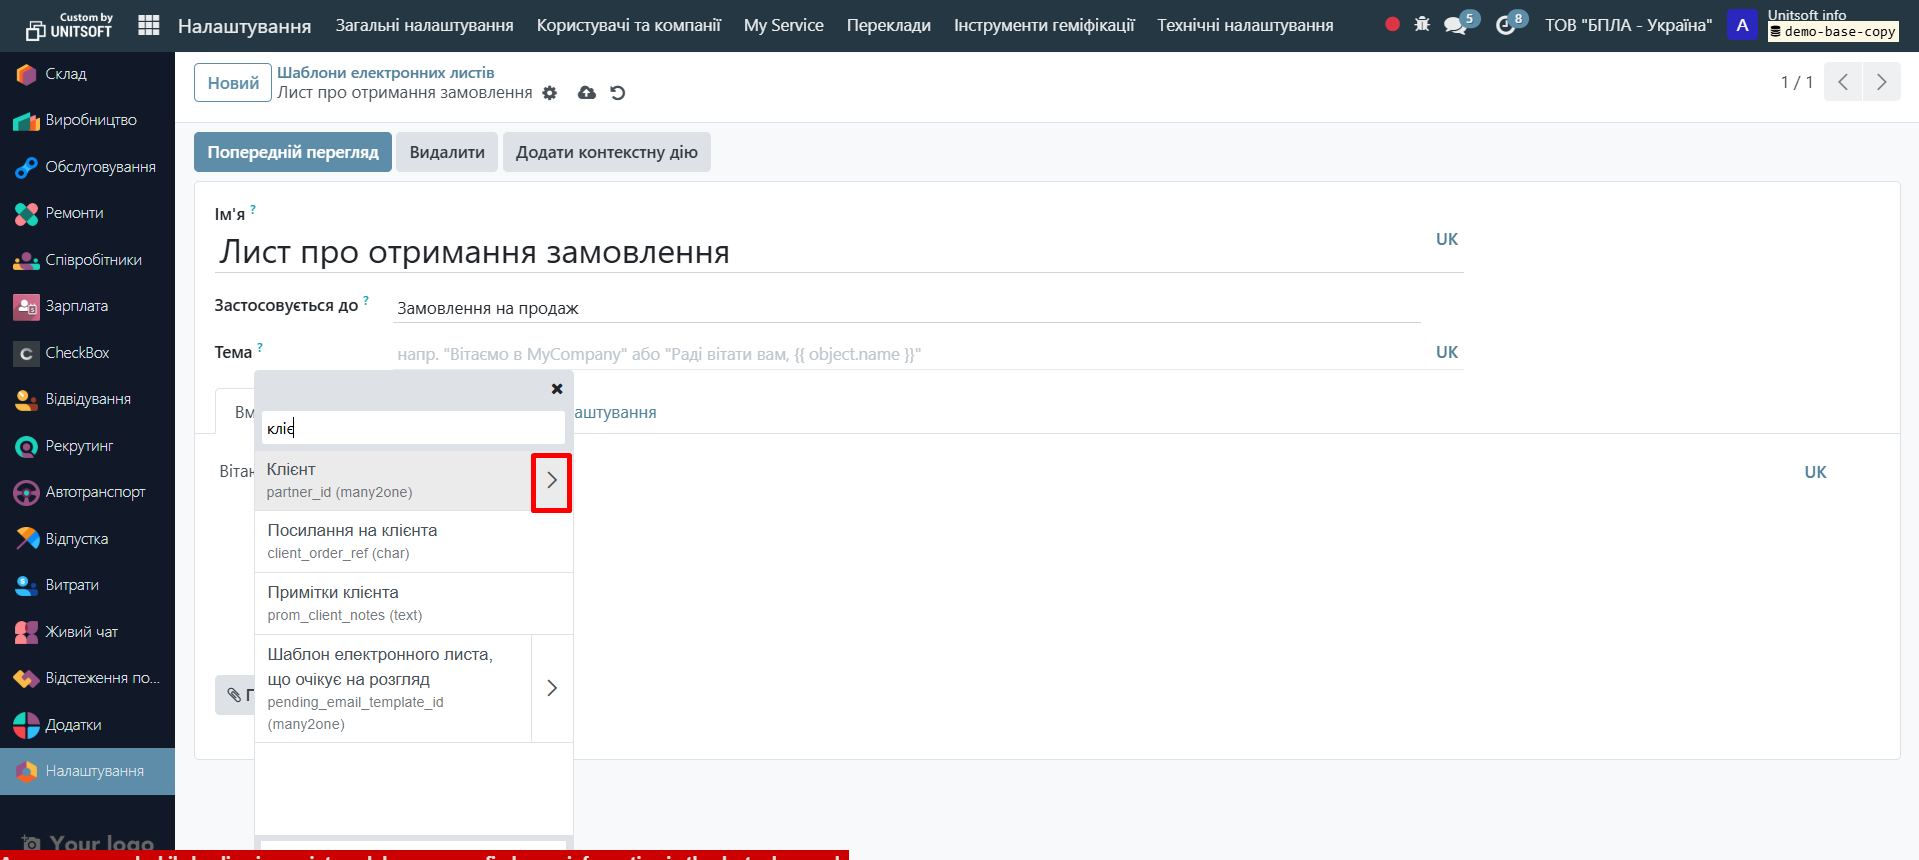
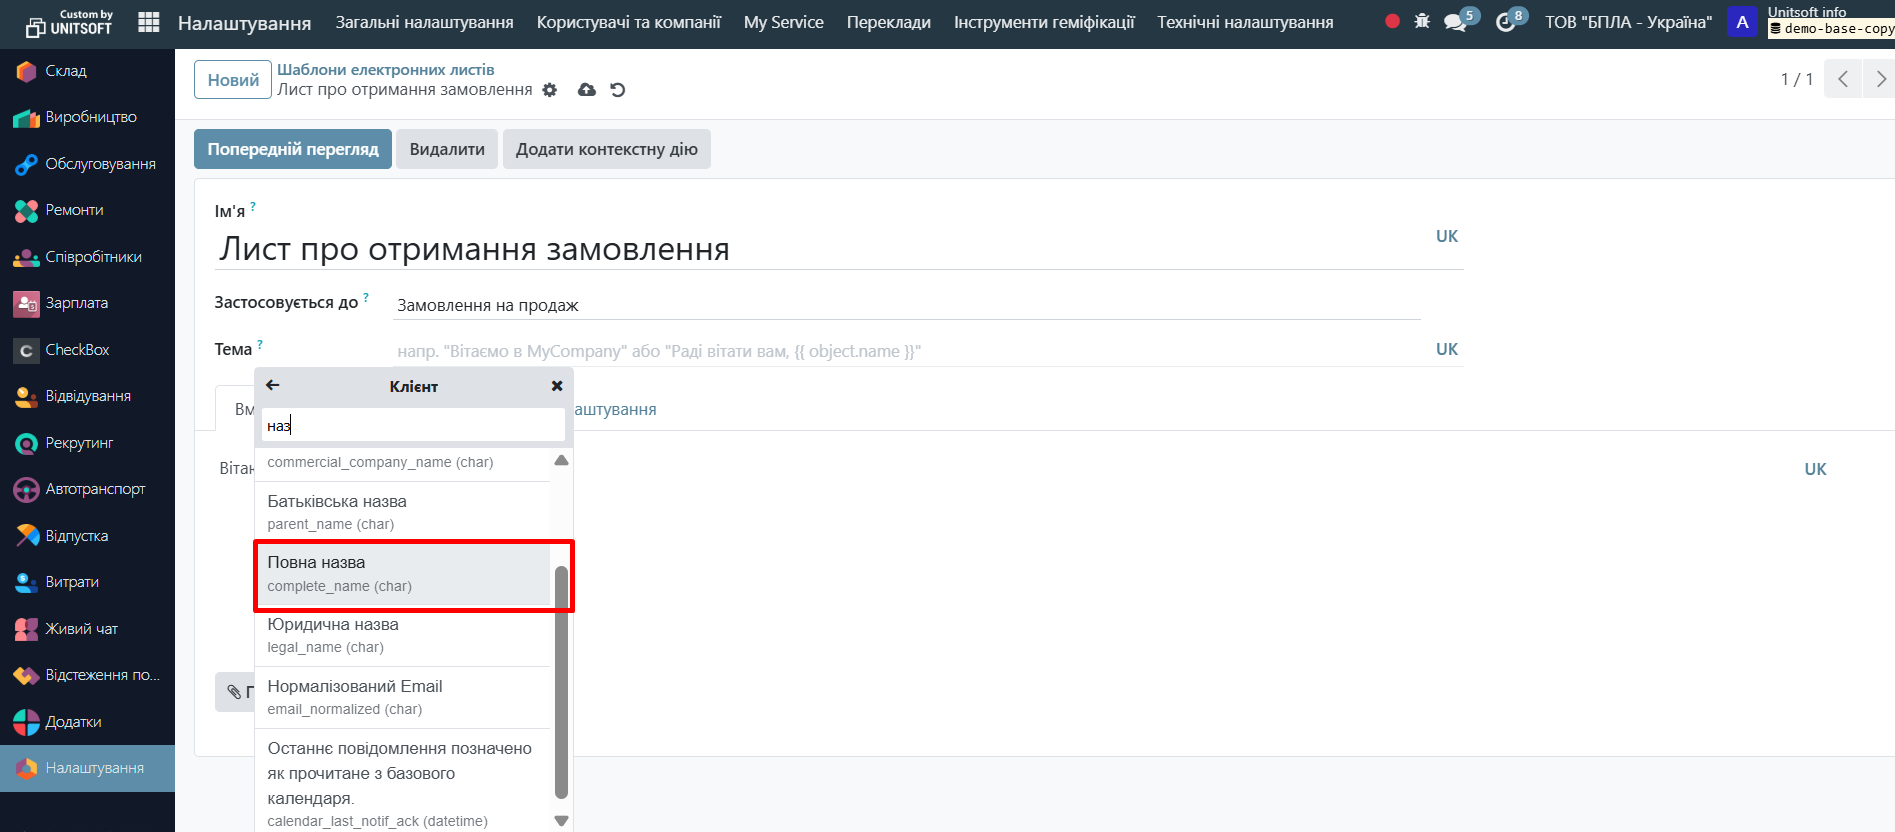
Next, enter the text that will be displayed in the email if the client's name is missing. Or press Enter:
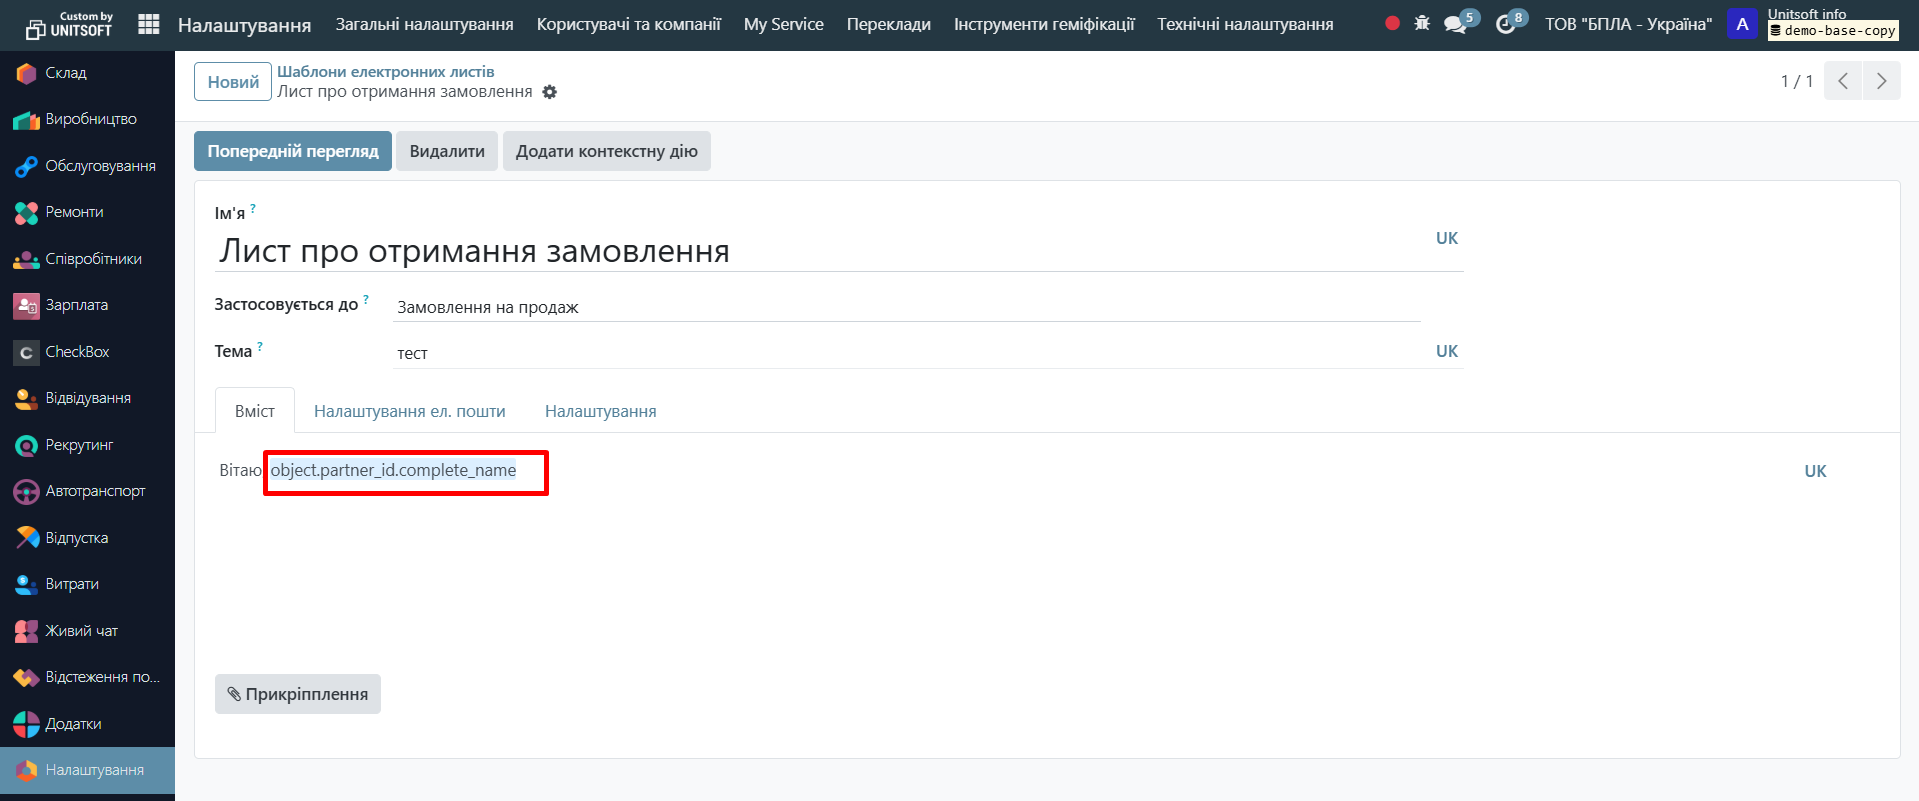
A QWeb variable will automatically appear in the email, responsible for the 'Full Client Name' value:
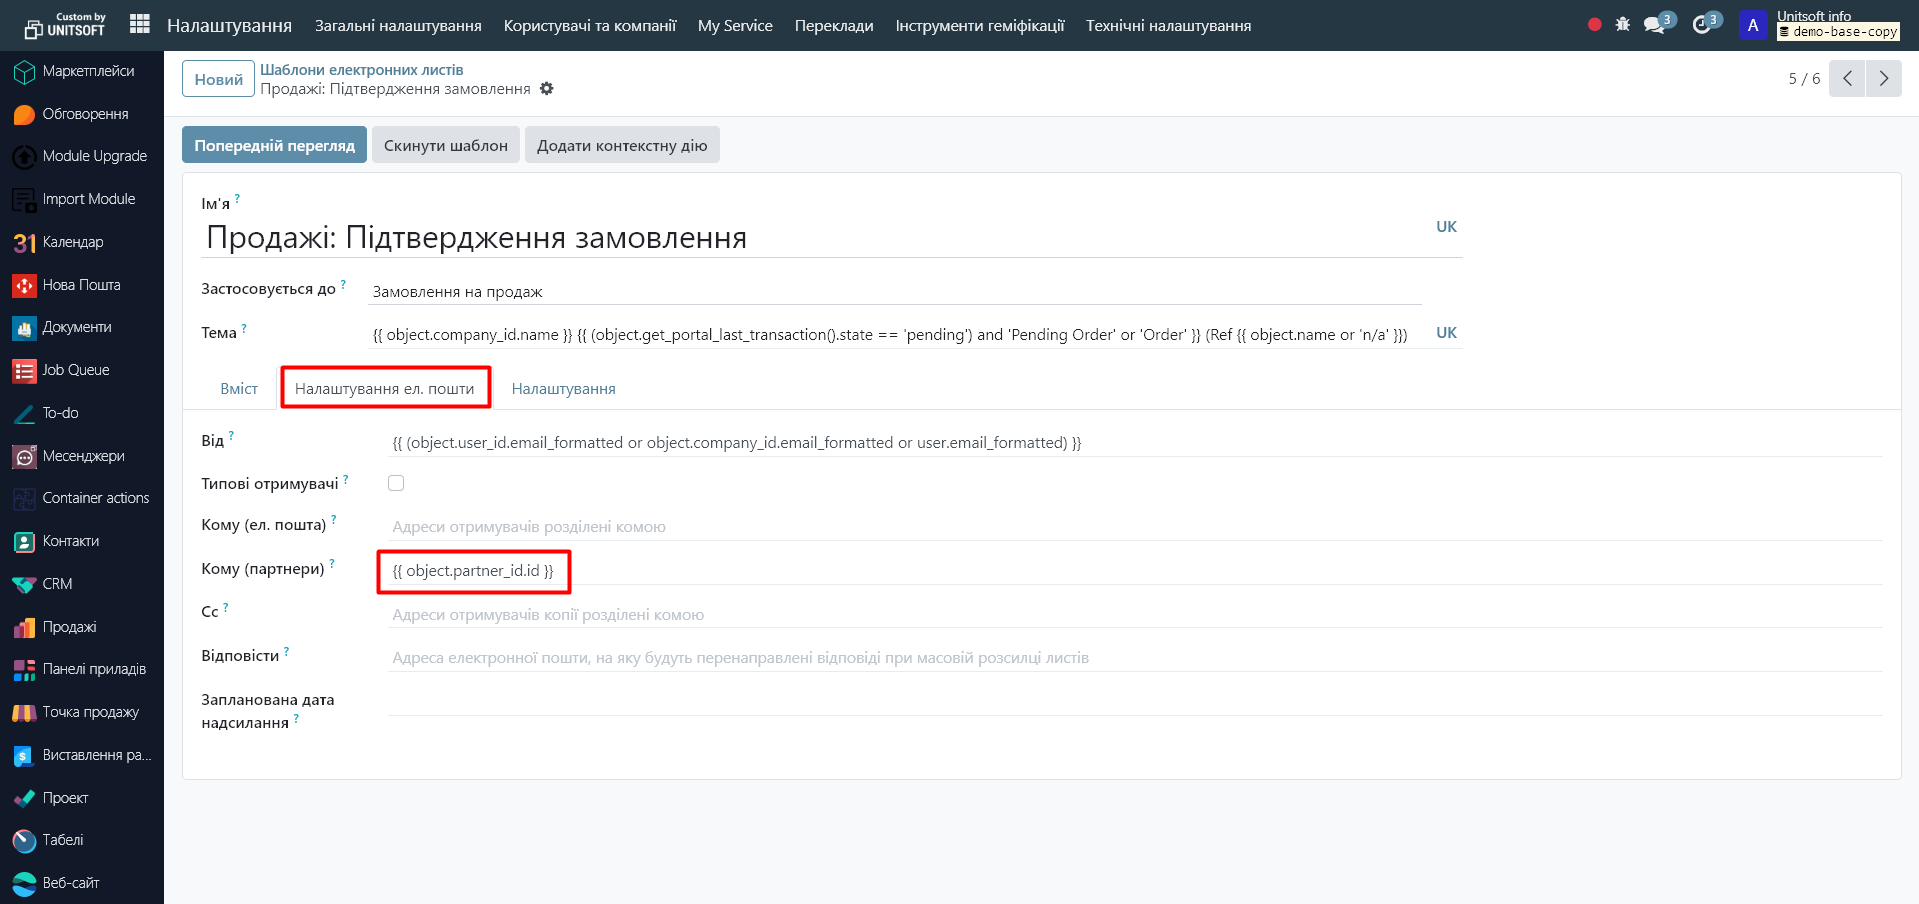
Step 3: Specify the email recipients
In the 'Email Settings' tab in the 'To (Partners)' field, specify the recipients. For example, if the recipient is dynamic – the order client, then here we specify {{ object.partner_id.id }}
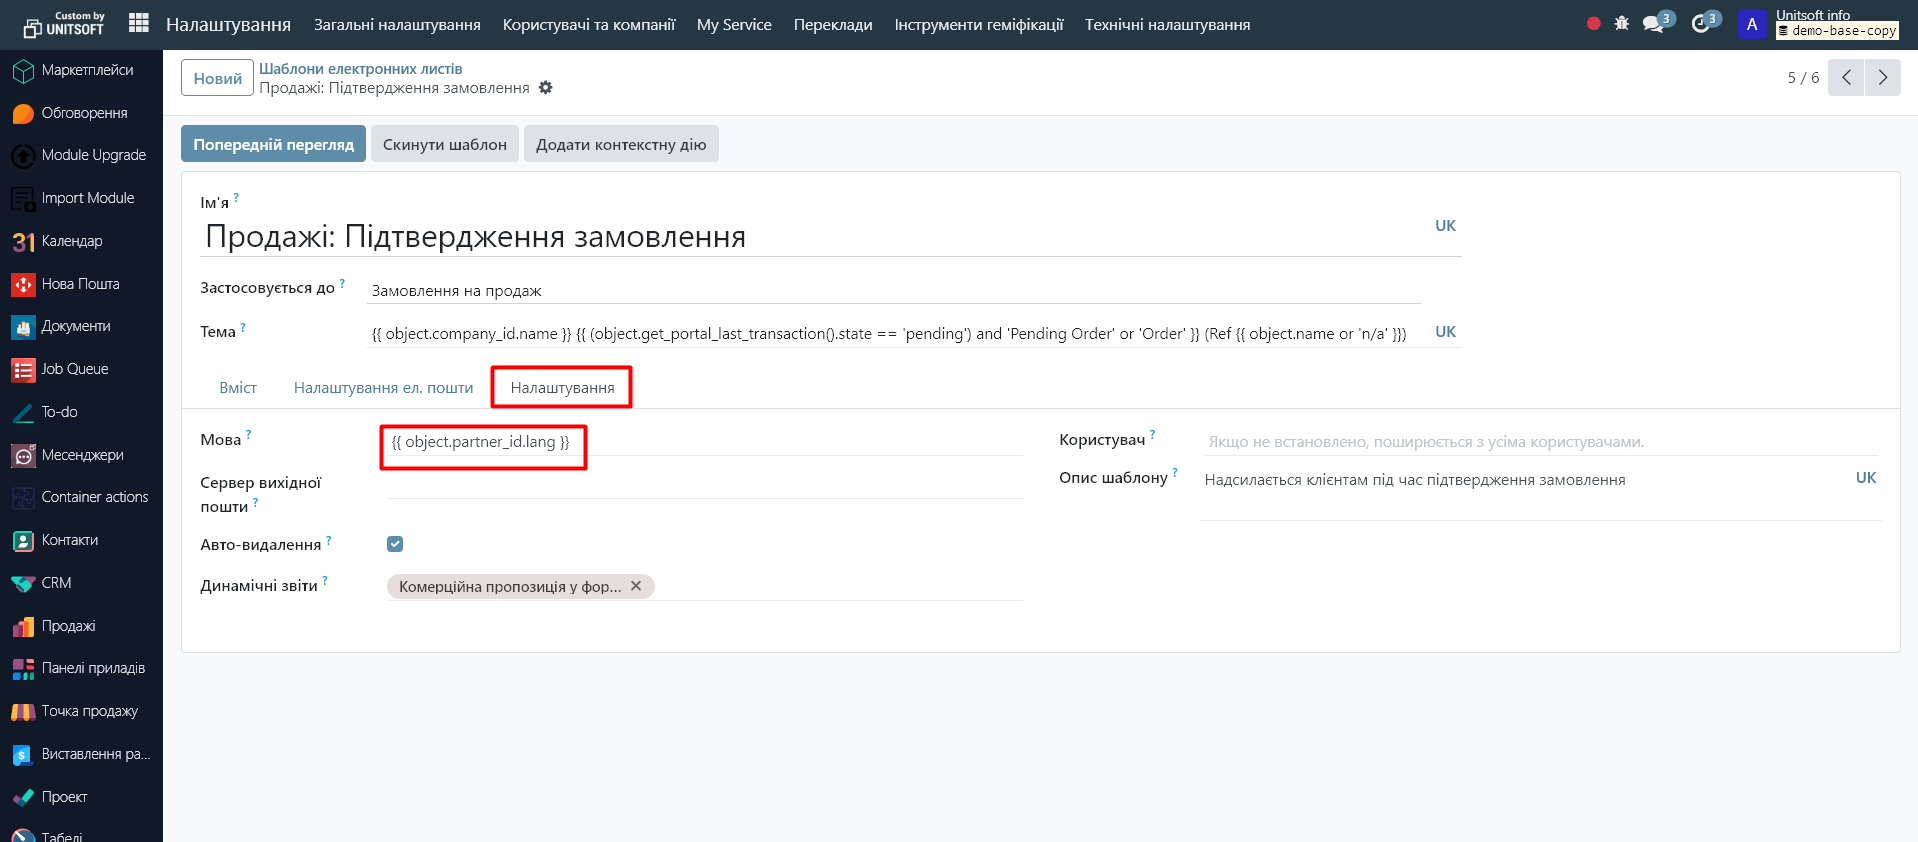
Step 4: Specify the email language
If multiple languages are connected in the system and you want to automatically send the email in the client's language (as indicated in the client's card in the 'Language' field), then in the 'Settings' tab in the 'Language' field, specify the expression {{ object.partner_id.lang }}
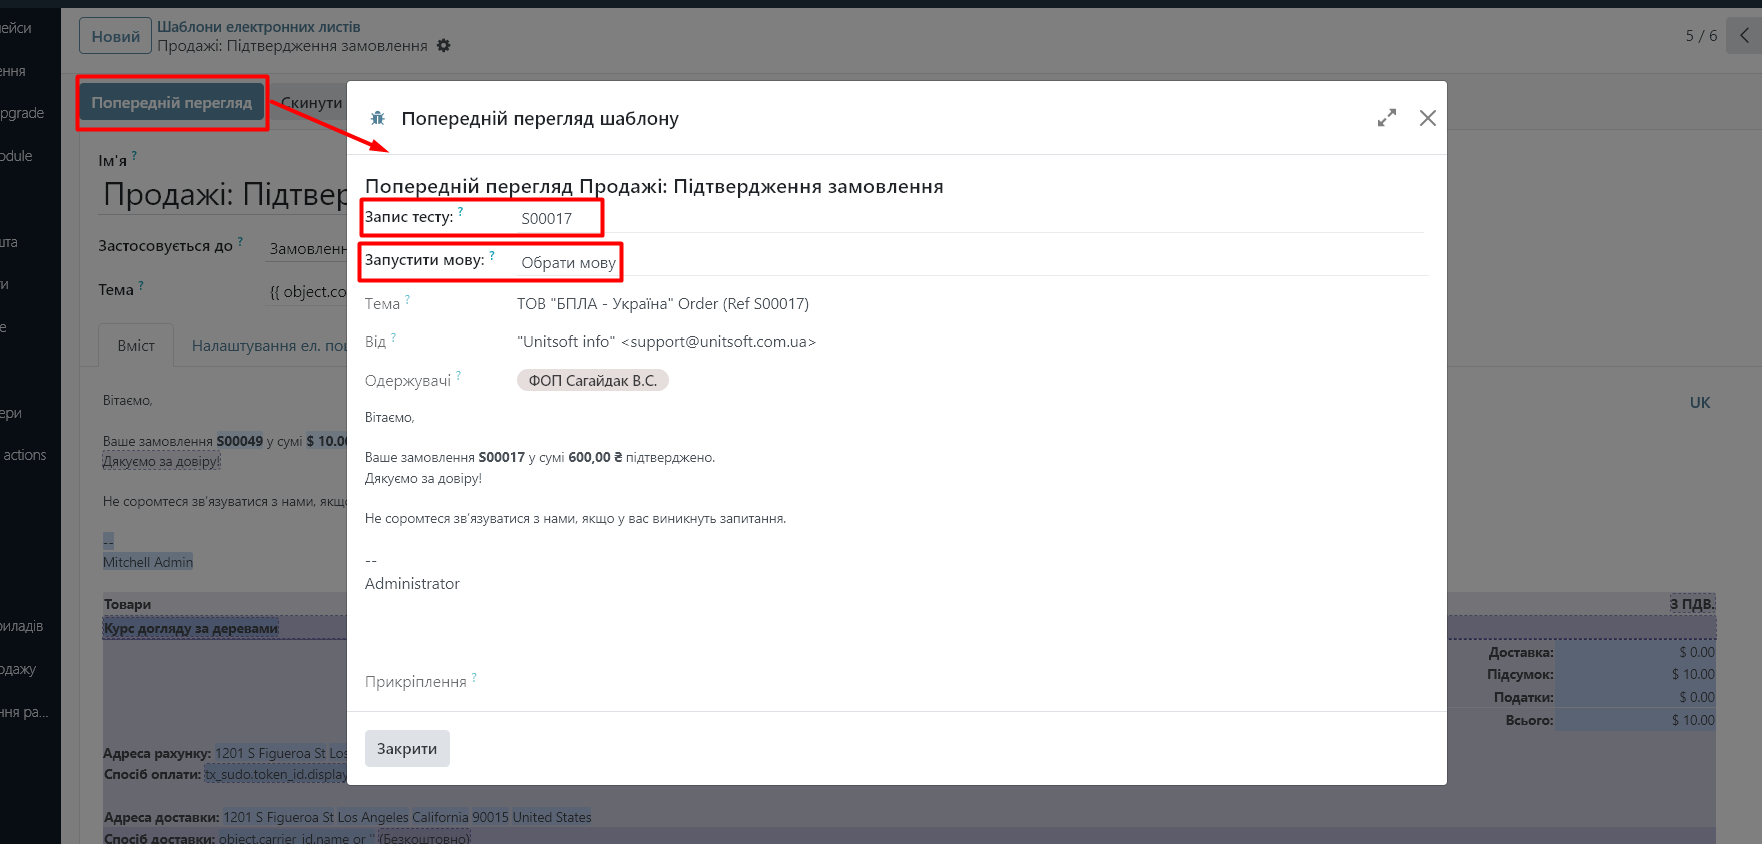
Step 5: Check the template accuracy
Click the 'Preview' button. Specify the test record (e.g., order – if the email is to be sent based on orders) and the language. Check the correctness of the data display:
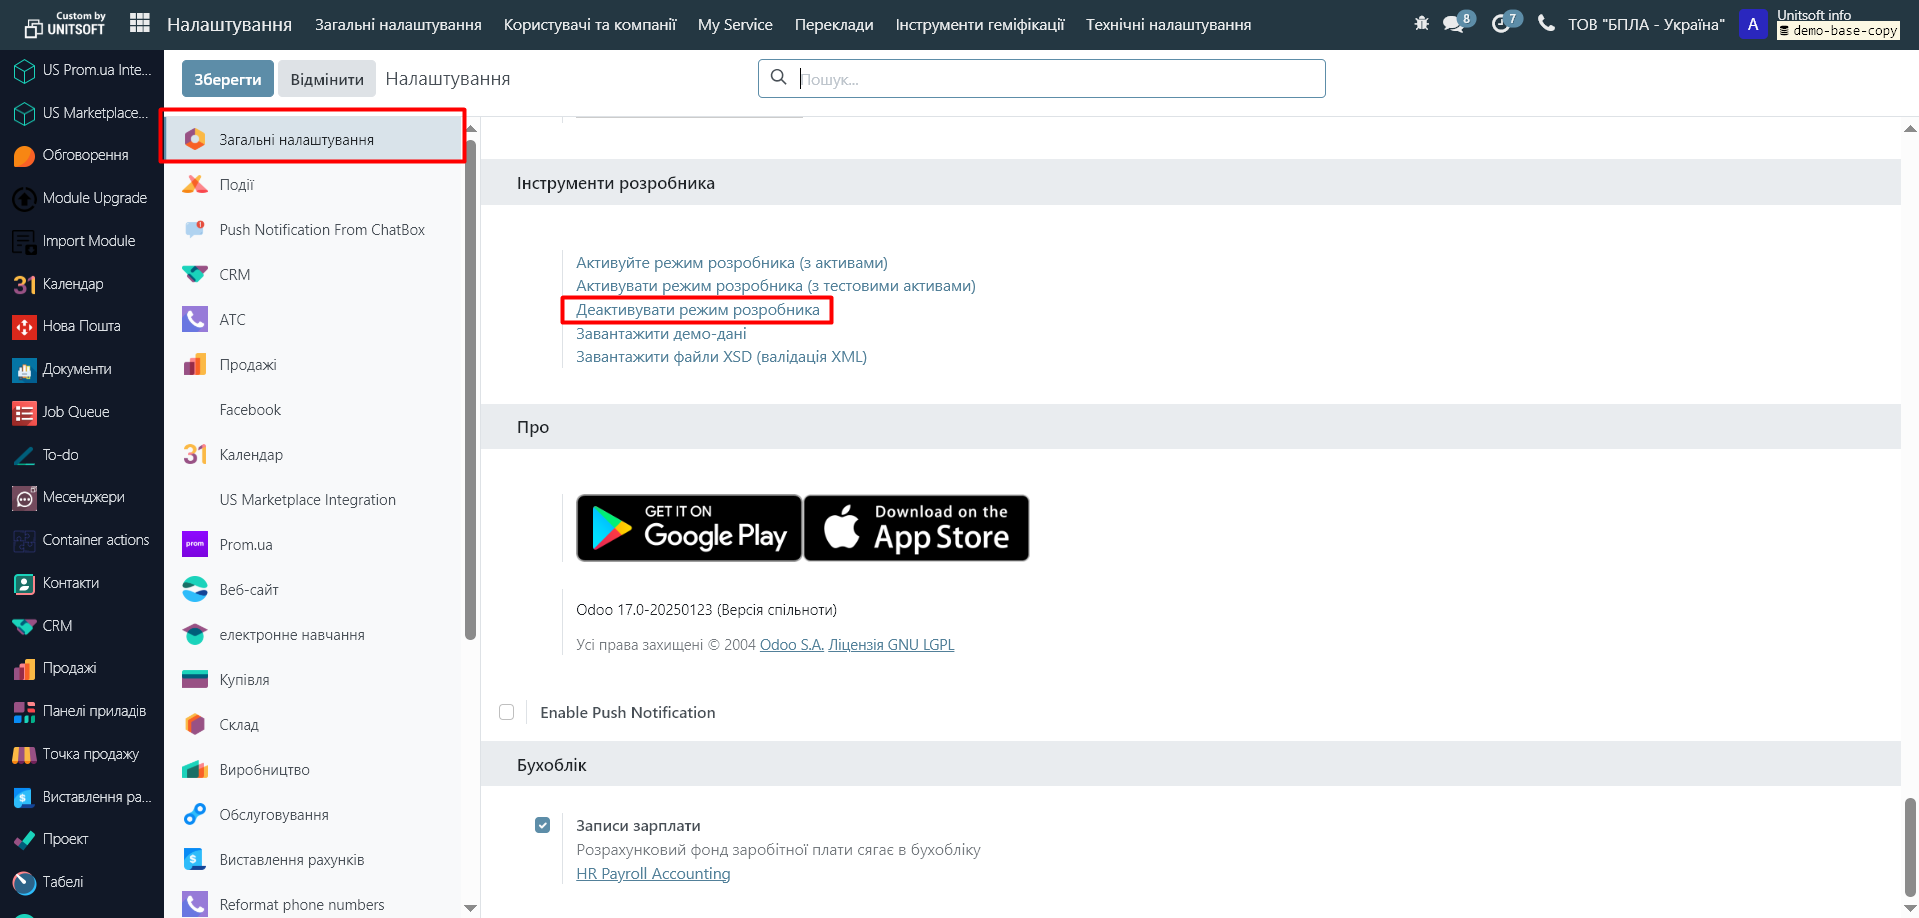
Step 6: Disable Developer Mode
Go to the 'Settings' module. In 'General Settings', scroll down the page and click 'Deactivate Developer Mode' (Deactivate the Developer Mode).
Note that in this guide we only set up the email template. To set up the sending of such emails (if it's not a typical Odoo mailing), you need to create the appropriate automation. How to do this, read in other articles on our blog.