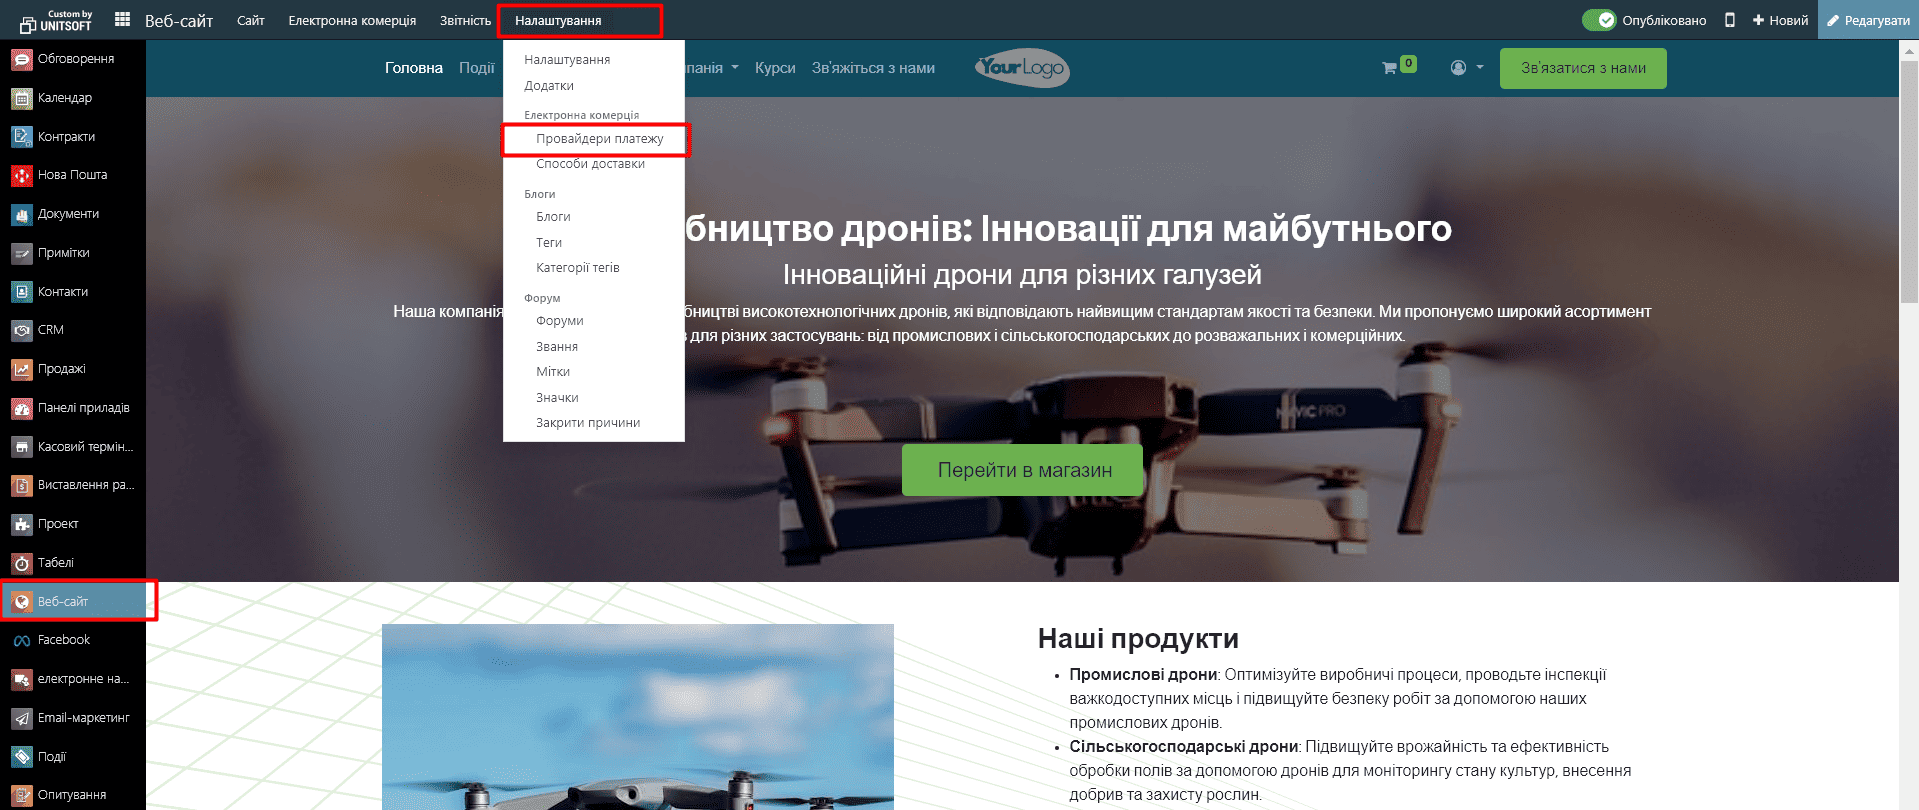
If you plan to accept payments on your website through payment providers (LiqPay, Paypal, WayForPay, MonoPay, etc.), then their integration modules must first be installed in your database. You can read how to do this here. Also note that most of these payment providers are available in the "Business+" package.
To configure available payment methods, go to the "Website" - "Settings" - "Payment providers" module:
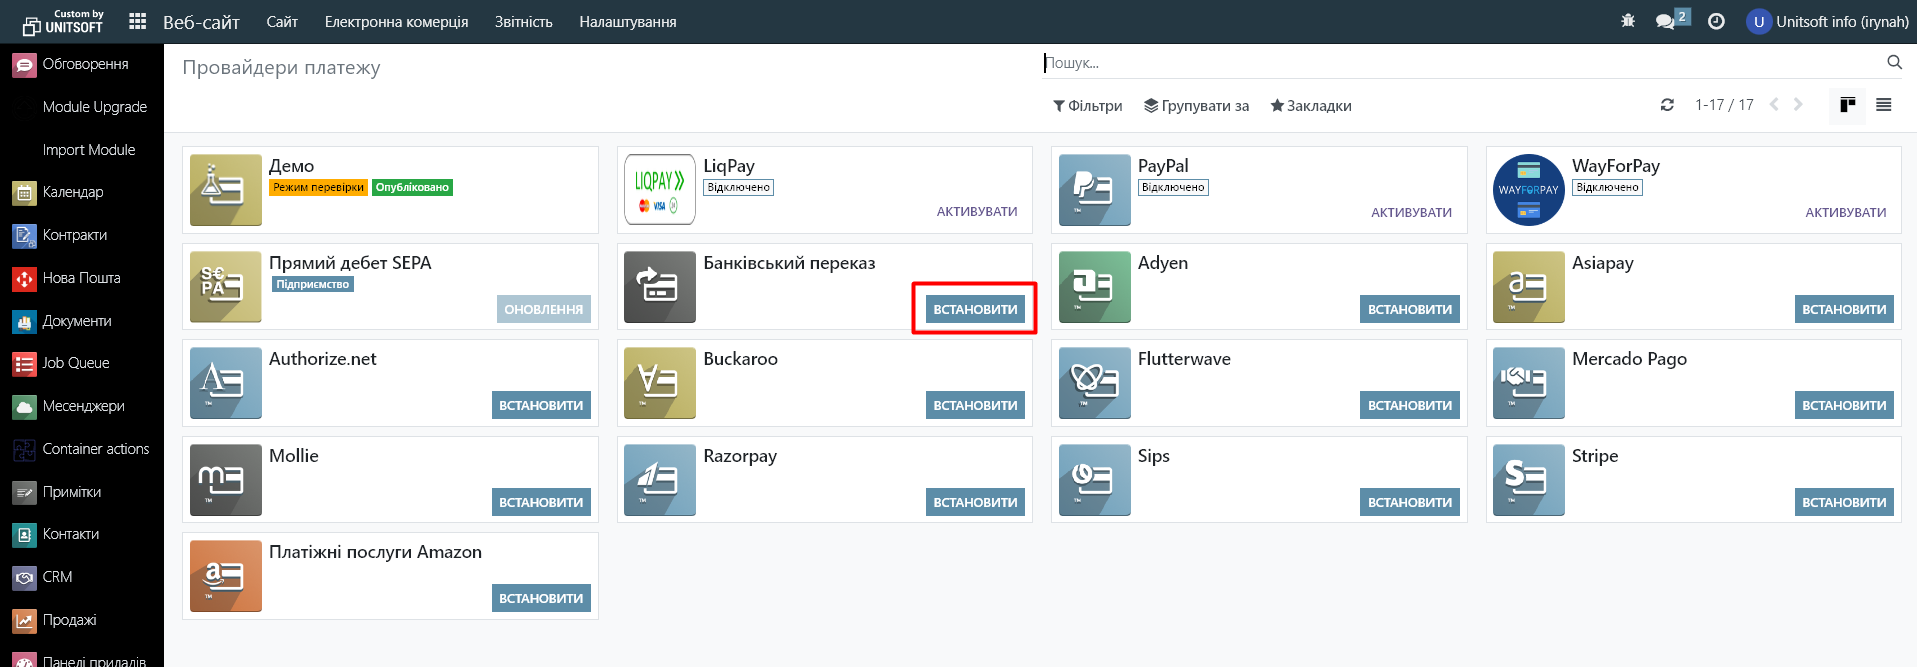
In the new window you will see a list of payment options. In addition to payment providers, there are also other options available here - "Bank transfer" (for making a separate payment, not through the website) and "Demo" (a test option, for checking the order process through the website).
If any of the required payment options are not yet installed, activate it via the "Install" button:
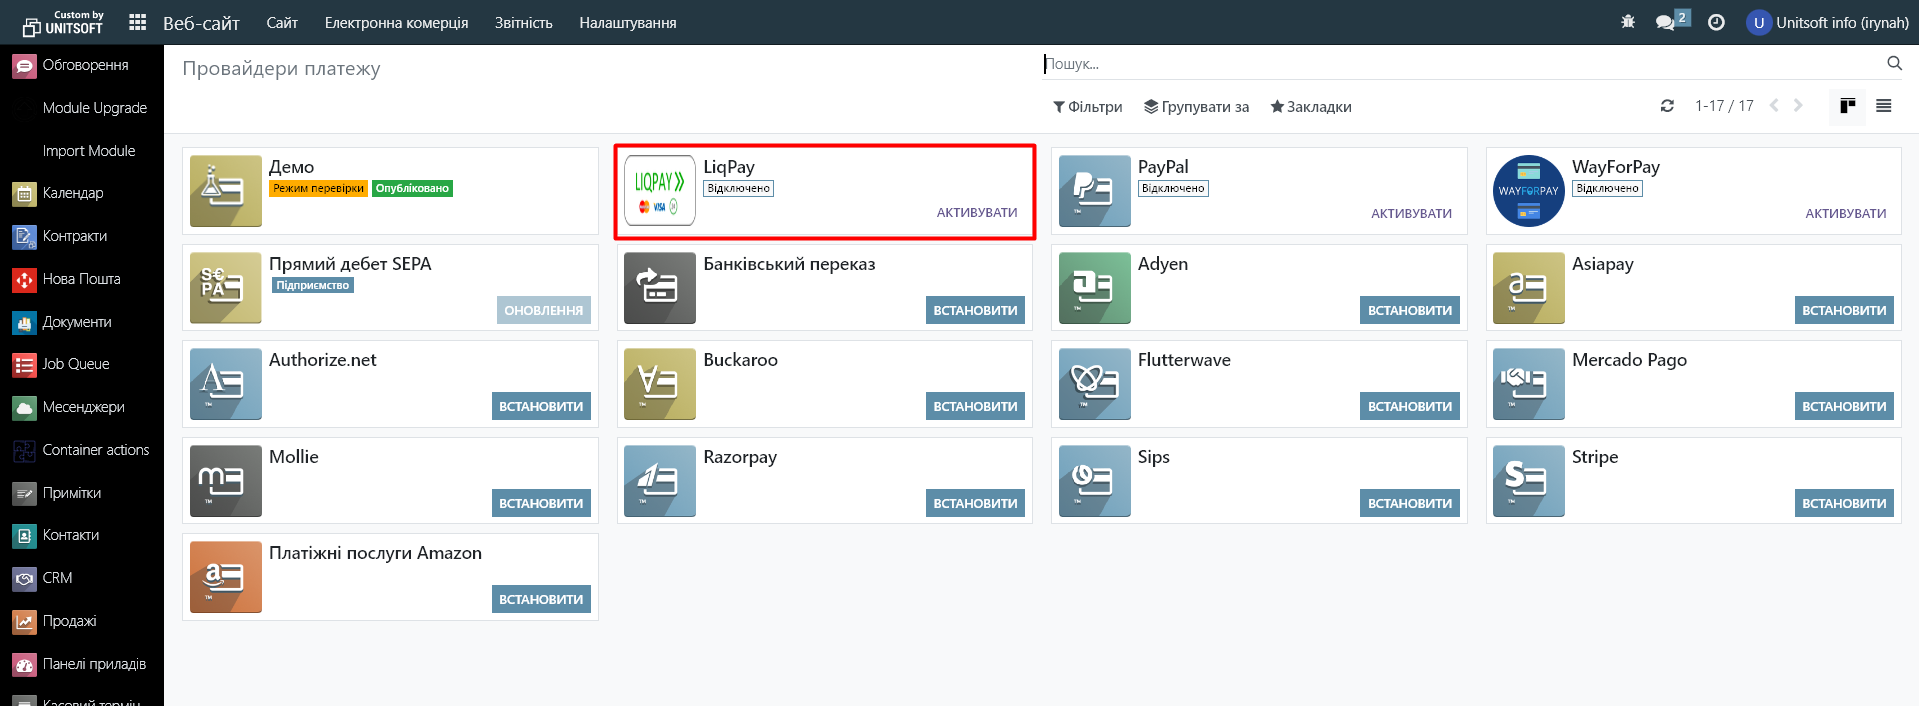
Next, go to the payment provider settings:
Publish it on the site by changing the status to "Enabled":
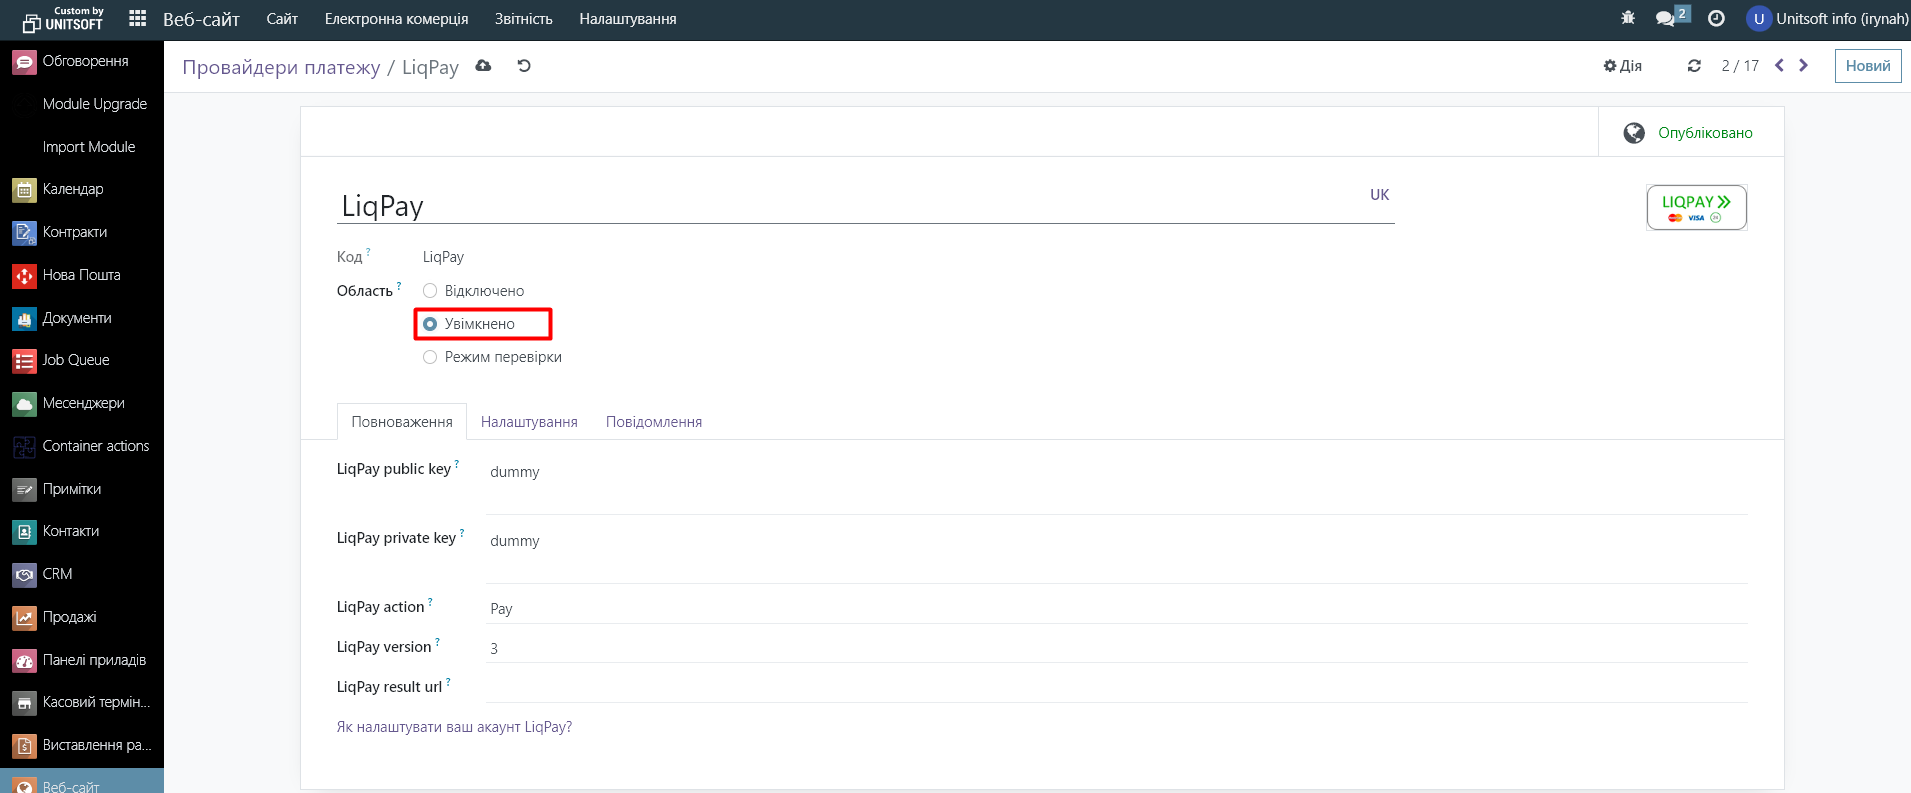
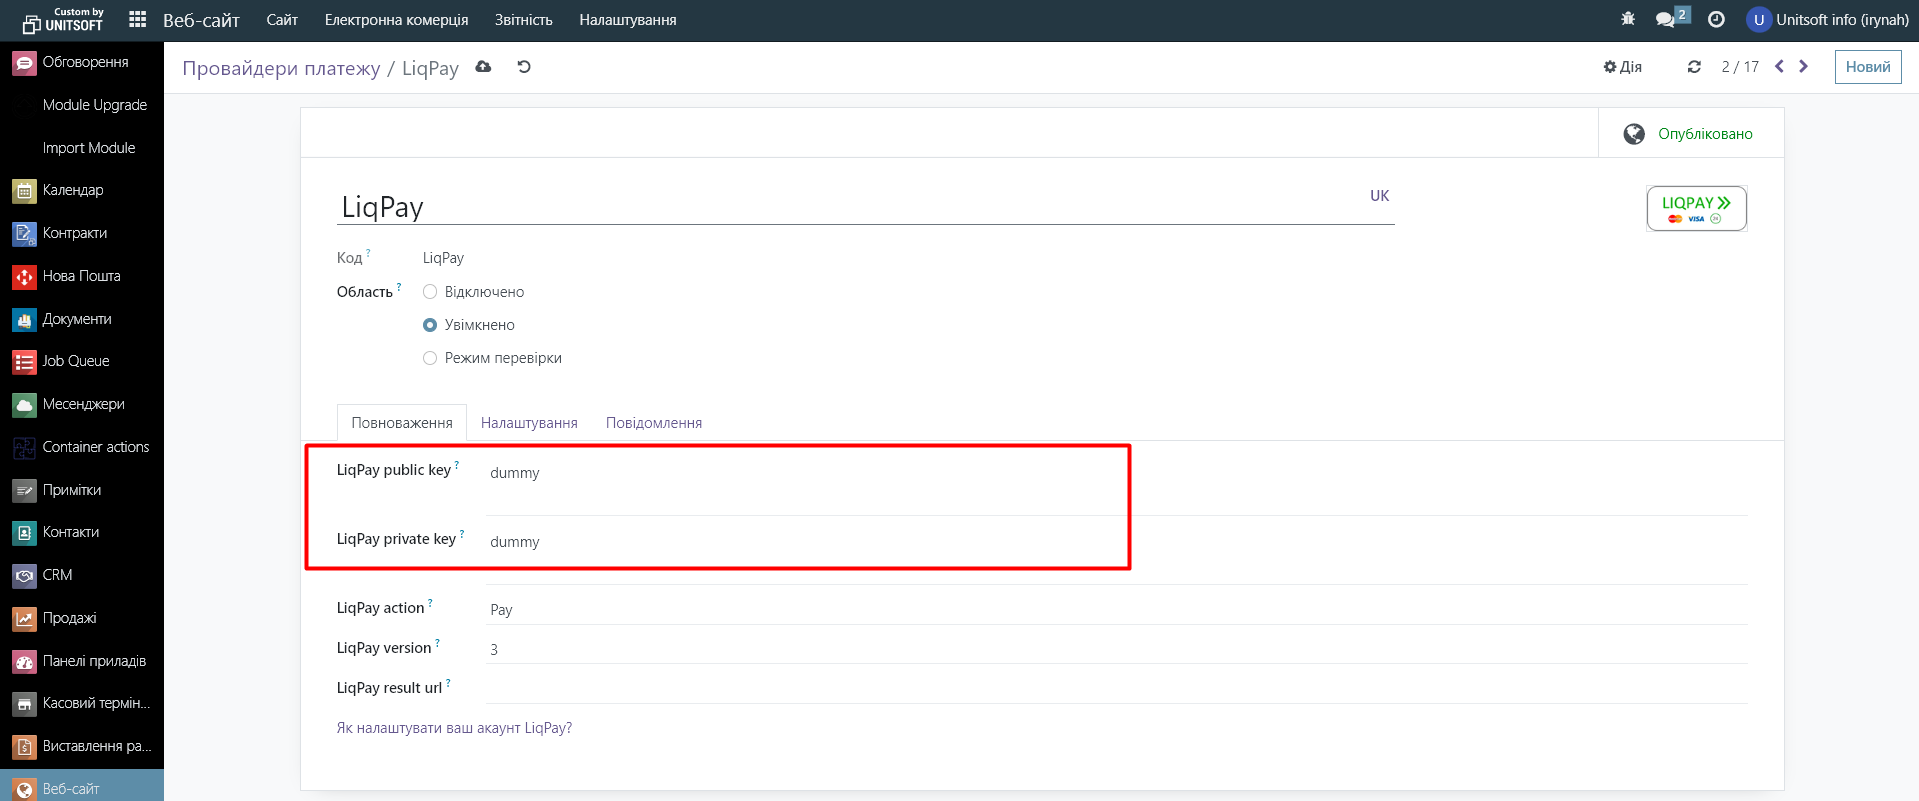
Please enter the keys from your payment provider's personal account below:
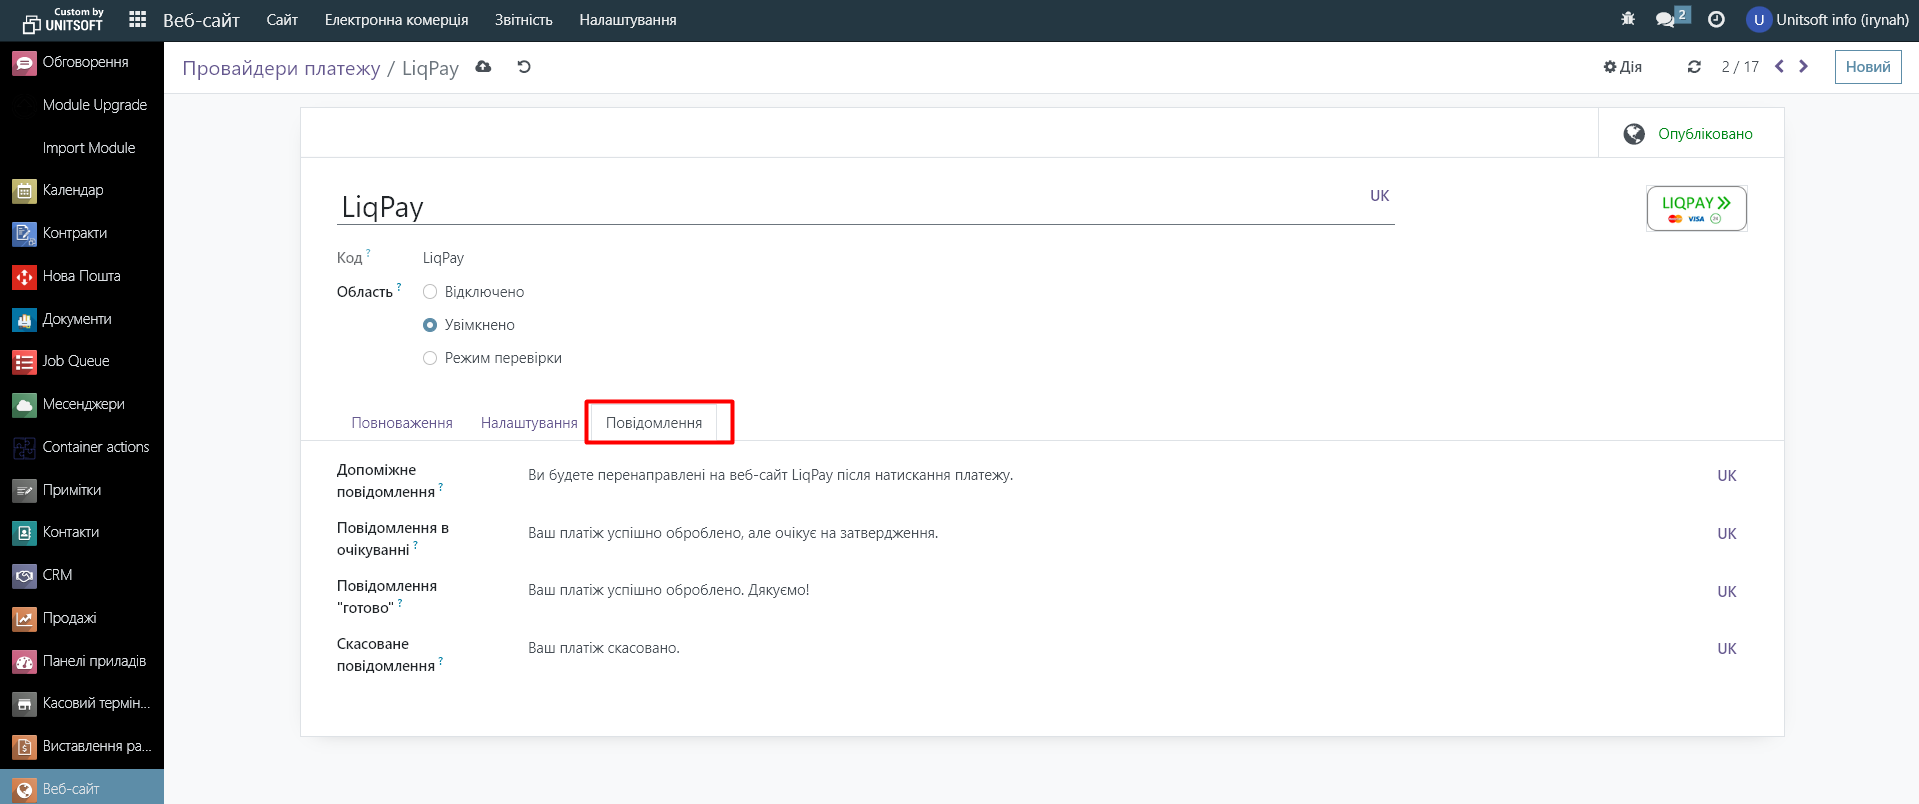
You can also configure the desired messages to be displayed on the site during the payment process. To do this, go to the "Messages" tab:
In the "Settings" tab, you need to specify the payment journal (the bank account to which the funds will be sent). You can also specify how this payment method should be displayed on the site and what the maximum amount is available for it (0 - no limits):
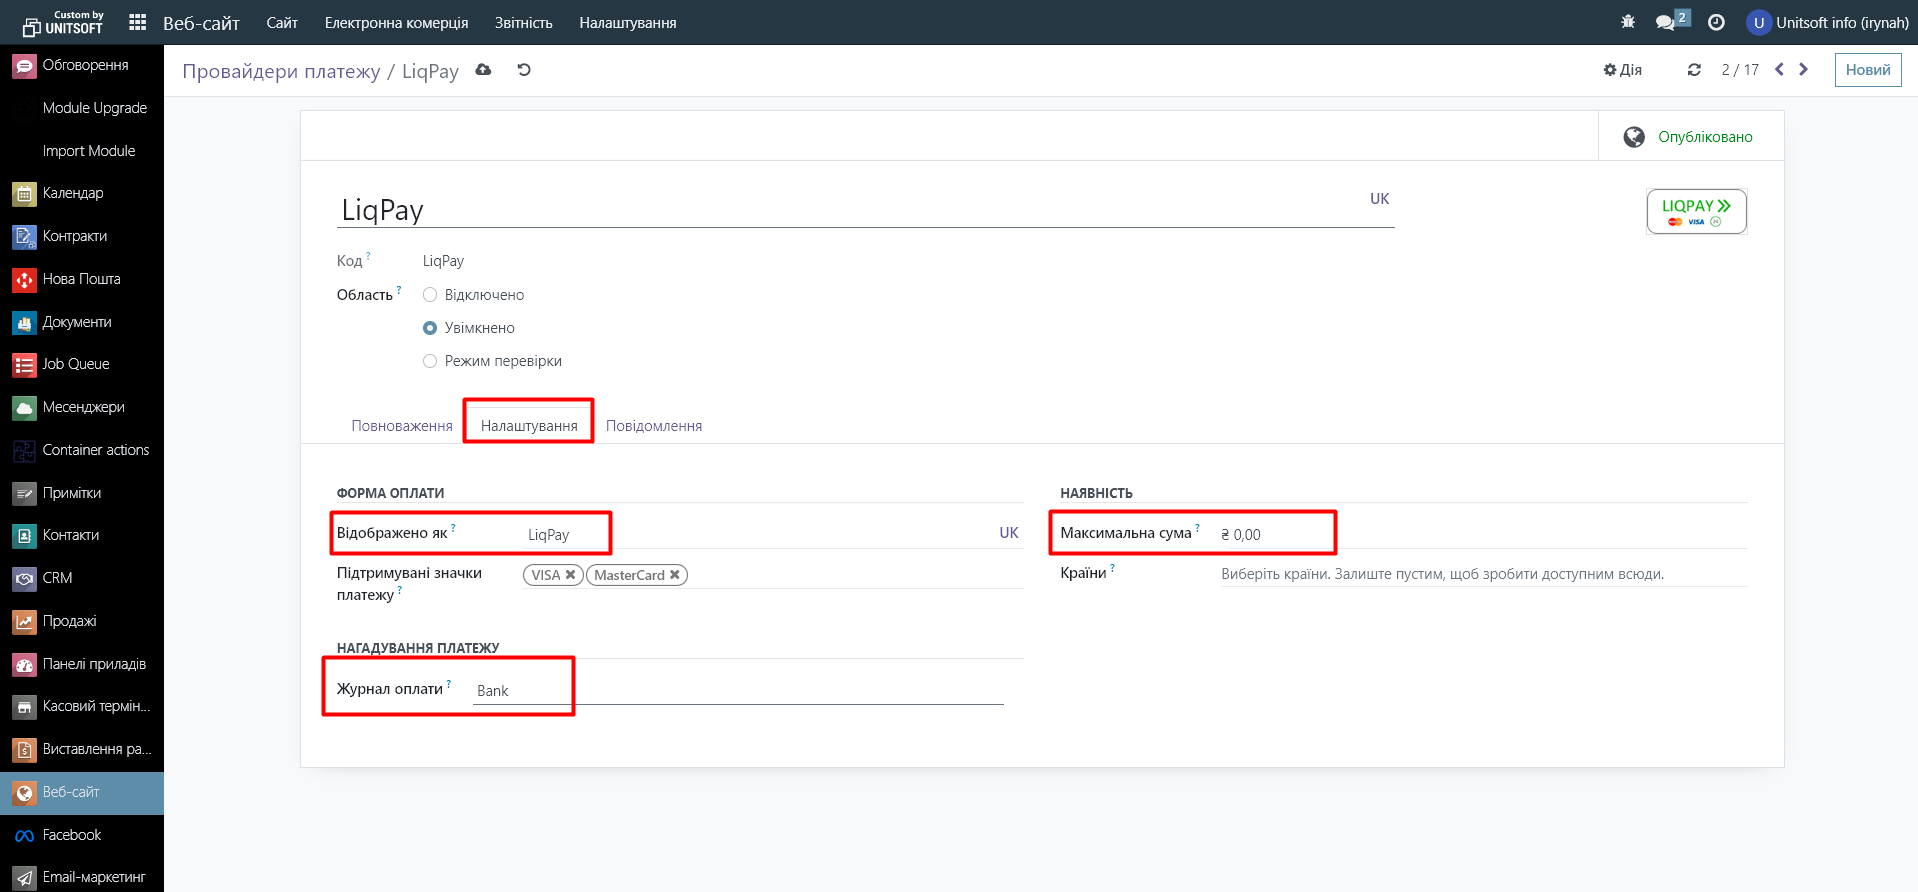
The available settings may vary slightly depending on the payment method. For example, for "Bank Transfer", you don't need to specify a payment history.
Next, go to the "Settings" module and in the "Sales" section, activate "Automatic invoice":
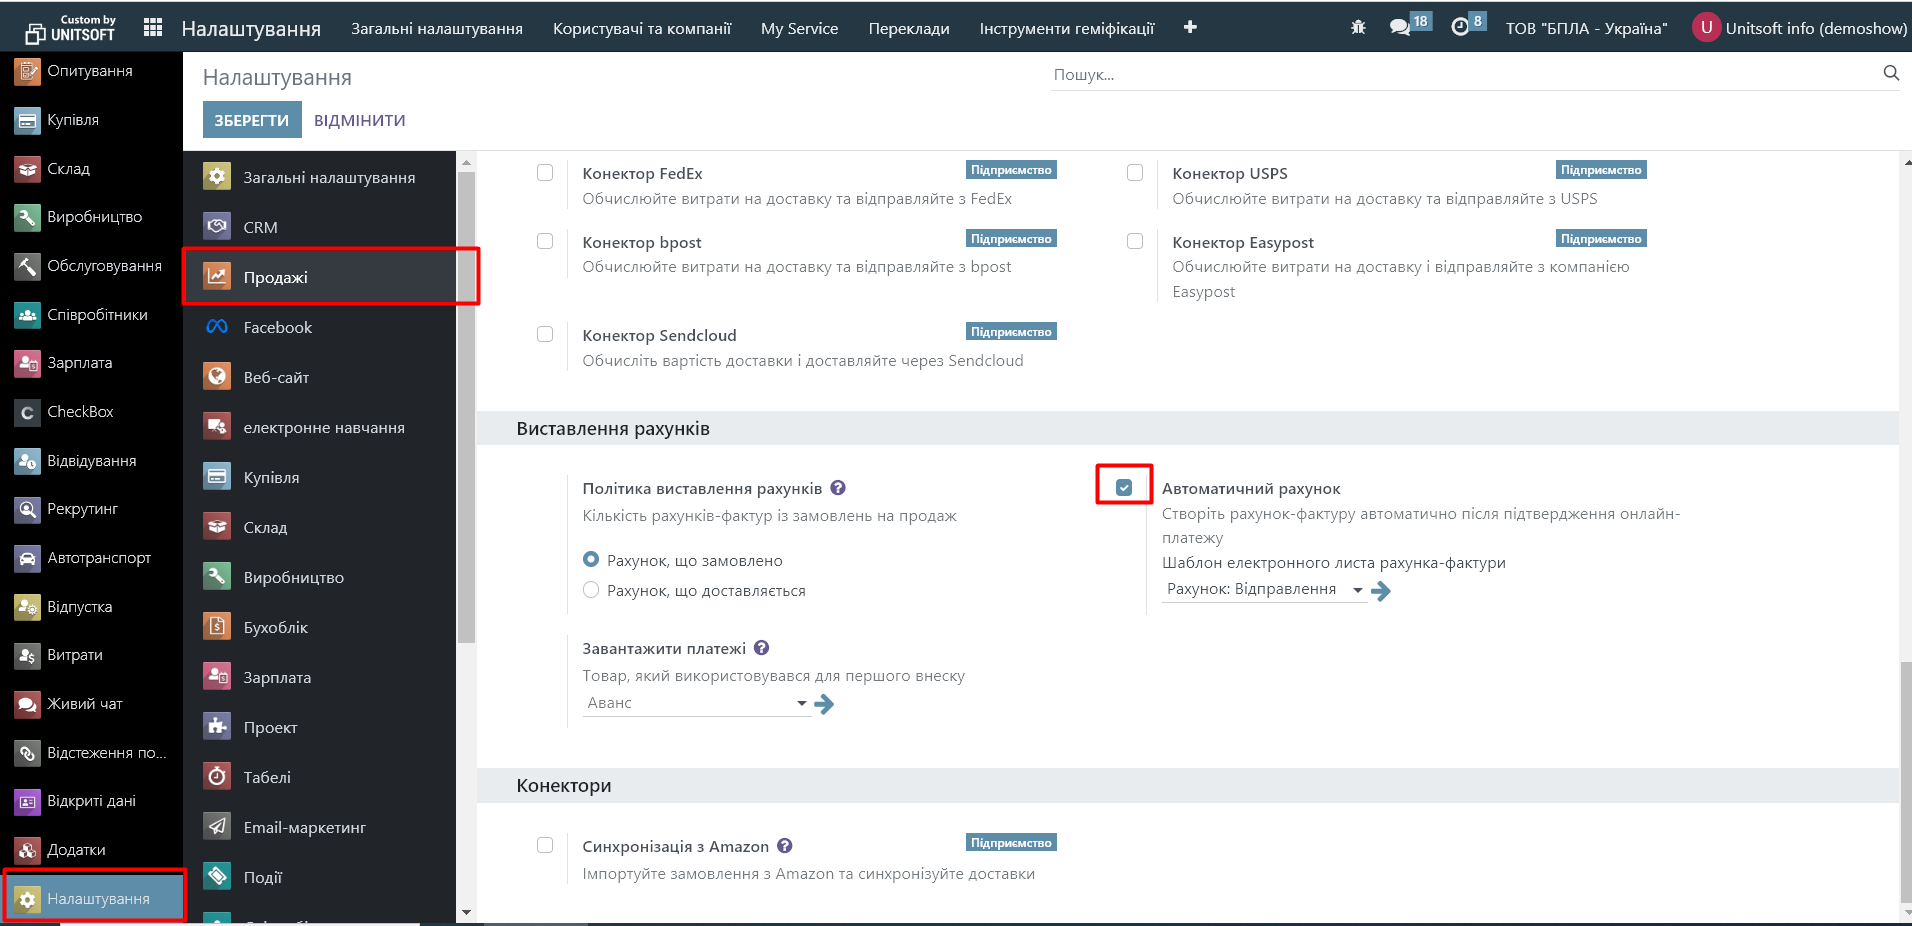
This function will automatically create an invoice for you after confirming your online payment.