Odoo CRM is a powerful tool for managing customer interactions. One of the key features is the action system, which helps users perform various tasks and organize workflows. With actions, you can schedule calls, meetings, send emails, and more, ensuring better communication with customers and more efficient management of your tasks.
In this guide, we will look at how to work with actions in Odoo CRM, how to create, edit, and view them, as well as what types of actions are available in the system.
Types of actions
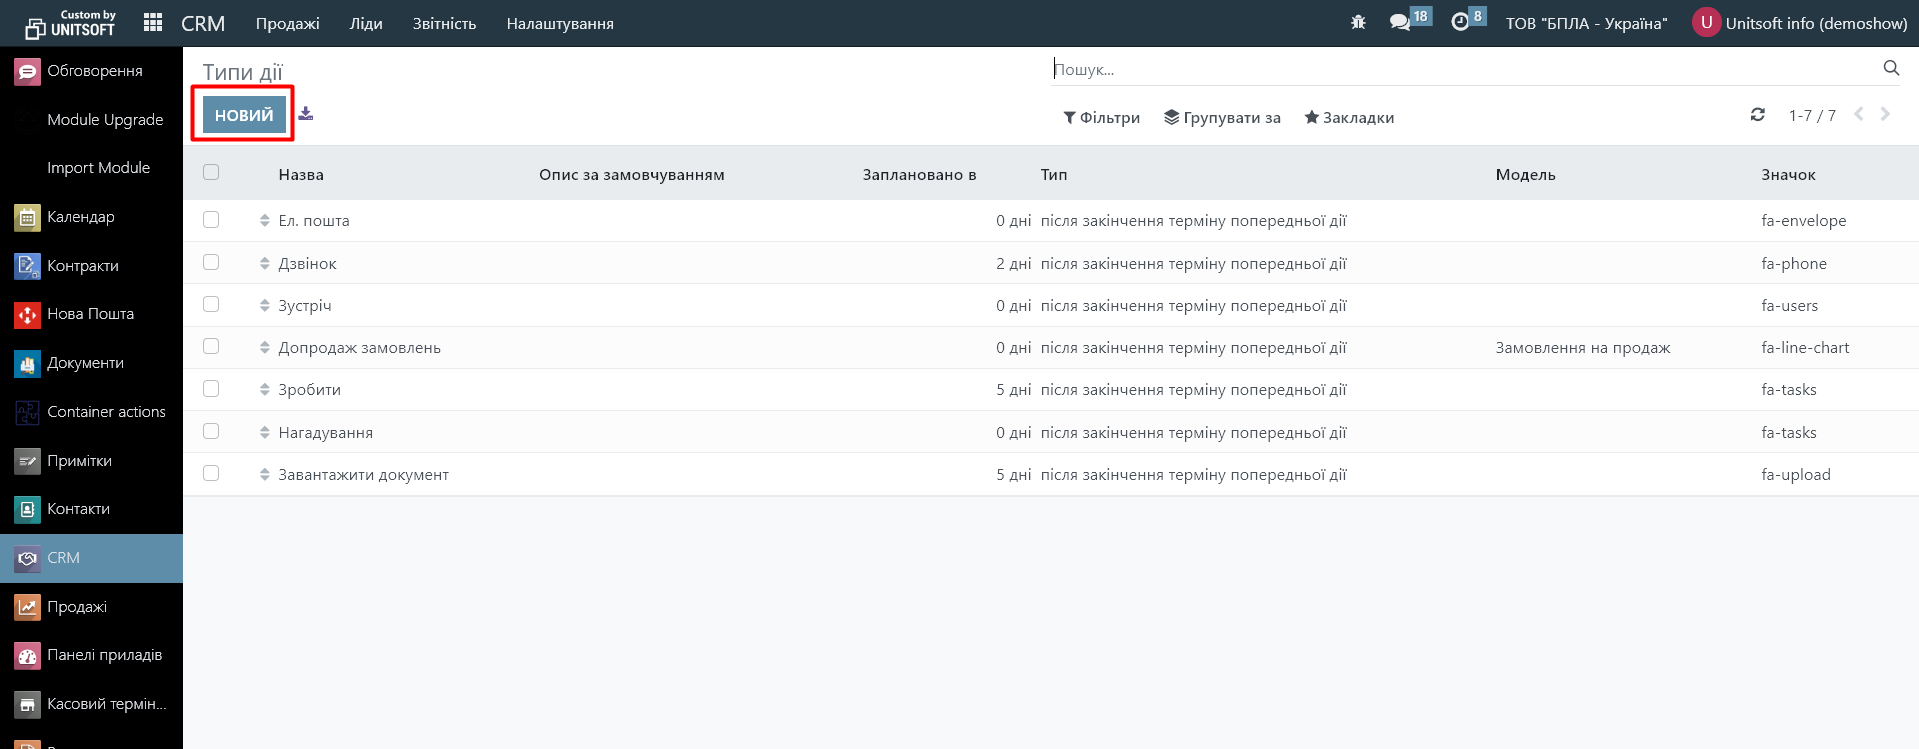
When you install the system, you will automatically have the main types of actions created - call, meeting, reminder, etc. If necessary, you can edit these actions, as well as create new ones.
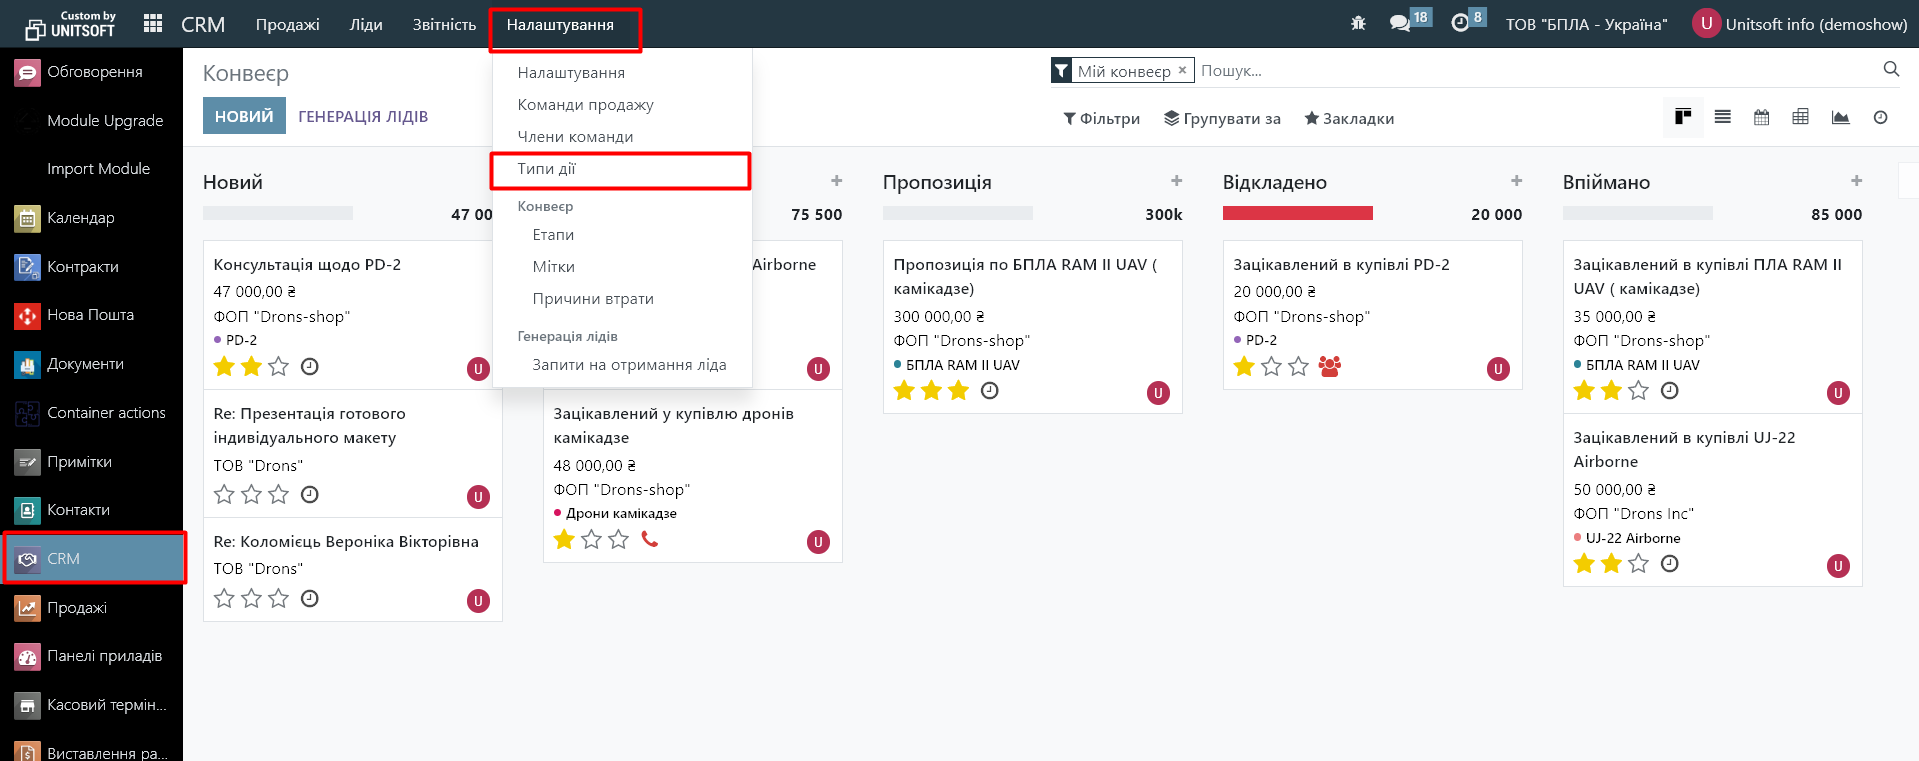
To do this, go to the "CRM" module - "Settings" menu - "Action types":
To create a new action type, click "New":
In the new window, enter the name of the action. Specify its type. Available options include meeting, reminder, phone call, and document download. Please note that for actions with the types “meeting” and “phone call,” scheduling is also available in the “Calendar” module.
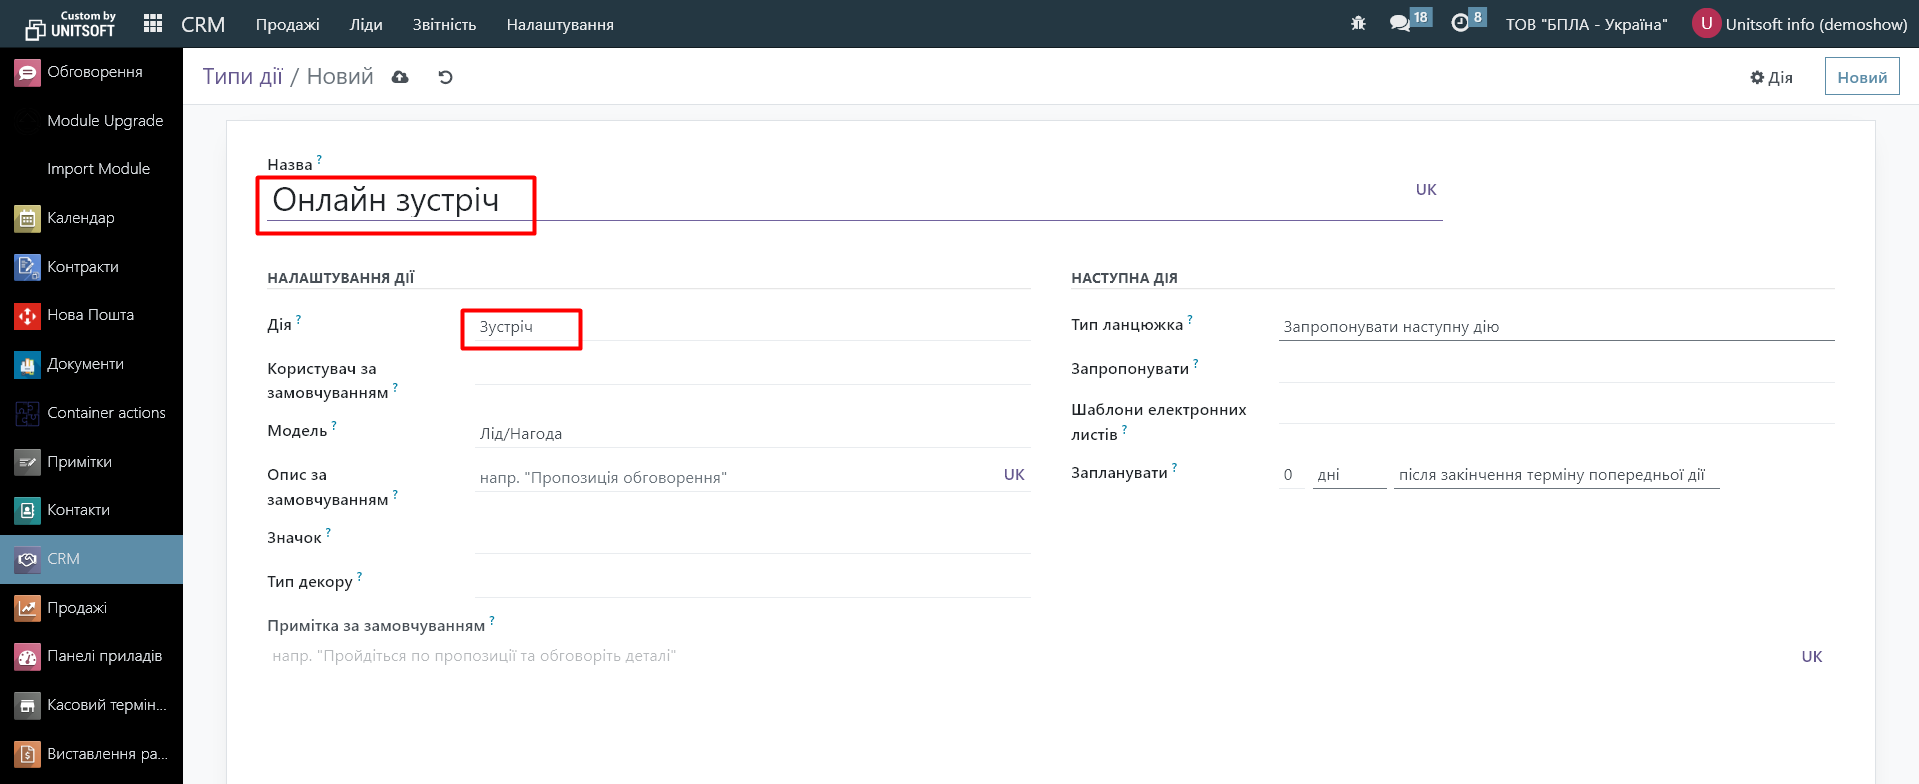
Below you can specify the user who should be the default user for this action.
The Model field allows you to specify in which modules this action will be available. For example, if you specify Lead/Opportunity, the action will be available only in CRM. If you leave this field blank, the action will be available in all modules and can be used in customer orders, invoices, contact cards, etc.
In the "Default Description" field, you can specify a short description of the action.
In the icon field, you can specify which symbol will represent this action. For example,
fa-tasks - 
fa-envelope - 
fa-phone - 
fa-users - 
fa-upload - 
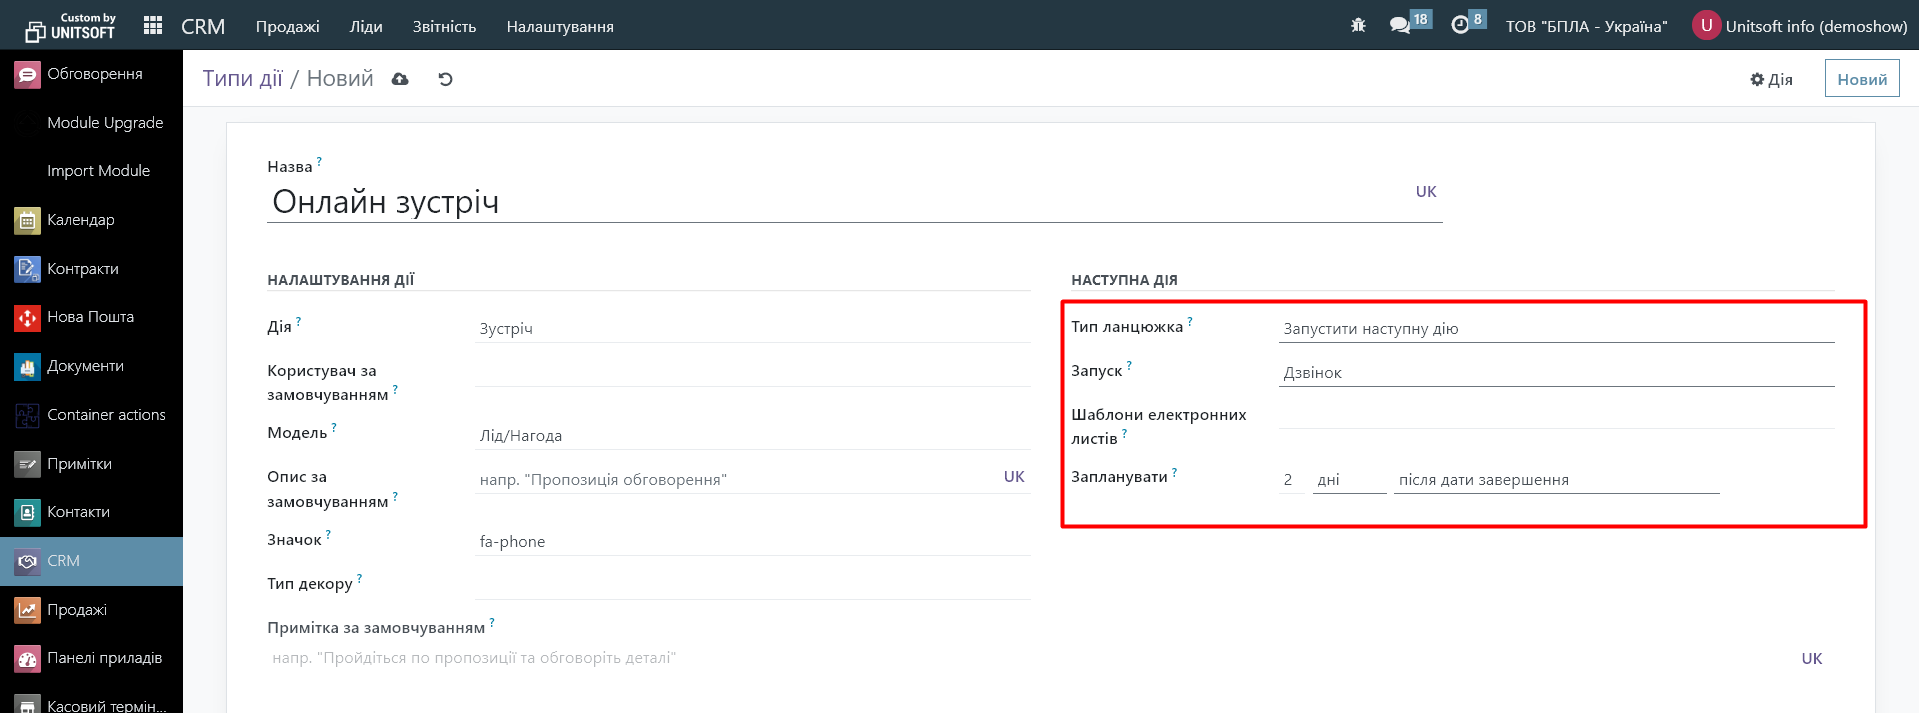
If you want to automatically schedule the next action after the current one, you can do so in the "Next Action" section. For example, you want to schedule a phone call two days after an online meeting. To do this, in the "Chain Type" field, select whether the system should automatically schedule the next action or only suggest it. In the "Suggest" field, specify the "Call" action and configure the rules for determining the deadline for the call.
Action planning
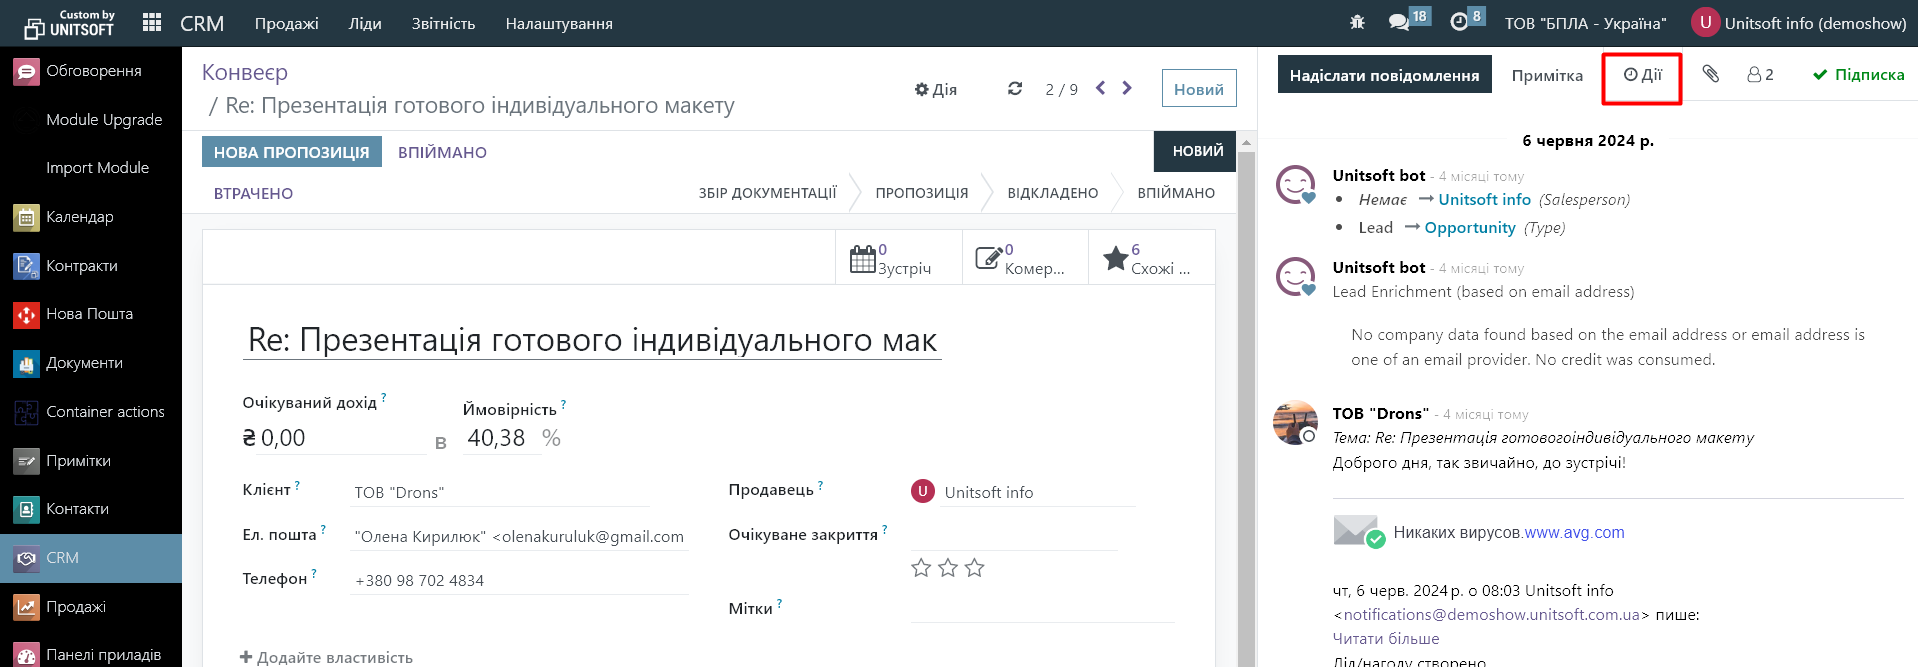
To schedule an action, go to the opportunity (lead) card and click the "Actions" button:
In the new window, select the type of action, its performer and deadline, and if necessary, specify its short description. For actions of the "meeting" and "call" types, a button will also be available to schedule the action via the "Calendar" module ("Open calendar"):
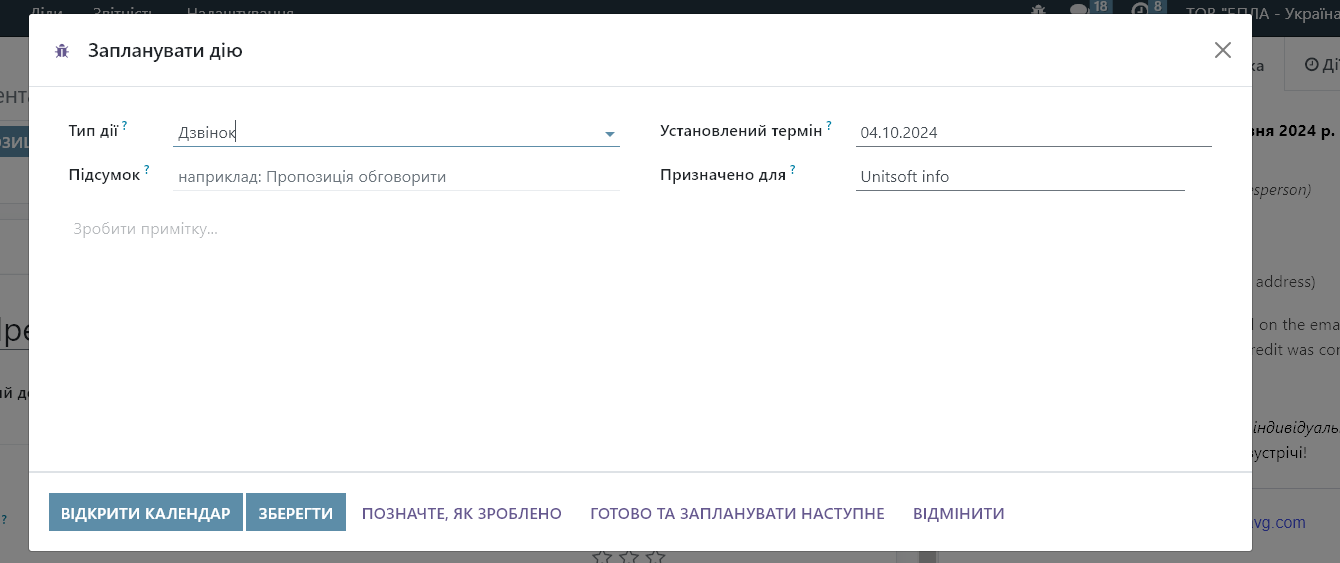
Save the action. Or click "Mark as done" if you've already completed it.
Review of planned actions and display of their execution
The user will be able to see the planned actions in several views:
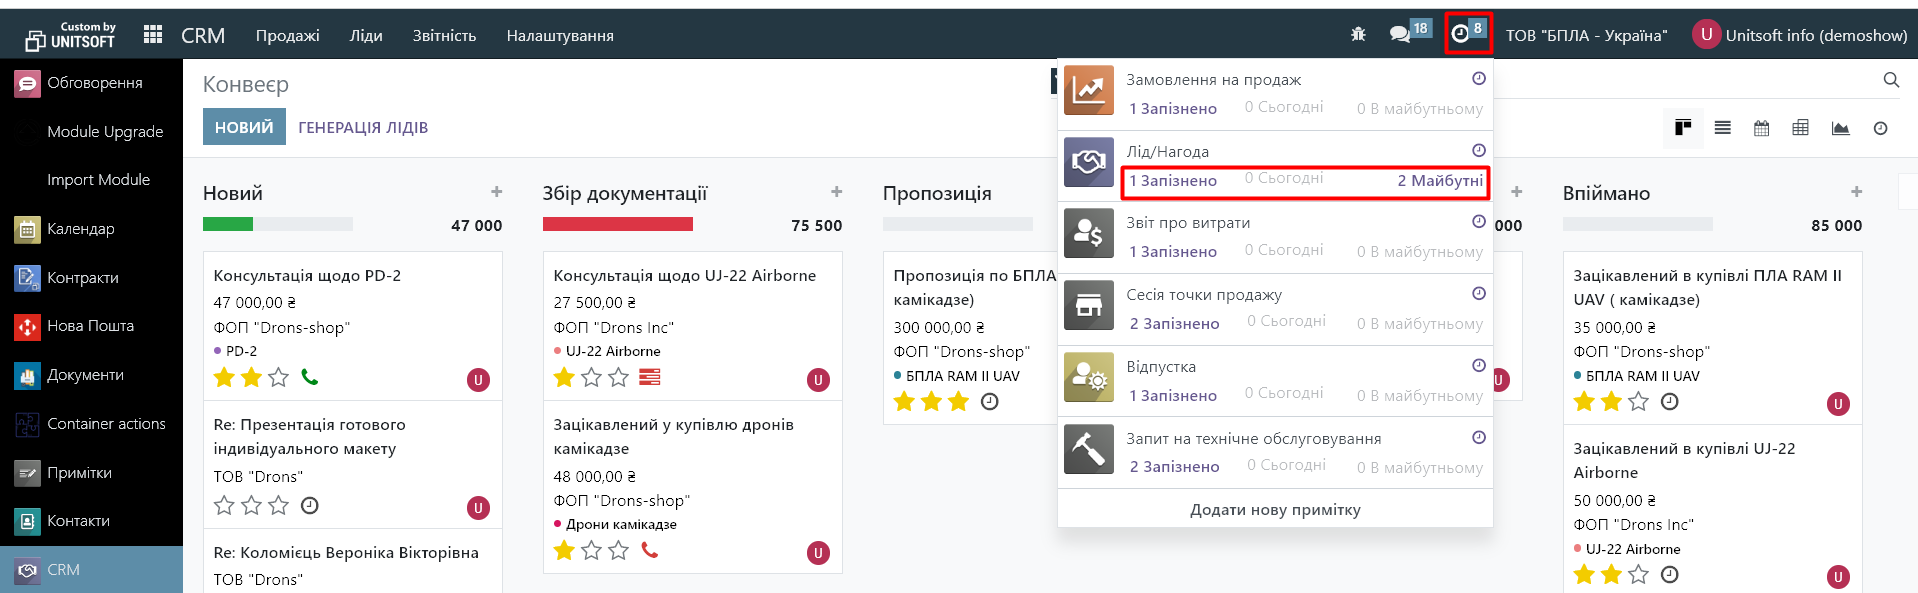
1. Actions button in the quick panel
In the top panel, click on the clock icon. Here you will see information about the number of scheduled actions and their status. By clicking on a link, for example, "1 late", you will be taken to the "My actions" panel and see more detailed information about the delayed action.
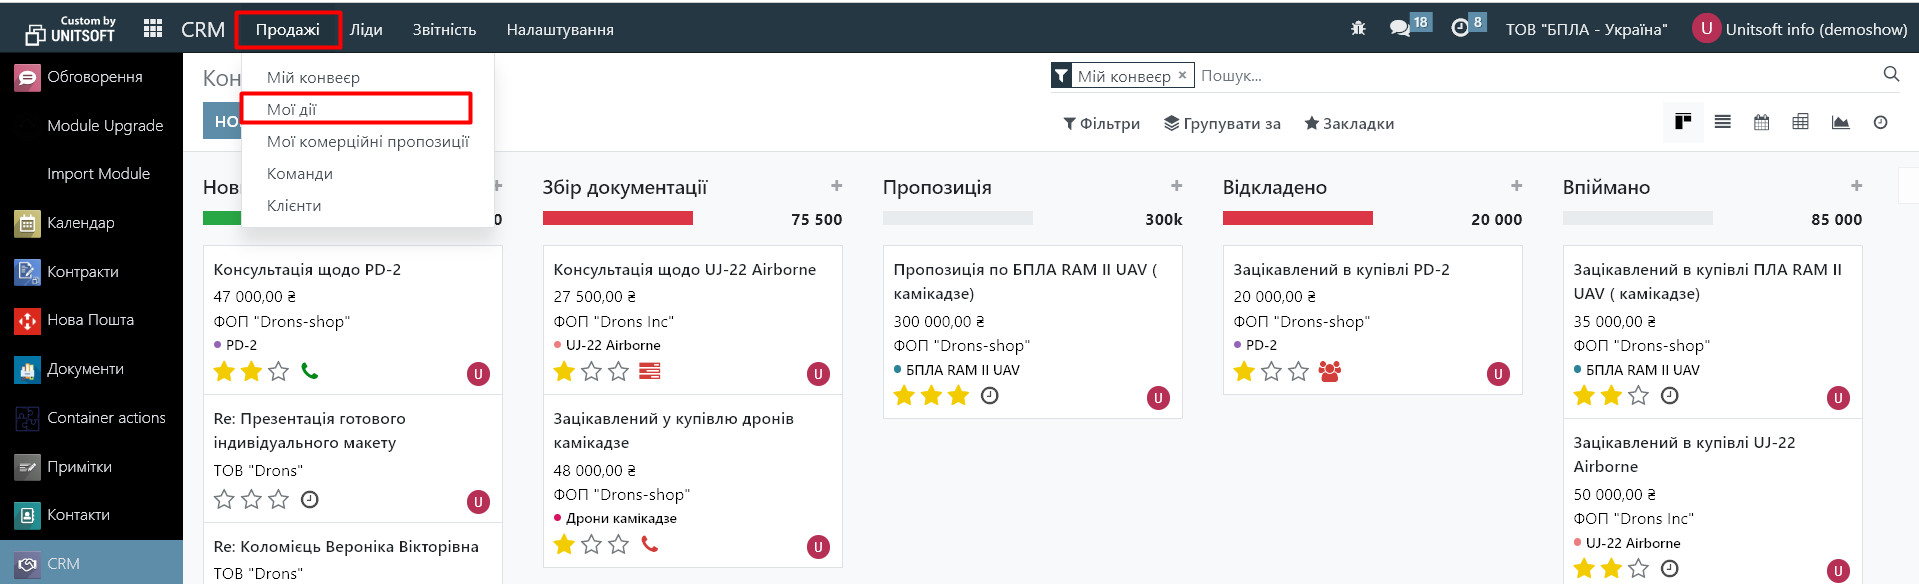
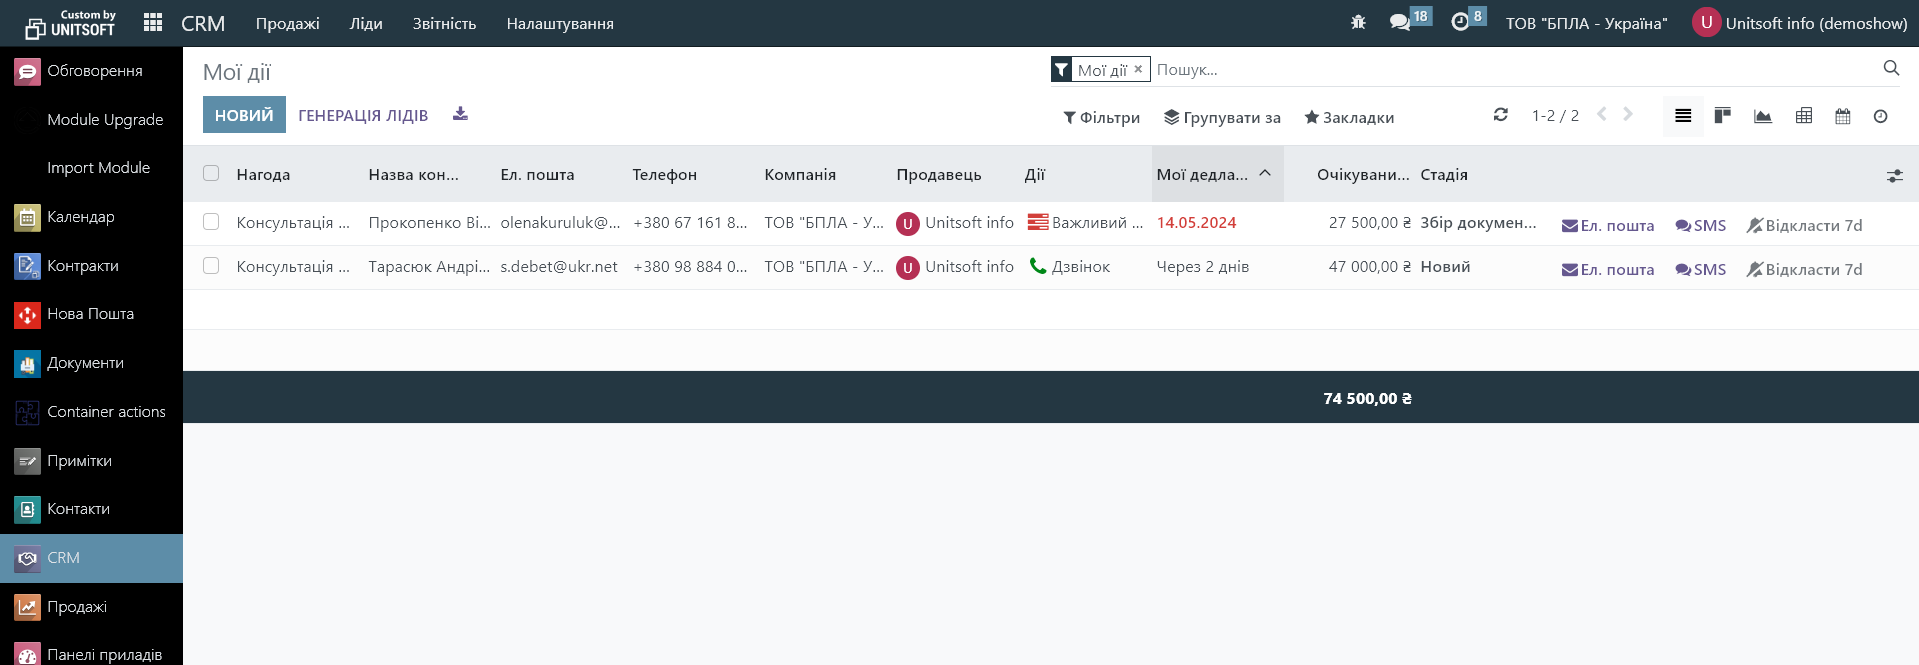
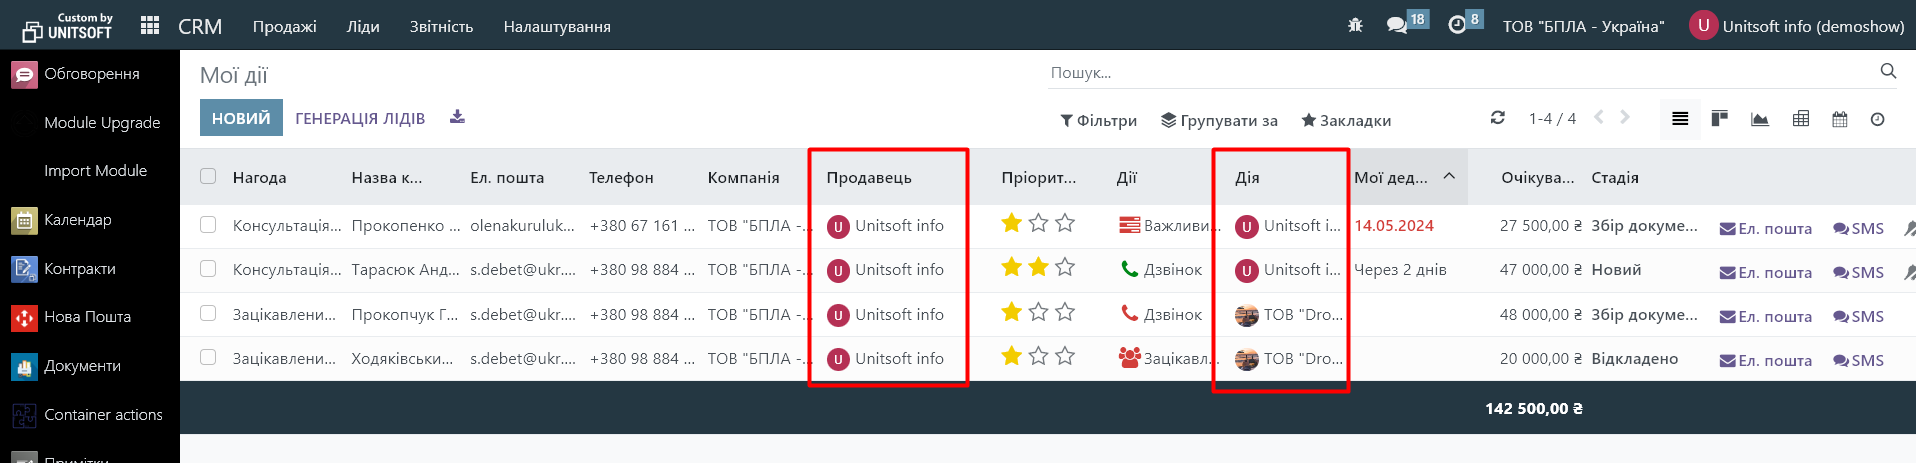
2. My Actions list
Click on the "Sales" - "My actions" menu:
Here you will see your planned actions. Future actions will be highlighted in green, planned for today in yellow, and overdue actions in red:
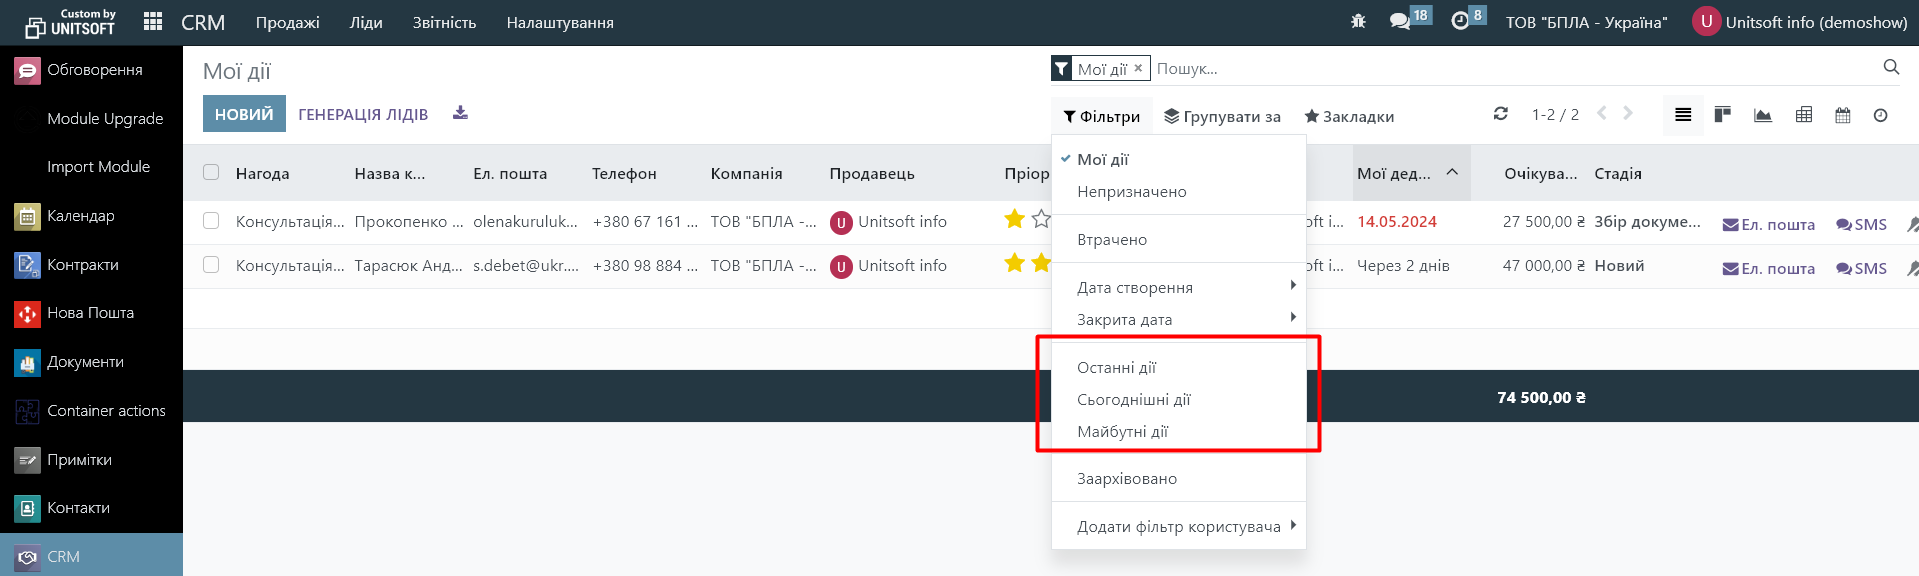
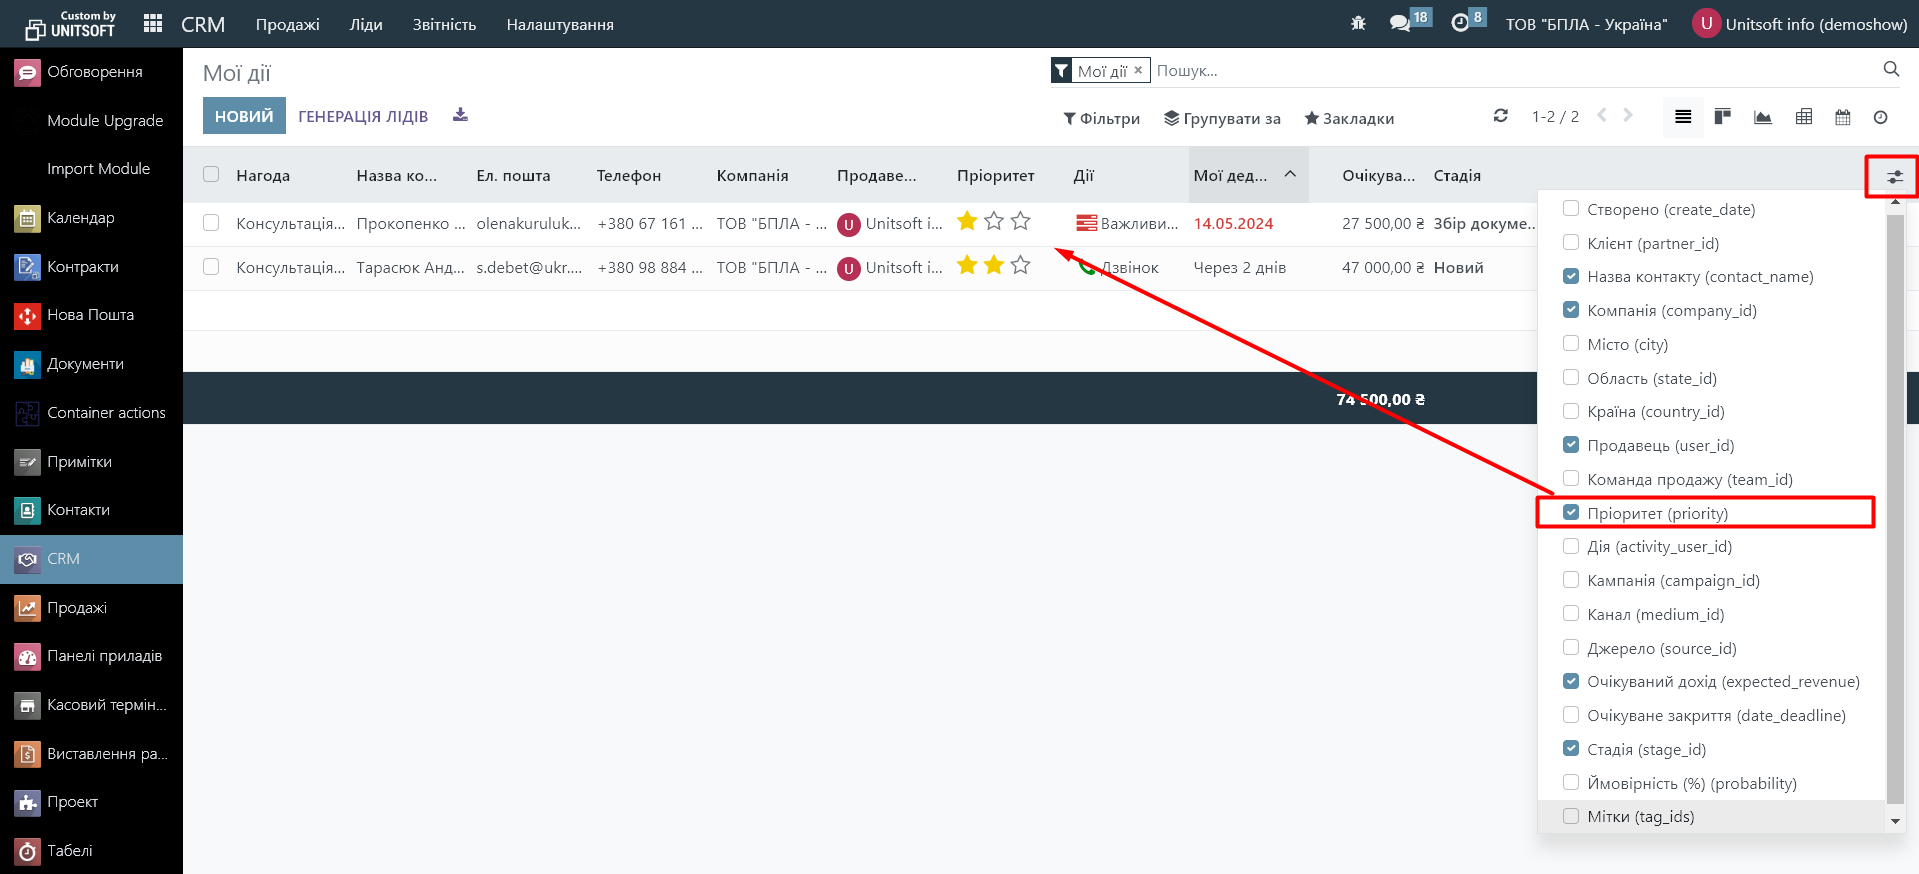
If necessary, actions can be filtered or grouped by type, deadline, or priority.
Also, if necessary, you can customize the appearance of the action list (add new columns) via the edit button:
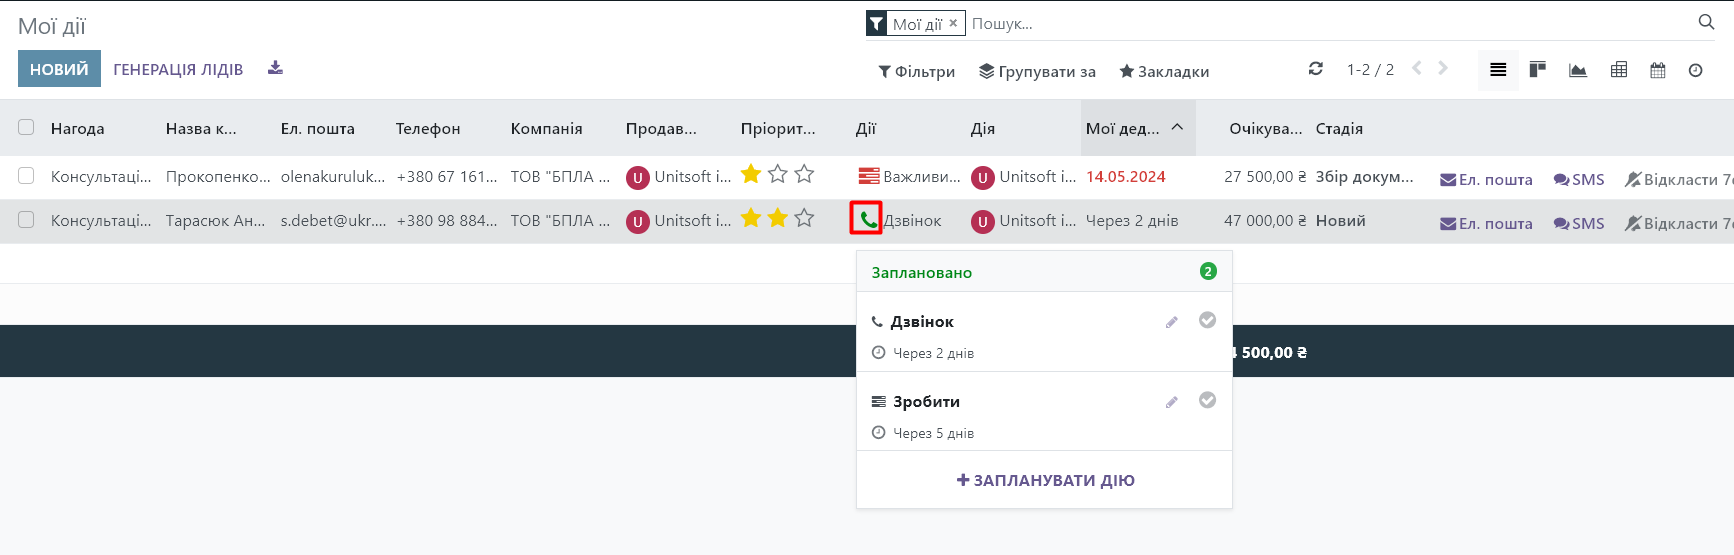
Please note that if you have multiple actions scheduled for one occasion, only one action will be displayed in the “My Actions” list – the one closest in deadline. After it is completed, the next action in deadline will appear in the list.
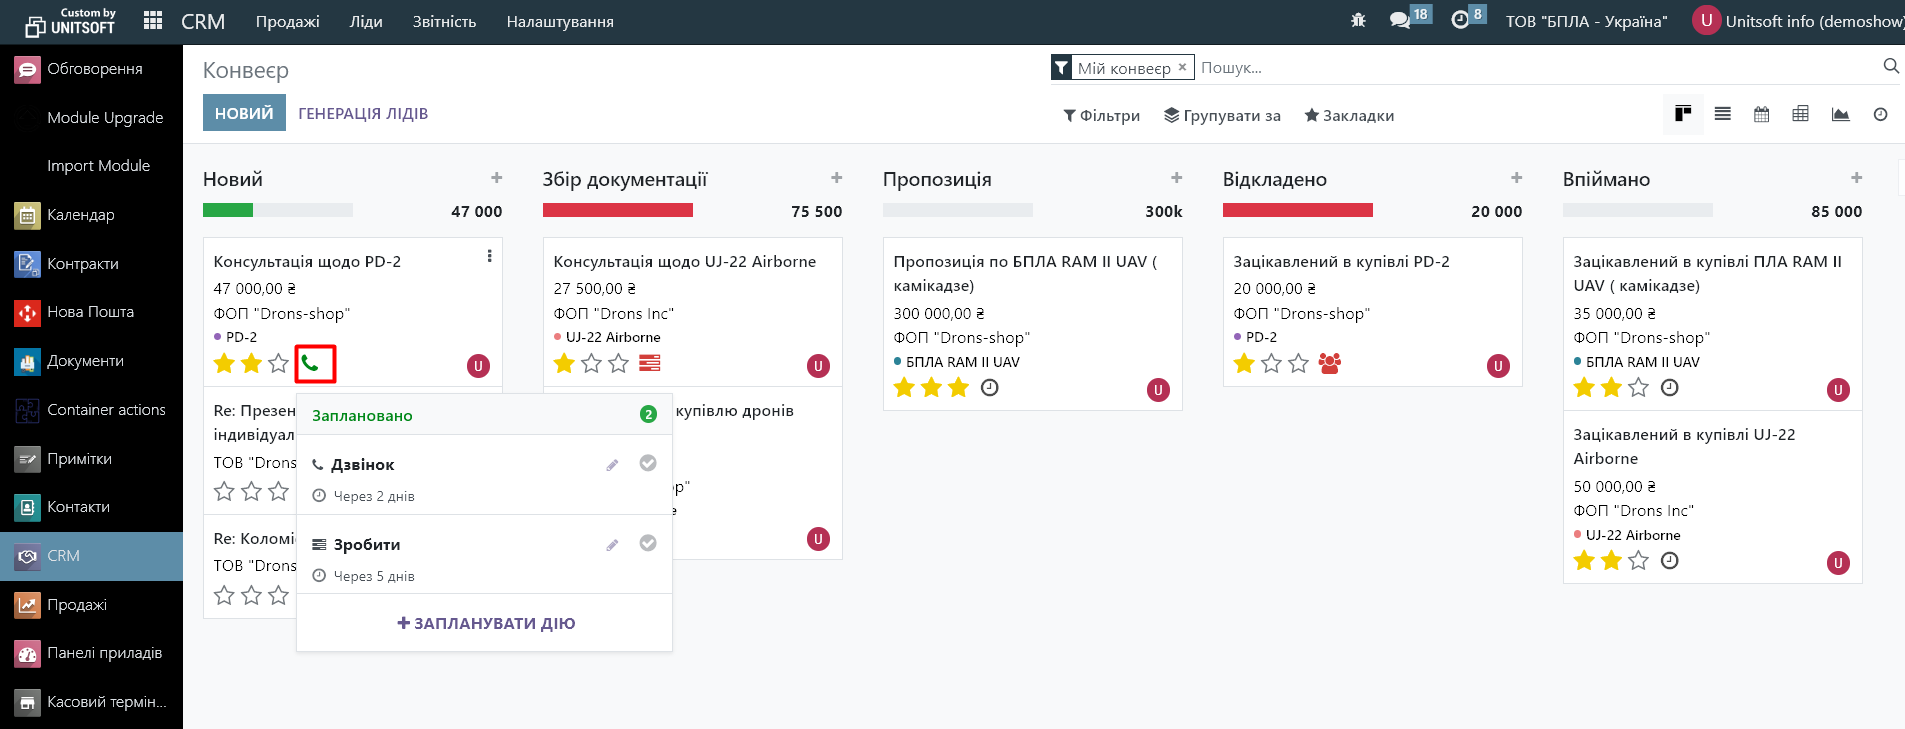
In this list, you can immediately mark the fact of performing an action. To do this, click on the action icon. An additional window will pop up with a list of planned actions for this occasion:
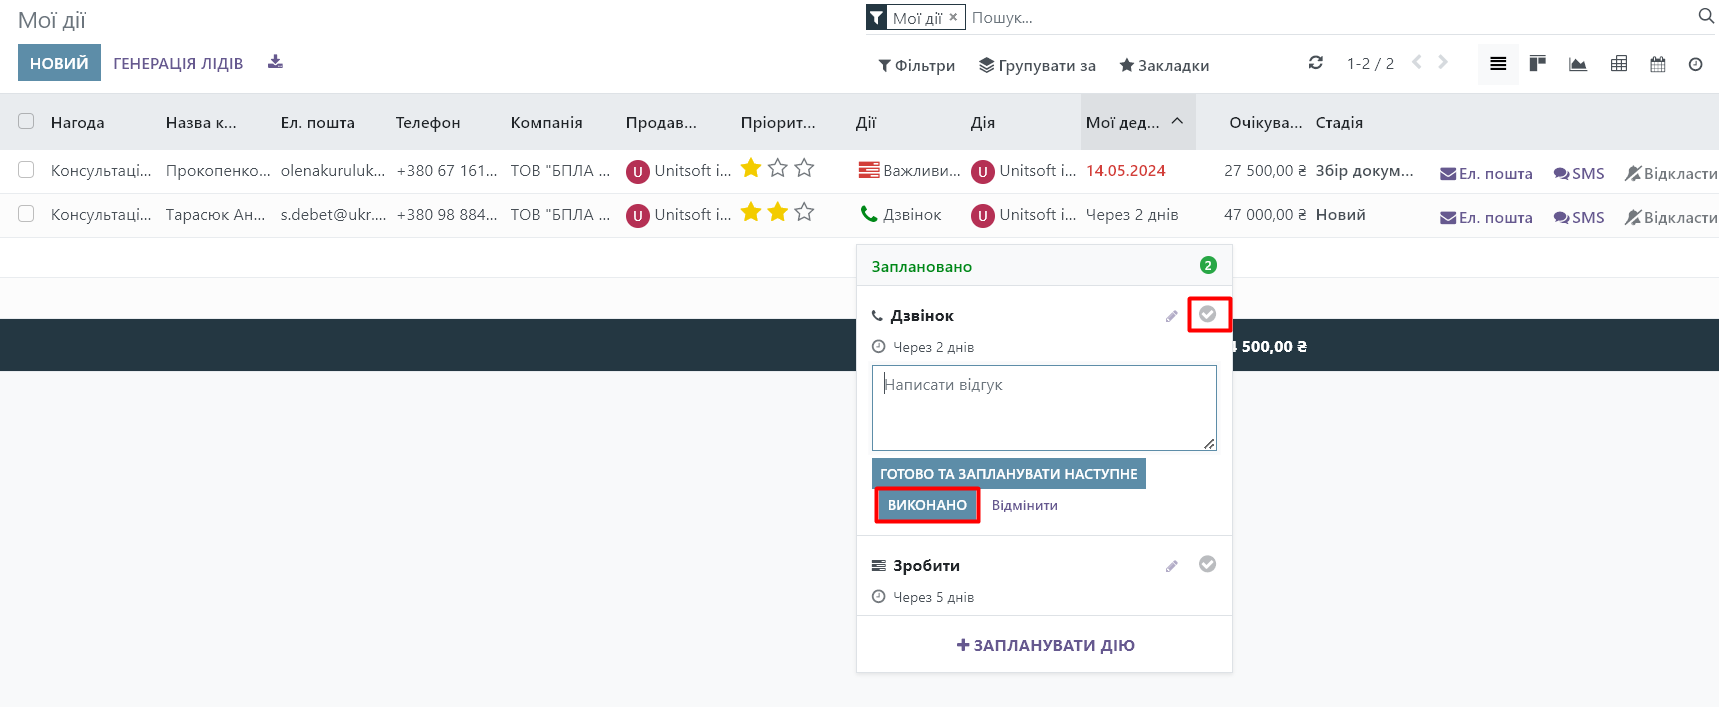
Next, click on the "Done" icon to display the fact that the action has been completed or on the pencil to edit it:
To analyze the planned actions of all managers, the manager can select the "My actions" filter:
In the "Seller" column, he will be able to see who is indicated by the manager in the opportunity card for which the action is planned. In the "Action" column - who is the direct executor of the planned action:
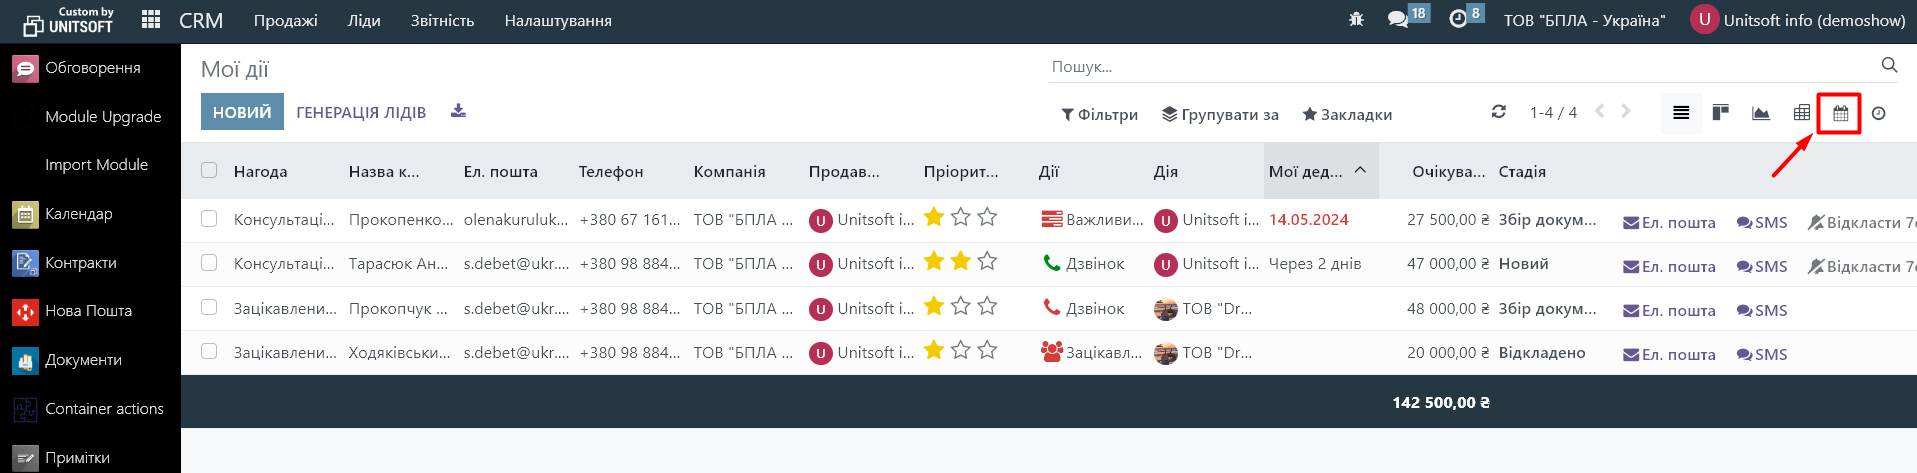
If necessary, the planned actions can be viewed in a calendar format, to do this, switch the view type in the right corner:
3. CRM pipeline:
4. Occasion card:
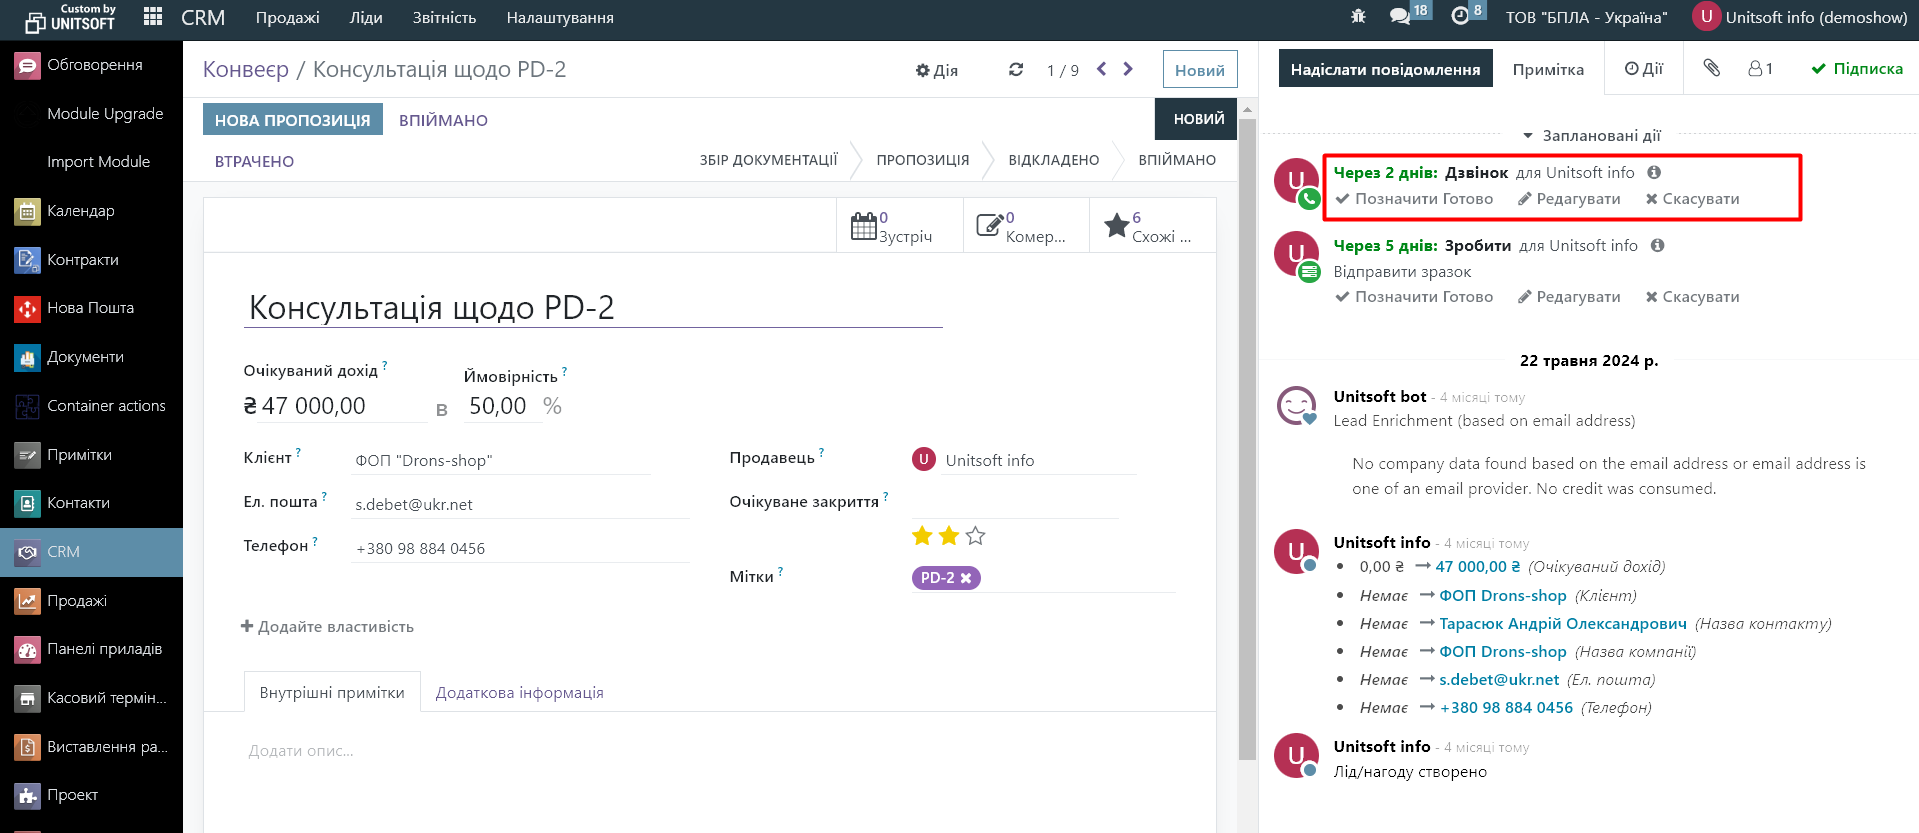
In the opportunity card, to mark the action as completed, click the "Mark Done" button.
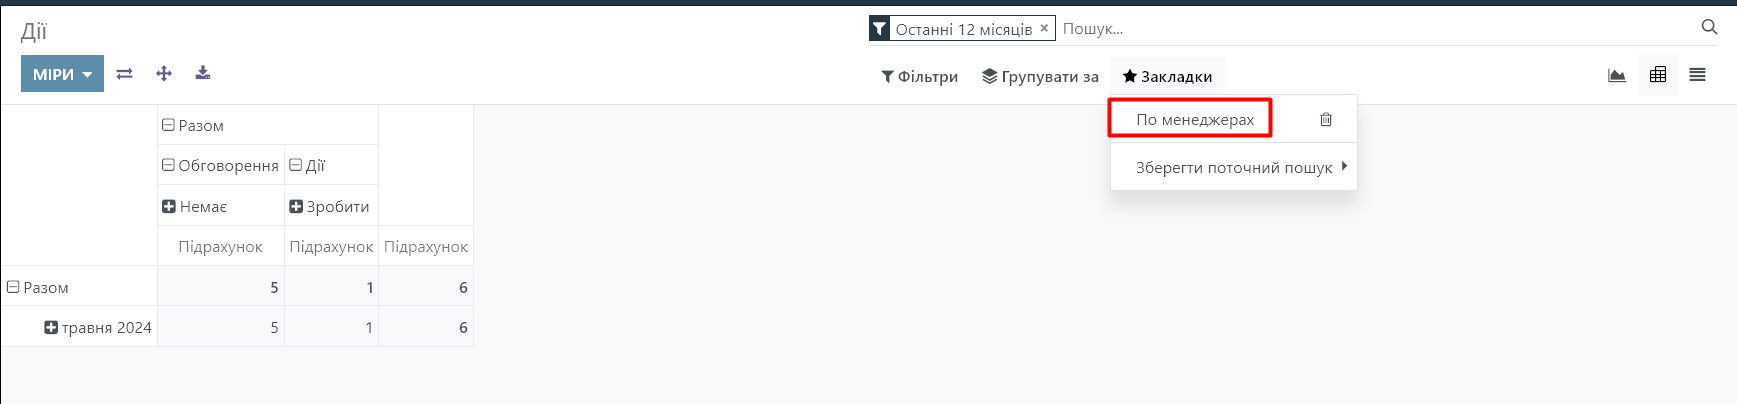
View reports on completed actions in CRM
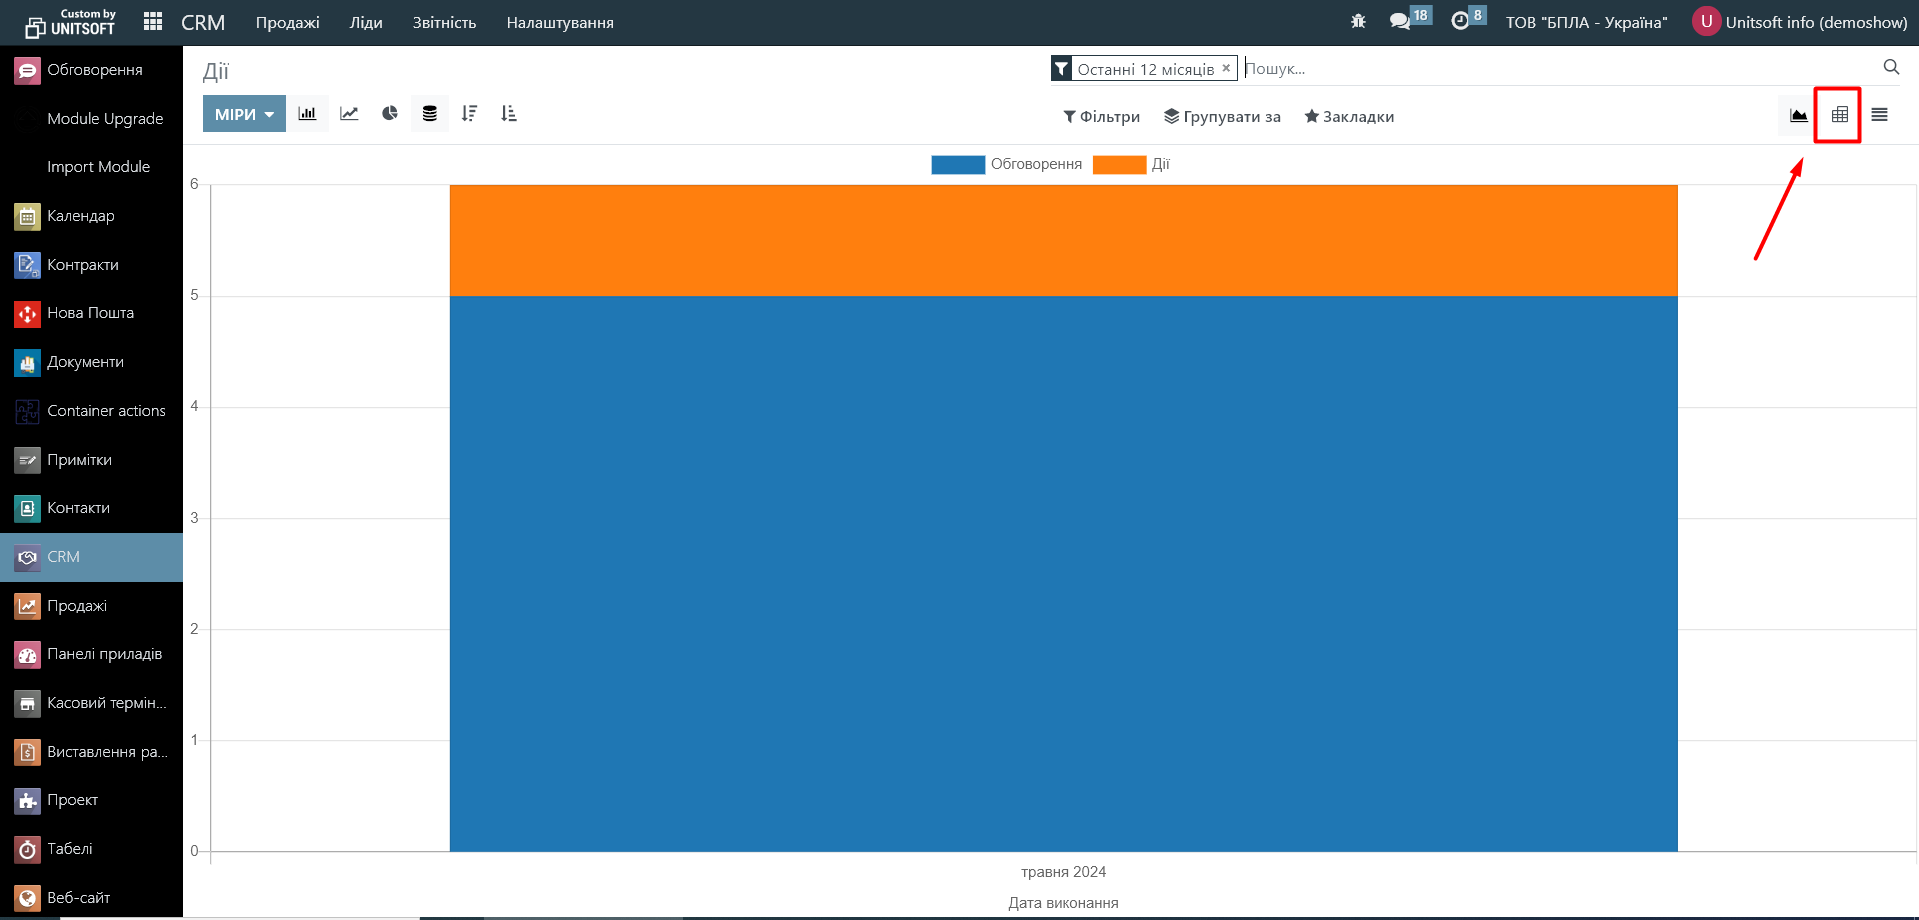
To view reports on completed actions, go to the "Reporting" - "Actions" menu:

Next, for convenience, you can switch to table mode:
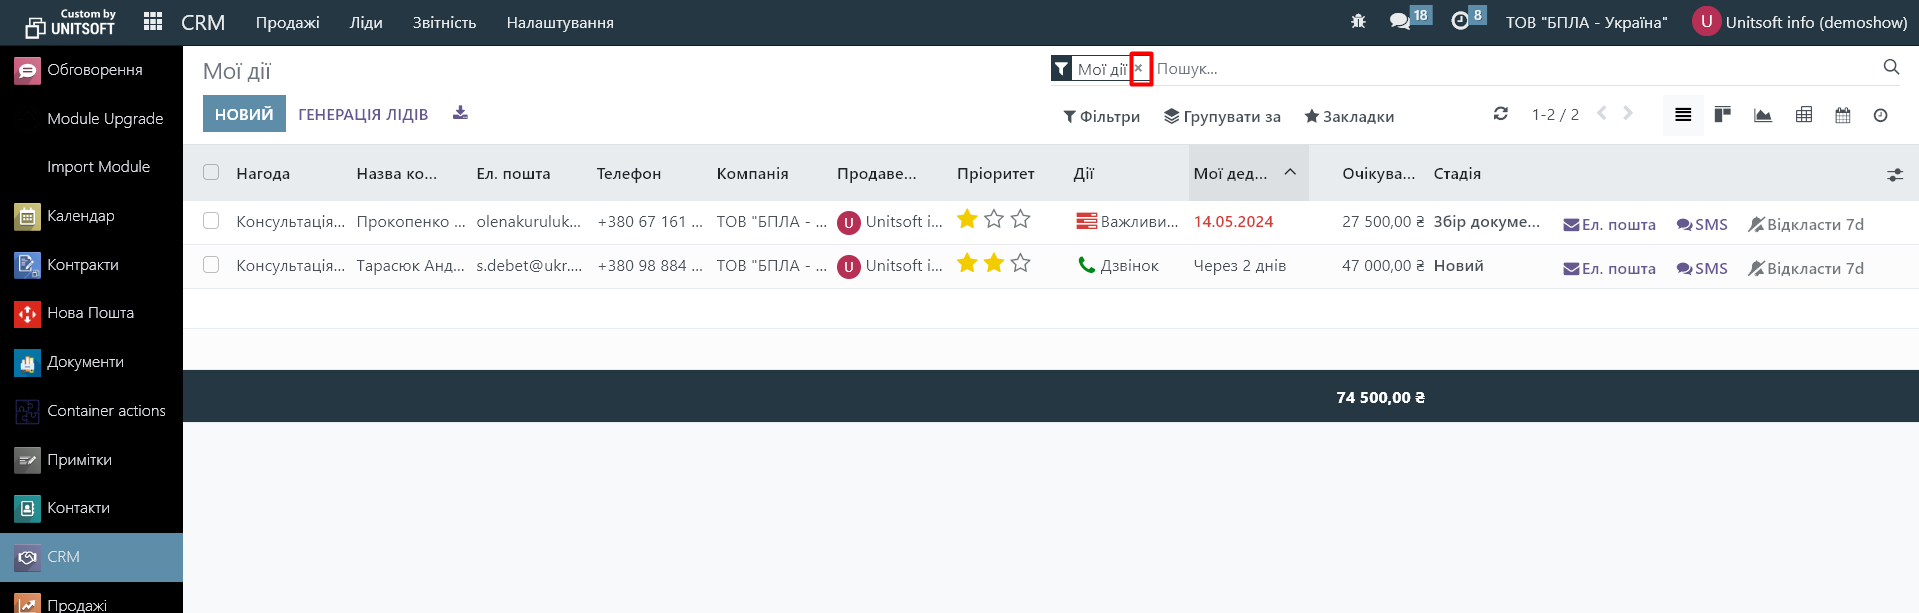
Remove active filters:
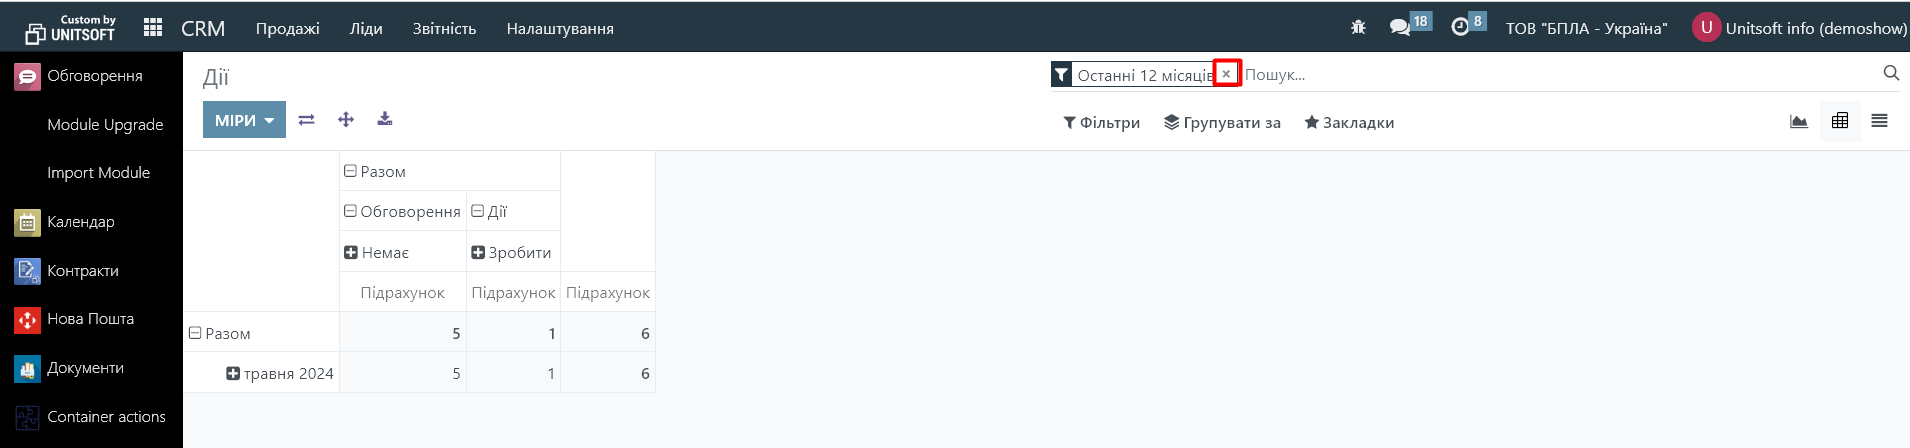
In the report, you will see information about the action taken (type "Actions") and the number of messages or emails sent by the manager via Odoo CRM (type "Discussions"):
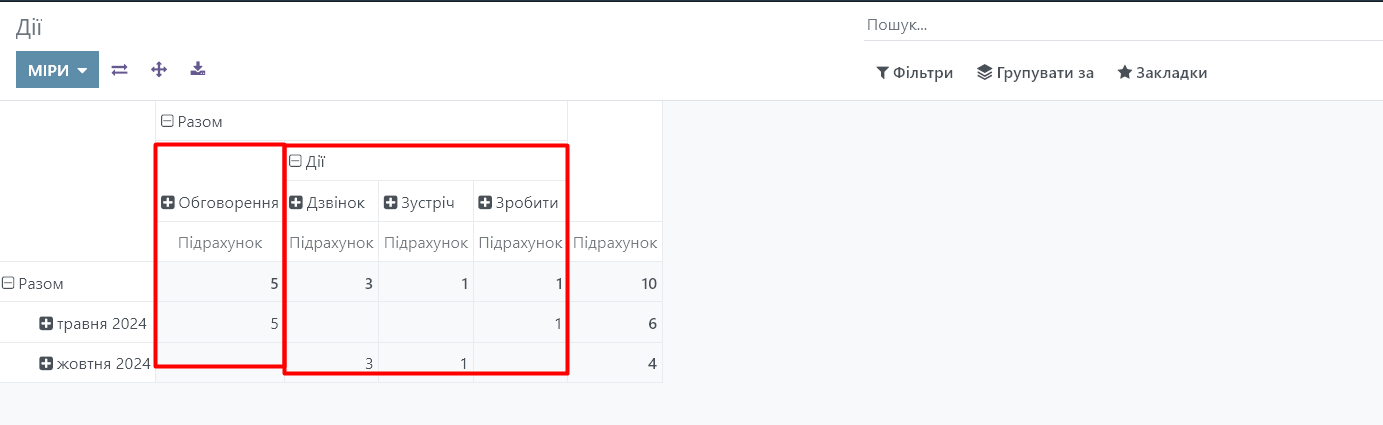
If you want to see only actions in the report, apply the filter:
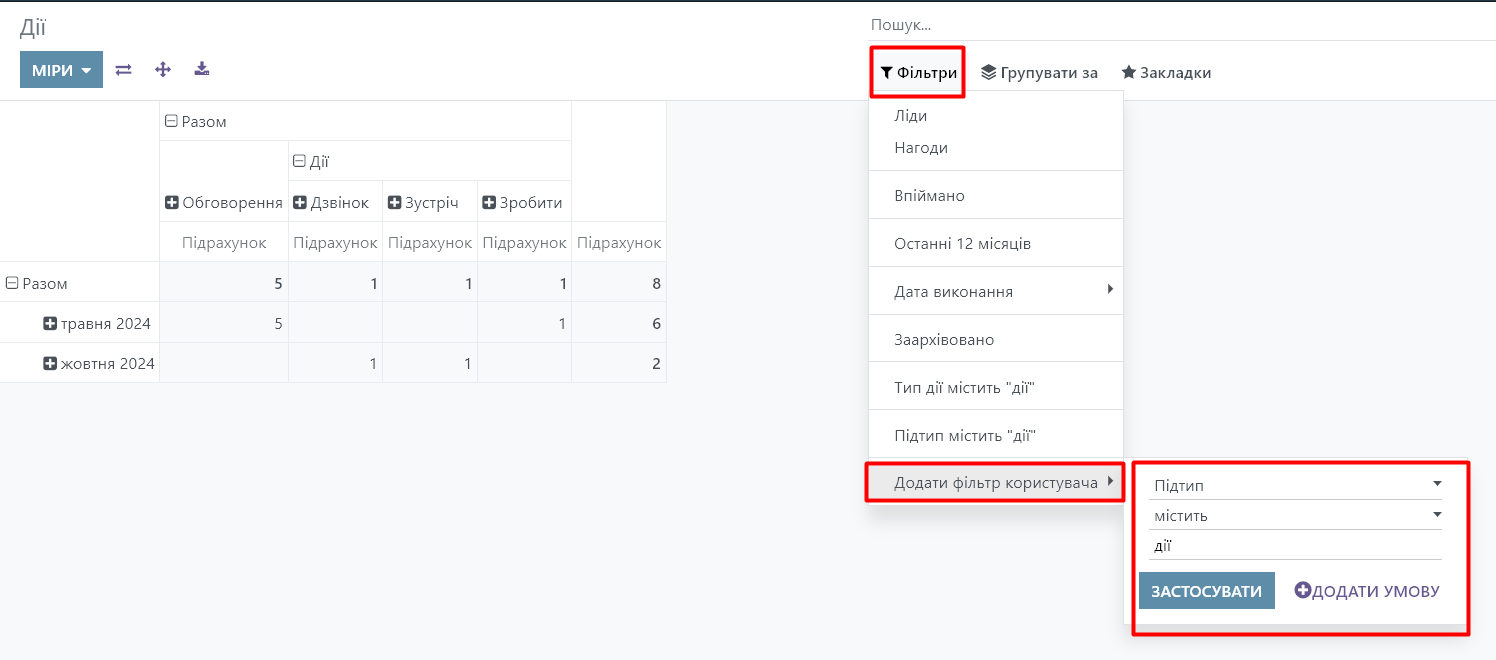
This report is customizable using groupings and filters.
For example, you don't want to see grouping by month, but only summarized information on actions taken by managers over the last quarter.
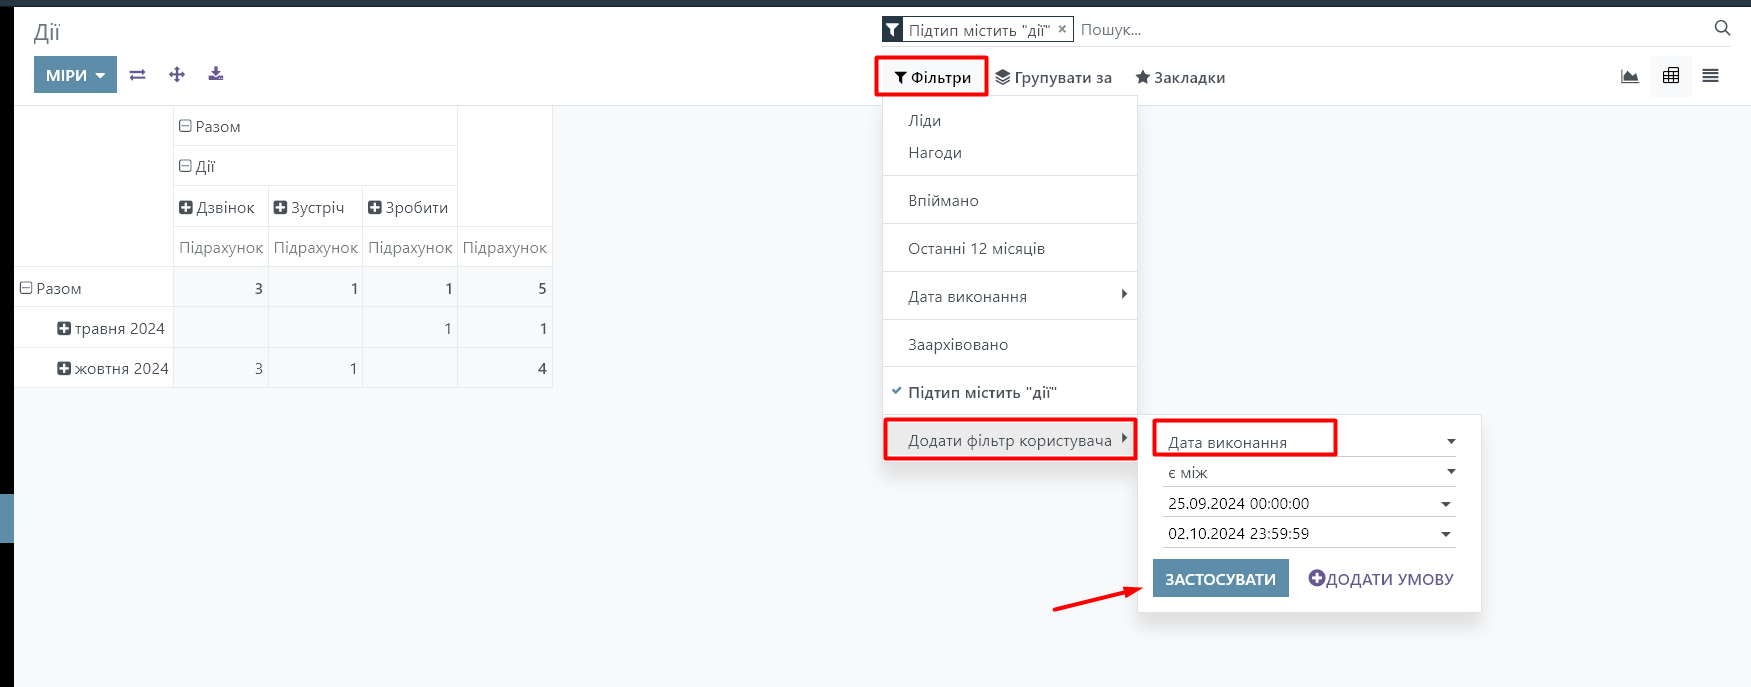
First, add filters. In our case, by execution date:
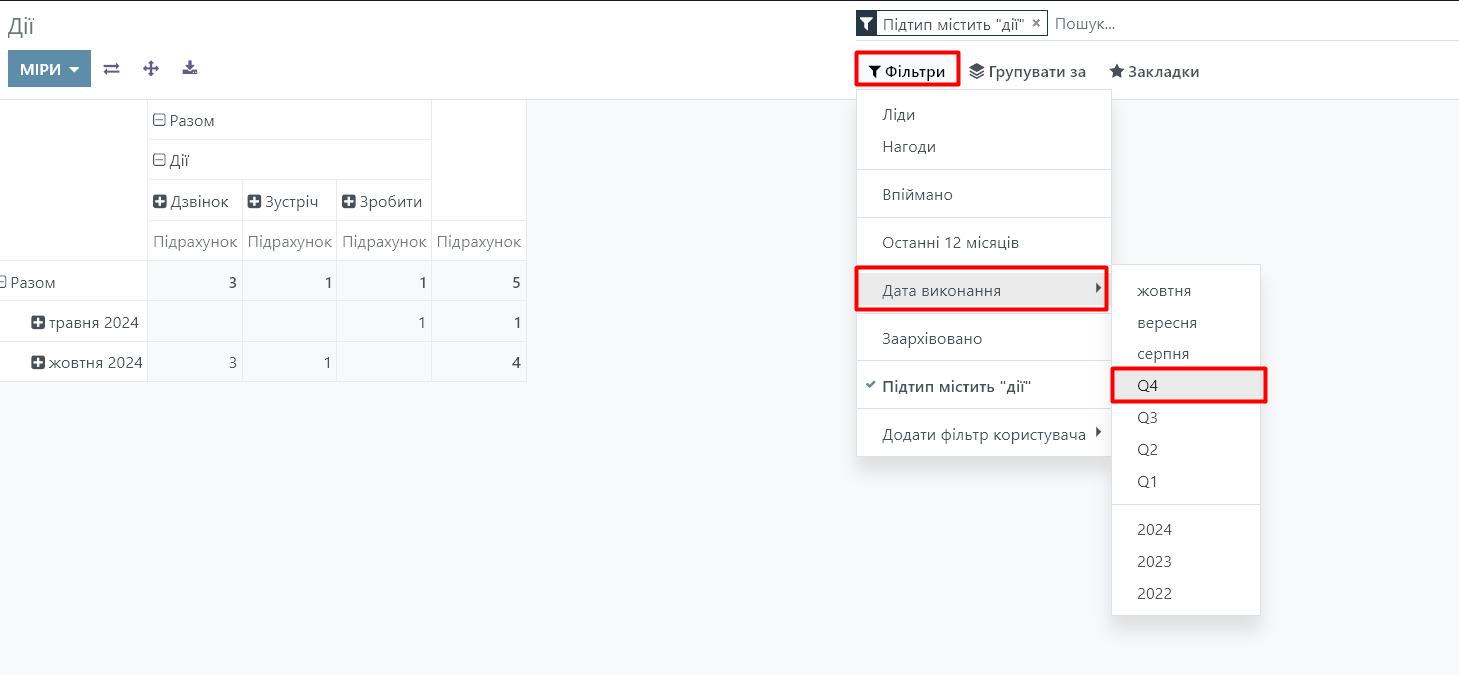
If necessary, you can specify any arbitrary date range in the filter:
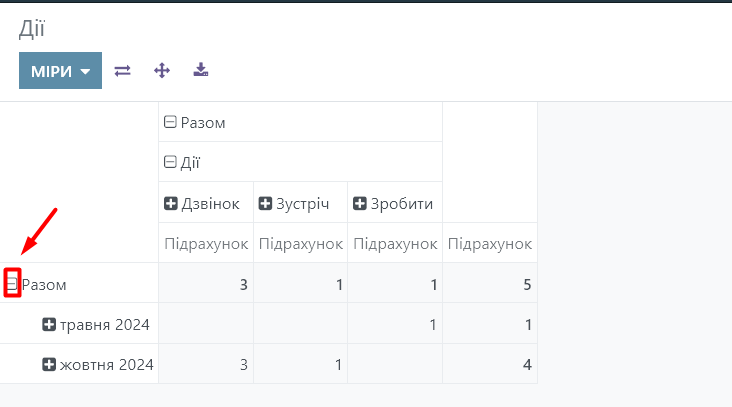
Then collapse the grouping by month by clicking on the "minus" icon next to "Total":
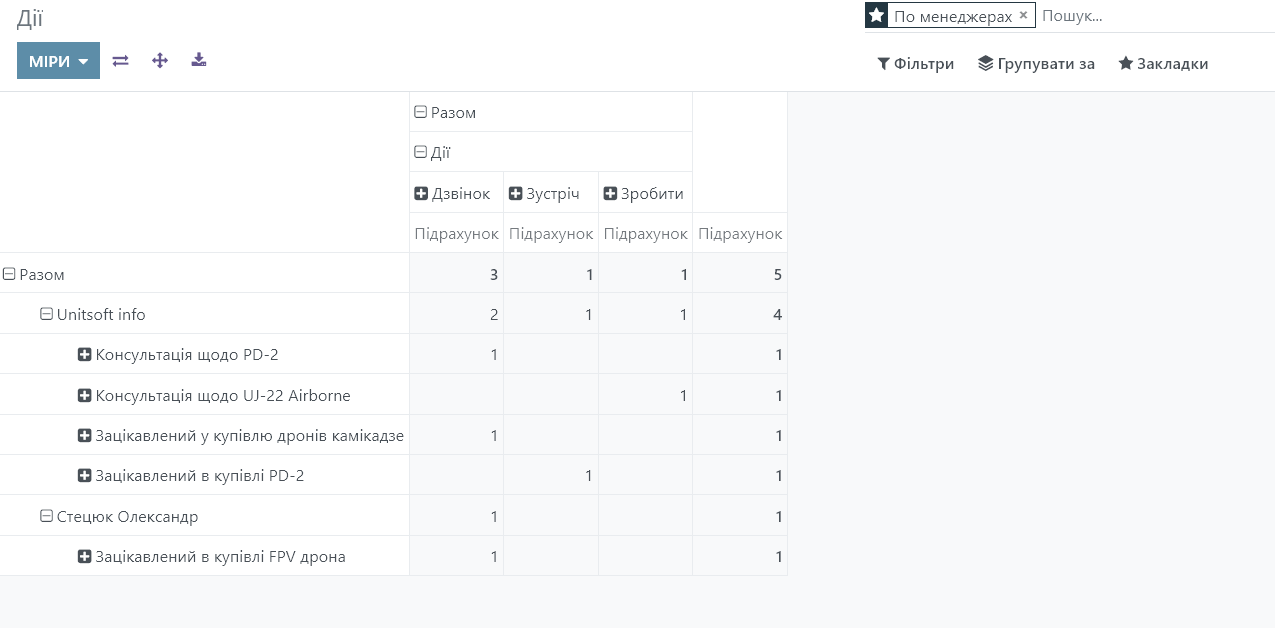
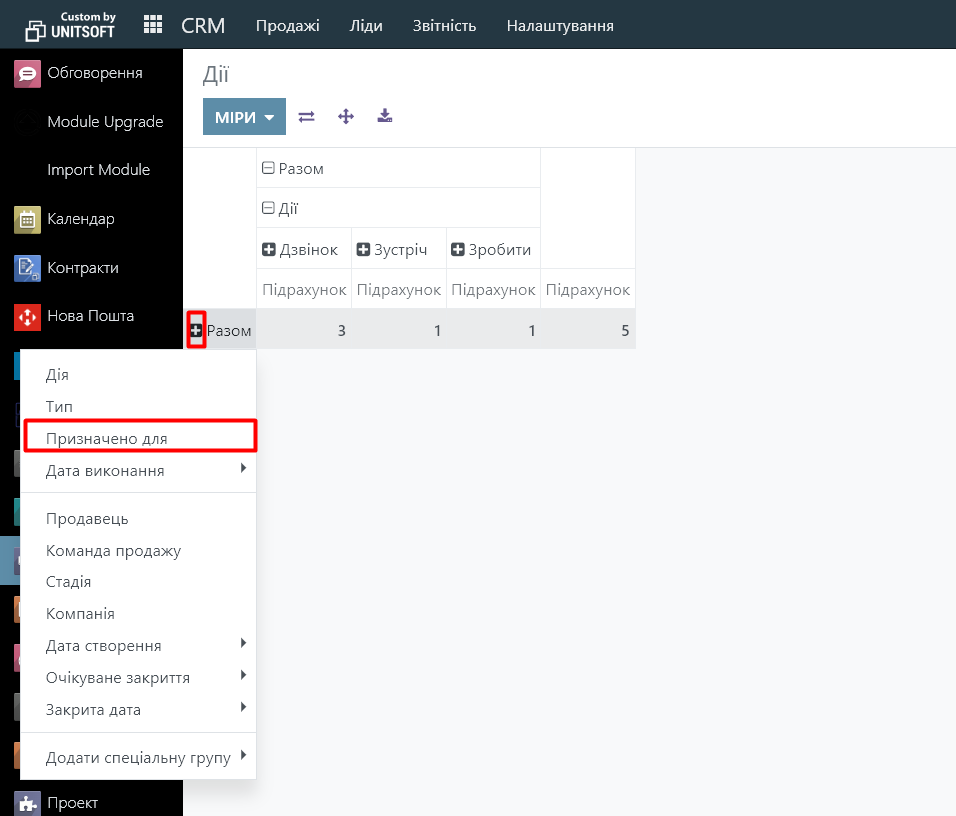
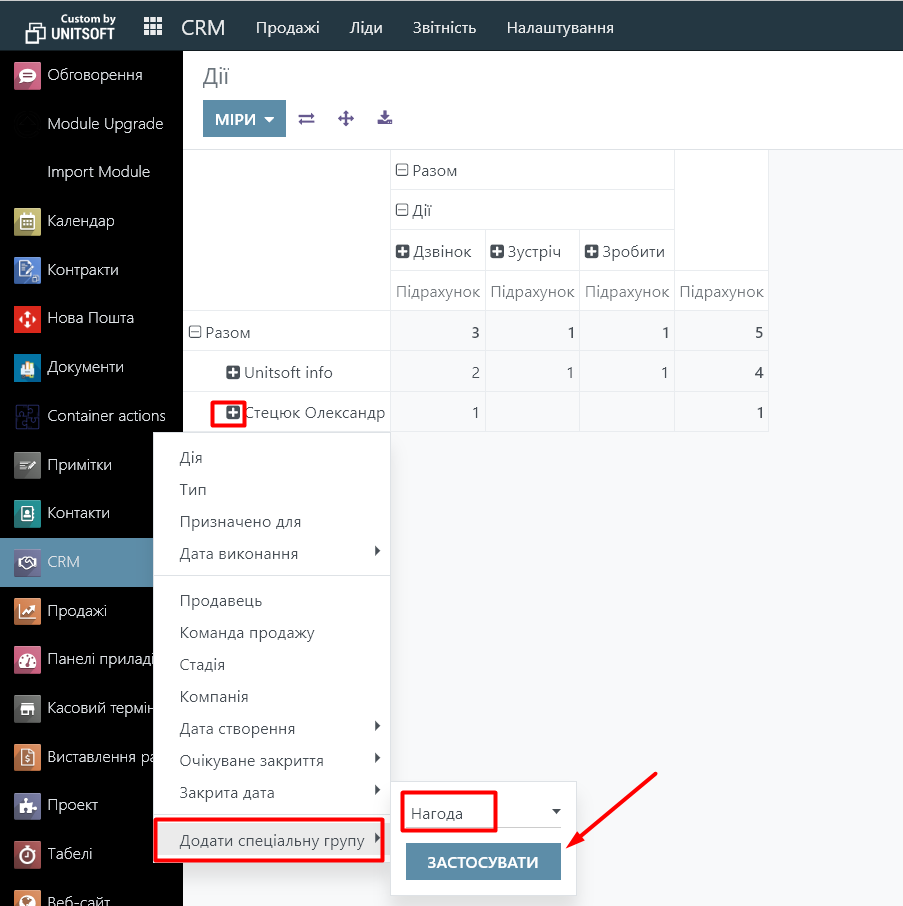
Add grouping by managers who completed the task. To do this, click the plus icon next to "Total" and click "Designated for":
We can also add grouping by occasions, in the context of which tasks were performed. To do this, click on the plus sign next to the manager - "Add special group" - "Occasion":
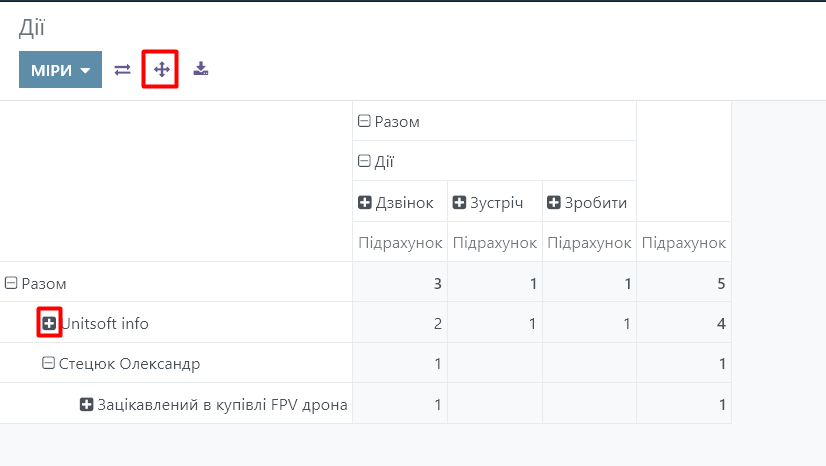
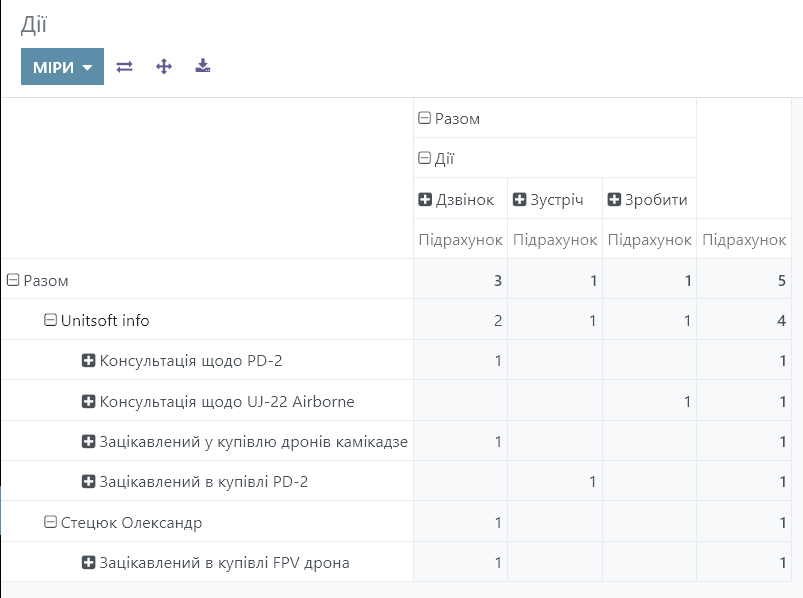
You will see a list of opportunities under the selected manager. If necessary, click on the plus sign next to another manager to see his or her list of opportunities. Or click on the "expand all" icon to display information for all managers:
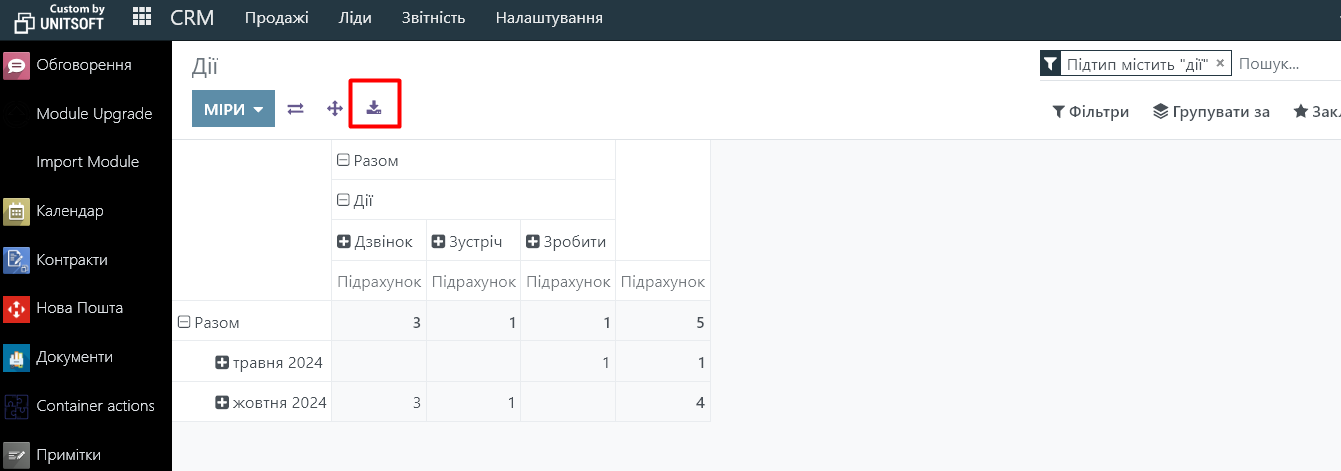
If necessary, the generated report can be downloaded in Excel format:
You can also customize a standard report with certain groupings that would be most convenient for you to work with, and save its settings via the "Bookmarks" button:
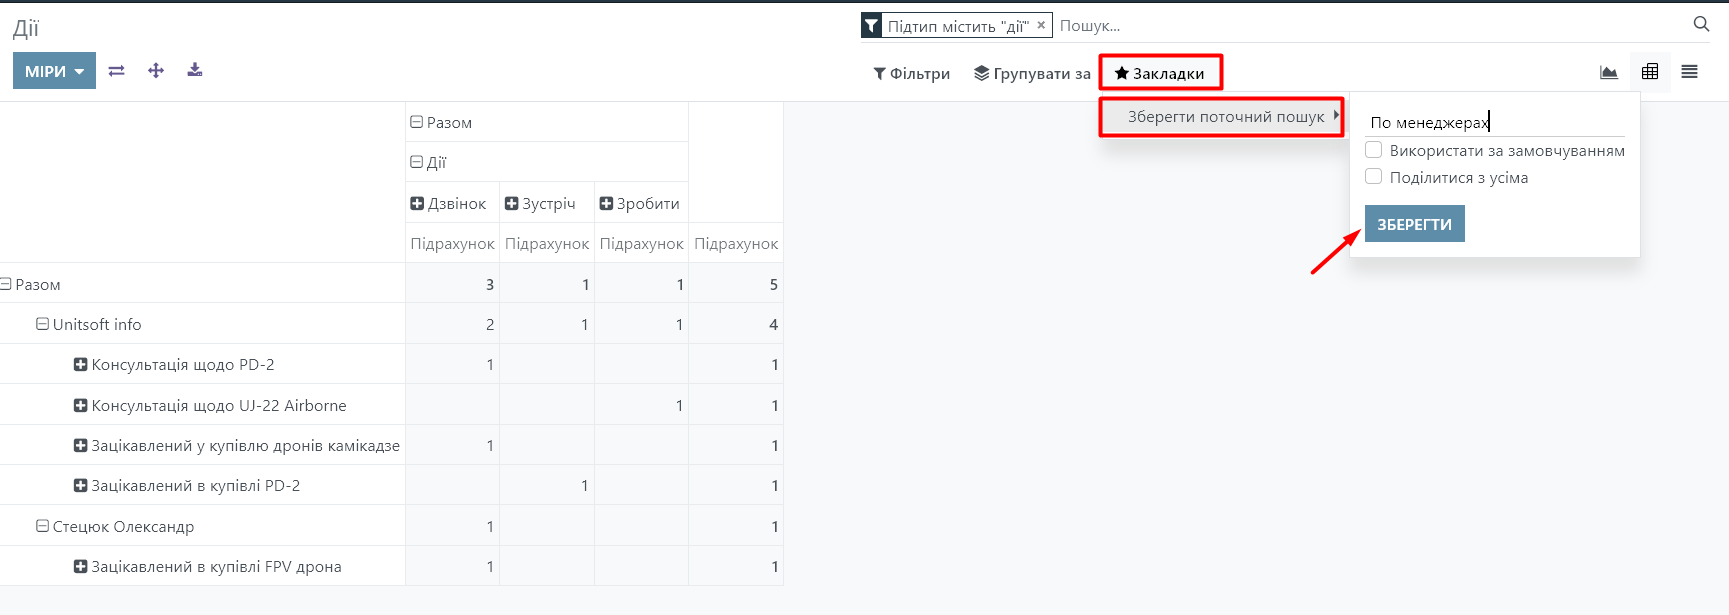
Specify a name for these report settings. Check "Share with everyone" if you want other users to see it as well. Or select "Use by default" if you want these settings to be enabled automatically when you open the report.
After saving, the customized report option will be available in the bookmarks. Click to select it: