Read how to configure the Checkbox module here.
Now you need to make separate settings for the point of sale to use the Checkbox functionality there.
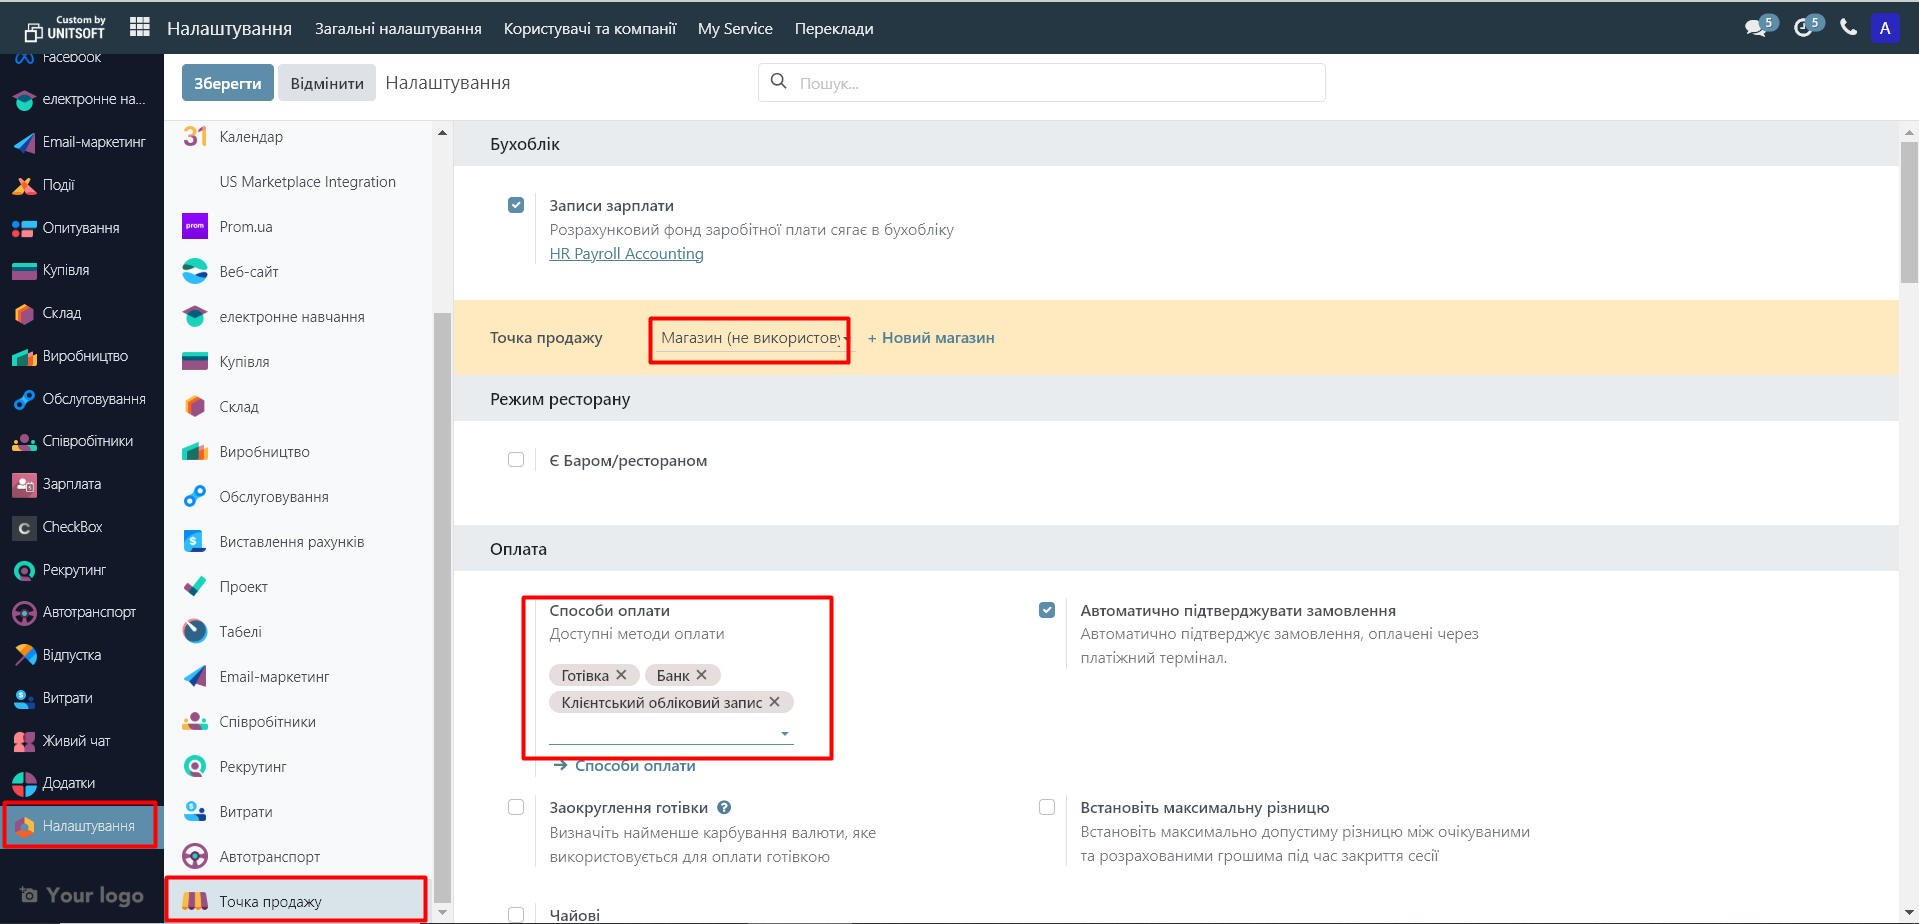
Step 1. Adding payment methods and general settings
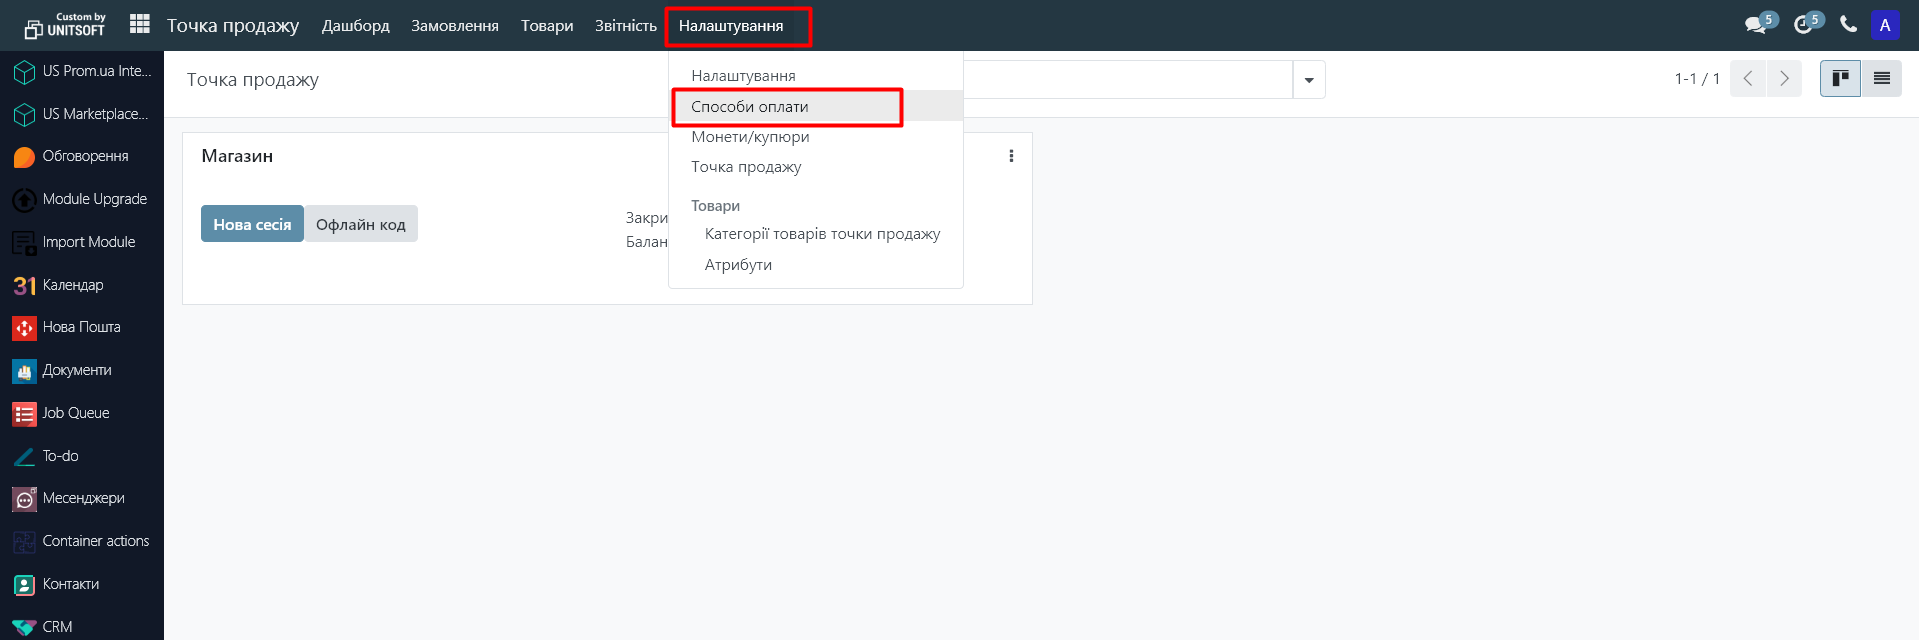
- Go to the main menu of the "Point of Sale" module - "Settings" - "Payment methods".
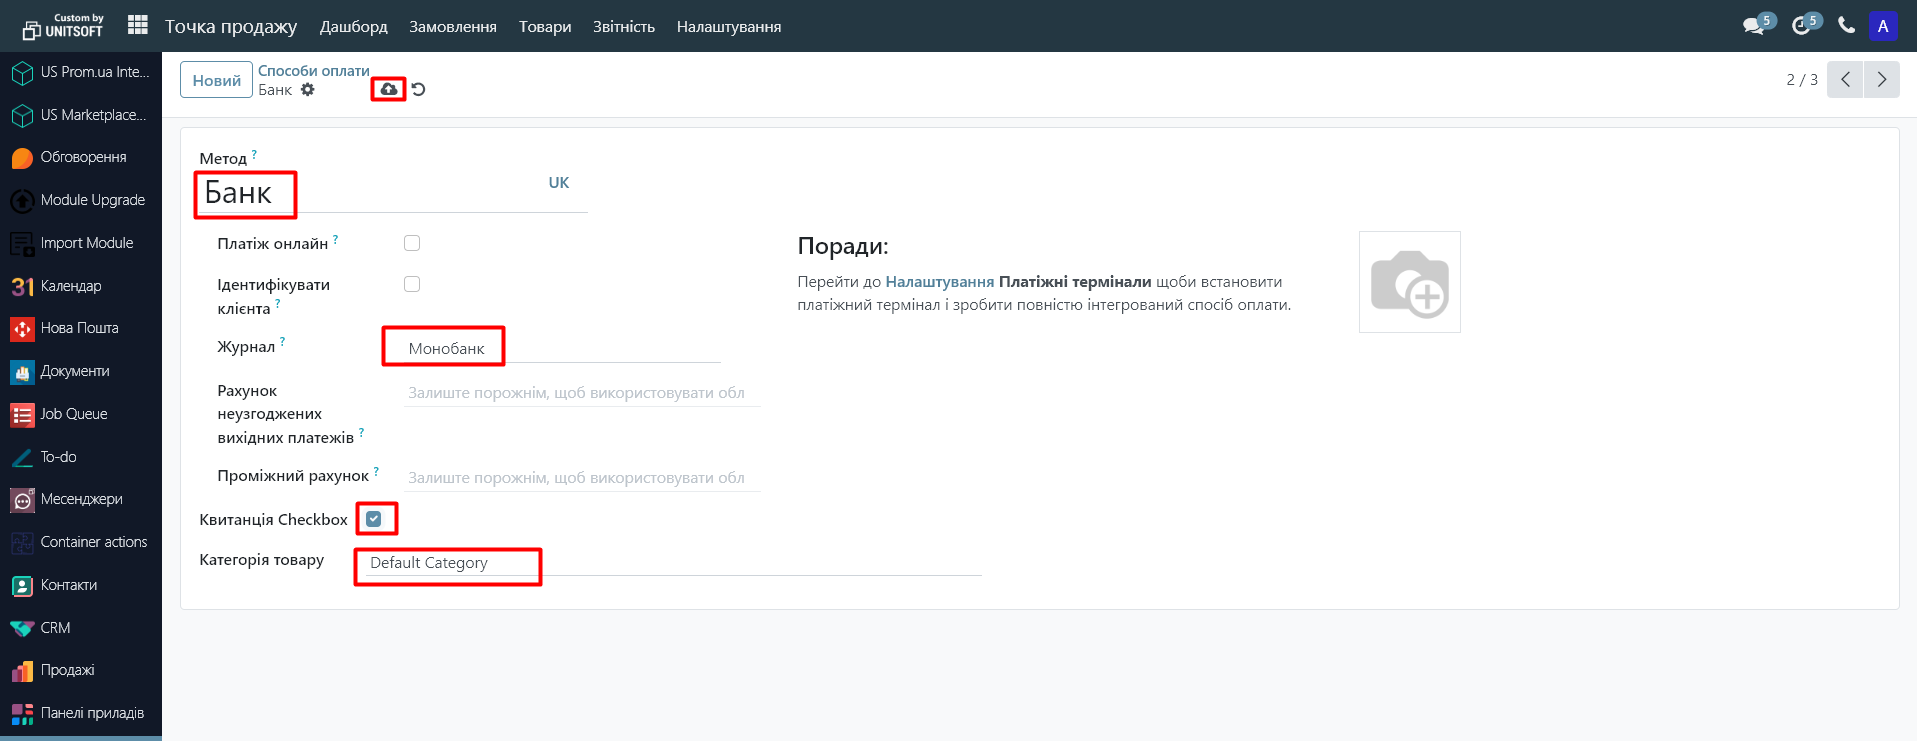
2. Click the "New" button.

In the "Method" field, enter the name of the payment method (for example, "Bank").
In the Journal field, select the journal (bank account or cash register) created earlier in the Invoicing module.
Enable the "Receipt Checkbox" option.
In the "Product Category" field, specify the appropriate product category.
- If there is no division into excise and non-excise goods, leave "Default Category".
Click "Save."
8. Go to the "Settings" module. In the "Point of Sale" section, specify the added payment methods:
9. Below, enable "Use QR code on tickets" and disable "Automatic receipt printing."
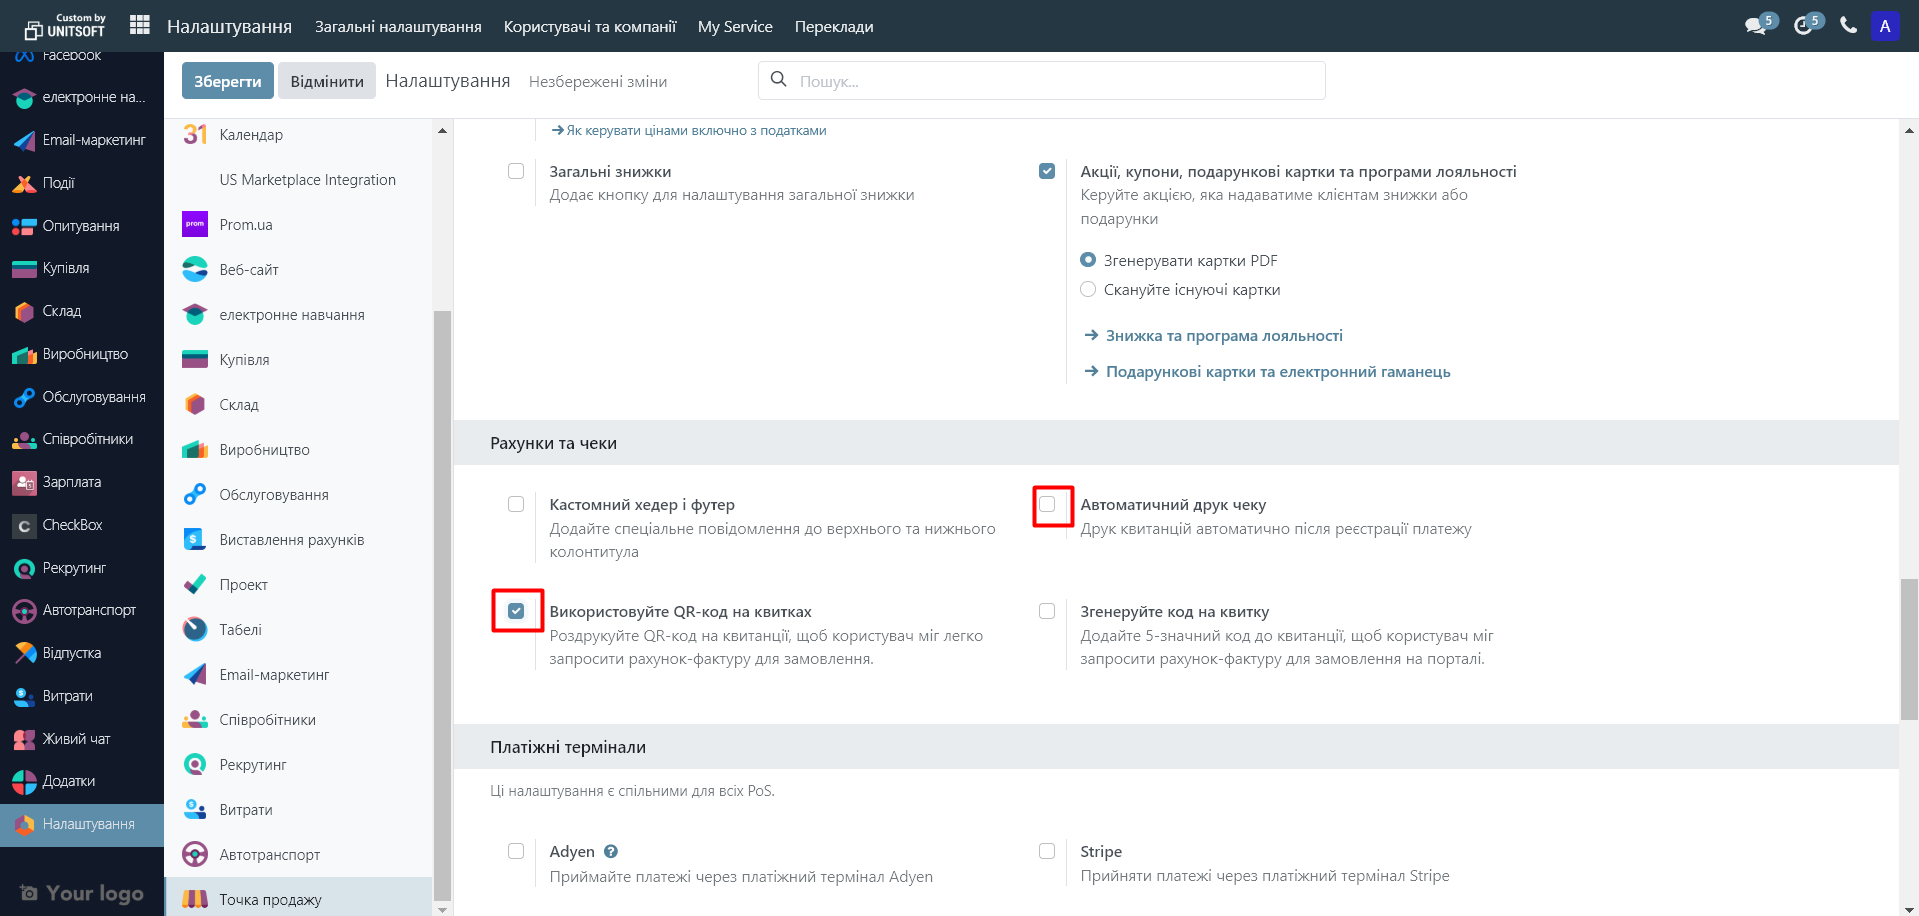
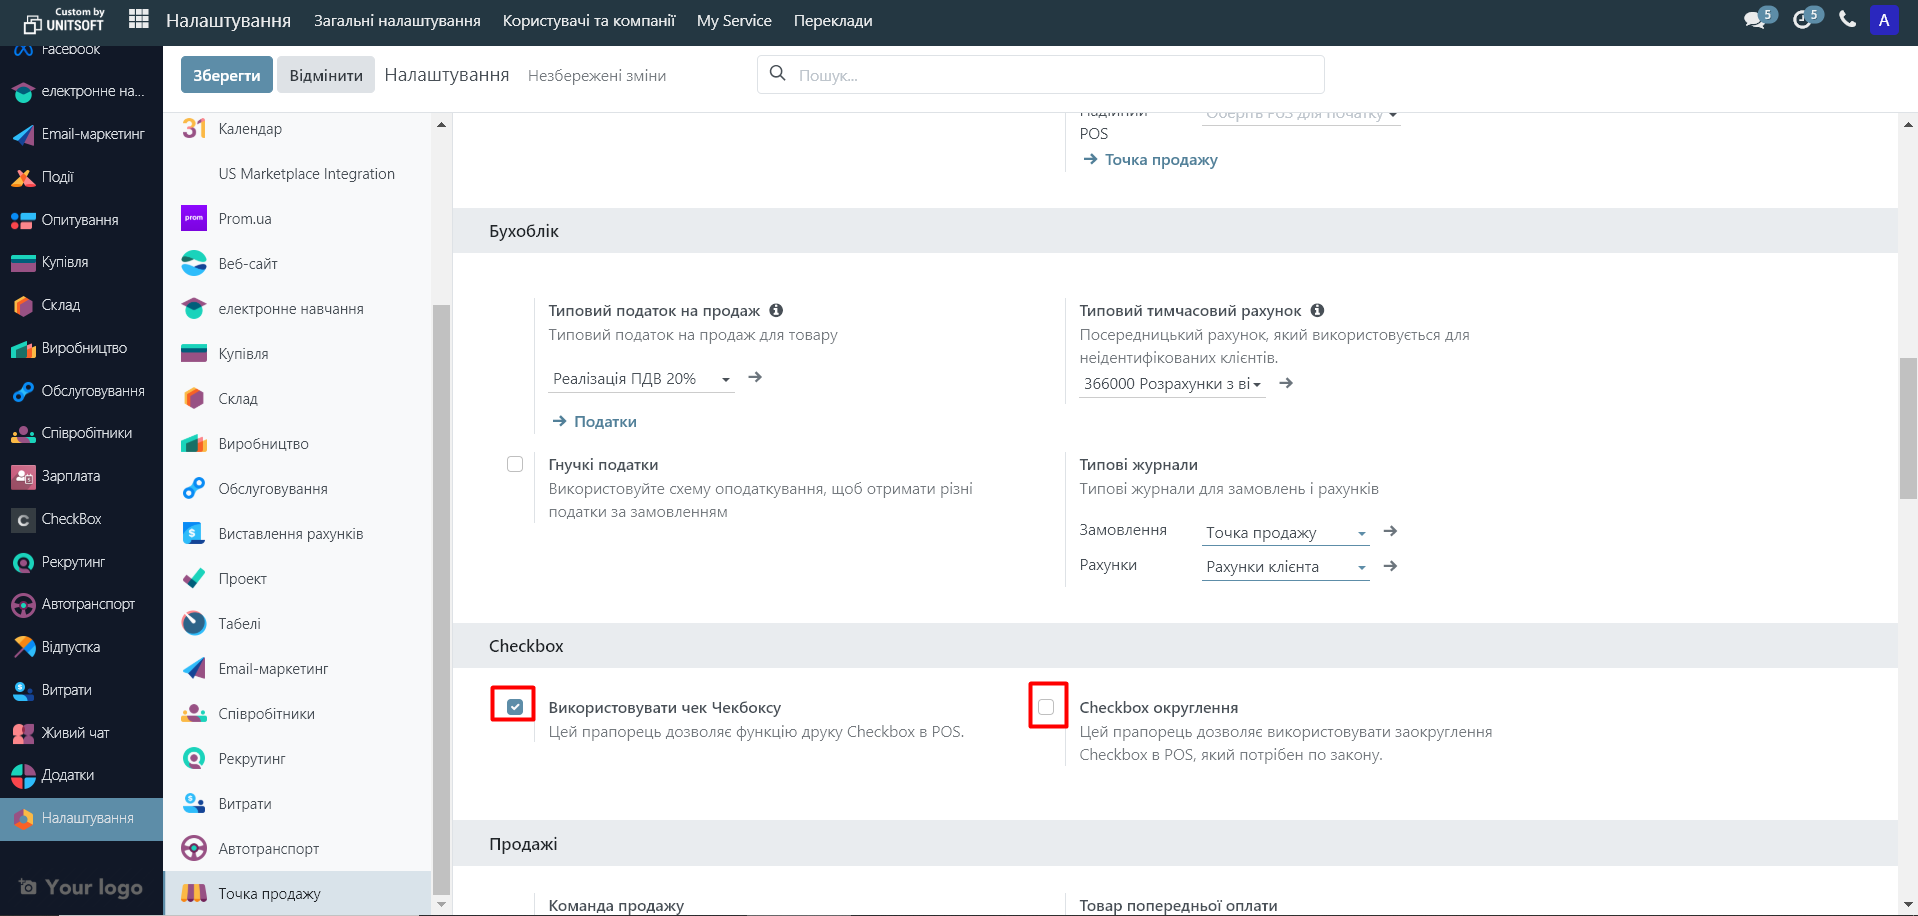
10. Make sure you have "Use Checkbox check" checked. Also add rounding if necessary:
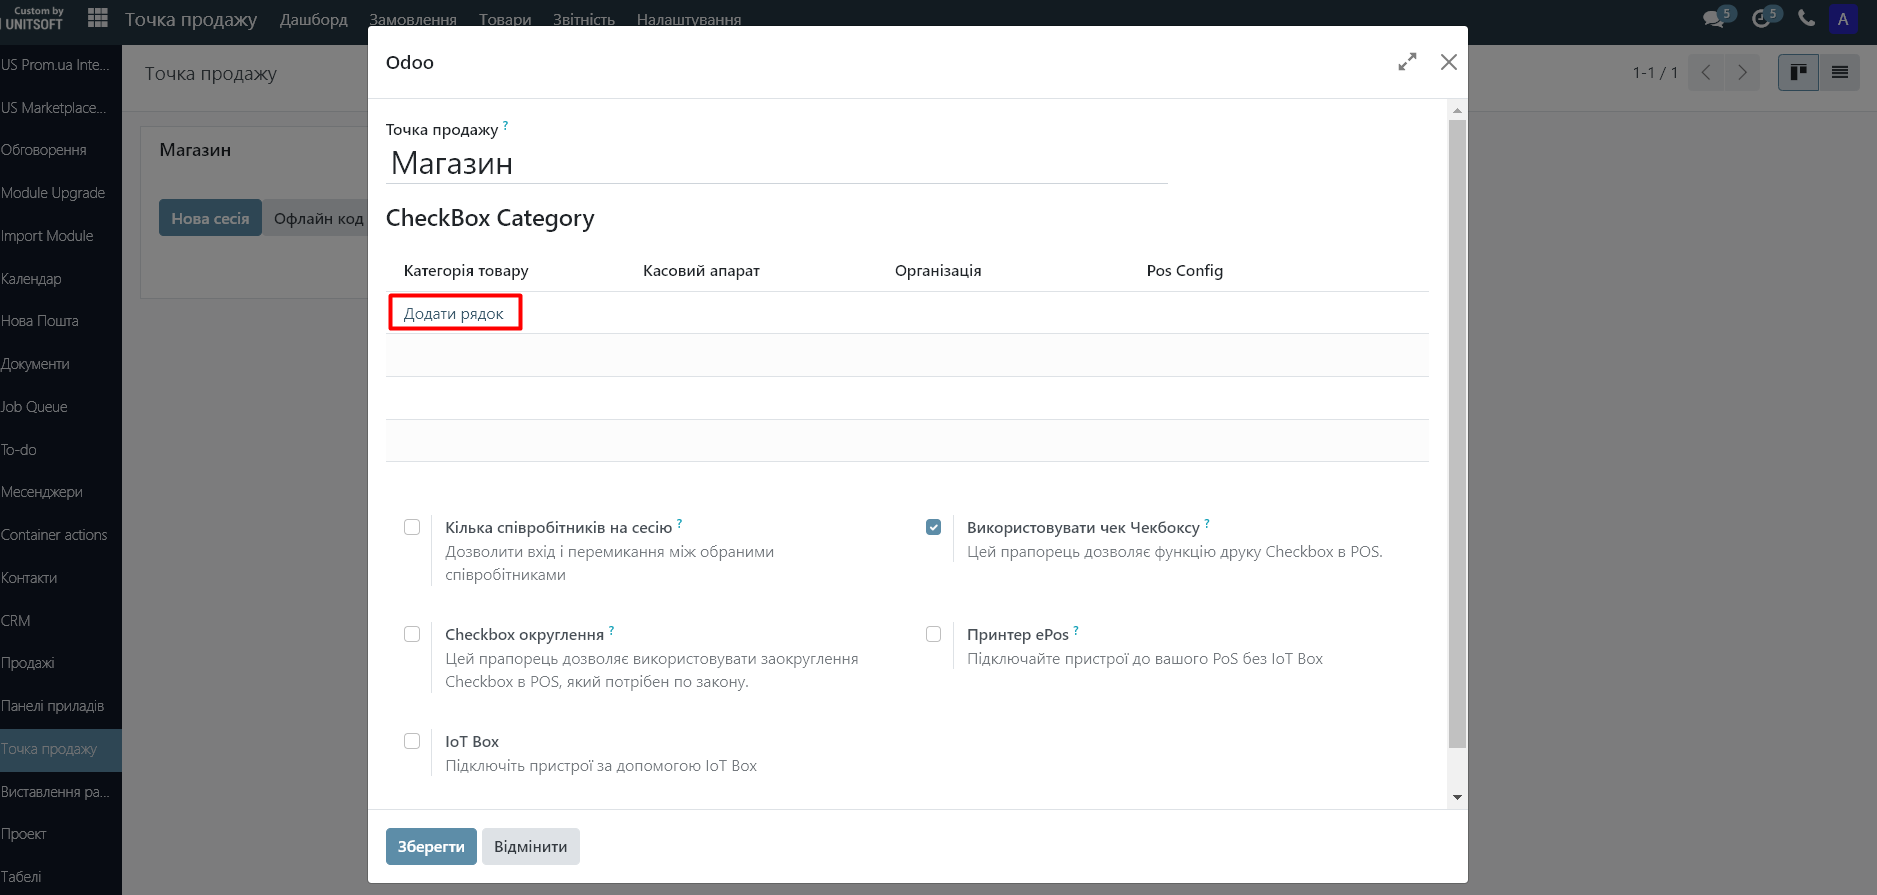
Step 2. Adding a "Checkbox" to the Point of Sale
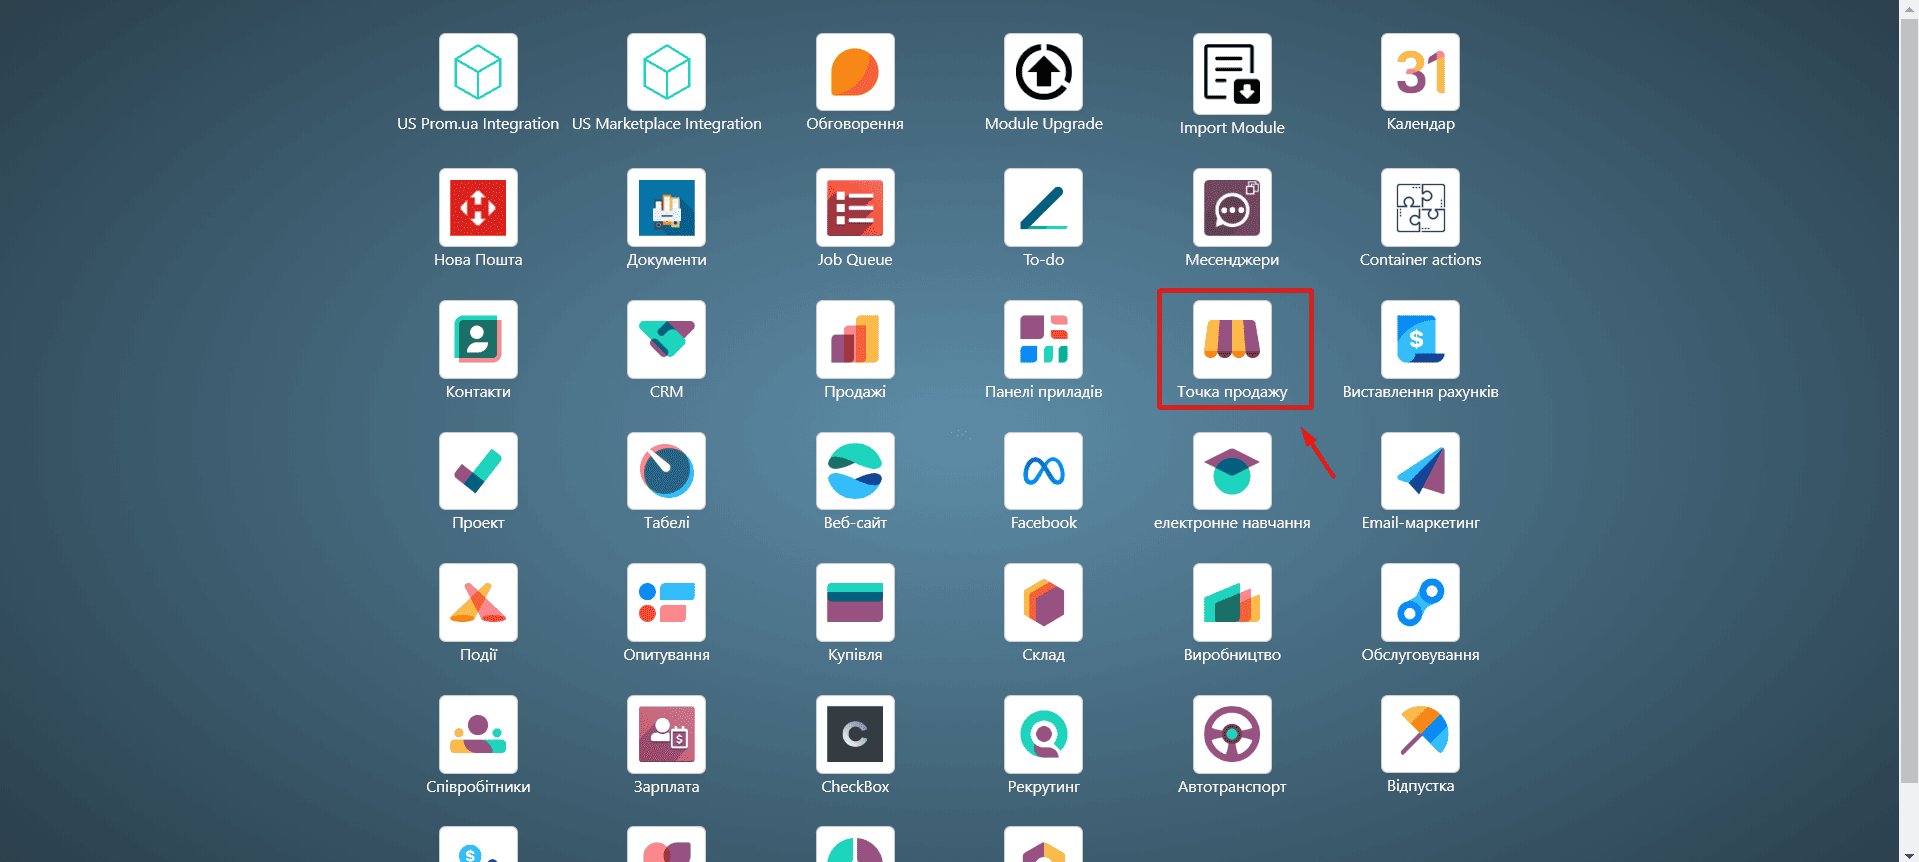
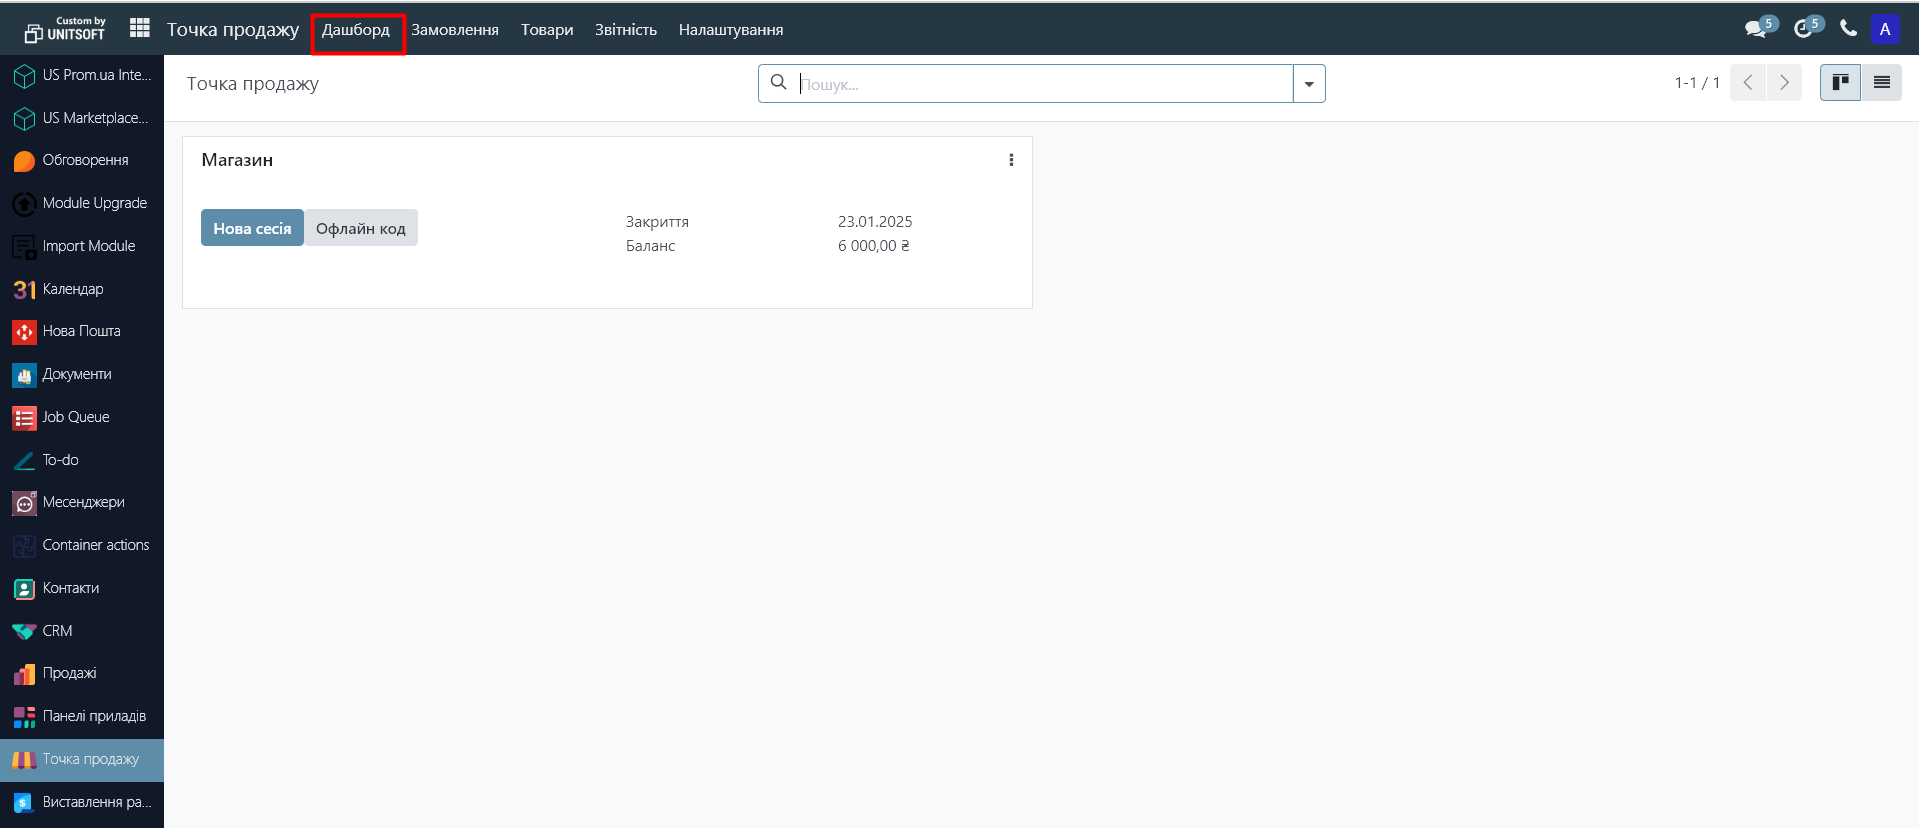
- Open the dashboard of the "Point of Sale" module.
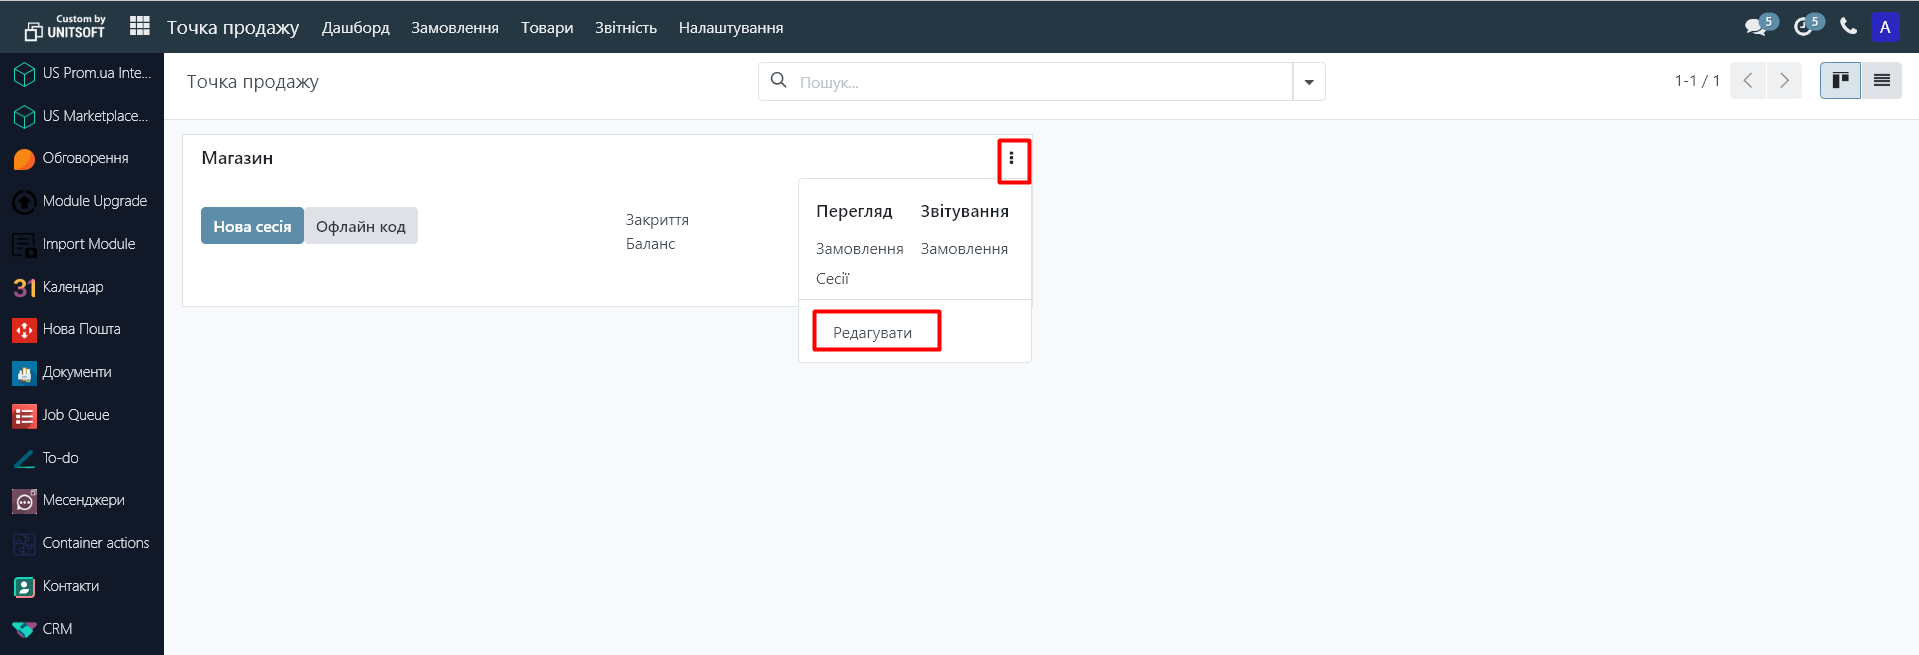
Click the three dots in the upper right corner of the point of sale and select "Edit".
In the "CheckBox Category" section, click "Add Row."
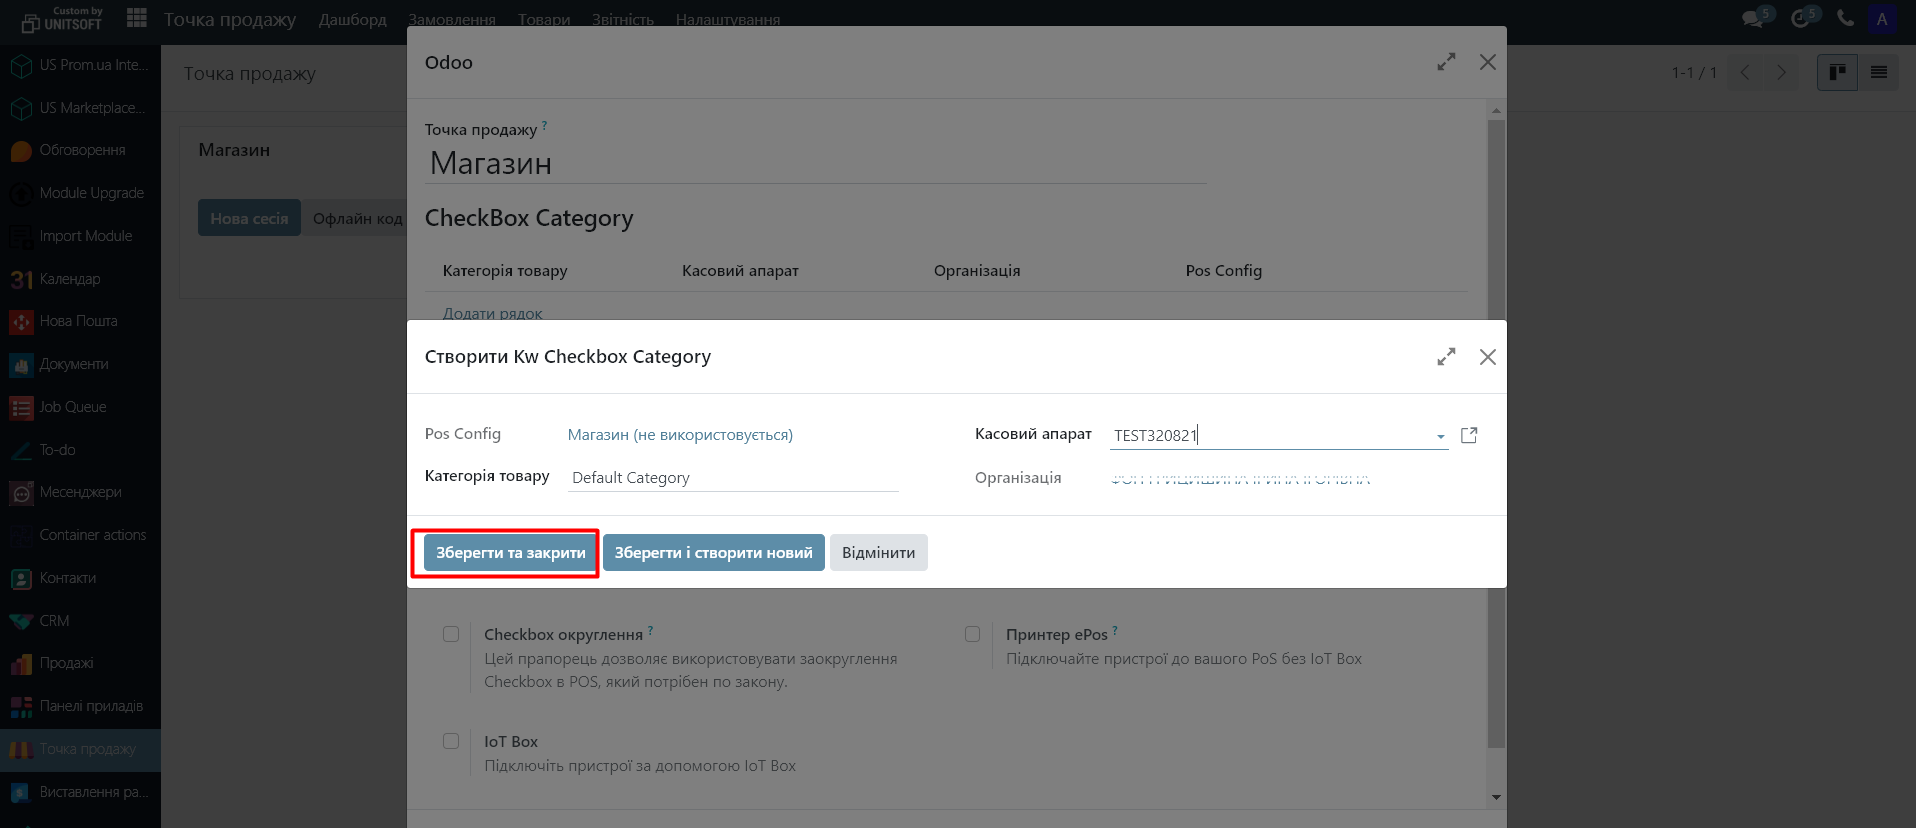
14. Select the cash register and product category. Click "Save and Close".
Step 3. Work at the point of sale with the generation of fiscal checks
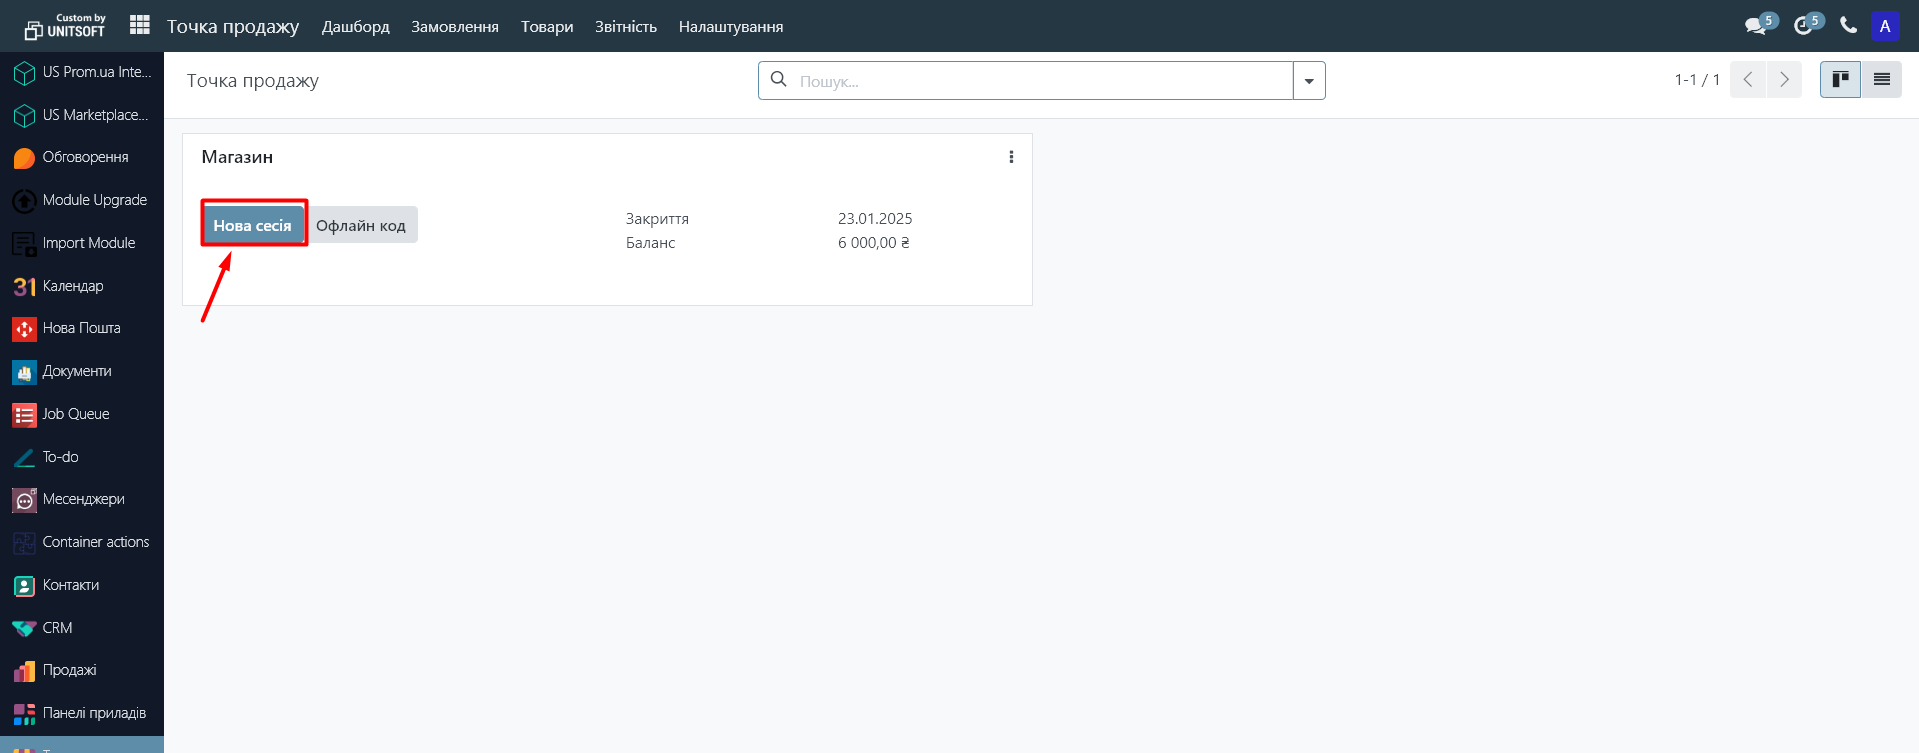
- Go to the "Point of Sale" module. At the desired point of sale, click "New Session":
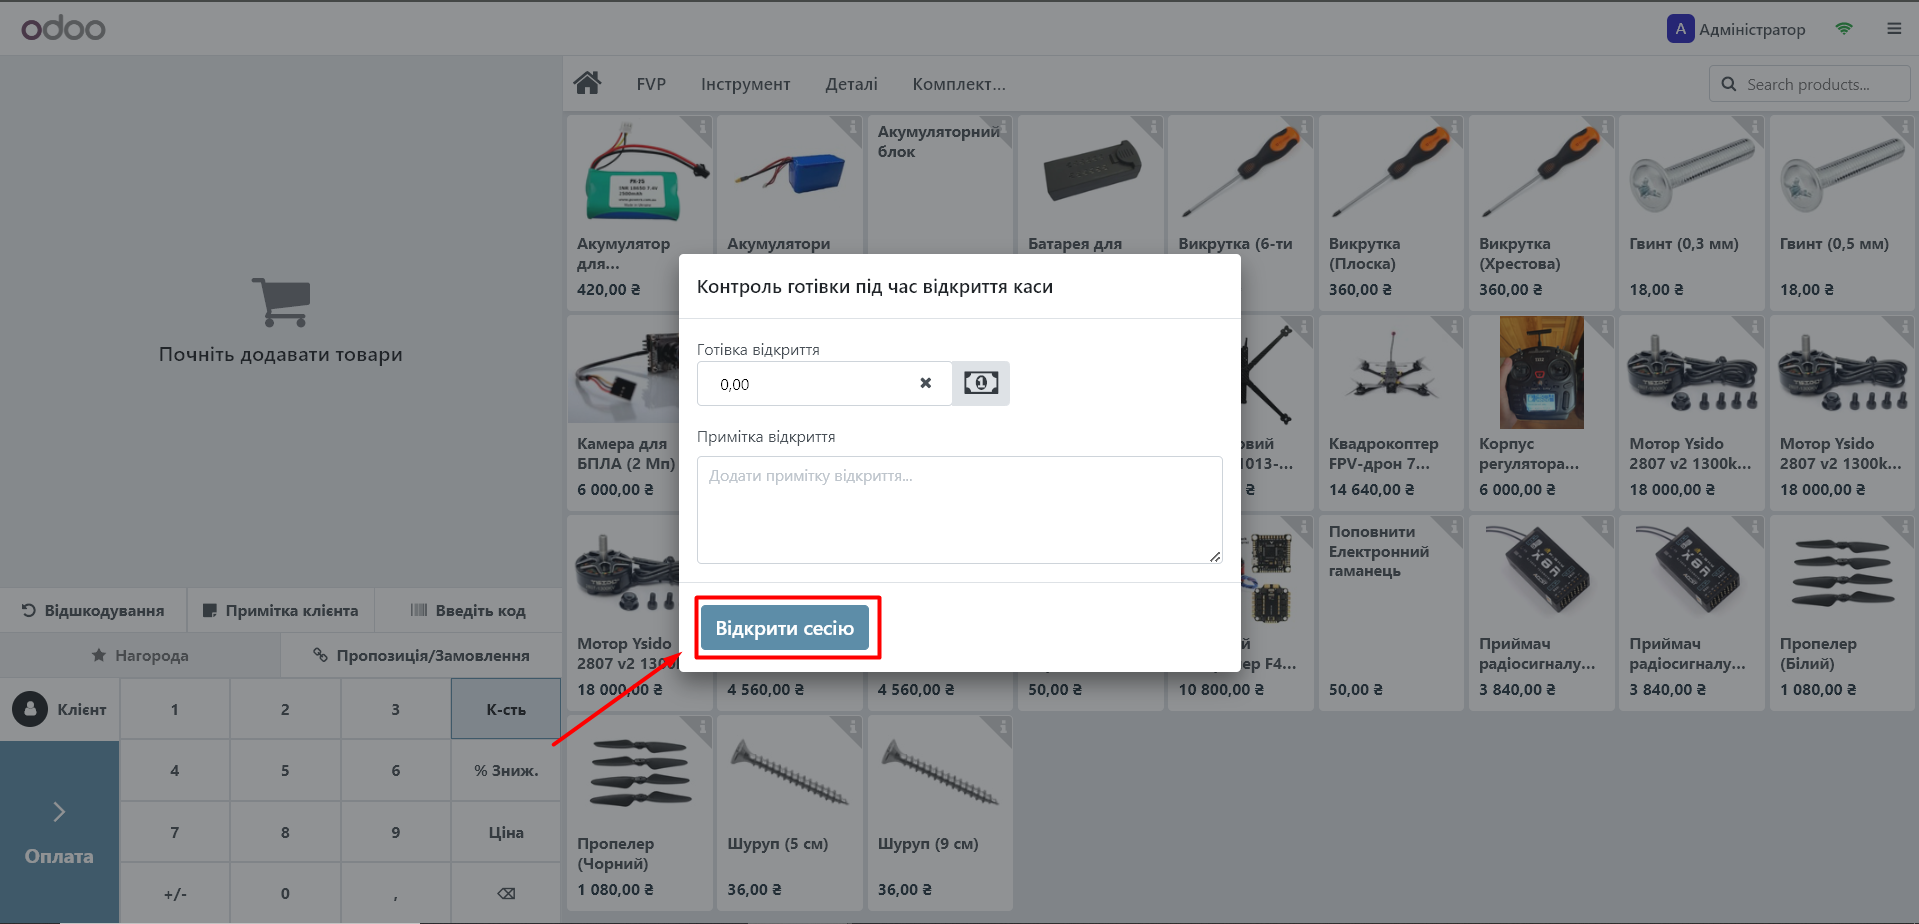
2. Enter the opening cash amount and click "Open Session":
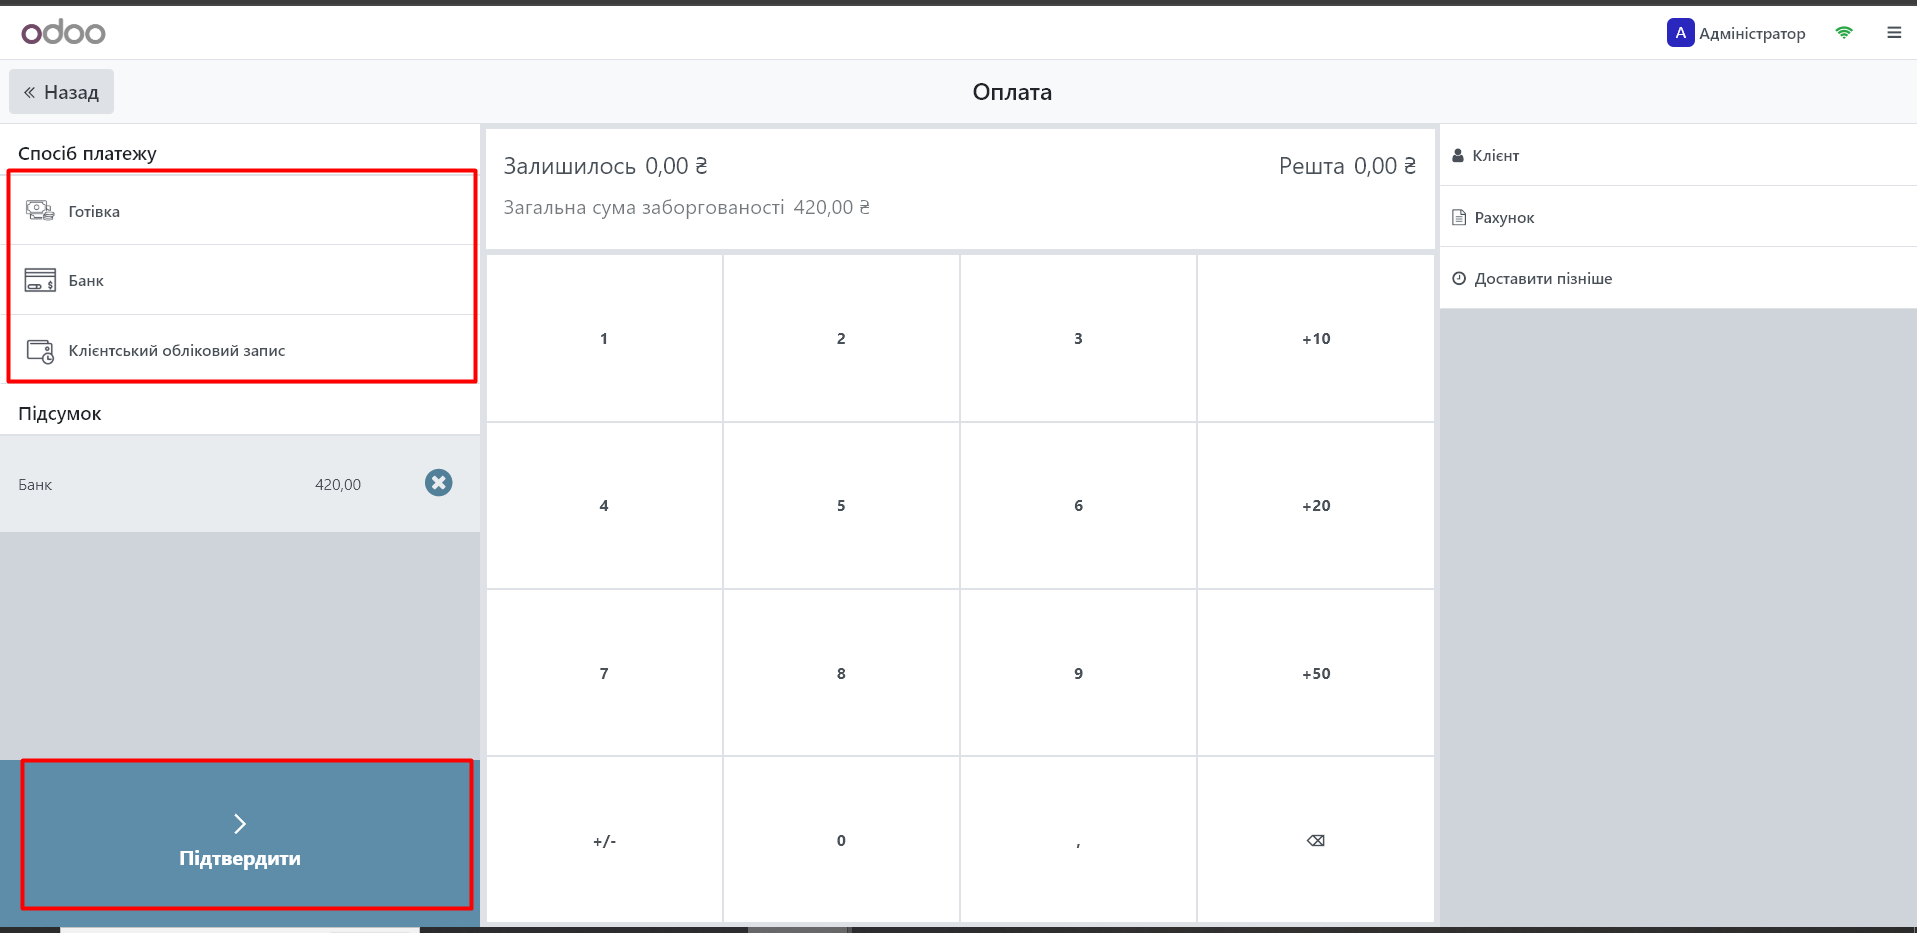
Select the product and click "Pay".

Specify the payment method and click "Confirm":
If the checkbox was checked for the selected payment method, you will receive a receipt with the fiscalized payment.
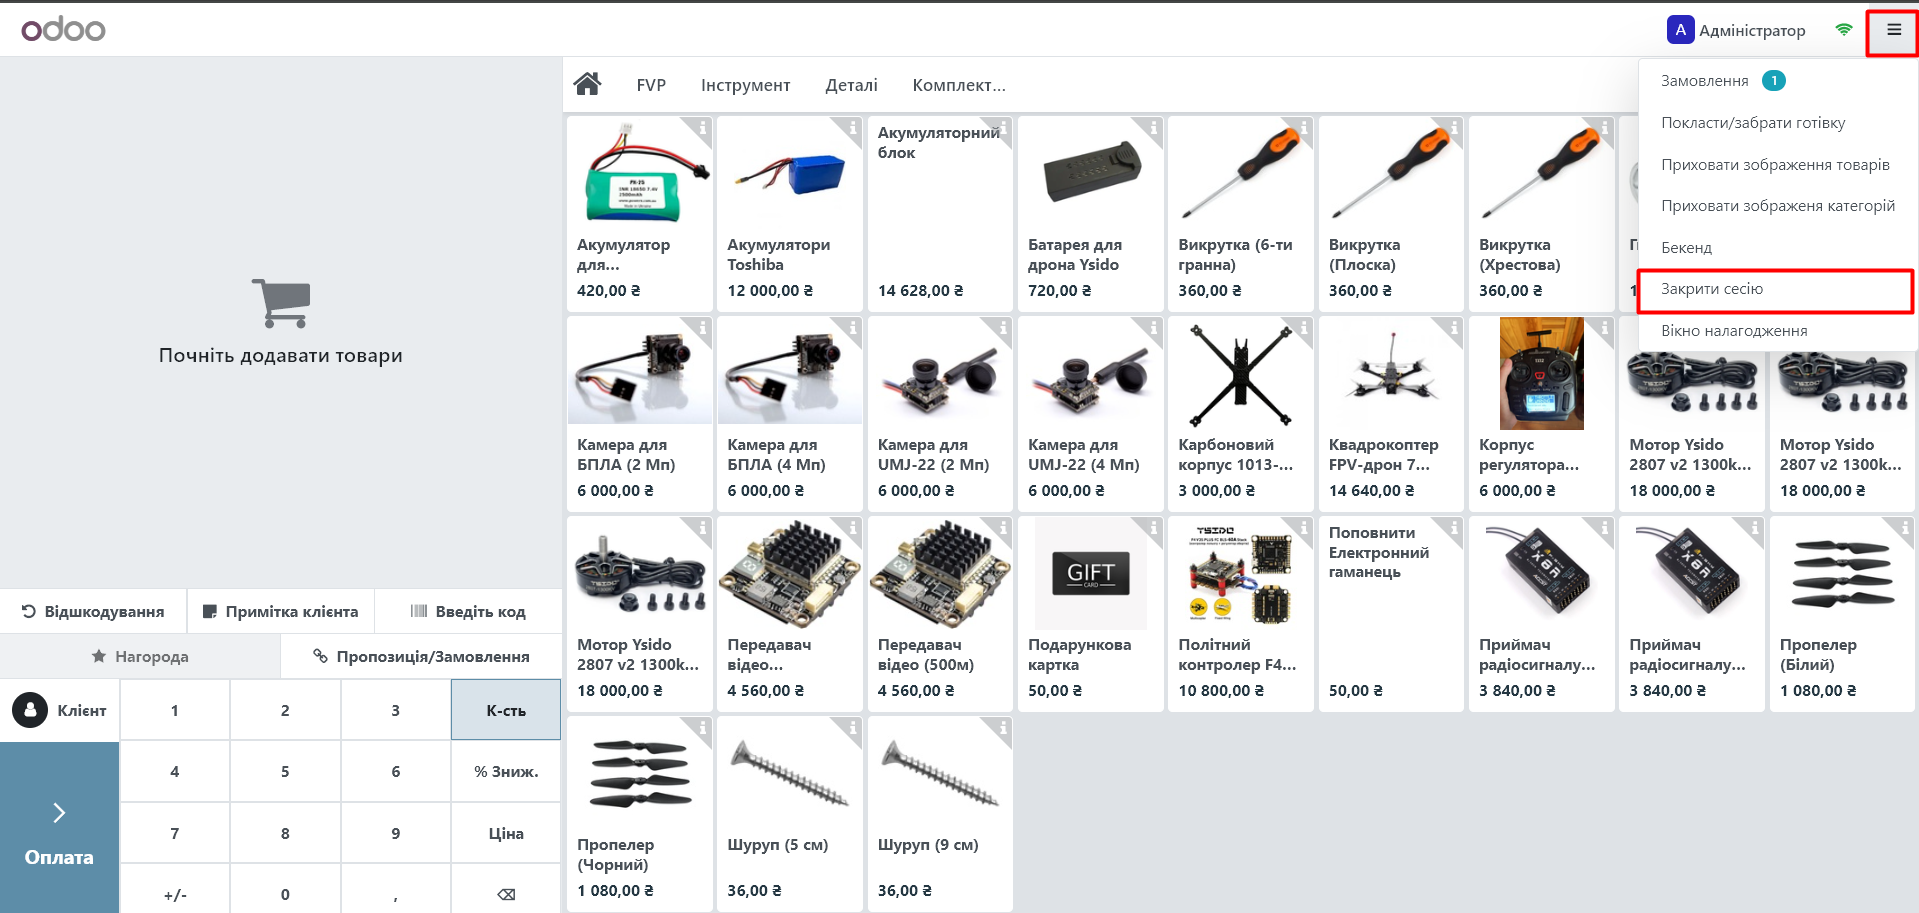
To close the session, click "Close ctcs." - "Confirm and make a transfer", or select "Keep session" to continue working.
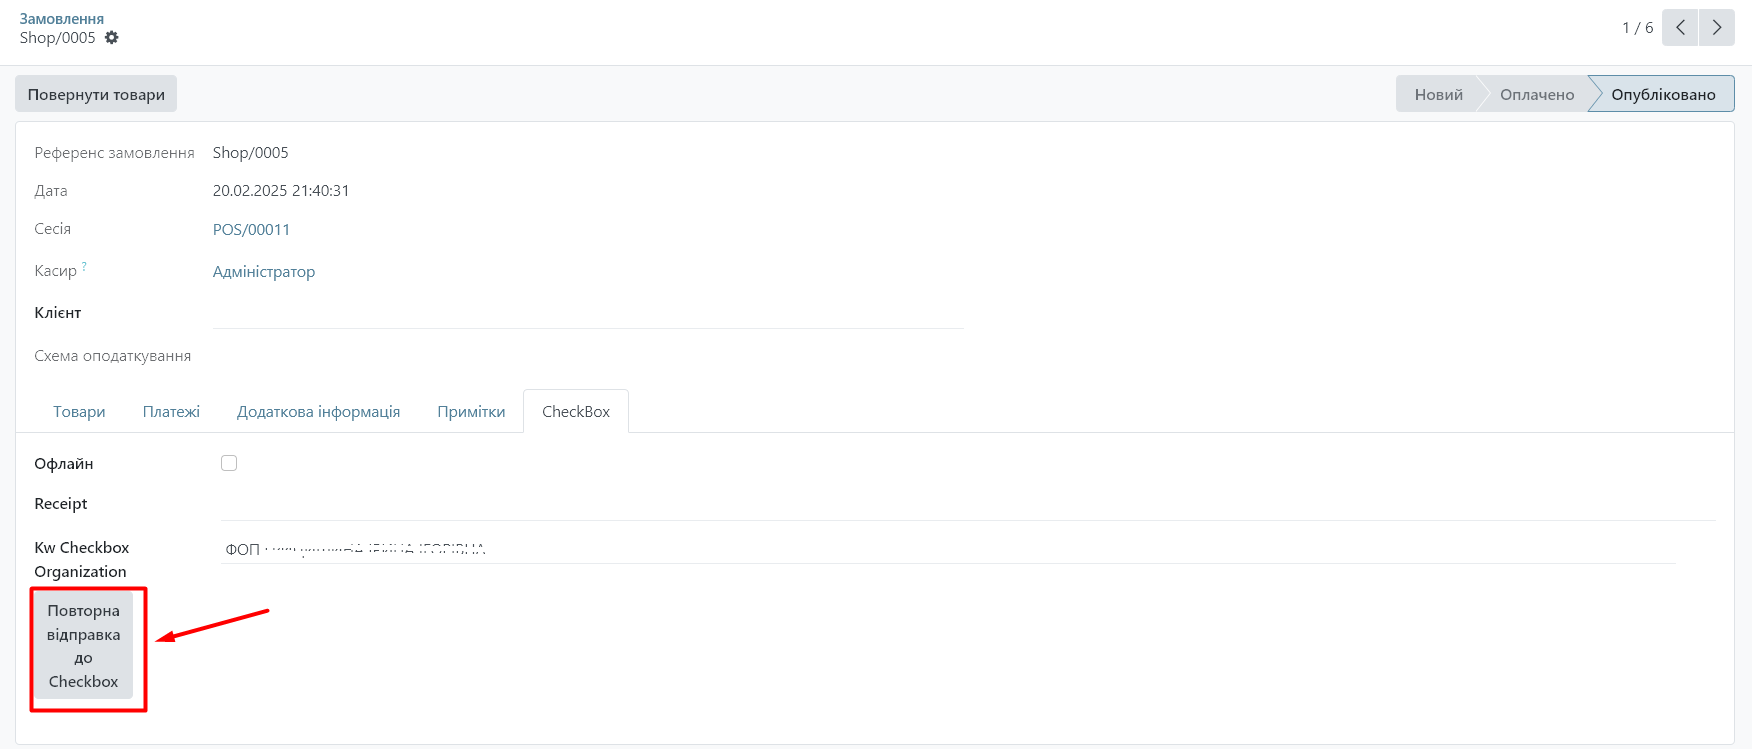
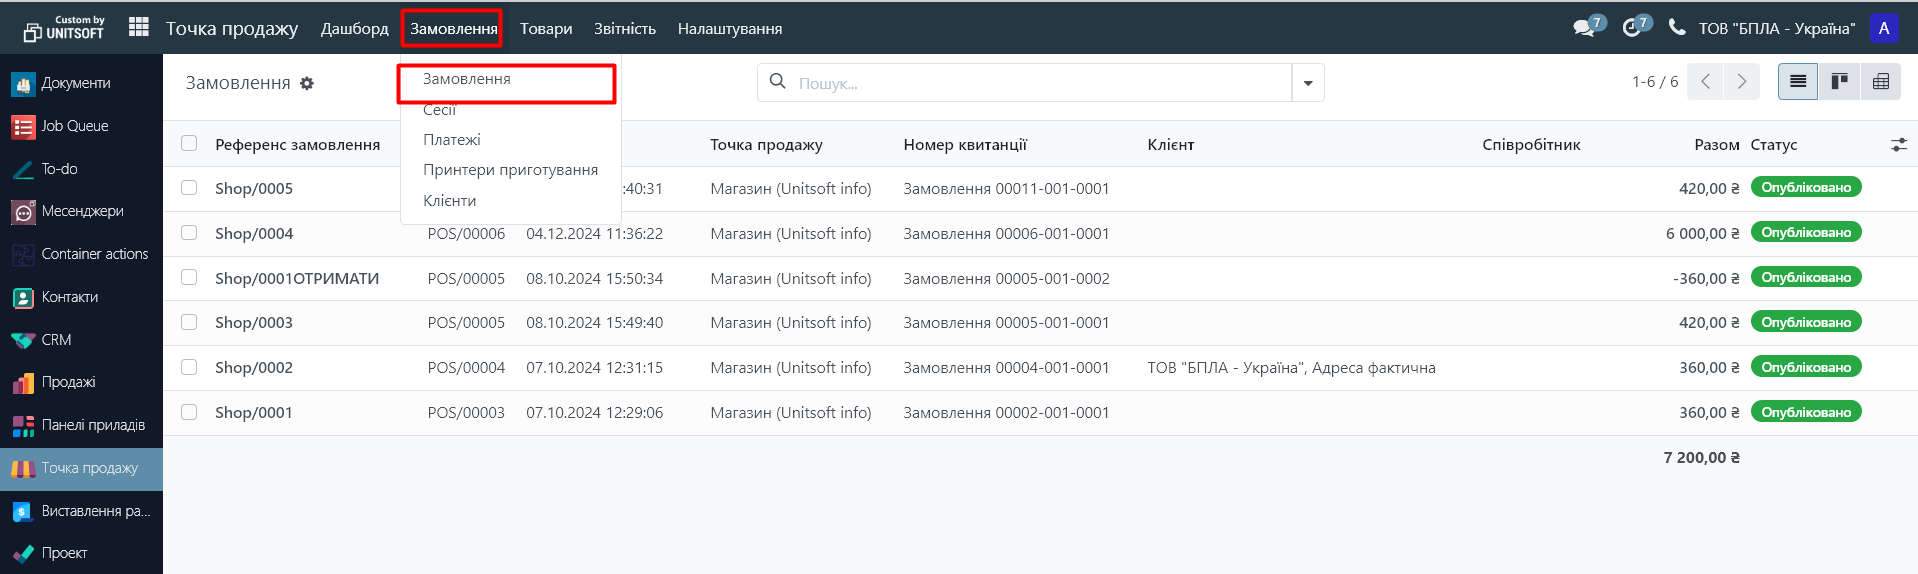
To check the success of fiscalization, go to "Orders" - "Orders".
Open the desired order and check the "CheckBox" tab.
- The "Receipt" field contains a link to the fiscalized payment in the "CheckBox" module.
- The "Kw CheckBox Organization" field displays the name of the organization through which the payment was made.
Importantly!
If the payment went through "Odoo", but for some reason did not go through "Checkbox", then the "Resend to Checkbox" button appears in the "Checkbox" tab. By clicking this button, the payment is re-sent to "Checkbox" and the check number appears in the "Recaipt" field, and the button disappears.