Nova Poshta Instructions
1. Module Description
This module allows the creation of "Nova Poshta" invoices from the Odoo system.

In the "Nova Poshta" module, you see a list of all sent invoices and their latest status.
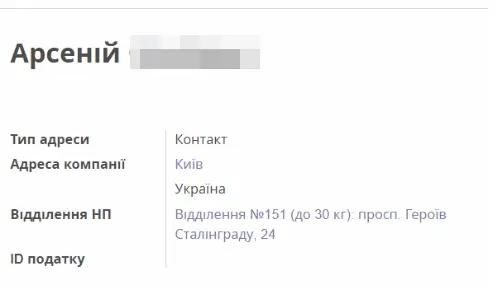
Adding a priority method for receiving parcels and selecting a "Nova Poshta" branch in the contact card.
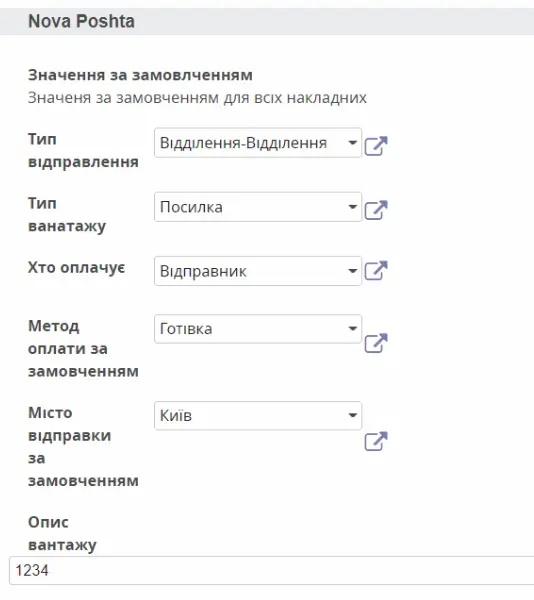
Default values for parcels (for all invoices) set in global settings.
Ability to create a "Nova Poshta" invoice directly from the order, with or without cash on delivery. The cash on delivery amount is specified in a separate field.
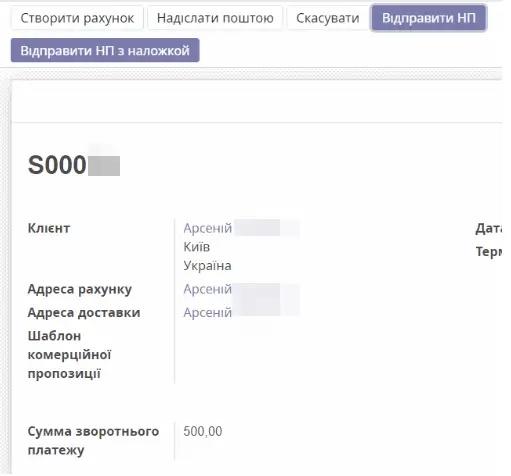
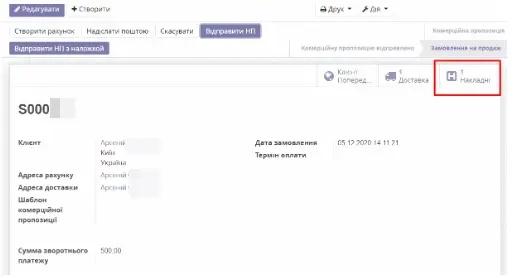
In the order, you see all the invoices created for it.
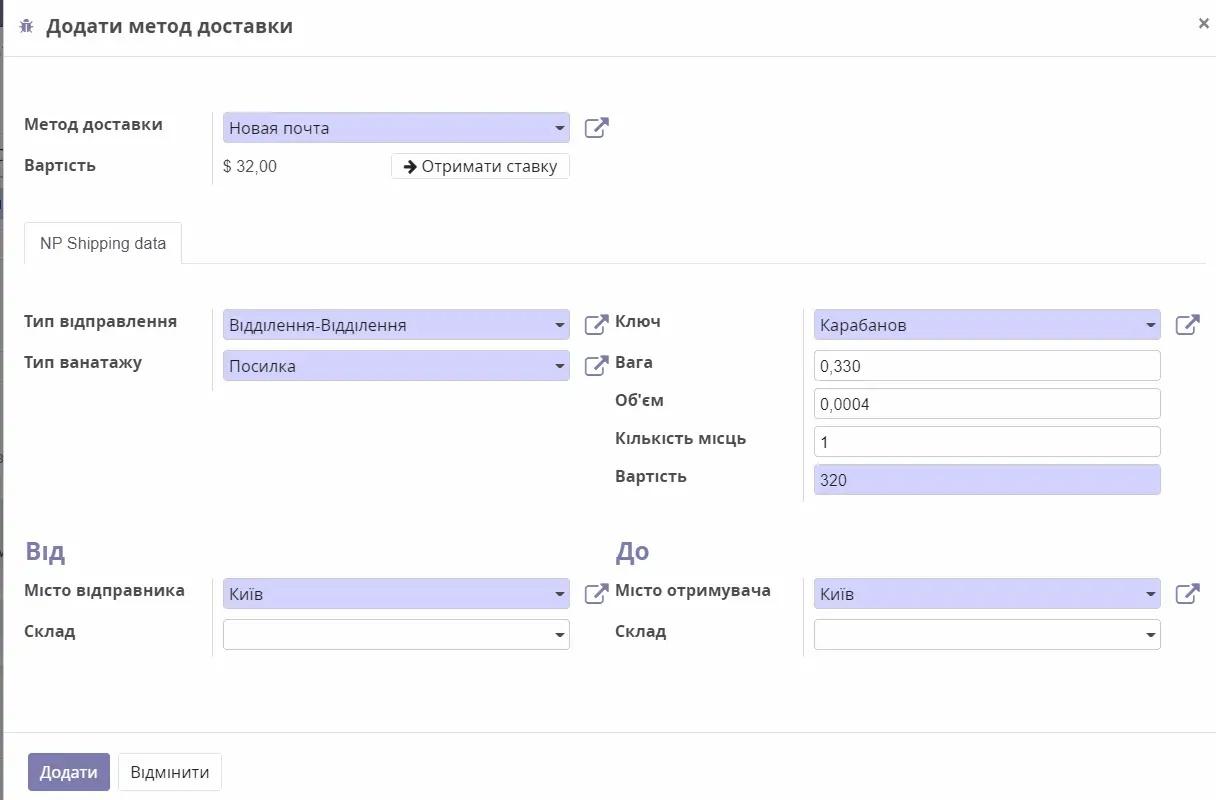
Adding the "Nova Poshta" delivery method to order lines with dynamic calculation of shipping costs. Ability to add shipping costs to the order amount.
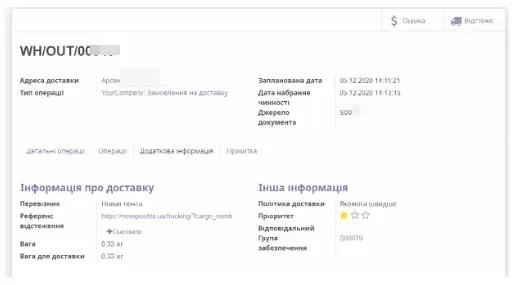
Integration of Nova Poshta deliveries with the Stock Picking module, namely the automatic generation of a Nova Poshta invoice after preparing the product in the warehouse with the transfer of a tracking link in the Delivery Order.
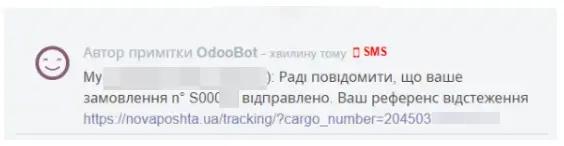
Sending an SMS to the client with the invoice number for delivery tracking.
 2. Module Settings
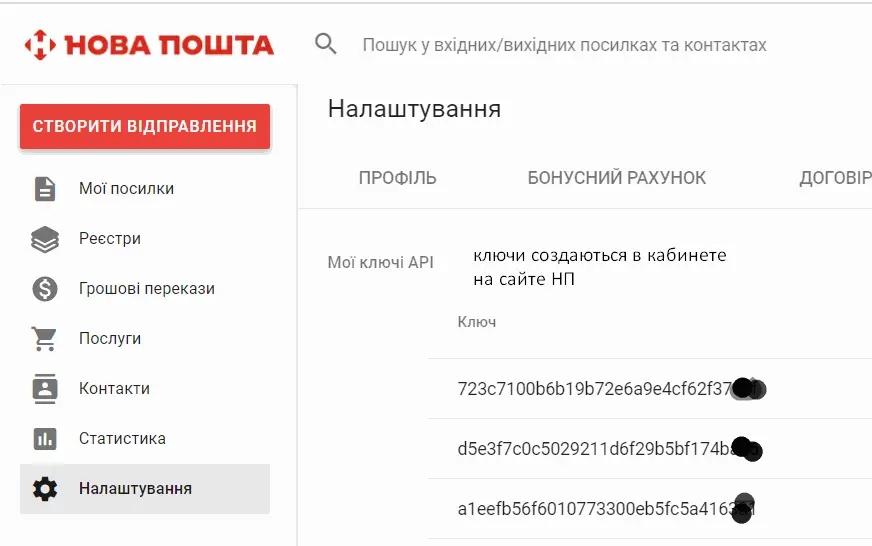
To configure the module, log into your personal account on the "Nova Poshta" website and obtain a key in the "Settings" section.
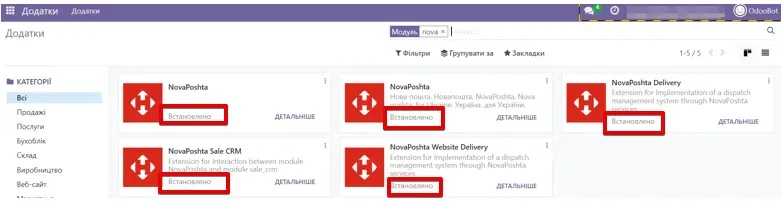
Then go to the Apps menu and in the search bar, specify NovaPoshta. Install these modules.
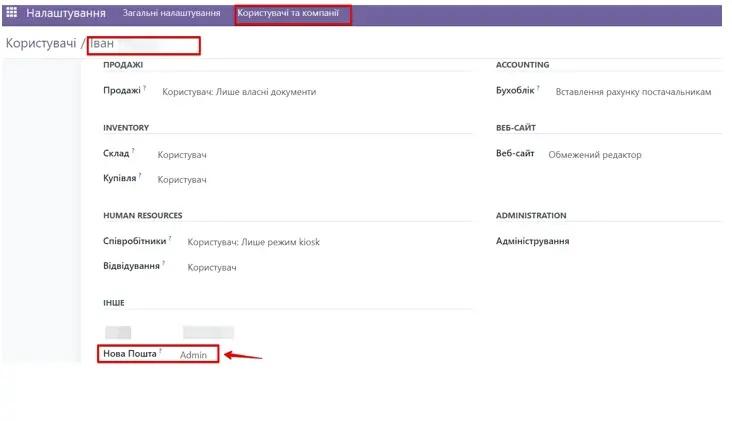
The next step is to provide access to those users who need to use it. In General Settings, go to the Users and Companies/Users tab and select the desired person. Find the Nova Poshta field and set the value to Admin.
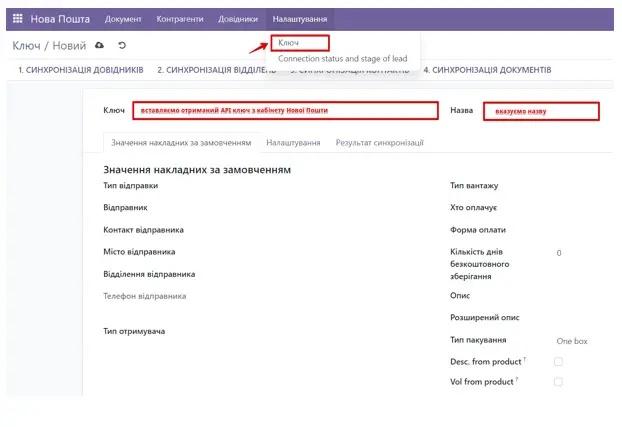
Then go to the new Nova Poshta menu, go to the Settings tab, and select "Key". In the new window, click "CREATE", specify the name and key (obtained in the Nova Poshta personal account). Save. The next step is to perform a step-by-step synchronization of the directories. Follow the specified order. First, click "Directory Synchronization", second - "Branch Synchronization", third - "Contact Synchronization", and the fourth final step - "Document Synchronization".
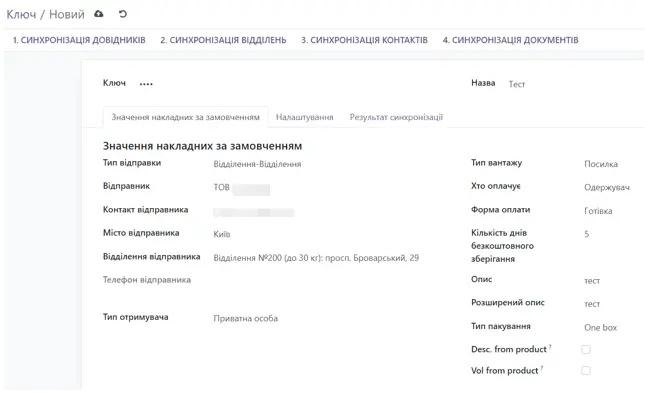
The next step is to specify the basic settings for the key you created. Enter the most frequently used data when sending parcels. This setting will be displayed by default. If necessary, you can replace the data with others in the required invoice.
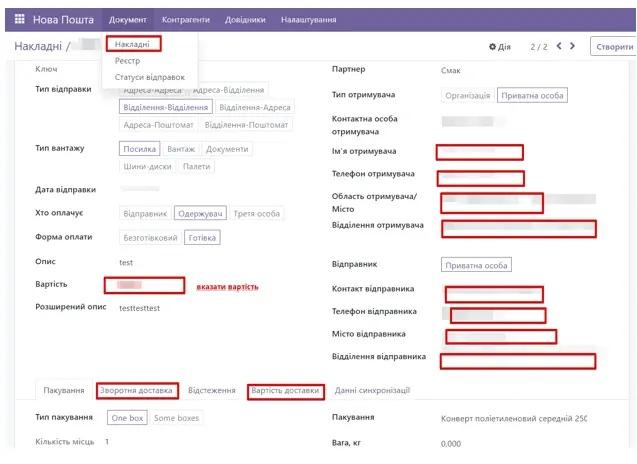
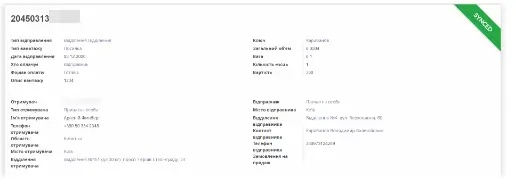
To create an invoice, you need to go to the Document/Invoices tab and click "CREATE". In the new invoice, fill in all the necessary Recipient details. Check the Sender details (which should have been loaded automatically if the previous step was completed). Specify the packaging conditions and return delivery (if applicable). On the Delivery Cost tab, click "CALCULATE DELIVERY". Click save and "SEND TO NP". If sent successfully, the invoice status will update to SUCCESS. If an error occurs, you will receive a message indicating what is incorrect or which fields need to be filled in on the Synchronization Data tab.
Also, in the invoice itself, you can update the status, print both the invoice and the labeling.


This module allows you to create invoice registries. To do this, go to the Documents/Registry tab and click CREATE. Select the invoices you want to combine. This registry can be printed.
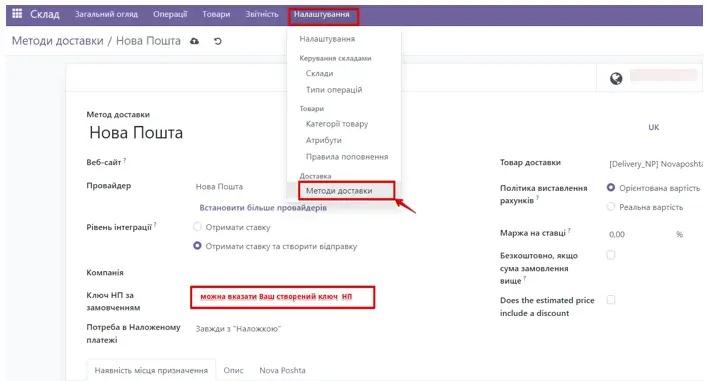
It should be noted that when this module is installed in the Odoo system, an additional delivery method is automatically added, namely Nova Poshta. To configure it, go to Warehouse/Settings/Delivery Methods and select Nova Poshta. In this window, you can specify your NP key (which will be displayed by default), specify cash on delivery requirements, and set up free delivery conditions (for example, if the order amount is more than 5000 UAH).
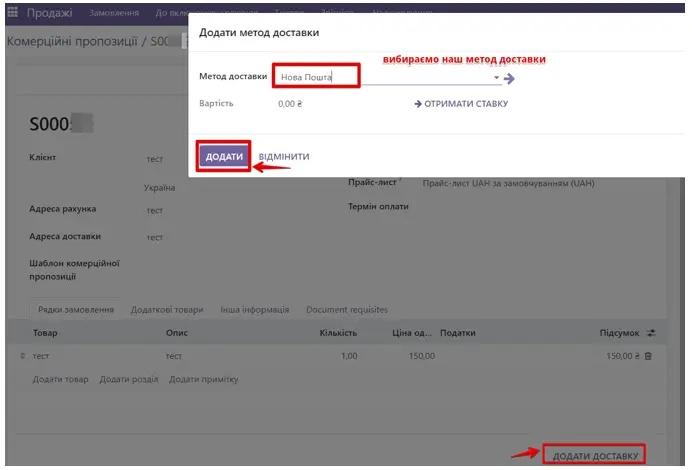
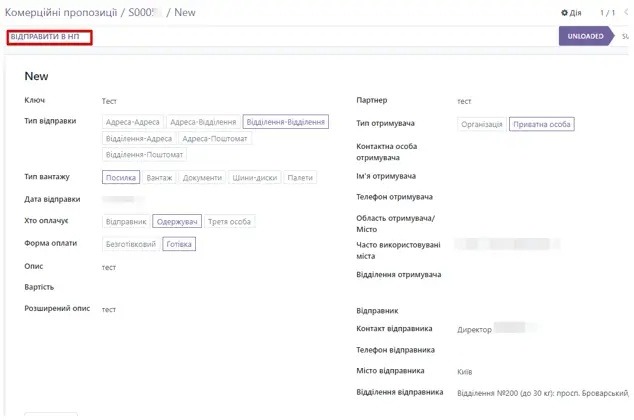
To see how this module works during sales, go to the Sales section and create a new commercial proposal. Select the product and click "ADD DELIVERY", in the Delivery Method field, select "Nova Poshta" from the suggested options and click "Add". A new Nova Poshta tab is automatically added, where you can either create a new invoice or add an already created one (for example, if one of your employees independently processed an invoice at a Nova Poshta branch).
If you select the Create new invoice option on the Nova Poshta tab, a new window will open with a similar invoice appearance as when previously created in the Nova Poshta section. Similarly, you need to fill in all the necessary fields and send it to NP. This invoice is added to the general list of invoices in the Nova Poshta section. All created invoices that are successfully sent to NP cannot be edited.