When creating a company in the Odoo system, 1 warehouse is automatically created, if needed, several can be created.
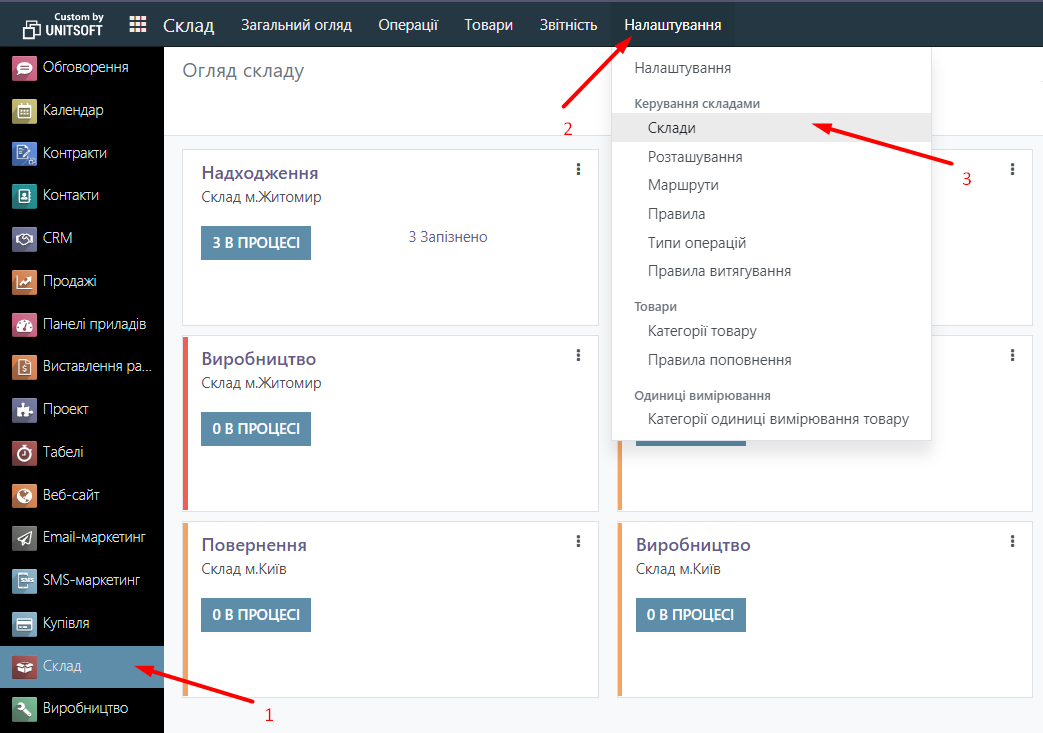
To create another warehouse, you need to go to the Warehouse module and in the menu click Settings, then click Warehouses.
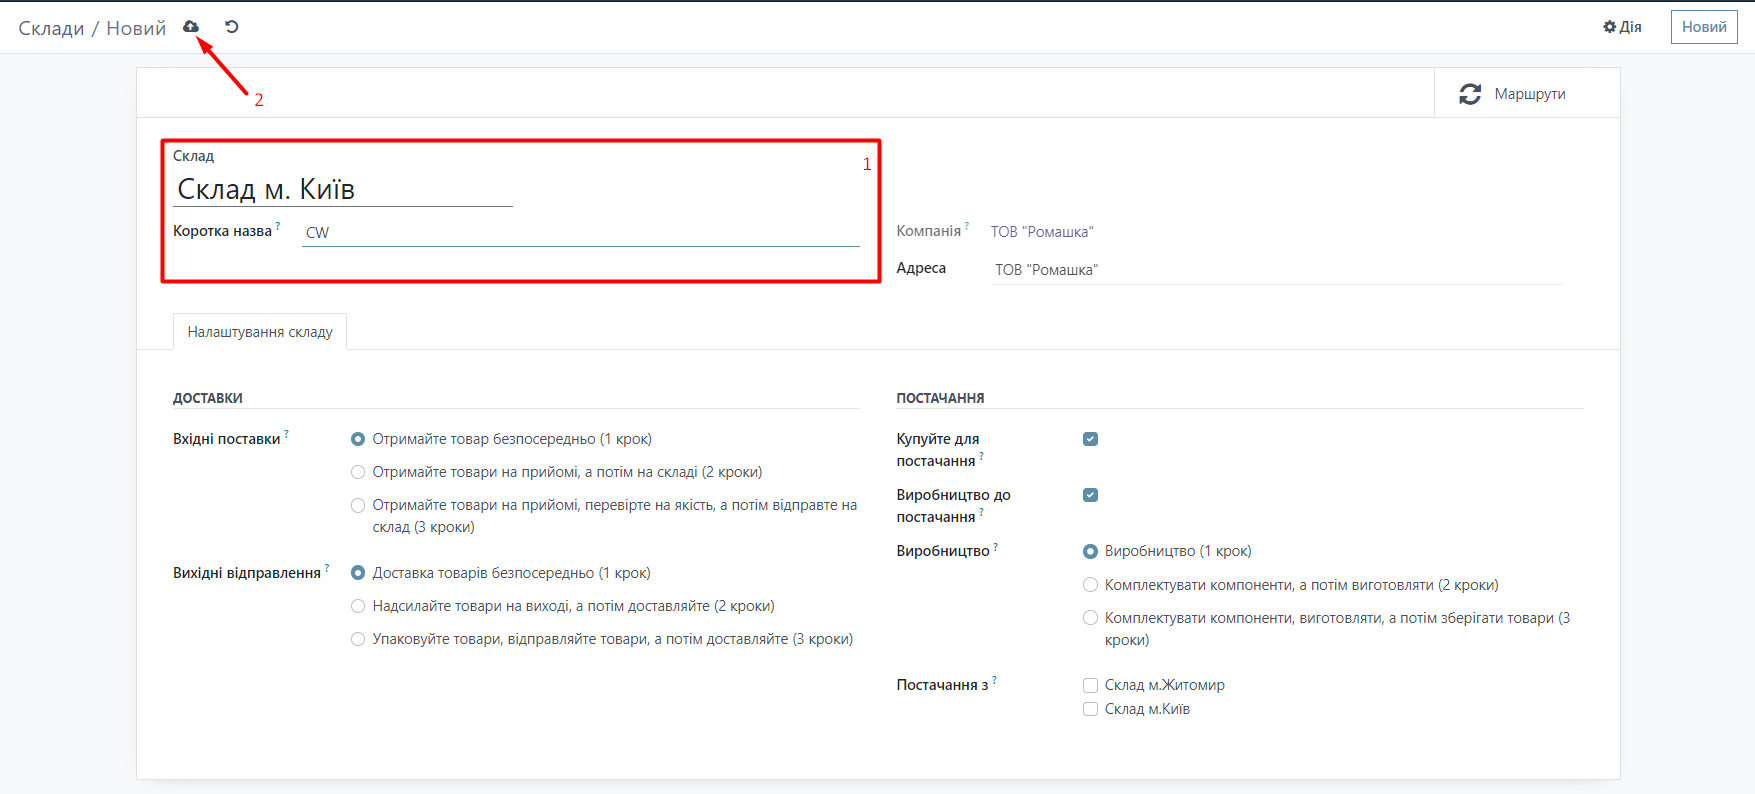
Press the New button.
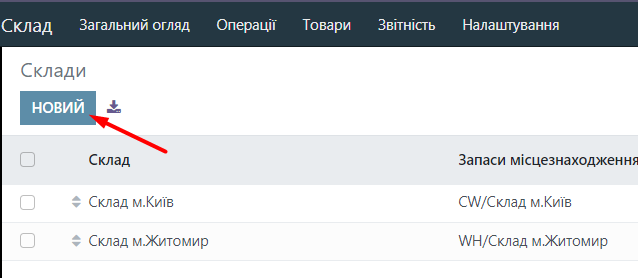
When creating a new warehouse, you need to specify its name and short name. The short name of the warehouse will be indicated in the numbering of documents. After that, click the Save button.
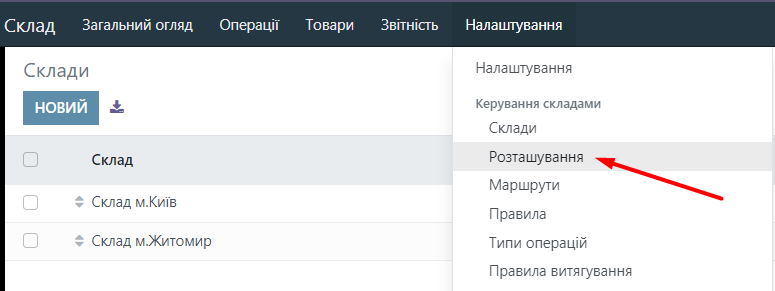
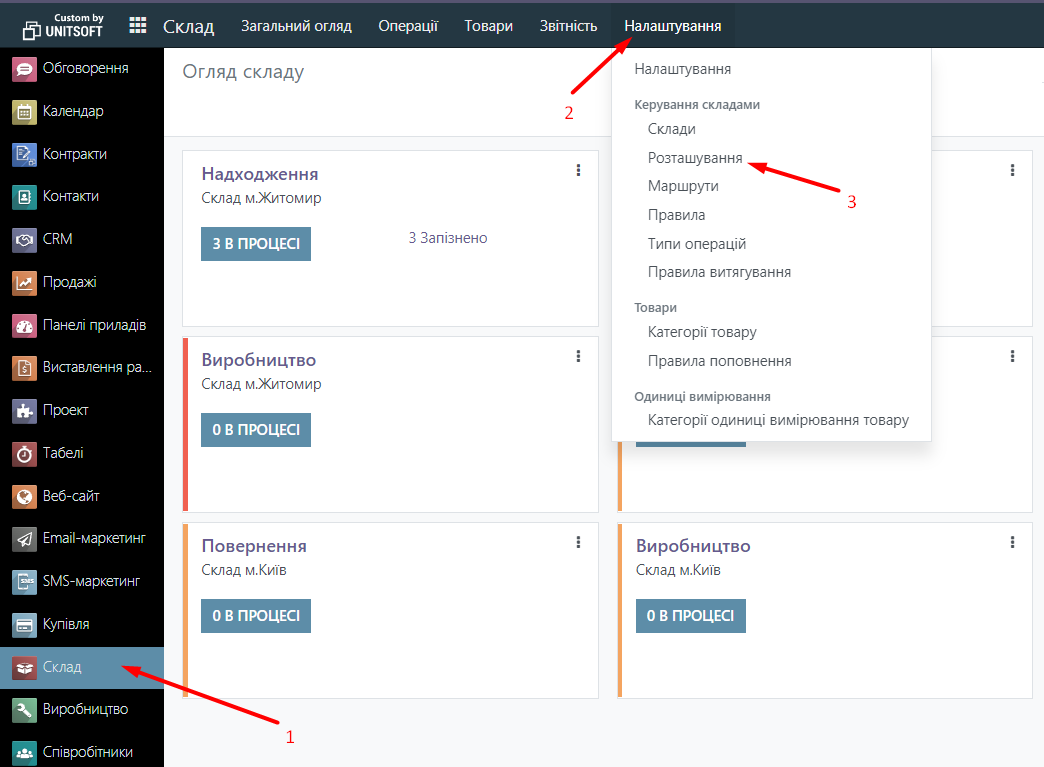
After creating the Warehouse, the Short Name should be edited to be clear when there are multiple warehouses. To do this, in the Warehouse module, go to the Locations in the Settings menu.
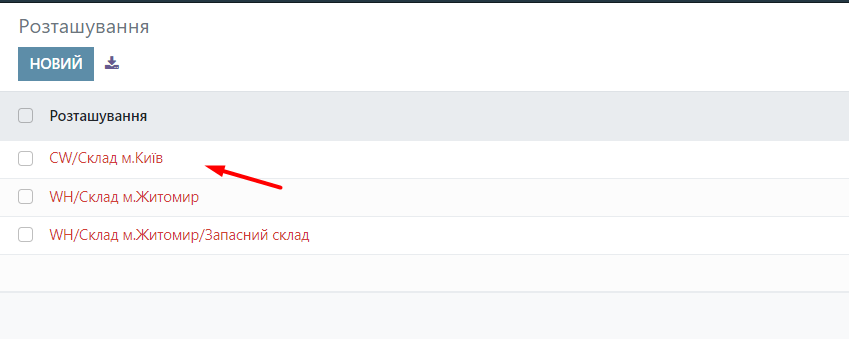
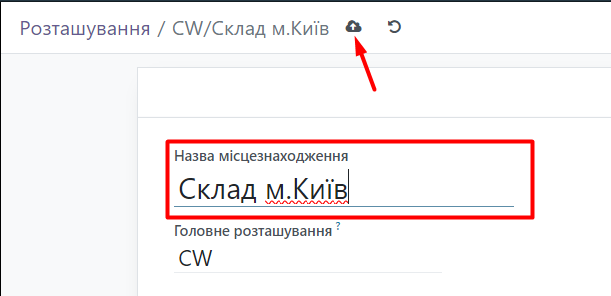
We go to the appropriate location of your Warehouse and in the Location Name, we enter, for example, the name of your Warehouse to which this Location belongs. After that, we click the Save button.
Warehouse accounting in the Odoo system is cell-based. Therefore, there is a setting that will show the location of the product in your warehouse (shelf, department, container). That is, within the warehouse, you can create separate product locations.
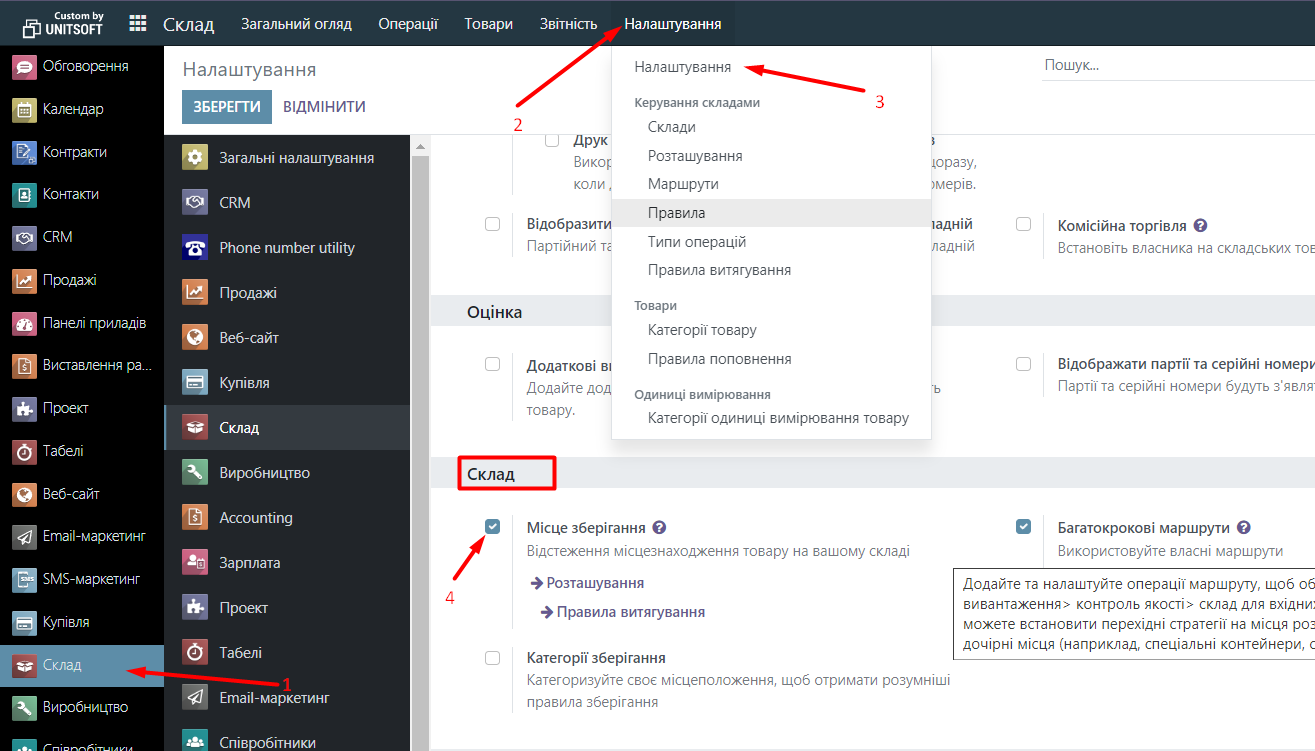
To include locations in the warehouse, you need to go to the Settings menu in the Warehouse module, select Settings, and in the Warehouse group, enable Storage Location.
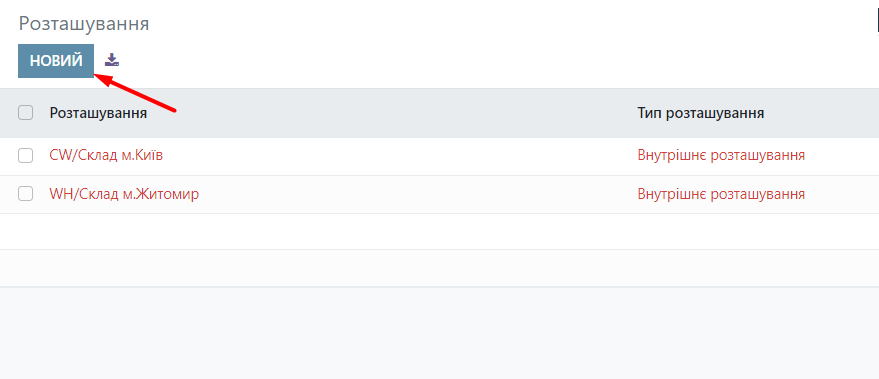
Now, to enter or create a Location, go to the Warehouse module in the Settings menu and select Location.
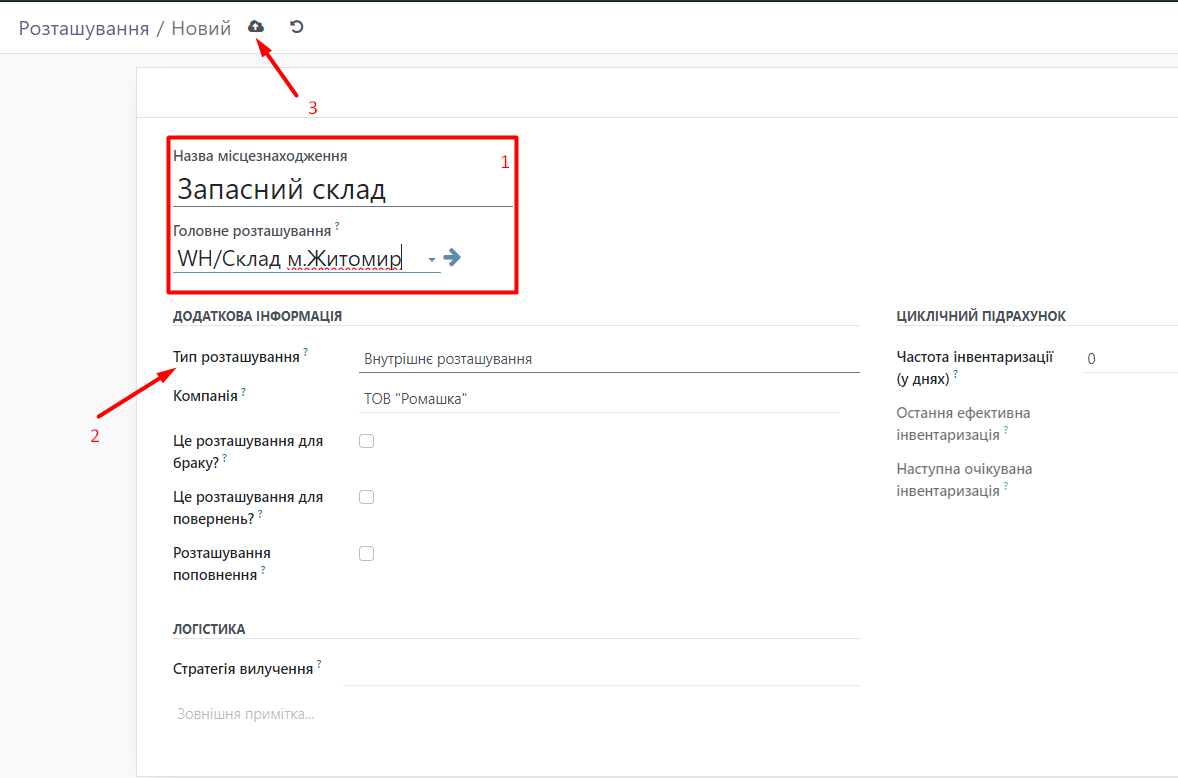
To create a new Location, click the New button. Enter the name of the Location and the Name of the main Warehouse where this location will be situated and the Type of location. After that, click the Save button.