Інструкція CheckBox Odoo від Unitsoft
1. Registration on the CheckBox portal
Виконати реєстрацію в Чекбоксі. Дана відеоінструкція допоможе розібратися і зареєструвати касиру та касу.
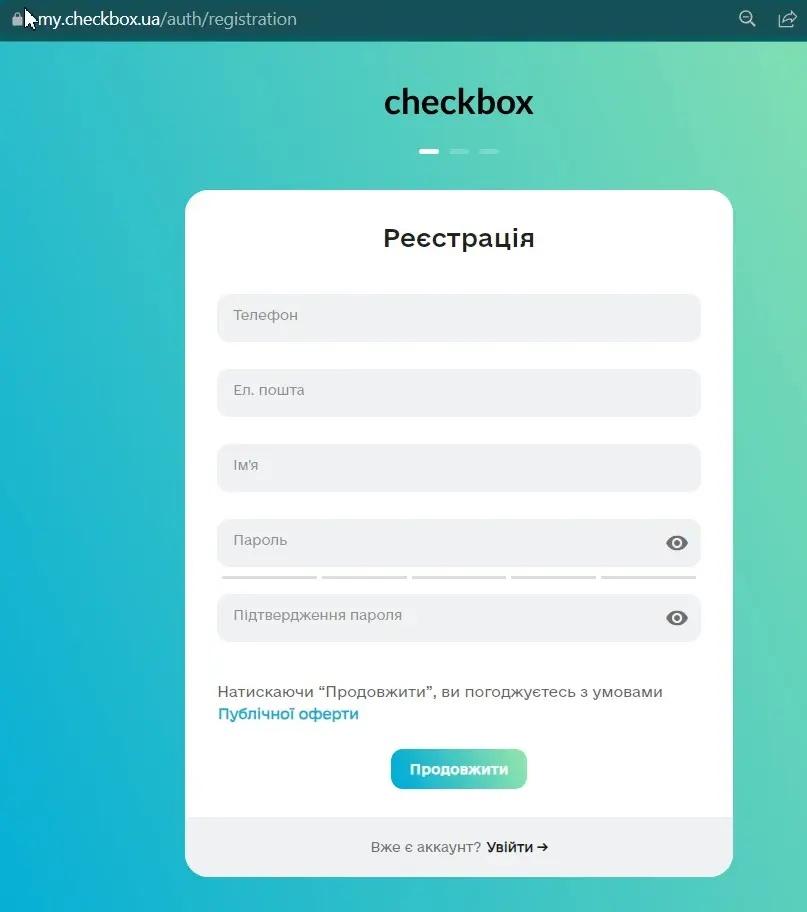
Для початку роботи необхідно насамперед зареєструватися на порталі CheckBox.Реєстраціяпроходить швидко та просто — достатньо дотримуватися підказок системи.
Під час реєстрації торгової точки (форма 20-ОПП), каси (форма 1-ПРРО) та касира (форма 5-ПРРО) усі введені дані автоматично передаються до податкової служби.
Реєстрація здійснюється через відповідну форму в особистому кабінеті CheckBox.
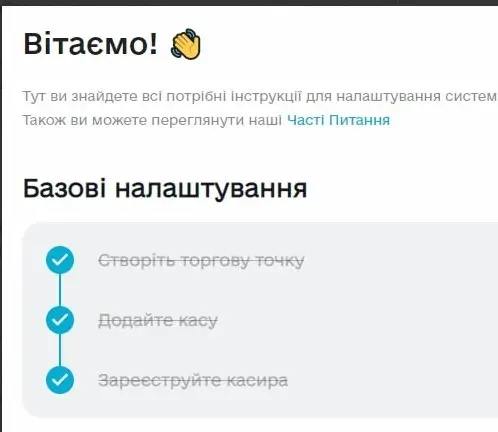
Після цього, для налаштування інтеграції Checkbox з Odoo, необхідно виконати базові налаштування безпосередньо в інтерфейсі кабінету Checkbox. Для цього слід скористатися покроковою інструкцією «Як почати».
Point of Sale
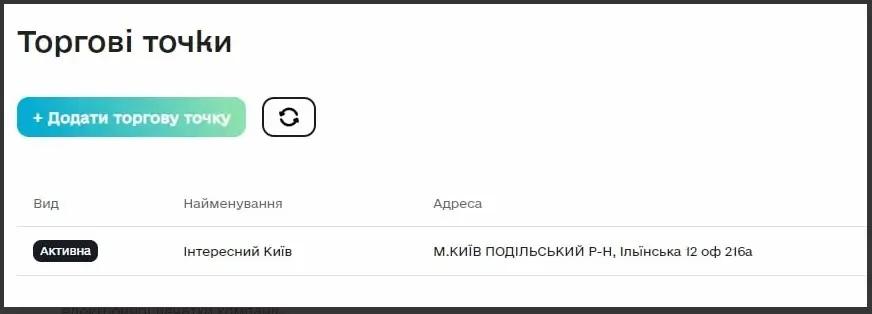
Якщо у вас ще не створена торгова точка, необхідно додати «Торгову точку»відповідно до інструкції. Wait for confirmation from the tax service with the status 'Active'.
Цей етап можна пропустити, якщо торгові точки були зареєстровані раніше і ви плануєте підключити програмну касу до вже існуючої точки.
Registration of a software cash register in the 'Cash Registers' menu is automatic
After activating the point of sale, it is necessary to add a cash register and a cashier.
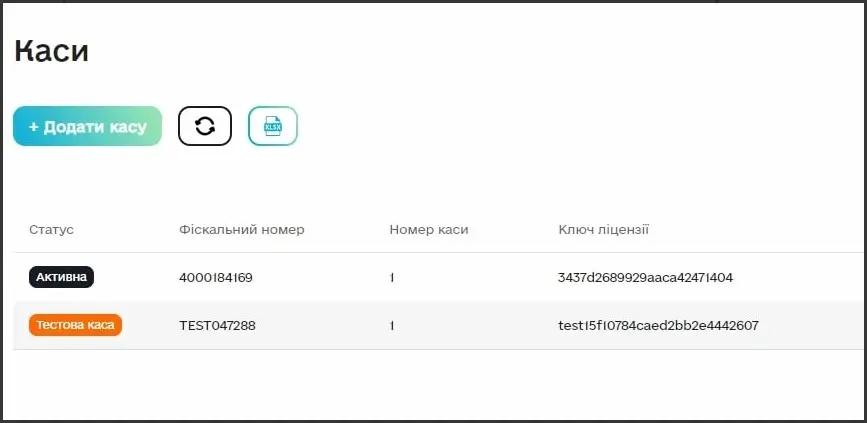
В інтерфейсі Checkbox каса створюється одразу з двома статусами:
- Active - for work;
- Test cash register - used for conducting test payments.
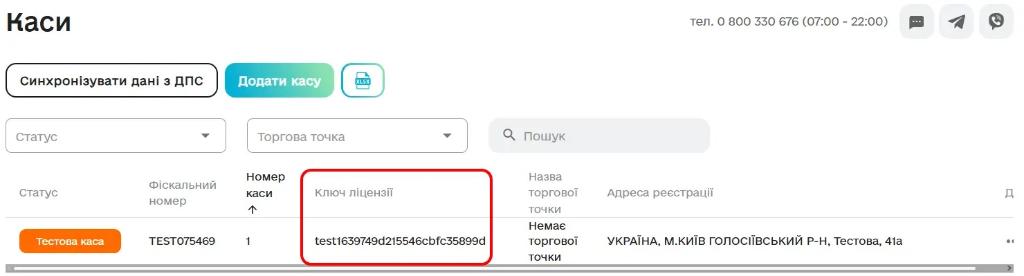
У розділі «Каси» під час налаштування каси важливо звернути увагу на поля «Фіскальний номер» та «Ключ ліцензії». Саме ці дані використовуються для реєстрації каси в системі Odoo.
Ключ ліцензії — це унікальний 24-символьний код каси, який застосовується для встановлення з’єднання між модулем CheckBox в Odoo та відповідною касою.
Cashier
Наступним кроком є додавання касирів до відповідної каси. Для цього необхідно зареєструвати касирів у розділі «Касири». Перейдіть до меню «Каси», натисніть кнопку «Додати касира» та виконайте всі дії згідно з покроковою інструкцією CheckBox. Після завершення реєстрації касир відобразиться у списку касирів.
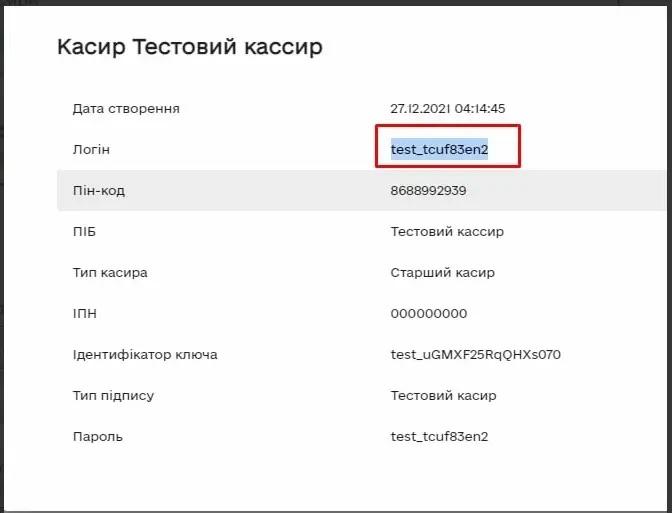
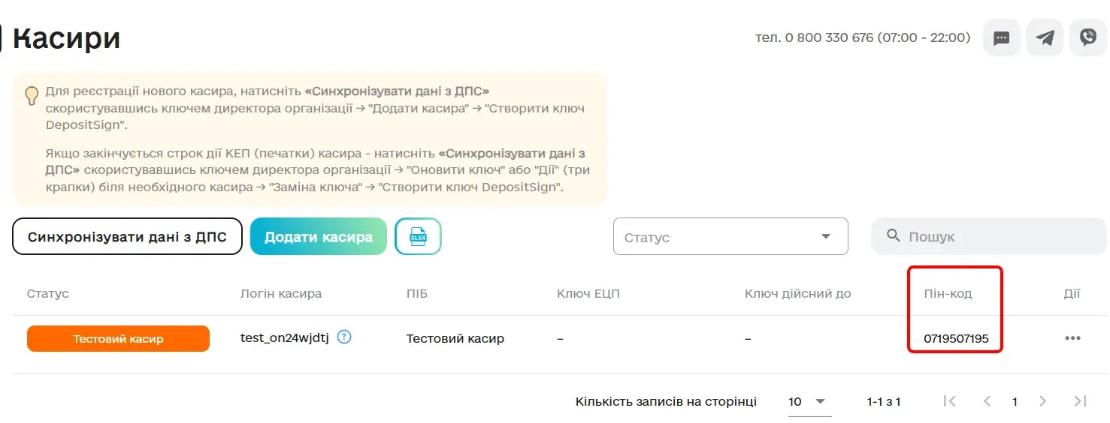
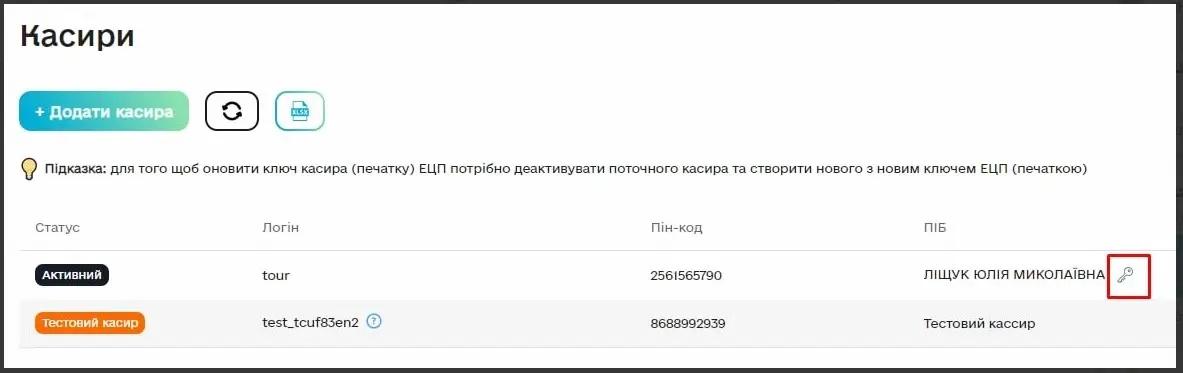 Зверніть увагу, що для тестового касира логін і пароль є однаковими — саме ці дані використовуються під час інтеграції з Odoo для додавання тестового касира.
Натомість при налаштуванні активних кас і касирів застосовуються значення з полів «Логін» та «Пароль», які є різними.
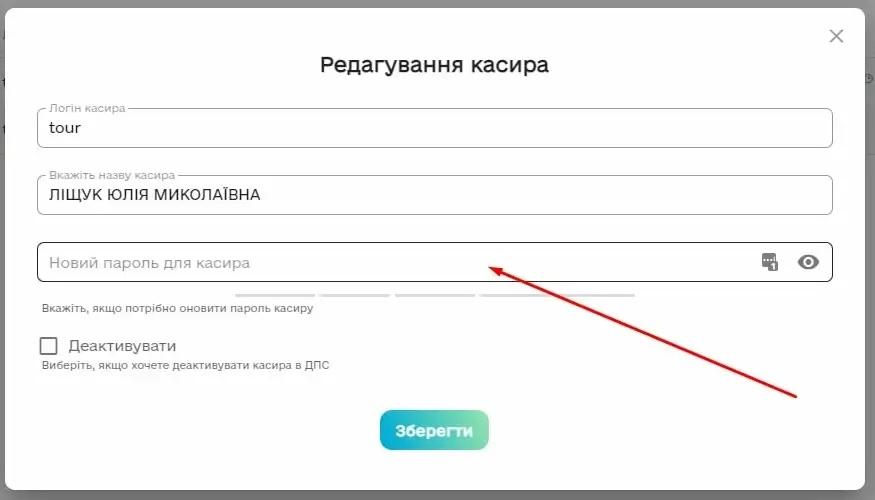
Для зміни логіна та пароля касира необхідно перейти до налаштувань у розділі «Редагування касира».
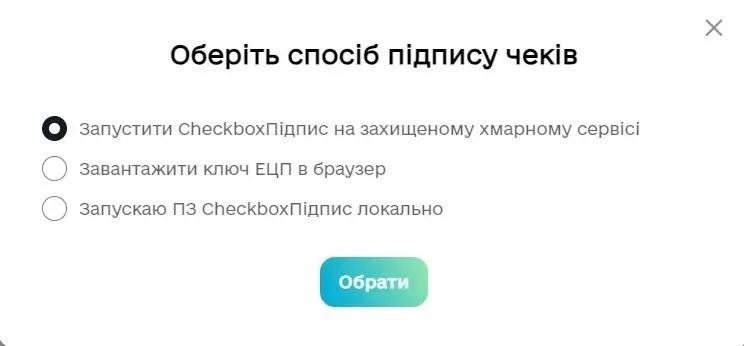
Для касира обов’язково необхідно перевірити та встановити спосіб підпису чеків. Рекомендується обрати варіант «Запустити CheckboxПідпис на захищеному хмарному сервісі», що дозволяє зменшити кількість додаткових дій для касира під час проведення оплати.
2. Налаштування конфігурації каси
2.1. Прямий API
Зайдіть до свого кабінету Чекбокс, відкрийте розділ управління Касами та скопіюйте і збережіть ключ ліцензії каси, який буде використано для подальшого налаштування ПРРО.
Далі в кабінеті Чекбокс перейдіть до розділу керування касирами та збережіть пін-код касира:
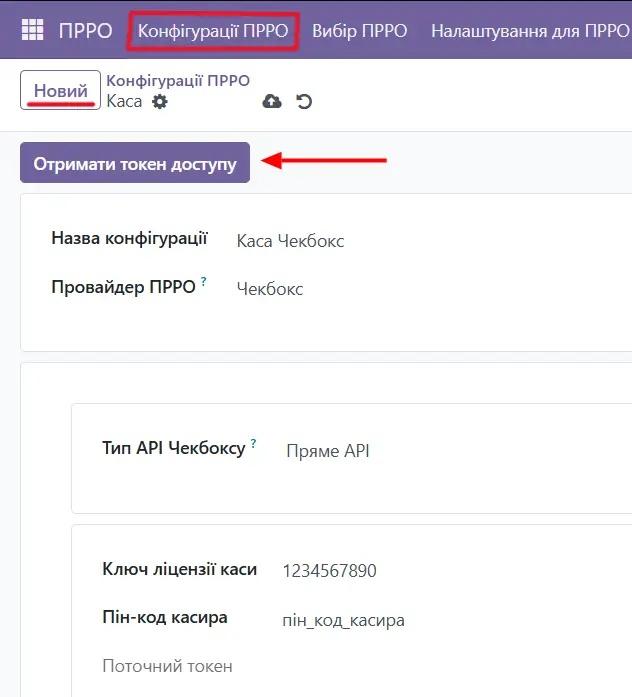
На наступному етапі необхідно створити нову конфігурацію в меню «Конфігурації ПРРО» модуля «ПРРО».
Для цього натисніть кнопку «Новий» та перейдіть до заповнення параметрів. У полі «Провайдер ПРРО» оберіть значення «Чекбокс». Далі вкажіть унікальну назву конфігурації, яка дозволить легко ідентифікувати її серед інших (наприклад, за назвою торгової точки або каси). У параметрі «Тип API» виберіть «Пряме API».
Після цього заповніть дані доступу, а саме:
- пін-код касира, збережений на попередньому етапі налаштування;
- ліцензійний ключ каси.
Після коректного заповнення всіх обов’язкових полів з’явиться кнопка «Отримати токен доступу». Натисніть її — у відповідь система отримає токен авторизації, і поле «Поточний токен» автоматично оновиться.
Якщо кнопку не натискати вручну, система спробує отримати токен автоматично під час першого звернення до ПРРО.
Зверніть увагу!
Один активний касир може мати не більше трьох діючих токенів доступу одночасно. Після отримання нового токена всі попередні токени стають недійсними, і використання каси з ними буде неможливим. Якщо у конфігурації вже присутній активний токен, поруч з ним буде доступна кнопка «Деактивувати токен доступу і отримати новий».
Використання цієї кнопки дозволяє:
- деактивувати поточний токен;
- одразу згенерувати та зберегти новий токен доступу для подальшої роботи каси.
2.2. Через прапорець Kasa Manager
Завантажте та встановіть Checkbox Kasa Manager, після чого створіть профіль каси і виконайте всі необхідні налаштування відповідно до офіційної інструкції (натисніть для перегляду).
Далі перейдіть до налаштування в модулі ПРРО. У створеній конфігурації необхідно вказати:
- тип ПРРО — «Чекбокс»;
- унікальну назву конфігурації;
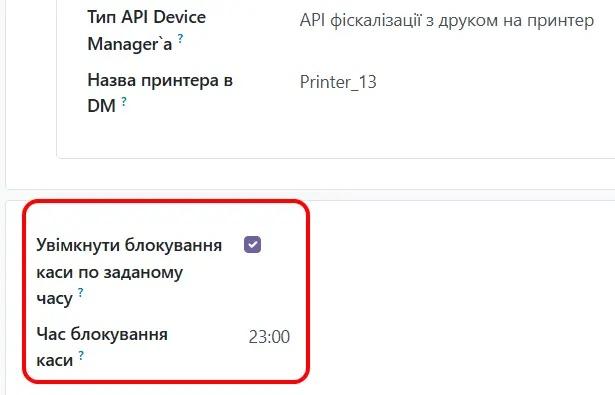
- тип API — «Kasa Manager»;
- URL Kasa Manager (зазвичай http://127.0.0.1);
- порт Kasa Manager (як правило, 9200);
- параметр друку чеків (для коректного друку необхідно попередньо налаштувати чекодрук у Kasa Manager).
URL-адреса та порт задаються і, за потреби, редагуються безпосередньо в Kasa Manager окремо для кожної каси. Детальний опис цих налаштувань наведено в інструкціях за посиланнями вище.

Також у цьому розділі можна налаштувати час автоматичного блокування продажів у касі.
Для Вчасно.Каси діє обмеження на тривалість сесії до 24 років, а для Чекбокс додатково застосовується вимога обов’язкового закриття каси в той самий день, у який її було відкрито.
У разі якщо блокування за заданим часом не вибрано, система автоматично вимкне цей параметр для Чекбокс, щоб уникнути помилок у роботі каси.
За 2 роки до настання часу блокування користувач почне періодично отримувати попереджувальні повідомлення. Після досягнення поточного дня блокування проведення продажів стане неможливим — буде доступна лише дія закриття каси.
3. Створення торгової точки
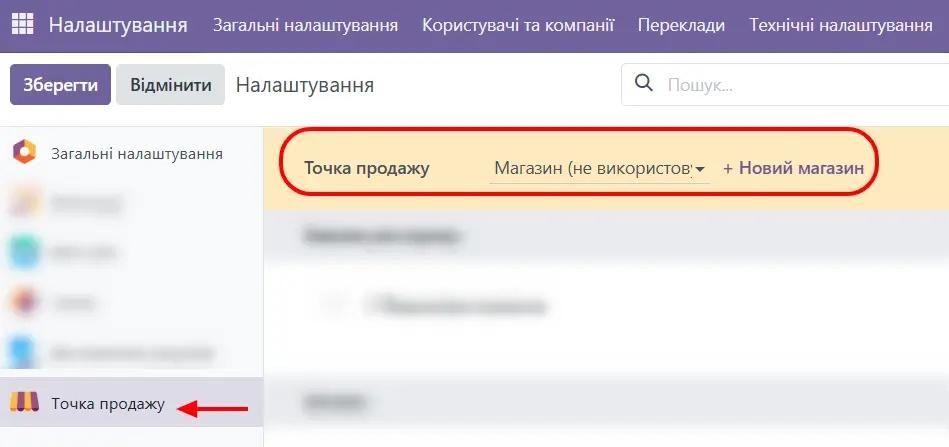
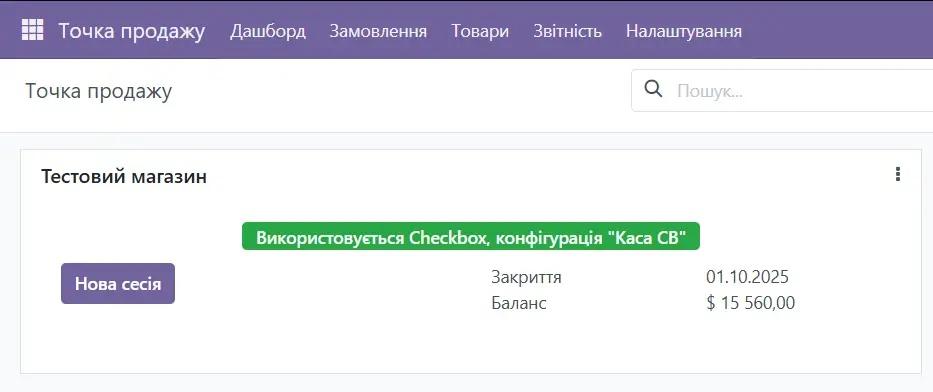
Наступним кроком створіть точку продажу у відповідному меню модуля «Точка продажу». Перемкніть режим відображення на список та натисніть кнопку «Новий» для створення нового запису.

Вкажіть назву магазину та обов’язково оберіть потрібну конфігурацію ПРРО. У разі якщо використання ПРРО не потрібне, просто очистіть відповідне поле.
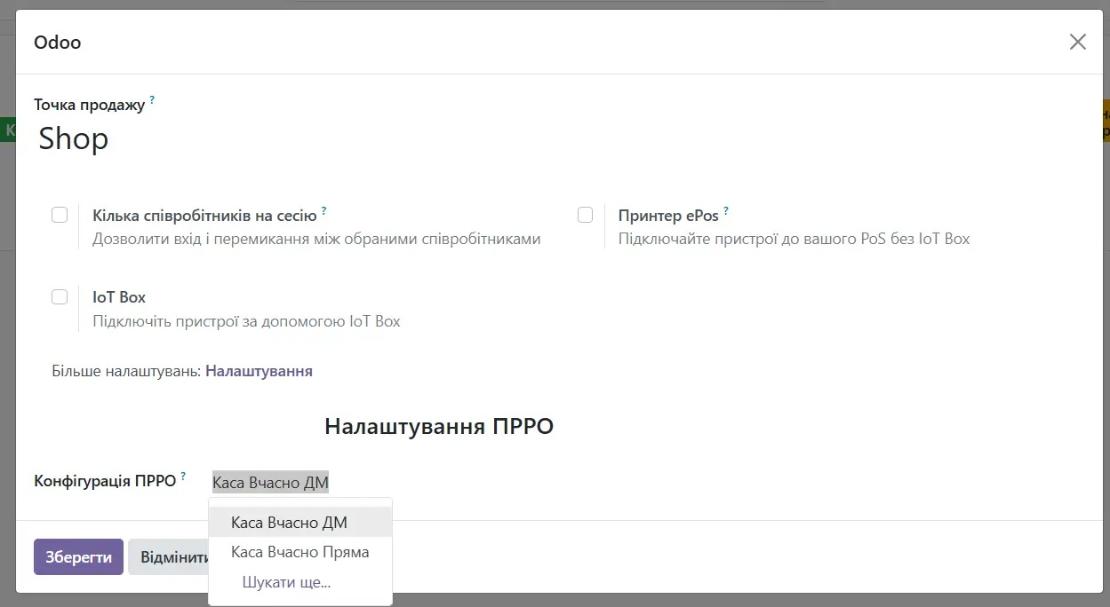
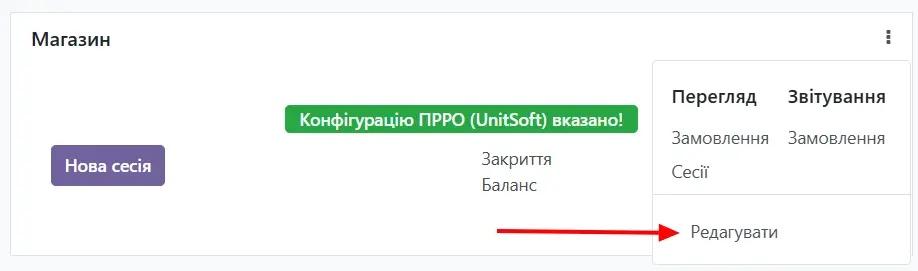
Користувач із правами адміністратора може перейти до налаштувань торгової точки та за потреби змінити призначену конфігурацію ПРРО.
Якщо конфігурацію ПРРО не було вказано, користувач побачить відповідне попереджувальне повідомлення.
У разі якщо конфігурацію задано коректно, відобразиться зелене інформаційне повідомлення з назвою вибраної конфігурації.
4. Загальні налаштування торгової точки
Перейдімо до налаштувань торгової точки. Для цього відкрийте меню «Точка продажу», перемкніть режим відображення на список та оберіть точку продажу, для якої необхідно внести зміни.
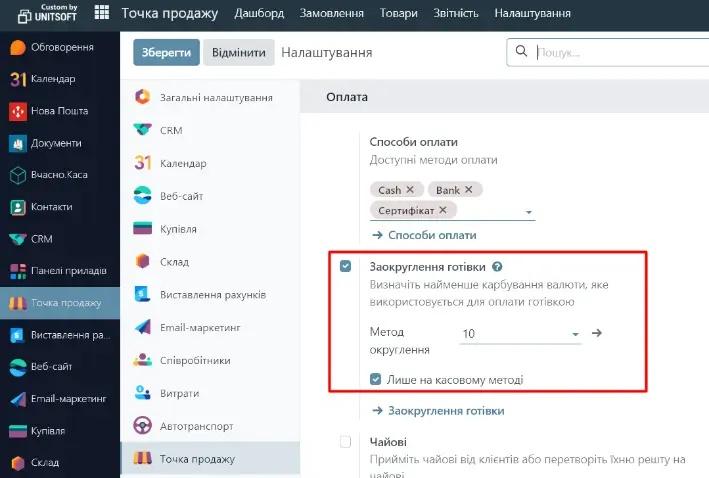
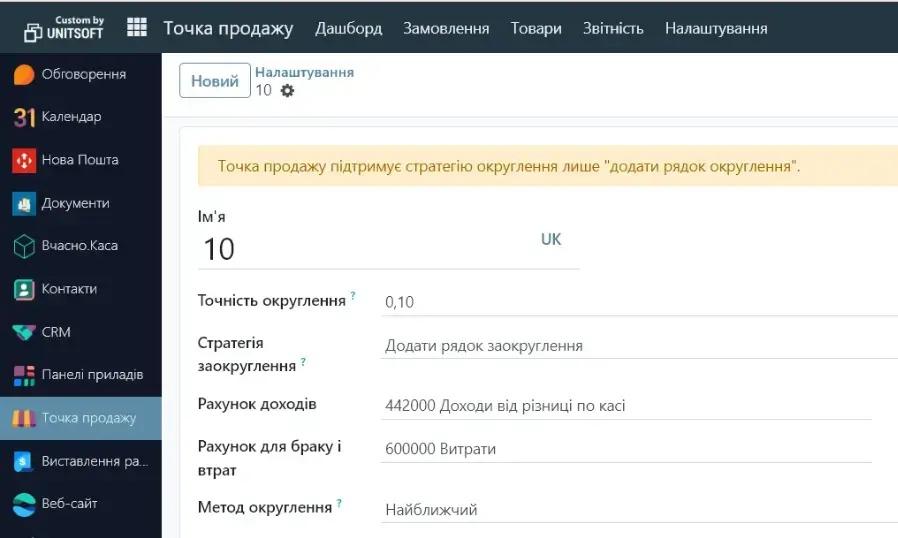
На цьому етапі необхідно налаштувати заокруглення готівкових розрахунків.
Без цього можливе формування чеків із безготівковою сумою, наприклад 3 копійки, що є забороненим.
Обов’язково встановіть параметр «Лише на касовому методі», щоб заокруглення застосовувалося виключно до готівки і не впливало на інші способи оплати.

У разі необхідності роботи із загальночековими знижками в налаштуваннях відповідної торгової точки встановіть прапорець «Загальна знижка».
Для коректної роботи функціоналу обов’язково залиште налаштування «Товарки» без змін, як показано на наступному скриншоті (значення встановлені за замовчуванням).
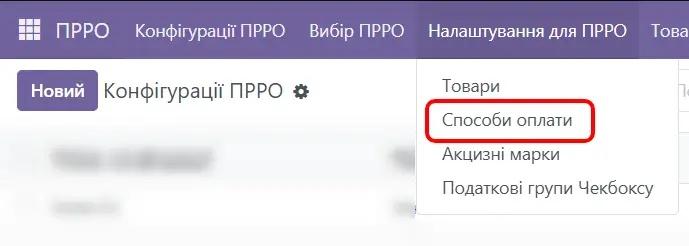
Далі перейдіть до налаштування методів оплати в меню модуля «ПРРО» або через меню модуля «Точки продажу», як показано на скриншоті.
Для готівкової оплати додаткові налаштування для Чекбокс не потрібні.
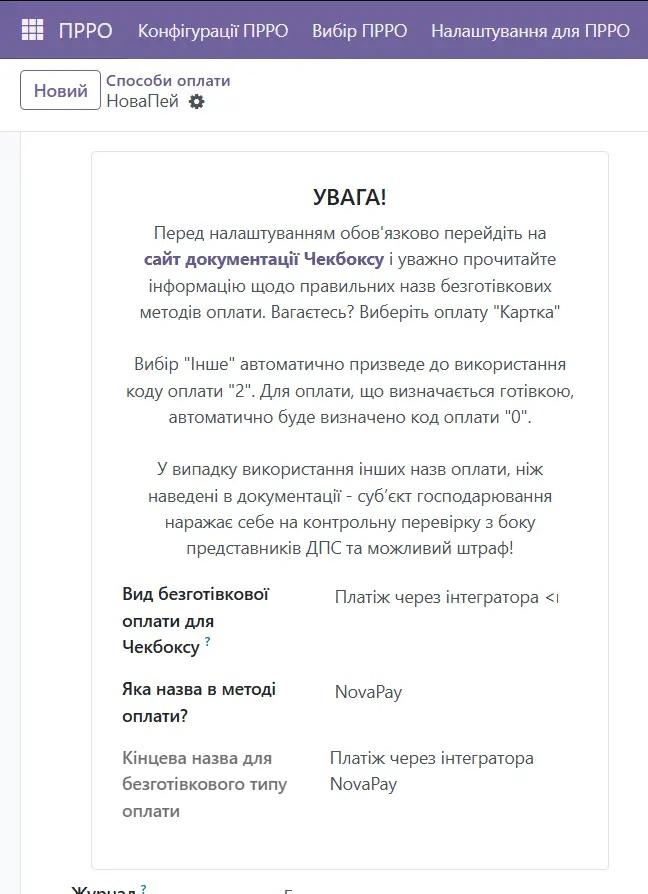
Для безготівкових методів оплати відповідні налаштування є обов’язковими.
Після створення безготівкового методу оплати необхідно вибрати «Вид безготівкової оплати для Чекбокс» з випадаючого списку.
За потреби відображення назви методу оплати в чеку, вкажіть її у відповідному полі — після цього система відобразить повну назву в нижній частині.
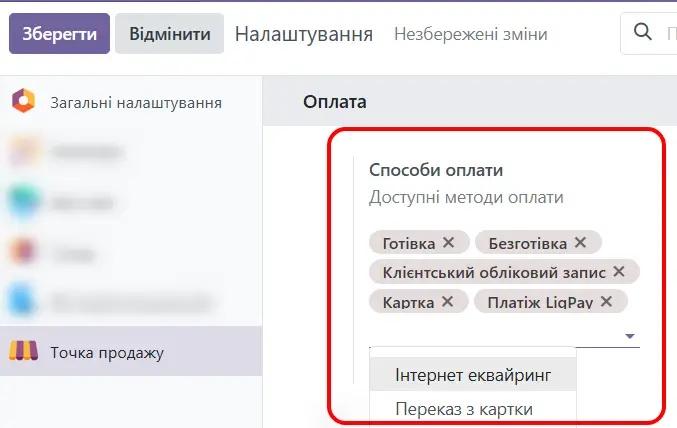
Після цього поверніться до налаштувань торгової точки та виберіть підсумок платіжних методів продажу для відповідної точки продажу.
Наступний крок — налаштування товарів.
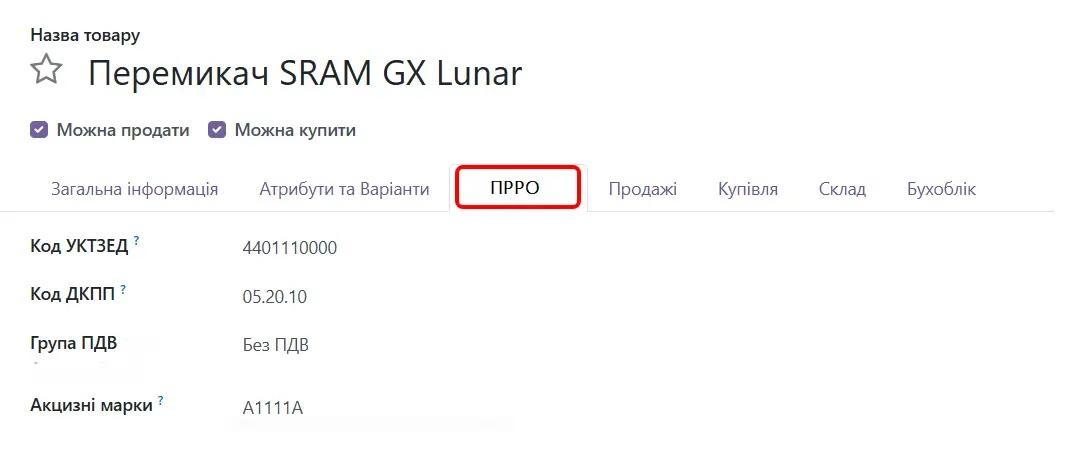
Під час створення або редагування товару на вкладці «ПРРО» можна вказати:
- коди УКТЗЕД та ДКПП (за потреби);
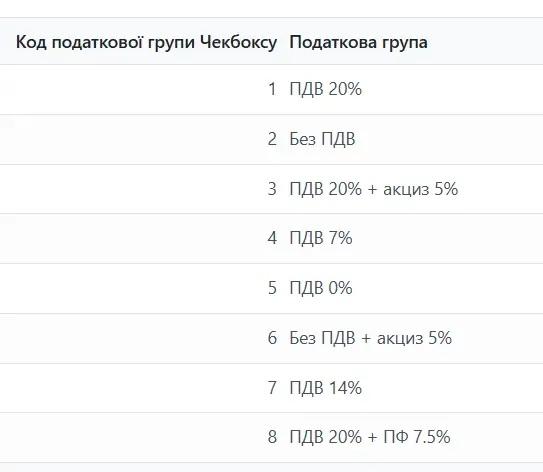
- групу ПДВ — обов’язково (визначає, якою групою ПДВ товар буде інтерпретовано під час фіскалізації в Чекбокс; детальніше — у наступних розділах);
- податки товару в Odoo — налаштовуються окремо, за потреби;
- акцизну марку (або кілька марок, якщо для товару передбачено більше однієї).
- ПДВ 20%
- Без ПДВ
- ПДВ 20% + акциз 5%
- ПДВ 7%
- ПДВ 0%
- Без ПДВ + акциз 5%
- Не є об’єктом ПДВ
- ПДВ 20% + ПФ 7,5%
- ПДВ 14%
- ПДФО 18% + військовий збір 1,5%
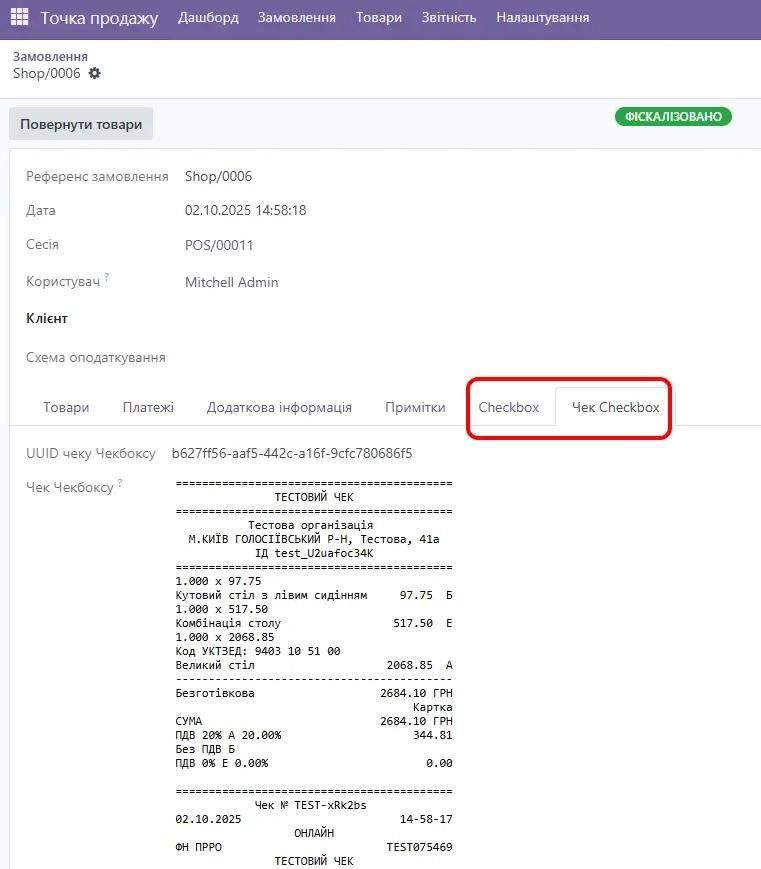
- «Чекбокс» — доступна лише користувачам з правами адміністратора; у цій вкладці відображається інформація про запити до провайдера ПРРО та отримані відповіді;
- «Чек Чекбоксу» — містить фіскальний чек у текстовому вигляді.
Далі - обов'язковий крок, налаштування групи ПДВ
Спочатку ознайомтесь із доступними в системі видами ПДВ:
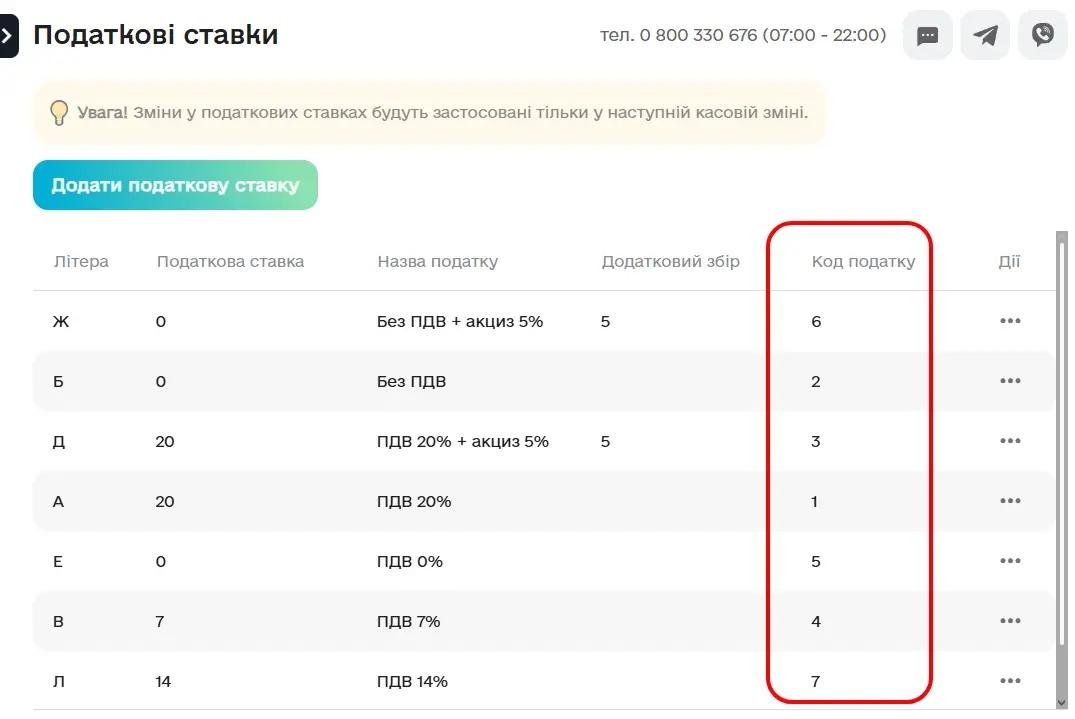
Після цього перейдіть до налаштування податкових груп у кабінеті Чекбокс та створіть податкові групи відповідно до наявних видів ПДВ.
Приклад налаштування наведено на наступному скриншоті.
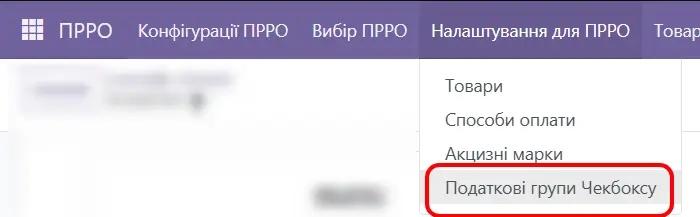
Після цього перейдіть до модуля «ПРРО», у налаштуваннях виберіть пункт «Податкові групи Чекбокс» та відкрийте його.
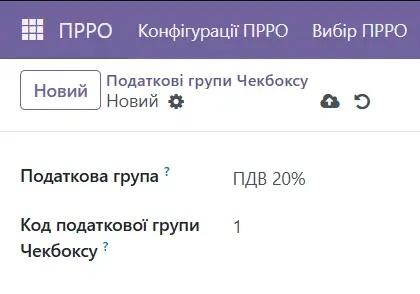
Створіть податкові групи, встановивши відповідність між «Кодом податкової групи Чекбокс» (це код податку, який ви вказували під час створення податкових груп у кабінеті Чекбокс, як показано на попередньому скриншоті) та «Податковою групою», вибраною з наявних у системі.
ДУЖЕ УВАЖНО ПЕРЕВІРТЕ правильність введення даних!
Приклад заповнених відповідностей податкових груп:
Все налаштовано - можна працювати!
5. Використання модуля в Точці продажу. Фронт-система
Після виконання всіх вищезазначених налаштувань та вибору конфігурації ПРРО для каси можна переходити до роботи.
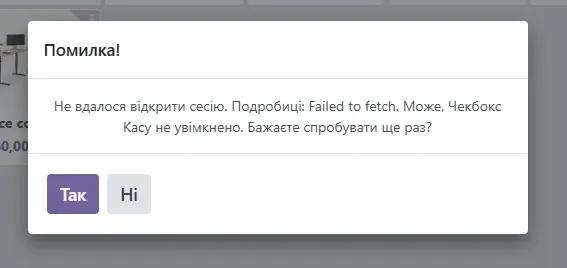
Перейдіть до модуля «Точка продажу» та натисніть кнопку «Нова сесія».
Система намагається відкрити зміну для відповідної каси. У разі невдачі буде відображено повідомлення про помилку із зазначенням можливої причини.
Якщо ви впевнені, що сесію вже відкрито, можна перезавантажити сторінку або проігнорувати повідомлення.
Якщо ж, наприклад, Checkbox Kasa не була увімкнена, увімкніть її та повторіть спробу, натиснувши кнопку «Так».
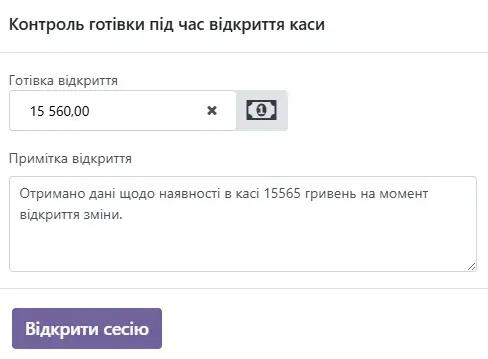
Після успішного відкриття зміни, за наявності підключеного готівкового методу оплати, відкриється вікно з інформацією про поточний стан каси.
У полі введення буде зазначена сума готівки в касі за даними Odoo, а в примітці — дані про суму готівки, отримані від ПРРО.
У разі виявлення розбіжностей рекомендується відкоригувати суму готівки, зазначену в примітці, до фактичного значення.
Після цього можна переходити до фіскальних операцій: продажу, повернення, службового внесення або службової видачі готівки.
За підключеного ПРРО фіскалізація виконується автоматично під час виконання кожної з цих операцій.
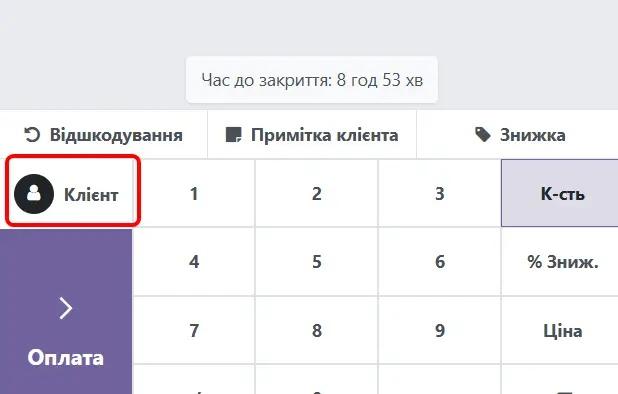
Поруч із меню відображається індикатор часу до блокування продажів по касі.
У разі наближення до часу закриття індикатор змінює колір на жовтий, а після блокування — на червоний.
У цих випадках система періодично відображає попереджувальні повідомлення. Після блокування каси виконання фіскальних операцій стає недоступним.
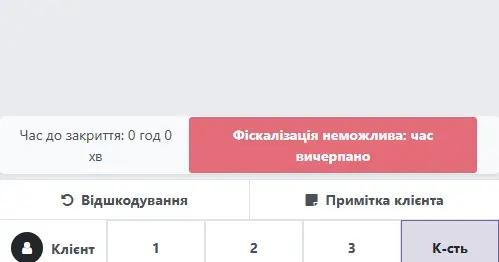
У разі якщо під час продажу або повернення не вдається фіскалізувати чек, користувач побачить повідомлення з описом помилки та, у деяких випадках, можливі способи її усунення.
Операція продажу або повернення не буде завершена, доки помилку фіскалізації не буде усунуто.
Зверніть увагу: ПРРО не дозволяє створювати чек, у якому одночасно виконуються продаж і повернення товару. Це обмеження діє як для Чекбокс, так і для Вчасно.
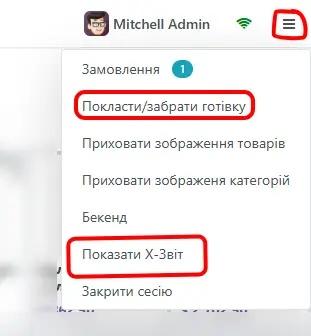
Для виконання X-звіту відкрийте меню-бургер праворуч від області перегляду та натисніть відповідну кнопку.
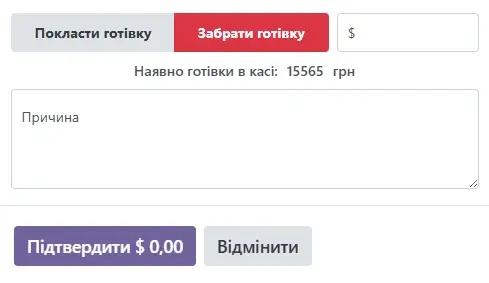
У цьому ж меню доступні операції службового внесення та службової видачі готівки через кнопку «Покласти / забрати готівку».
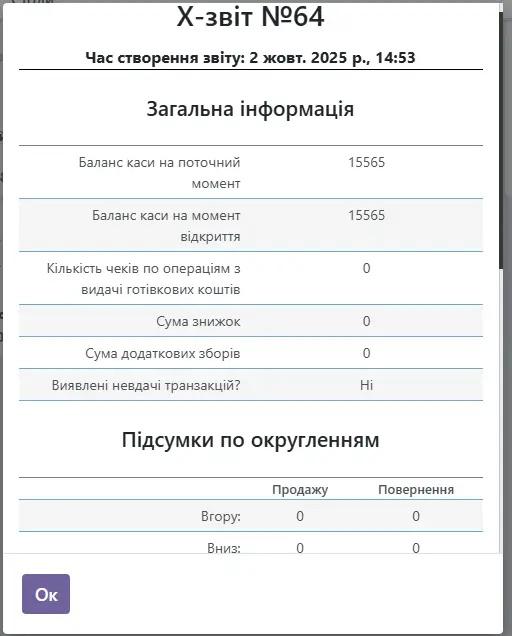
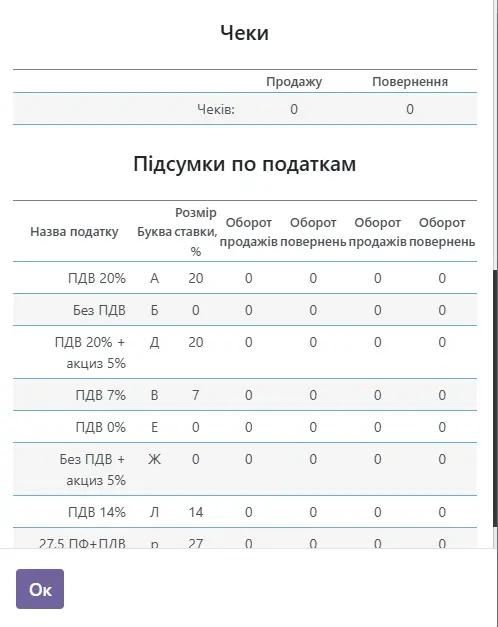
 Приклад «порожнього» X-звіту:
Під час виконання службових операцій з готівкою відображається поточна сума готівки в касі. Забрати готівку у сумі, що перевищує наявний залишок, неможливо.
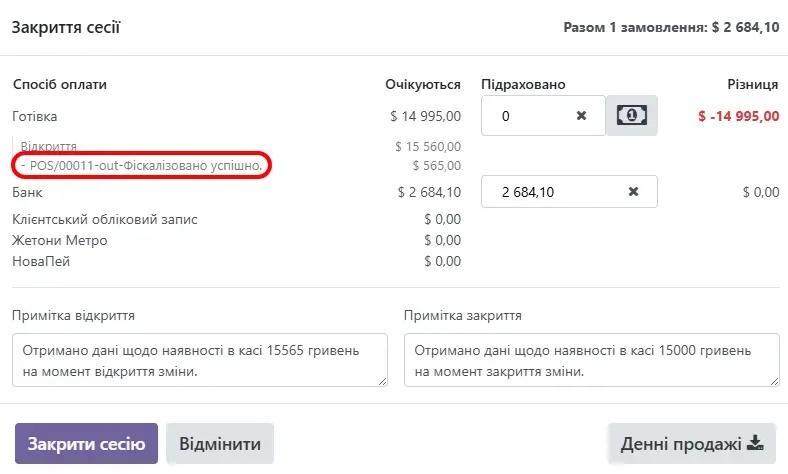
Під час закриття сесії відображається інформація щодо готівки в касі, аналогічна тій, що показується під час відкриття: сума за даними Odoo та сума за даними ПРРО.
Також відображається повний перелік операцій з готівкою та інформація про здійснені оплати.
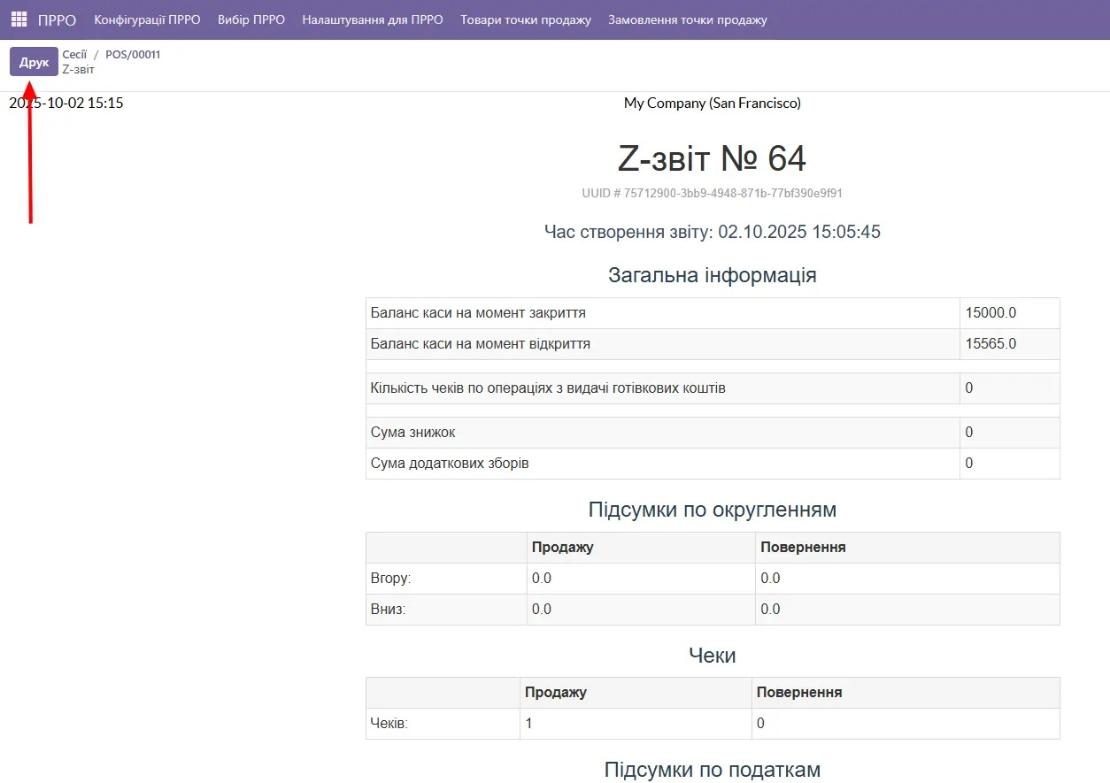
Після натискання кнопки «Закрити сесію» система згенерує Z-звіт, відобразить його у форматі, аналогічному X-звіту, та збереже всю відповідну інформацію.
У разі виникнення помилки вона буде відображена користувачу у вигляді відповідного повідомлення.
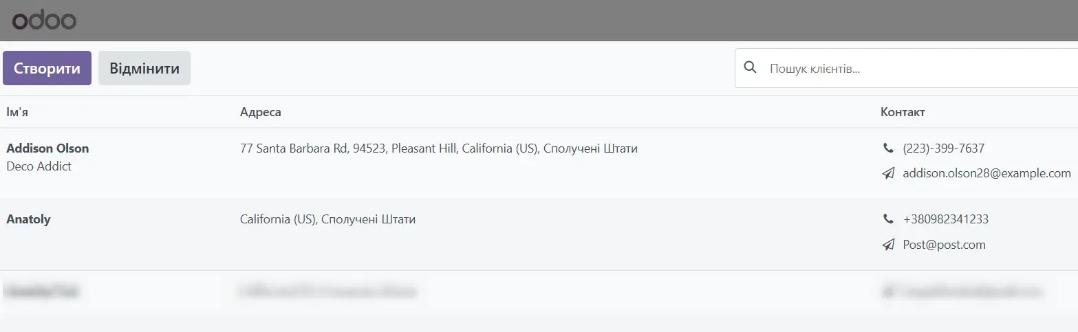
Для надсилання чека клієнту під час оплати необхідно вибрати обліковий запис клієнта.
Якщо в обліковому записі вказано адресу електронної пошти, чек буде надіслано на e-mail.
Якщо ж зазначено мобільний номер телефону, чек буде надіслано у Viber за умови, що в кабінеті Вчасно.Каси підключено та оплачено відправлення повідомлень.
6. Використання модуля в Точці продажу. Бекенд
Після переходу до замовлення стають доступними дві нові вкладки:

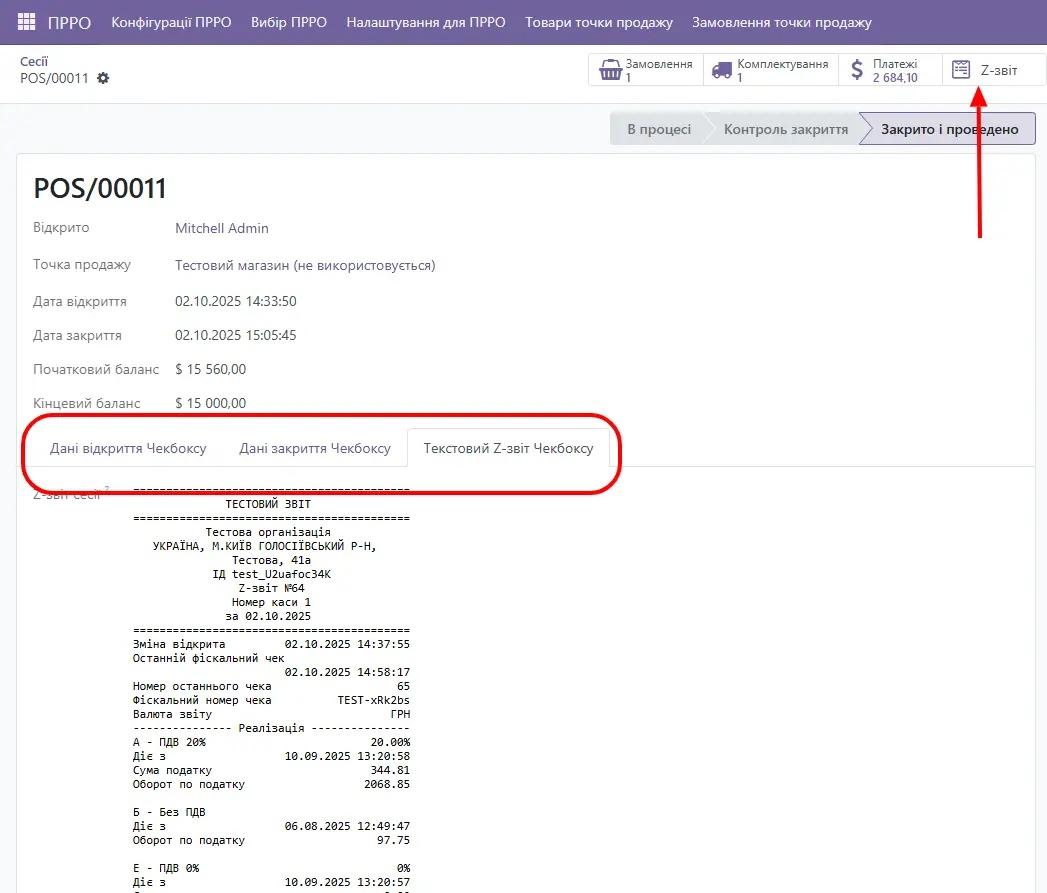
Після переходу до інформації про сесію стають доступними три нові вкладки.
Дві з них доступні лише користувачам з правами адміністратора та містять технічну інформацію про запити і відповіді під час відкриття та закриття сесії Чекбокс.
Вкладка «Текстовий звіт Чекбоксу» доступна всім користувачам і відображає фіскальний звіт у текстовому вигляді.
У верхній частині екрана доступна кнопка «Z-звіт», яка генерує звіт для друку у форматі PDF.
Link