Facebook Instructions
1. Module description
Lead form is a type of online form used by companies and marketers to collect information from potential clients. It is often used as part of a lead generation strategy to gather contact details and other important information from individuals who have shown interest in a product, service, or company. The information collected through lead forms typically includes data such as: name, email address, phone number, company name, and any other data relevant to the business's marketing efforts.
This module is designed to transfer all visitor data from the lead form in Facebook to the Odoo database. Then companies can use this data for further work with potential clients, building relationships, and potentially converting them into customers.
The module can become an important tool for companies looking to expand their customer base and connect with potential clients interested in their products or services.
2. Module settings
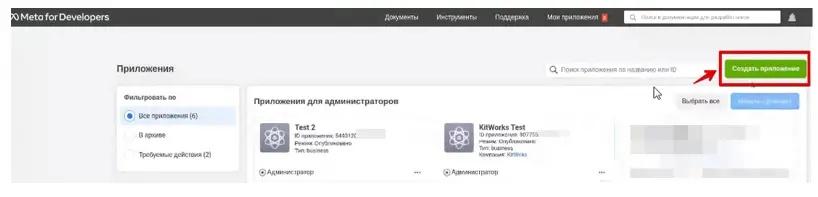
To start working with the kw_facebook_lead_form module, you should go to the Meta for Developers dashboard and create a new app.
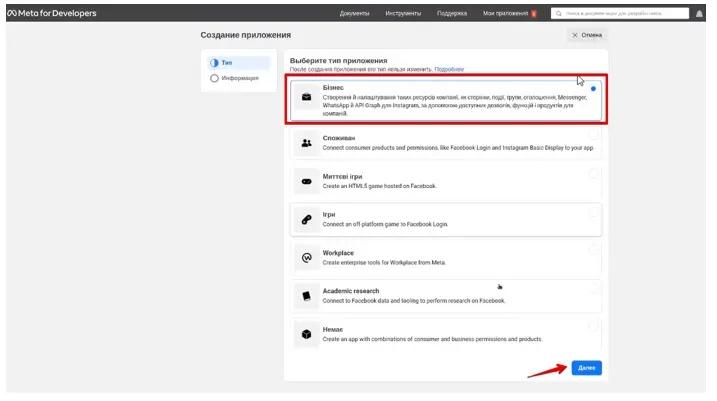
 In the new window, select "Other" applications and click the Next button. Select the Business type. Next.
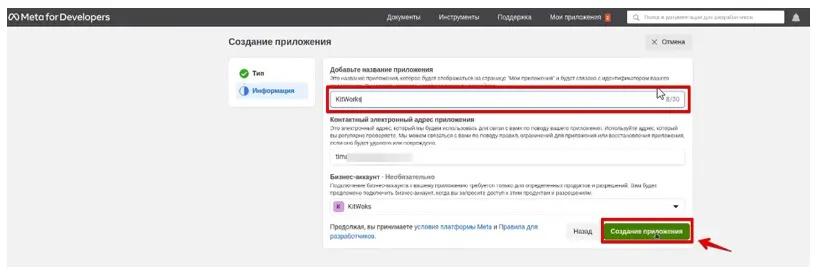
 Specify the app name. Add a business account. Click the Create App button.
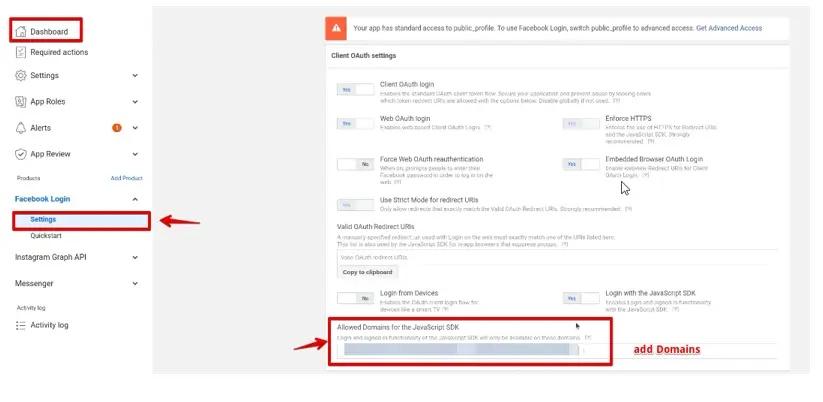
 Next, open the created app and go to the Dashboard tab. Go to Facebook Login/Settings to make the appropriate checkbox settings and specify the domain of your Odoo system (you can enter multiple addresses in this field).
 The next step is to go to the Odoo system, open the Apps menu, click the Update Apps List button (located on the left in the top row), and enter "kw_facebook_lead_form" and "kw_graph_api" in the search bar. Install these modules.
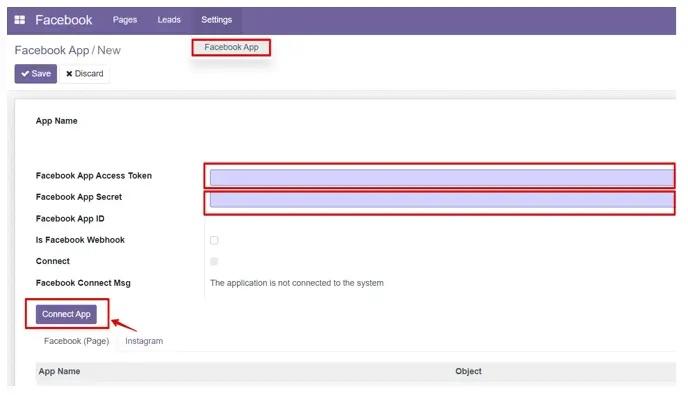
 Open the Facebook menu, go to the Settings / Facebook App tab, and click the Create button. In the form provided, you should specify the Token and App Key. All data is taken from the personal Facebook business account. To specify the Facebook App Access Token, go to the Tools / Access Token Tool tab and find the required App Token, copy it, and paste it into the Odoo system. Then go to the Settings / General section and copy the App Secret for the Facebook App Secret field. It is also worth noting: for the successful setup of this module, your business account on Facebook must be confirmed. After filling in all the data, click Connect App.
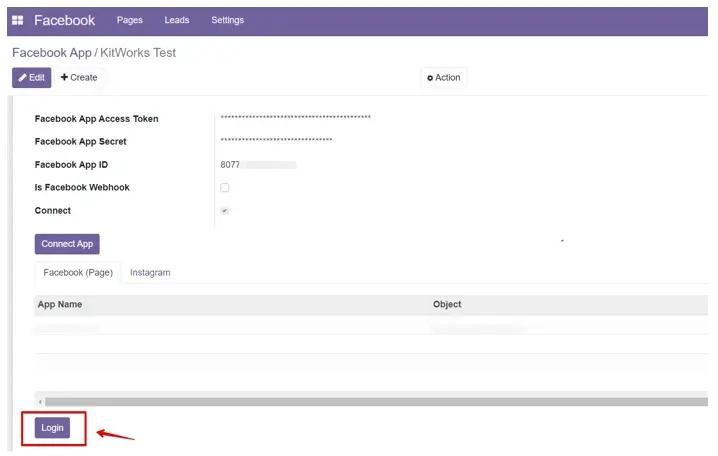
 When entering the correct data and connecting with the application, you will receive a Facebook App ID and a checkmark will appear next to the Connect field. The next step is to click the Login button.
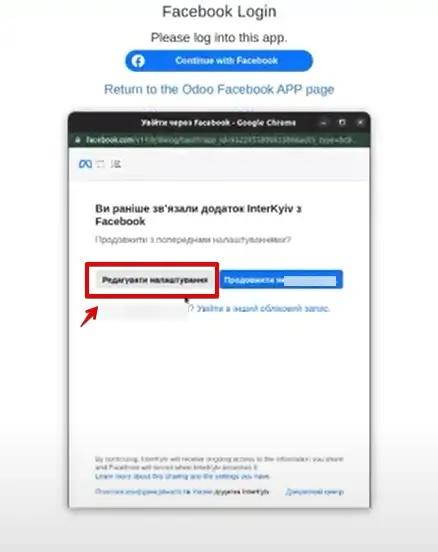
 You will be automatically redirected to the FB page, where you need to edit the settings and choose the Facebook page you plan to connect to the Odoo system. After completing this setup and agreeing to the permissions from FB, return to the Odoo database.
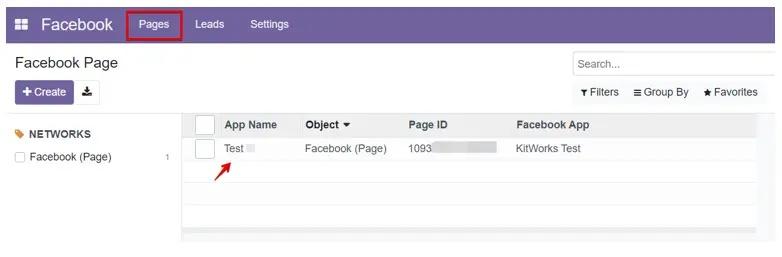
 Next, go to the Pages tab and select an existing page.
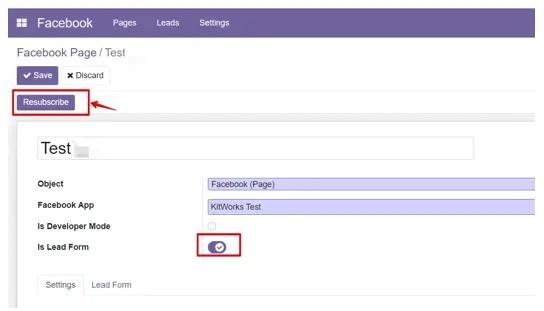
 In order to receive lead forms, you need to check the box next to the Is Lead Form field. Then click the Resubscribe button to resubscribe and give consent for additional permissions.
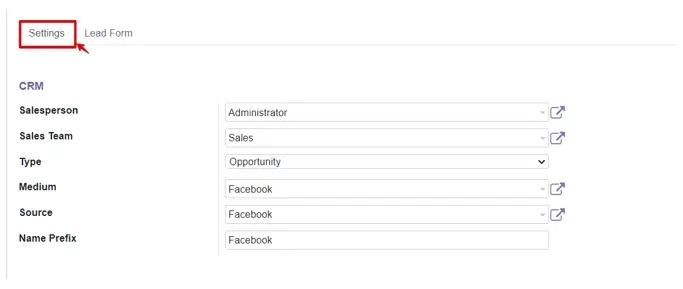
 On the Settings tab, you will have the opportunity to specify default values when creating a lead in the CRM module.
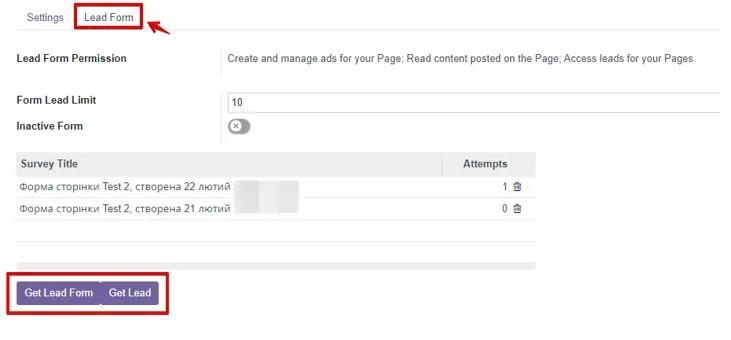
 By going to the Lead Form tab, you will see the lead form permissions. Form Lead Limit - will allow you to limit survey forms (the last ten, for example). You can also deactivate the form using the Inactive Form button.
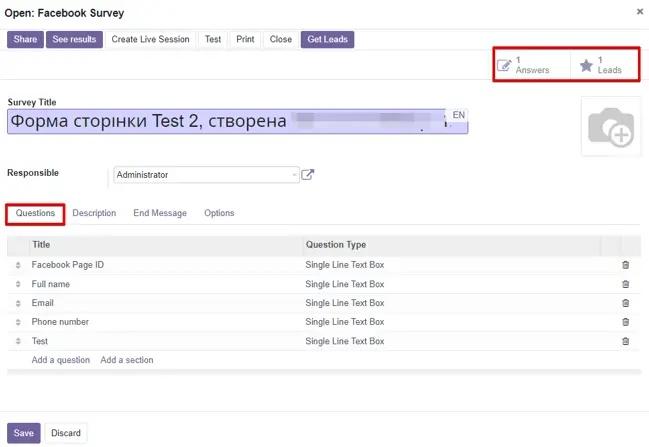
 By selecting the desired survey, you see the questions present in the form, the number of responses, and the number of leads created.
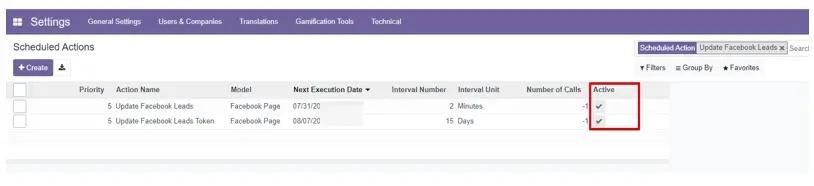
 For convenience and comfort, this module includes automatic actions. By activating developer mode, go to General Settings/Technical/Automation/Scheduled Actions. Every 2 minutes, information about Facebook leads is updated. If necessary, you can change this frequency yourself. To do this, go to the desired action and specify the desired frequency. Also, every 15 days, the Facebook leads token is updated.