Google Drive Instruction
1. Backups
1.1 Local Backup
 1.2 Google Drive Backup
You need to set up OAuth credentials for this project before you can submit it for review in Google Cloud. This implies that you need to set up OAuth credentials for your project before proceeding with certain actions, such as submitting the project for review. This usually occurs when you are trying to use OAuth 2.0 credentials for authentication or authorization in your project. To resolve this issue and set up OAuth credentials for your project in Google Cloud, follow these steps:
1.2.1 Go to Google Cloud Console
Visit Google Cloud Console
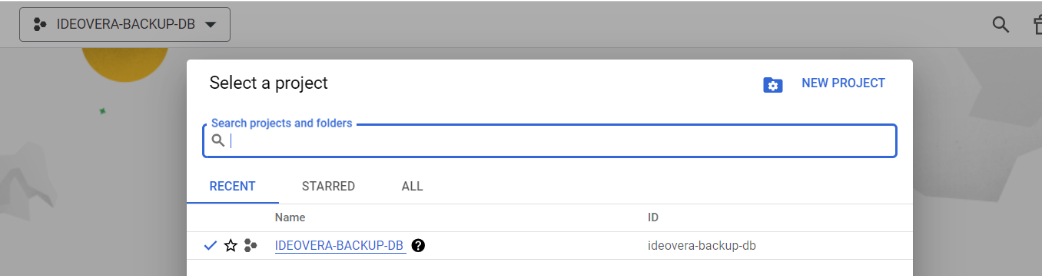
1.2.2 Select your project
Ensure you are working in the correct Google Cloud project. If you need to switch to another project, use the project selector in the top navigation bar.
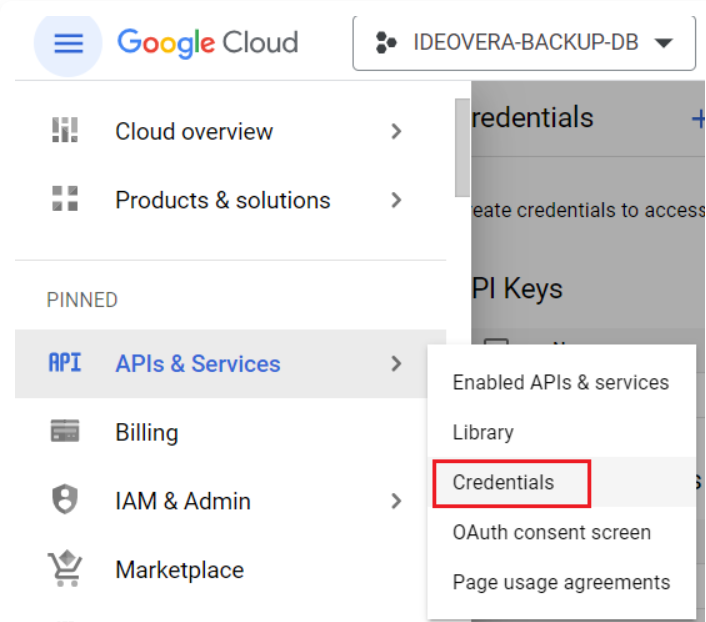
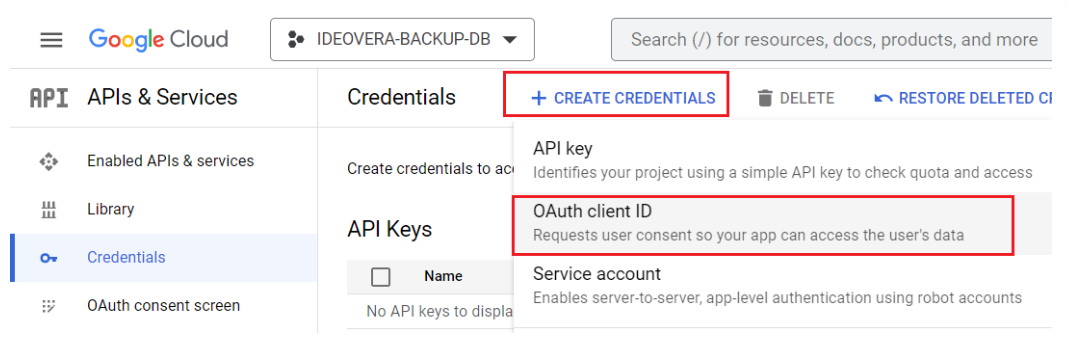
1.2.3 Create OAuth credentials
To set up OAuth credentials, you need to create a new OAuth client ID. Follow these steps:
- Click the API & Services menu on the left sidebar.
- Select credentials.
1.2.4 Create a new OAuth client ID
- Click the Create Credentials button
- Select the OAuth client ID from the dropdown menu
1.2.5 Configure the OAuth client ID
Select the application type. Choose a web application.
Set up the authorized redirect URI, consent screen information, and other required parameters.
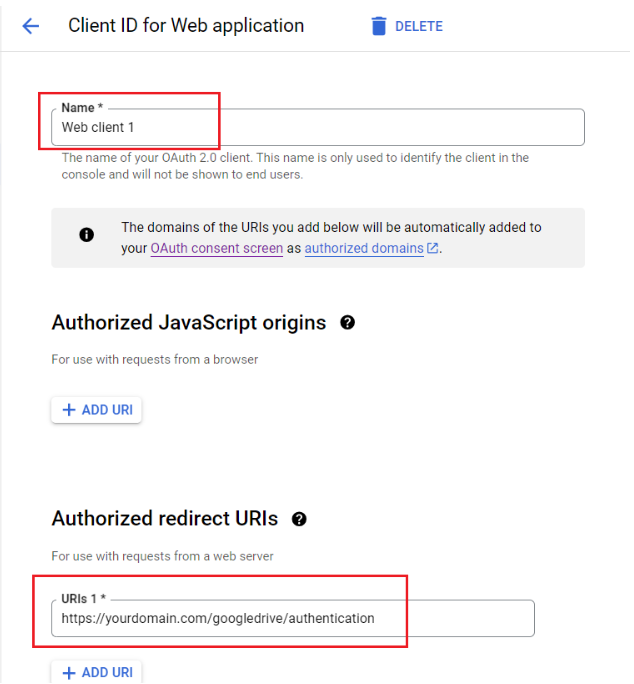
1.2.6 Create the OAuth client ID
Click the 'Create' button to create the OAuth client ID.
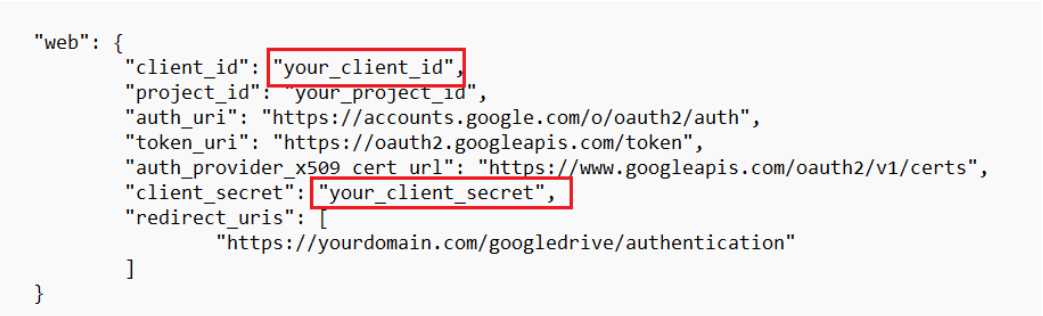
1.2.7 Download or copy credentials
After creating the OAuth client ID, you can download the credentials as a JSON file or copy the client ID and client secret.

1.2.8 Use OAuth credentials
You can now use these OAuth credentials in your application or project to enable OAuth-based authentication and authorization.
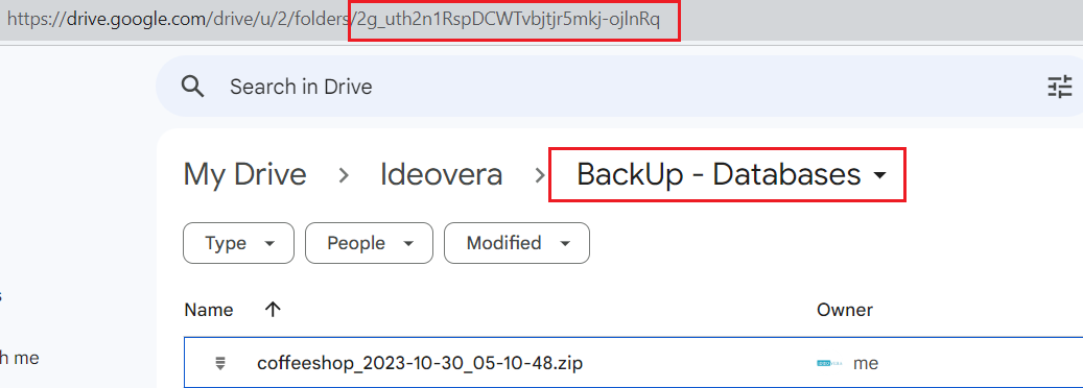
 2. Create a backup folder on Google Drive
Go to your Google Drive account. Create a new folder and copy the folder ID.
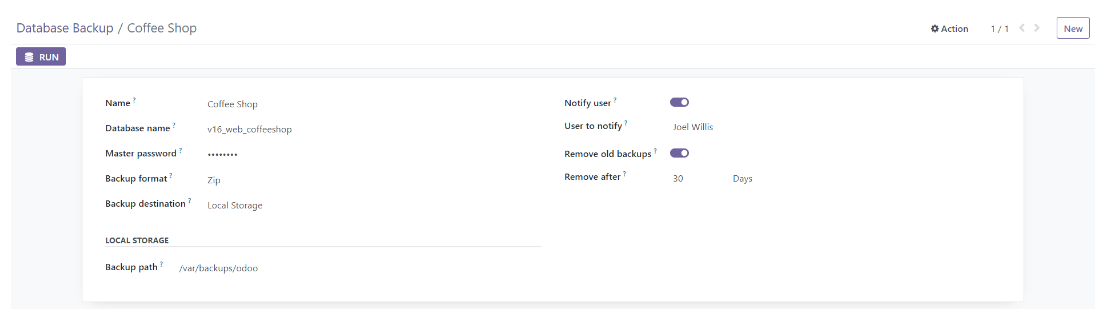
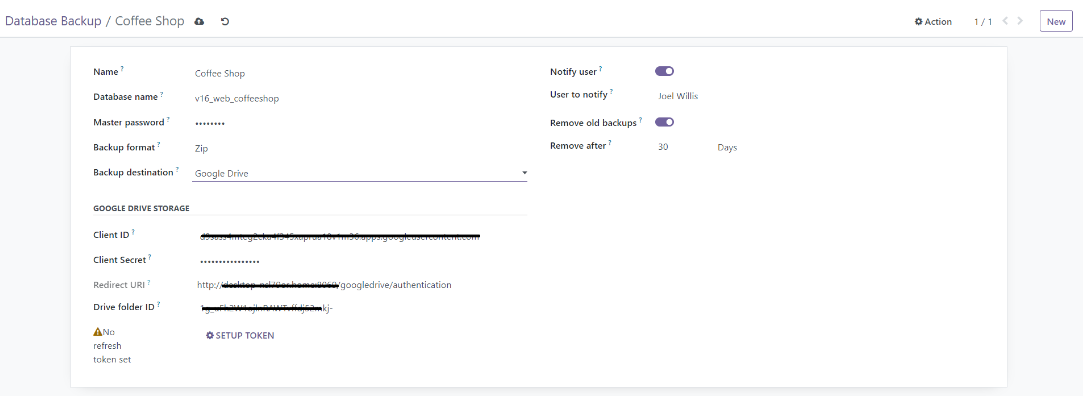
3. Configure database backup in Odoo
After completing the Google Cloud setup, you can configure the backup database in Odoo. The initial configuration does not include the refresh token. Therefore, it is necessary to proceed to the next step by clicking the SETUP TOKEN button.
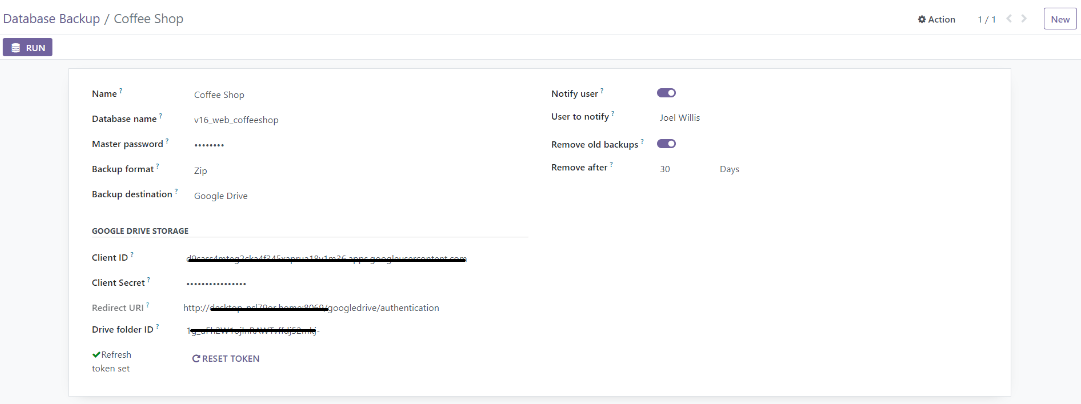
 4. Refresh token setup completed successfully
5. Configuration and execution
Optimize your process with a system that allows you to configure and run settings in a single form

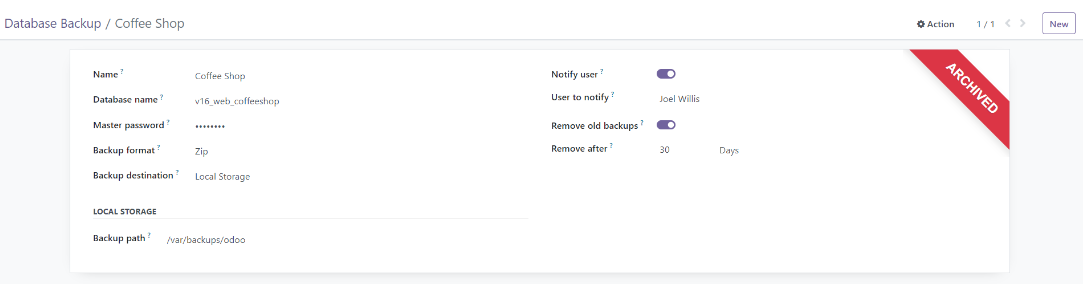
6. Archived configuration
You will have the option to pause the configuration by archiving it and easily unarchive it when needed.
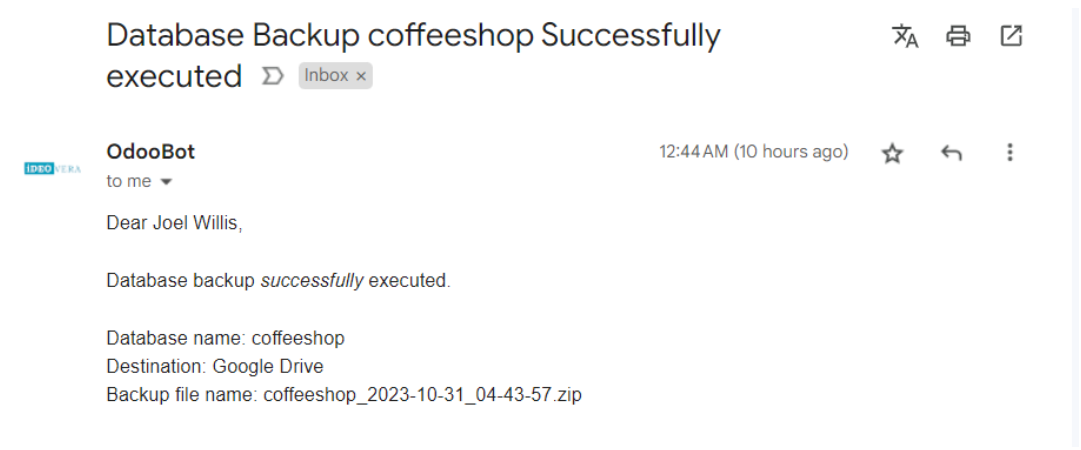
7. Automatic email notification
Stay informed with timely email notifications sent after each cron run, ensuring you stay updated and can monitor your system. Receive an email with the result of the backup operation.