Viber ChatBot Instructions
1. Installation
- Install the module according to the us_messenger module documentation
2. Configuration
In Viber
- Create a bot and get its token
- Please note that from 5.02.24 Viber bots can only be created on commercial terms. Please find more information here.
In Odoo
- Activate developer mode
- Open the menu [[ Settings ]] >> Technical Settings >> System Parameters
- Check if the parameter web.base.url is set correctly and is accessible via the Internet (it should not be a local host). Also, Viber only accepts https addresses (not http). If you can only use localhost, use ngrok
- Open the menu [[ Messengers ]] >> Messengers
- Select the Kanban card with the Viber icon and the name 'Enter_bot_name'
- Enter the new bot token in the token field
- Enter the bot name and select the operators the user will contact
- Unzip the project
- Click the [Run] button in the upper left corner
3. Usage
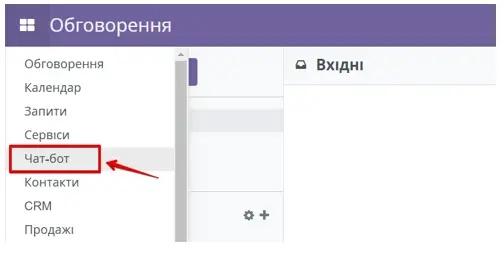
Conversation in the "Discussion" menu
In Viber:
- Start a conversation with the created bot
- Optionally, enter contact details (email, phone number)
- Click the "Contact Operator" button
In Odoo:
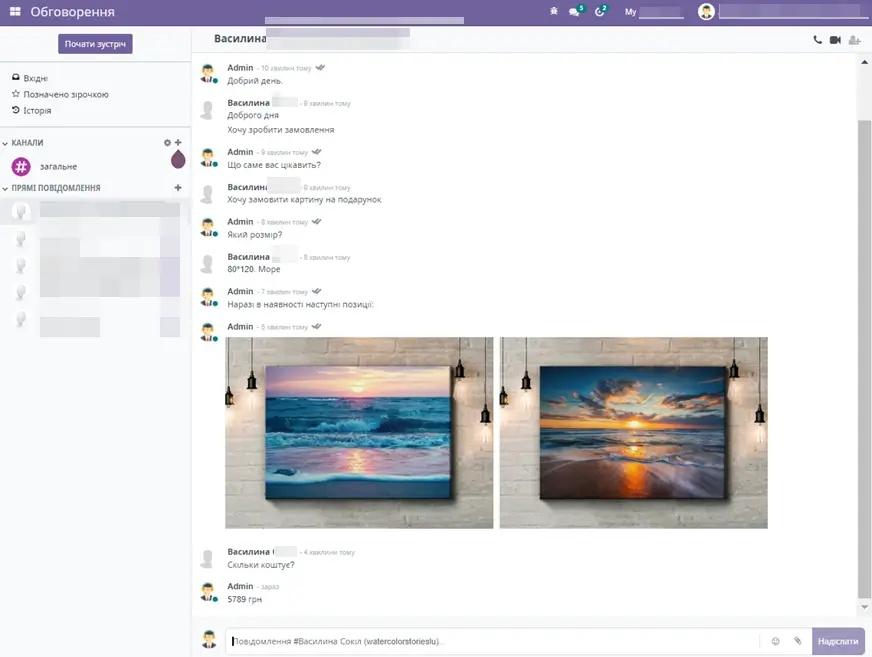
- Open [[ Discussion ]]
- RESULT: two contact records will be created, a child and a parent. Later, other child cards from different messengers can be joined to the parent record
- RESULT: a channel named Viber:<VIBER NAME> appeared.
- Open the channel and reply to the message
In Viber:
- RESULT: the message is delivered through the bot
You can continue the chat conversation this way
Conversation in any document where there is discussion
In Odoo:
- Make sure that in [[ Messengers ]] >> Messengers >> <Your bot's name> >> Settings, the CHATTER field says "yes".
- Add subscribers to the chat by clicking the button'Add subscribers'. Select only parent contacts (without any bot name)
- Click the button'Send Message'. Select who and in which messenger to send the message. Write the message and send it.
- Note: The message will be sent not only to the selected messenger but also by email. To disable email sending, you can click the "Subscribers" button, select a subscriber, click "Edit subscription" and disable "Discussion", and enable "Note".
- In the [[ Discussion ]] menu, you will see a message from the document with the signature from which this message was written
In Viber:
- RESULT: a new message will appear
- Reply to this message
In Odoo:
- RESULT: you will see the message from Viber in the chat document
Carousel Content message
You can create your own carousels. Learn more about creating carousels on the site.
- To change the carousel, go to [[ Messengers ]] >> Messengers >> Your bot's name >> For Developers >> Common Code
Viber ChatBot Instructions from Kitworks
1. Module Description
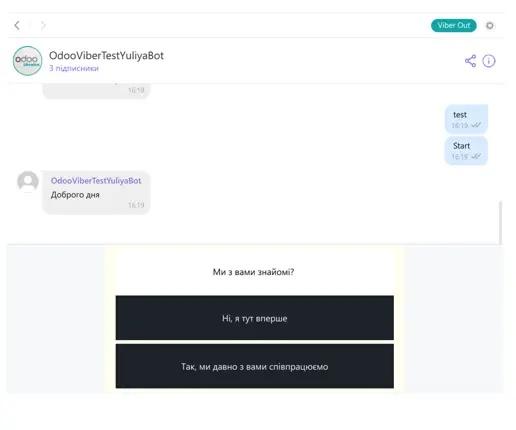
Chatbot— is a program that simulates a real conversation with a user. Since chatbots use artificial intelligence, they understand language, not just commands. In addition to chatbots created using artificial intelligence, there are also those that operate based on programmed scenarios with multiple choices, for example, option A leads to option B.
Viber ChatBot Module- a virtual manager that helps maintain communication with clients through Viber bot from the Odoo interface.
Using our module, you can:
- Configure your own steps;
- Provide automatic responses to standard support requests;
- Create new or update old client contacts;
- Create new CRM Leads;
- Send notifications about changes in orders, requests to your clients - for example, about delivery or change of order status;
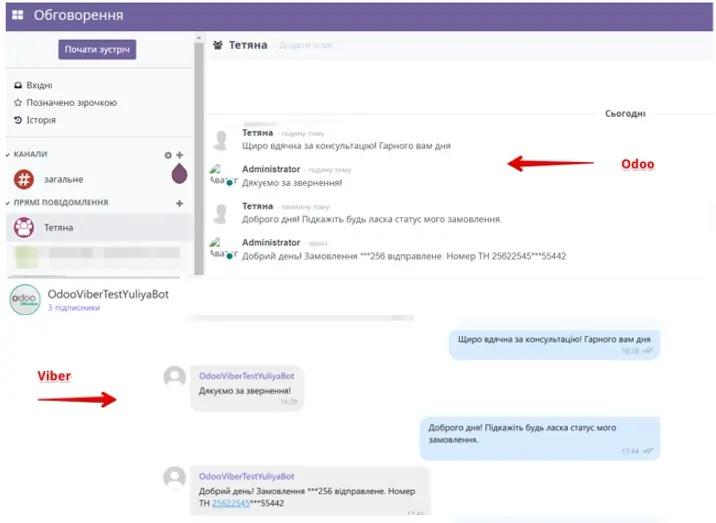
All messages from messengers go to the standard Odoo Discuss interface:
At any stage of working with the chatbot, the client can seek consultation from the operator and get answers to their questions.
2. Module Configuration
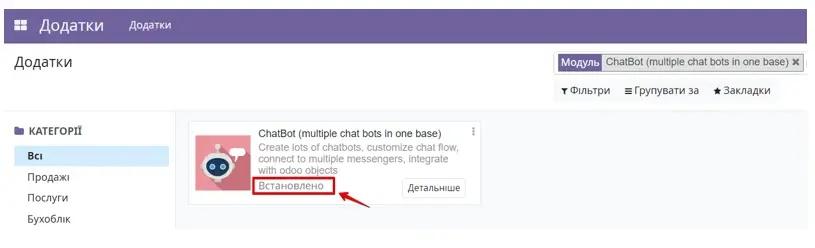
To configure this module, select the Applications category, click the Update application lists button (located on the left in the top row), and enter "chatbot" in the search bar, then install the found modules.
Next, go to the Chatbot module. If the chatbot does not appear in the list of modules, you need to check the user's access rights to this module. To do this, go to user settings and grant the appropriate access levels.
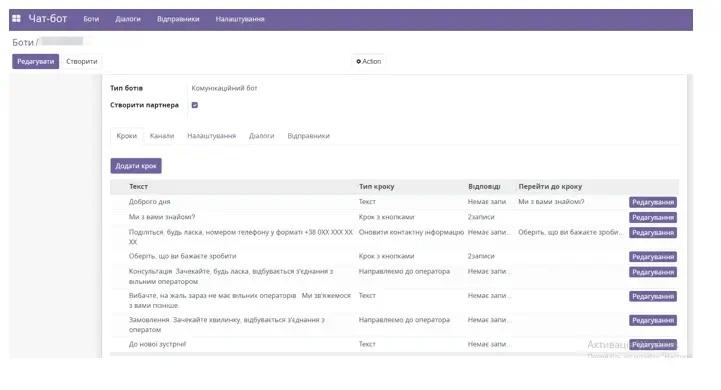
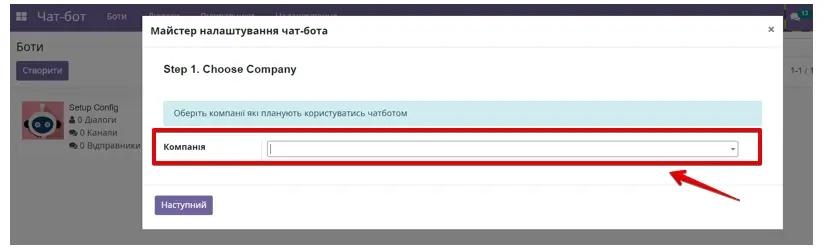
The chatbot menu consists of four sections and the initial setup wizard "Setup Config":
- «Bots»– contains a list of all bots being used;
- «Dialogs»– list of all dialogs;
- «Senders»– list of all message senders;
- «Settings»– additional module settings.
Go to the Chatbot menu and click "Settings". You will be taken to the initial setup wizard form.

By default, communication and operator chatbots are immediately created, providing the opportunity to build dynamic communication with the client, with the possibility of connecting an operator to the dialog at any moment.
Step 1. You select the company or list of companies for which chatbots need to be created.
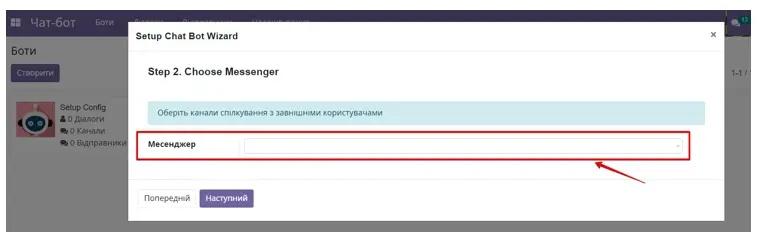
Step 2. You choose which messengers will be used for further communication. For the list of selected messengers, settings are applied additional applications for further configuration.
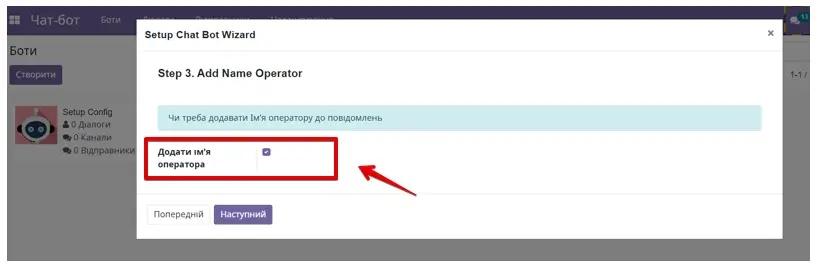
Step 3. You choose whether to add the operator's name to messages with responses to the user. By default, this feature is enabled.
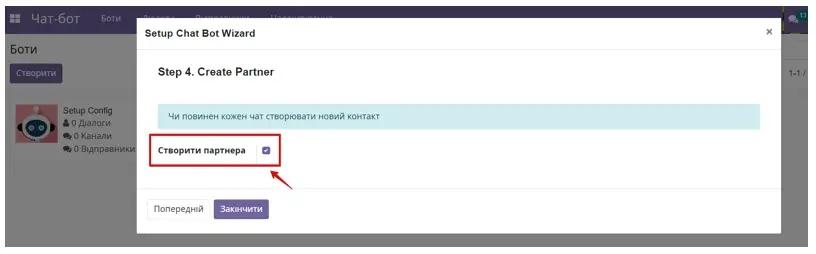
Step 4. You specify whether to create or not create a Contact (Lead) for a new client who has written to the chatbot for the first time. It is recommended to keep the checkbox active so that a new Contact is created for each client. If a Contact is not created for a new client in the Odoo database, the system will not be able to correctly display dialogs in the Discussion module for all unknown contacts.
Click the "Finish" button. You will see a list of all created chatbots according to your settings.
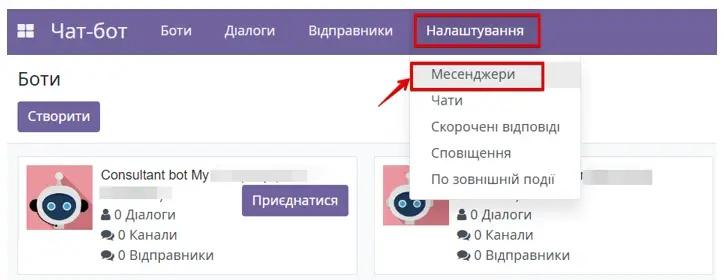
If after setting up the main chatbot module there is a need add new communication channels to add new messengers to the system, this can be done in several ways: install through the "Applications" menu and install through the "Messengers" menu in the chatbot settings.
After installing the necessary modules, go to the Chatbot menu. Go to the Settings tab and select Messengers.
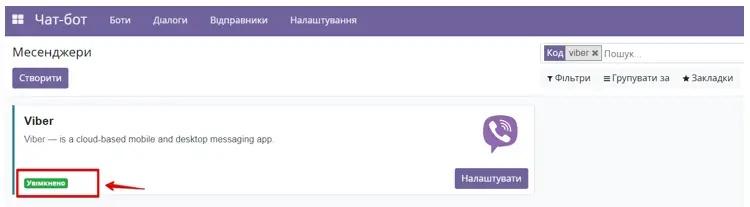
Find the communication channel you need in the list and activate it by clicking the "Activate" button. The status of the communication channel will change to "Enabled" and a button will appear to go to the messenger settings.
When purchasing modules, you will be provided Extended instruction to the module settings with all necessary setup steps and a description of the functionality. You can also get Extended instruction upon request.